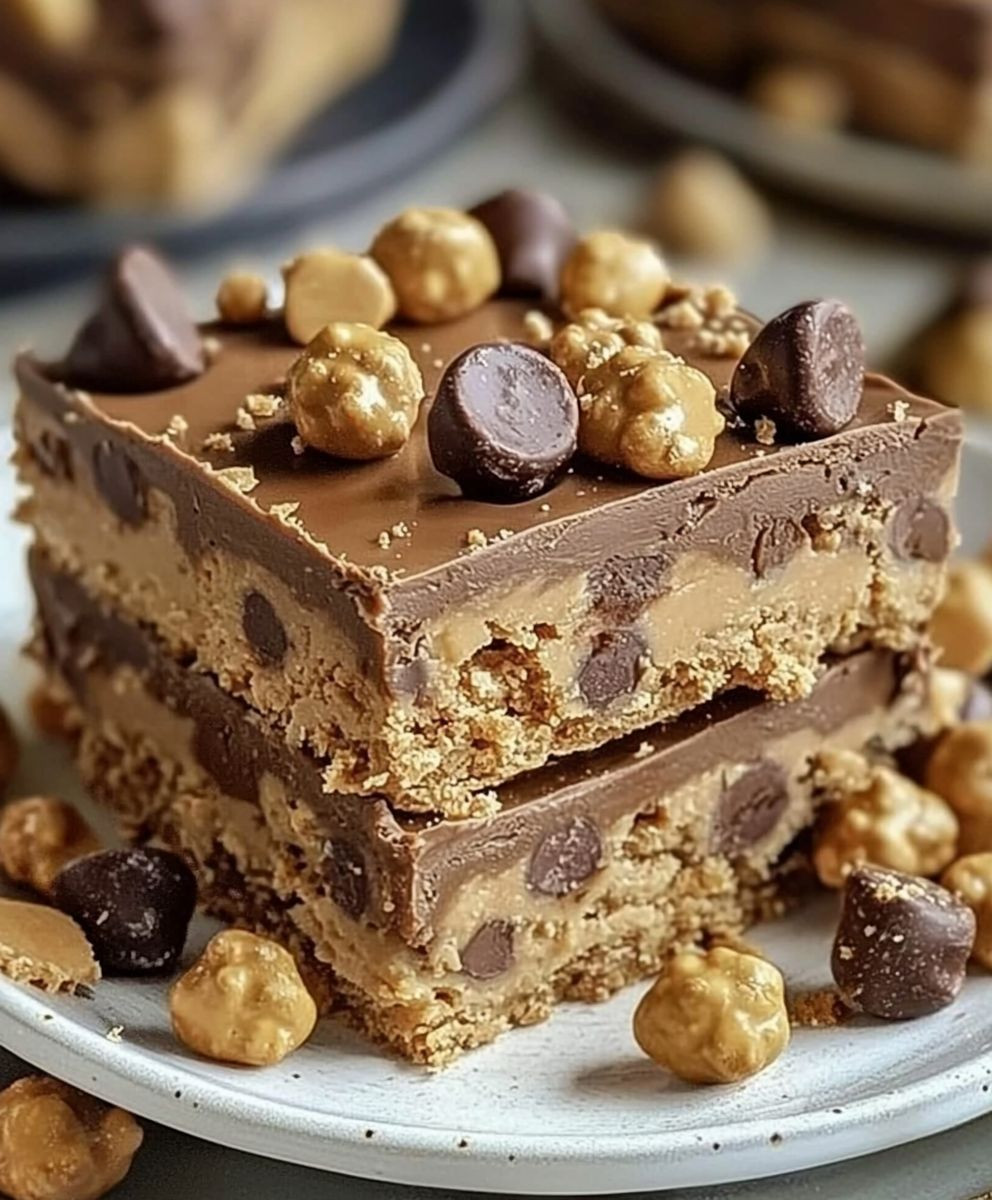
Reese’s Peanut Butter Bars are a delightful treat that combines the rich, creamy flavor of peanut butter with the sweetness of chocolate, creating a dessert that is simply irresistible. As a fan of no-bake recipes, I find that these bars not only satisfy my sweet tooth but also evoke fond memories of childhood snacks. The combination of peanut butter and chocolate has been a beloved pairing for decades, and these bars pay homage to that classic flavor profile.
People love Reese’s Peanut Butter Bars for their perfect balance of taste and texture. The smooth, velvety chocolate layer on top complements the thick, chewy peanut butter base, making each bite a heavenly experience. Plus, they are incredibly convenient to make, requiring minimal ingredients and no baking time, which is a huge bonus for busy individuals or those new to the kitchen. Whether you’re preparing for a family gathering or simply indulging in a sweet treat at home, these bars are sure to impress and satisfy. Join me as we dive into this delicious recipe that celebrates the timeless combination of peanut butter and chocolate!

Ingredients:
- 1 cup creamy peanut butter
- 1 cup unsalted butter, softened
- 2 cups powdered sugar
- 2 cups graham cracker crumbs
- 2 cups semi-sweet chocolate chips
- 1 teaspoon vanilla extract
Preparing the Base
Let’s start by making the delicious peanut butter base for our bars. This is the heart of the recipe, and it’s super easy to whip up!
- In a large mixing bowl, combine the softened unsalted butter and creamy peanut butter. Using a hand mixer or a stand mixer, beat them together on medium speed until the mixture is smooth and creamy. This should take about 2-3 minutes.
- Next, add in the powdered sugar and vanilla extract. Mix on low speed to prevent the sugar from flying everywhere, then increase to medium speed until everything is well combined. The mixture will be thick and slightly sticky.
- Now, gently fold in the graham cracker crumbs using a spatula. Make sure to mix until the crumbs are fully incorporated, and the mixture resembles a thick dough.
Setting the Base
Now that we have our peanut butter mixture ready, it’s time to transfer it to a baking dish.
- Line a 9×13 inch baking dish with parchment paper, leaving some overhang on the sides for easy removal later. This step is crucial for easy cleanup and to prevent sticking.
- Using your spatula, spread the peanut butter mixture evenly into the bottom of the prepared baking dish. Press it down firmly to create an even layer. You can use the back of a measuring cup to help smooth it out.
- Once the base is evenly spread, place the baking dish in the refrigerator for about 30 minutes. This will help it firm up before we add the chocolate layer.
Preparing the Chocolate Topping
While the base is chilling, let’s prepare the chocolate topping. This is what makes these bars truly irresistible!
- In a microwave-safe bowl, add the semi-sweet chocolate chips. Microwave them in 30-second intervals, stirring in between, until the chocolate is completely melted and smooth. This usually takes about 1-2 minutes total, depending on your microwave.
- Once melted, remove the bowl from the microwave and let it cool for a minute or two. This will prevent the chocolate from melting the peanut butter layer when we pour it on top.
Assembling the Bars
Now comes the fun part—assembling our Reese’s Peanut Butter Bars!
- Take the baking dish out of the refrigerator. You should see that the peanut butter base has firmed up nicely.
- Pour the melted chocolate over the peanut butter layer. Use a spatula to spread it evenly across the top, ensuring that every corner is covered.
- Once the chocolate is spread evenly, gently tap the baking dish on the counter a few times. This will help eliminate any air bubbles and ensure a smooth finish.
- Now, return the baking dish to the refrigerator for at least 1 hour, or until the chocolate is completely set. If you’re in a hurry, you can also place it in the freezer for about 30 minutes.
Cutting and Serving
After the chocolate has set, it’s time to cut and serve these delicious bars!
- Once the chocolate is firm, remove the baking dish from the refrigerator. Use the parchment paper overhang to lift the entire block of bars out of the dish.
- Place the block on a cutting board. Using a sharp knife, cut the bars into squares or rectangles, depending on your preference. I usually aim for about 24 bars, but you can make them larger or smaller as you like.
- Transfer the cut bars to a serving plate or an airtight container. If you have any leftovers (which is rare!), store them in the refrigerator to keep them fresh.
Enjoying Your Reese’s Peanut Butter Bars
These bars are perfect for any occasion—whether it’s a family gathering, a potluck, or just a sweet treat
Conclusion:
In summary, these Reese’s Peanut Butter Bars are an absolute must-try for anyone who loves the delightful combination of chocolate and peanut butter. The rich, creamy texture paired with the satisfying crunch of the graham cracker crust creates a treat that is simply irresistible. Whether you’re preparing them for a family gathering, a potluck, or just a cozy night in, these bars are sure to impress and satisfy your sweet tooth. For serving suggestions, consider drizzling some melted chocolate on top for an extra touch of indulgence, or sprinkle some chopped peanuts for added crunch. If you’re feeling adventurous, you can even experiment with different types of nut butters or add a layer of caramel for a unique twist. The possibilities are endless! I encourage you to give this recipe a try and experience the joy of making your own Reese’s Peanut Butter Bars. Once you do, I would love to hear about your experience! Share your thoughts, any variations you tried, or even a photo of your delicious creation. Let’s spread the love for these delightful treats together! Print
Reese’s Peanut Butter Bars: The Ultimate No-Bake Recipe for Chocolate Lovers
- Total Time: 90 minutes
- Yield: 24 bars 1x
Description
Enjoy these no-bake Reese’s Peanut Butter Bars, featuring a creamy peanut butter base and a rich semi-sweet chocolate topping. Perfect for satisfying your sweet cravings, these easy-to-make treats are ideal for any occasion!
Ingredients
- 1 cup creamy peanut butter
- 1 cup unsalted butter, softened
- 2 cups powdered sugar
- 2 cups graham cracker crumbs
- 2 cups semi-sweet chocolate chips
- 1 teaspoon vanilla extract
Instructions
- In a large mixing bowl, combine the softened unsalted butter and creamy peanut butter. Using a hand mixer or a stand mixer, beat them together on medium speed until the mixture is smooth and creamy (about 2-3 minutes).
- Add in the powdered sugar and vanilla extract. Mix on low speed to prevent the sugar from flying everywhere, then increase to medium speed until well combined. The mixture will be thick and slightly sticky.
- Gently fold in the graham cracker crumbs using a spatula until fully incorporated, resembling a thick dough.
- Line a 9×13 inch baking dish with parchment paper, leaving some overhang on the sides for easy removal.
- Spread the peanut butter mixture evenly into the bottom of the prepared baking dish, pressing down firmly to create an even layer.
- Place the baking dish in the refrigerator for about 30 minutes to firm up.
- In a microwave-safe bowl, add the semi-sweet chocolate chips. Microwave in 30-second intervals, stirring in between, until melted and smooth (about 1-2 minutes total).
- Let the melted chocolate cool for a minute or two to prevent it from melting the peanut butter layer.
- Remove the baking dish from the refrigerator; the peanut butter base should be firm.
- Pour the melted chocolate over the peanut butter layer and spread it evenly with a spatula.
- Gently tap the baking dish on the counter a few times to eliminate air bubbles.
- Return the baking dish to the refrigerator for at least 1 hour, or until the chocolate is completely set (or freeze for about 30 minutes if in a hurry).
- Once the chocolate is firm, lift the entire block of bars out of the dish using the parchment paper overhang.
- Place on a cutting board and cut into squares or rectangles (aim for about 24 bars).
- Transfer the cut bars to a serving plate or an airtight container. Store leftovers in the refrigerator.
Notes
- For a more decadent treat, consider adding a sprinkle of sea salt on top of the chocolate layer before it sets.
- These bars can be stored in an airtight container in the refrigerator for up to a week.
- Prep Time: 20 minutes
- Cook Time: 10 minutes