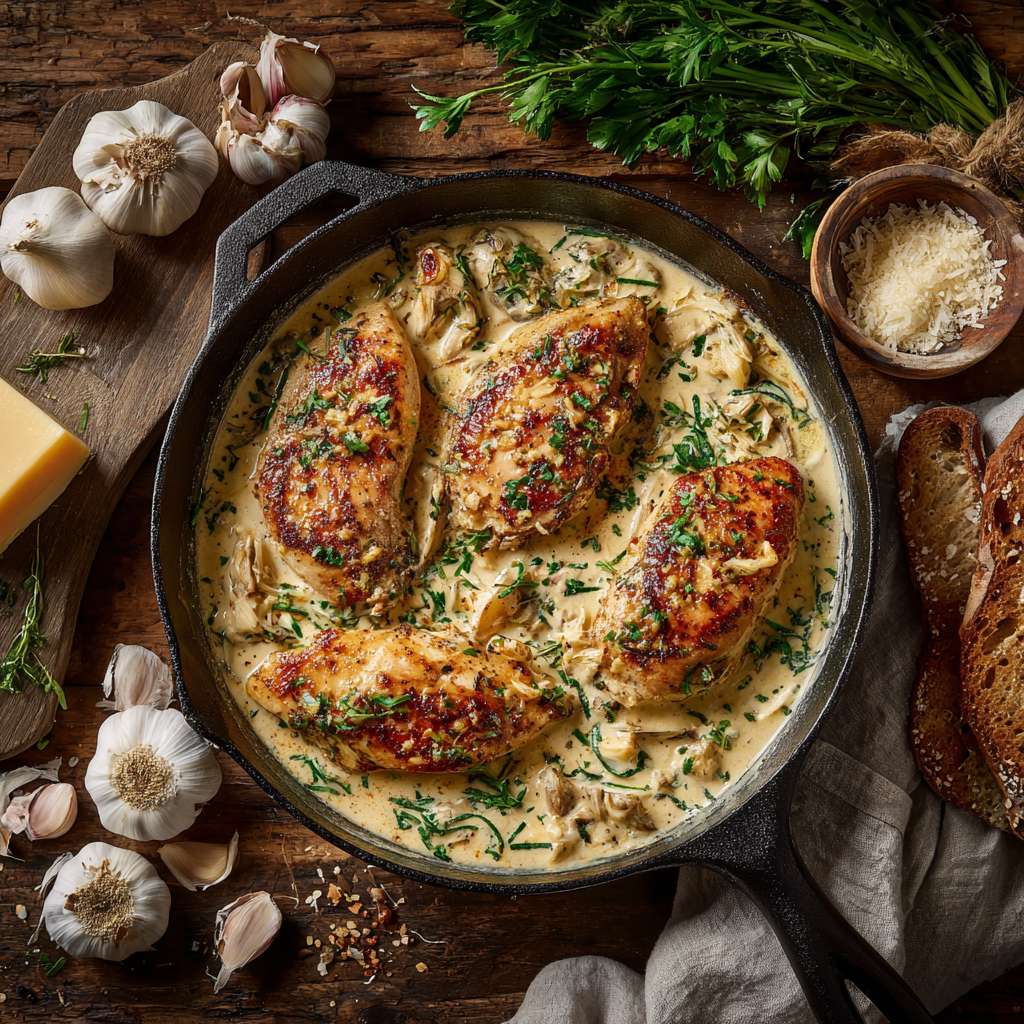
Garlic Parmesan Chicken, oh, where do I even begin? Imagine sinking your teeth into a perfectly juicy chicken breast, coated in a crispy, golden crust bursting with savory garlic and nutty Parmesan. It’s a flavor explosion that’s both comforting and sophisticated, and trust me, once you try this recipe, it’ll become a regular in your dinner rotation.
While its exact origins are debated, the combination of garlic and Parmesan cheese has been a culinary love affair for centuries, particularly in Italian cuisine. Parmesan, with its rich, umami flavor, pairs beautifully with the pungent aroma of garlic, creating a symphony of taste that elevates even the simplest dishes. This particular preparation, Garlic Parmesan Chicken, has gained immense popularity in recent years, becoming a beloved weeknight staple for families everywhere.
But what makes this dish so irresistible? It’s the perfect balance of textures – the tender, moist chicken contrasting with the crunchy, flavorful coating. The aroma alone is enough to make your mouth water! Plus, it’s incredibly versatile. Serve it with pasta, roasted vegetables, a fresh salad, or even on a sandwich. And the best part? It’s surprisingly easy to make, requiring minimal ingredients and effort. So, let’s get cooking and create some culinary magic!

Ingredients:
- For the Chicken:
- 4 boneless, skinless chicken breasts (about 6-8 ounces each)
- 1 tablespoon olive oil
- 1 teaspoon garlic powder
- 1 teaspoon onion powder
- 1/2 teaspoon dried oregano
- 1/4 teaspoon red pepper flakes (optional, for a little heat)
- Salt and freshly ground black pepper to taste
- For the Garlic Parmesan Coating:
- 1/2 cup grated Parmesan cheese
- 1/4 cup breadcrumbs (panko breadcrumbs work best for extra crispiness)
- 2 cloves garlic, minced
- 2 tablespoons melted butter
- 1 tablespoon chopped fresh parsley (optional, for garnish and flavor)
- Optional Additions:
- Lemon wedges, for serving
- Your favorite side dishes (pasta, roasted vegetables, salad, etc.)
Preparing the Chicken:
- Pound the Chicken: This step is crucial for even cooking. Place each chicken breast between two sheets of plastic wrap or in a large resealable bag. Use a meat mallet or rolling pin to pound the chicken to an even thickness of about 1/2 inch. This ensures that the chicken cooks quickly and evenly, preventing some parts from drying out while others are still raw. Don’t overdo it; you just want to flatten it slightly.
- Season the Chicken: In a small bowl, combine the olive oil, garlic powder, onion powder, oregano, red pepper flakes (if using), salt, and pepper. Mix well. Rub this mixture all over the chicken breasts, ensuring they are evenly coated. This is where the initial flavor base comes from, so don’t skimp on the seasoning! Make sure to get both sides of the chicken.
- Let the Chicken Rest (Optional): If you have time, let the seasoned chicken rest for at least 15 minutes (or up to an hour) in the refrigerator. This allows the flavors to meld and penetrate the chicken, resulting in a more flavorful final product. However, if you’re short on time, you can skip this step.
Making the Garlic Parmesan Coating:
- Combine the Ingredients: In a medium bowl, combine the grated Parmesan cheese, breadcrumbs, minced garlic, melted butter, and parsley (if using). Mix well until everything is evenly distributed. The mixture should be slightly crumbly but hold together when pressed. If it seems too dry, add a little more melted butter, a teaspoon at a time. If it seems too wet, add a little more breadcrumbs.
- Taste and Adjust (Optional): Give the coating a taste and adjust the seasoning as needed. You might want to add a pinch of salt, pepper, or garlic powder to enhance the flavor. Remember that the Parmesan cheese is already salty, so be careful not to over-salt.
Coating and Cooking the Chicken:
- Preheat the Oven: Preheat your oven to 400°F (200°C). This temperature allows the chicken to cook through while the Parmesan coating gets nice and golden brown.
- Prepare a Baking Sheet: Line a baking sheet with parchment paper or aluminum foil. This will prevent the chicken from sticking and make cleanup easier. You can also lightly grease the baking sheet with cooking spray.
- Coat the Chicken: Take each seasoned chicken breast and press it firmly into the garlic Parmesan coating, ensuring that both sides are completely covered. Use your hands to gently press the coating onto the chicken so it adheres well. You want a nice, even layer of coating on each breast.
- Place on Baking Sheet: Place the coated chicken breasts on the prepared baking sheet, making sure they are not touching each other. This allows for even cooking and browning.
- Bake the Chicken: Bake in the preheated oven for 20-25 minutes, or until the chicken is cooked through and the coating is golden brown and crispy. The internal temperature of the chicken should reach 165°F (74°C). Use a meat thermometer to check the temperature at the thickest part of the chicken.
- Broil for Extra Crispiness (Optional): If you want an even crispier coating, you can broil the chicken for the last 1-2 minutes of cooking time. Keep a close eye on it to prevent the coating from burning. Place the baking sheet on the top rack of the oven and broil until the coating is golden brown and bubbly.
- Let Rest: Once the chicken is cooked through, remove it from the oven and let it rest for a few minutes before serving. This allows the juices to redistribute, resulting in a more tender and flavorful chicken.
Serving Suggestions:
- Serve Immediately: Serve the garlic Parmesan chicken immediately while it’s hot and crispy.
- Garnish (Optional): Garnish with fresh parsley or a squeeze of lemon juice for added flavor and visual appeal.
- Pair with Sides: This chicken pairs well with a variety of side dishes, such as:
- Pasta (spaghetti, fettuccine, or penne) with marinara sauce or Alfredo sauce
- Roasted vegetables (broccoli, asparagus, Brussels sprouts, or carrots)
- Salad (Caesar salad, garden salad, or spinach salad)
- Mashed potatoes or rice
- Garlic bread
- Lemon Wedges: Serve with lemon wedges for squeezing over the chicken. The lemon juice adds a bright, zesty flavor that complements the garlic and Parmesan.
Tips and Variations:
- Use Different Cheese: Experiment with different types of cheese in the coating. Asiago, Romano, or a blend of Italian cheeses would all work well.
- Add Herbs: Add other herbs to the coating, such as thyme, rosemary, or basil.
- Spice it Up: Increase the amount of red pepper flakes for a spicier dish. You can also add a pinch of cayenne pepper to the coating.
- Air Fryer Option: You can also cook this chicken in an air fryer. Preheat your air fryer to 375°F (190°C). Place the coated chicken breasts in the air fryer basket in a single layer, making sure they are not touching. Cook for 12-15 minutes, or until the chicken is cooked through and the coating is golden brown and crispy.
- Make it Gluten-Free: Use gluten-free breadcrumbs to make this dish gluten-free.
- Add a Sauce: Serve the chicken with a dipping sauce, such as marinara sauce, ranch dressing, or honey mustard.
- Prepare Ahead: You can prepare the chicken ahead of time by coating it and storing it in the refrigerator until you’re ready to bake it. Just add a few minutes to the cooking time.
- Leftovers: Leftover garlic Parmesan chicken can be stored in the refrigerator for up to 3 days. Reheat in the oven or microwave. It’s also great cold in salads or sandwiches.
Troubleshooting:
- Chicken is Dry: Make sure you don’t overcook the chicken. Use a meat thermometer to check the internal temperature and remove it from the oven as soon as it reaches 165°F (74°C). Pounding the chicken to an even thickness also helps prevent it from drying out.
- Coating is Not Crispy: Use panko breadcrumbs for a crispier coating. Make sure the oven is hot enough and that the chicken is not overcrowded on the baking sheet. You can also broil the chicken for the last few minutes of cooking time to crisp up the coating.
- Coating is Falling Off: Make sure you press the coating firmly onto the chicken so it adheres well. You can also lightly brush the chicken with olive oil or egg wash before coating it to help the coating stick.
- Garlic is Burning: Make sure the garlic is finely minced to prevent it from burning. You can also add the garlic to the coating after the chicken has been baking for a few minutes to prevent it from burning.
Nutritional Information (Approximate):
(Note: Nutritional information is an estimate and may vary based on specific ingredients and portion sizes.)
- Calories: Approximately 350-450 per serving
- Protein: 35-45 grams
- Fat: 20-30 grams
- Carbohydrates: 10-15 grams
Enjoy!
Conclusion:
And there you have it! This Garlic Parmesan Chicken recipe is truly a game-changer for weeknight dinners or even a special occasion. It’s quick, easy, and delivers an explosion of flavor that will have everyone asking for seconds. The combination of the savory garlic, the salty Parmesan, and the juicy chicken is simply irresistible. I know I keep saying it, but trust me, this is one you absolutely have to try.
Why is it a must-try? Well, beyond the incredible taste, it’s incredibly versatile. You can whip this up in under 30 minutes, making it perfect for those busy evenings when you don’t have a lot of time to spend in the kitchen. Plus, the ingredients are readily available at most grocery stores, so you don’t have to hunt down any obscure items. It’s also a fantastic way to elevate a simple chicken breast into something truly special. Forget boring, bland chicken – this recipe is all about bold, delicious flavor!
But the best part? You can totally customize it to your liking! Feeling adventurous? Add a pinch of red pepper flakes for a little kick. Want to make it even more decadent? Try using a blend of Parmesan and Romano cheese. You could even add a squeeze of lemon juice at the end for a bright, citrusy finish. The possibilities are endless!
Serving Suggestions and Variations:
This Garlic Parmesan Chicken pairs perfectly with so many different sides. For a classic combination, serve it with a side of creamy mashed potatoes and steamed broccoli. Or, for a lighter meal, try it with a fresh salad and some crusty bread for dipping in the delicious sauce. It’s also fantastic served over pasta – toss it with some fettuccine or linguine and you’ve got a complete and satisfying meal.
Here are a few more ideas to get your creative juices flowing:
* Garlic Parmesan Chicken Sandwiches: Slice the chicken and serve it on toasted rolls with some lettuce, tomato, and a drizzle of extra sauce.
* Garlic Parmesan Chicken Salad: Dice the chicken and add it to your favorite salad for a protein-packed and flavorful lunch.
* Garlic Parmesan Chicken Pizza: Top your homemade or store-bought pizza crust with the chicken, some extra Parmesan cheese, and your favorite veggies.
* Creamy Garlic Parmesan Chicken Pasta: Add heavy cream to the pan after cooking the chicken to create a rich and creamy sauce for pasta.
* Garlic Parmesan Chicken with Roasted Vegetables: Roast your favorite vegetables (like Brussels sprouts, carrots, or sweet potatoes) alongside the chicken for a complete and healthy meal.
I’m so excited for you to try this recipe and experience the magic of Garlic Parmesan Chicken for yourself. I truly believe it will become a staple in your kitchen, just like it has in mine.
So, what are you waiting for? Head to the grocery store, gather your ingredients, and get cooking! And most importantly, don’t forget to share your experience with me! I’d love to hear how it turned out, what variations you tried, and what sides you served it with. Leave a comment below, tag me on social media, or send me an email – I can’t wait to see your culinary creations! Happy cooking!
Garlic Parmesan Chicken: The Ultimate Recipe Guide
Crispy and flavorful baked garlic Parmesan chicken, perfect for a quick and easy weeknight meal. Tender chicken breasts coated in a delicious garlic Parmesan crust.
Ingredients
- 4 boneless, skinless chicken breasts (about 6-8 ounces each)
- 1 tablespoon olive oil
- 1 teaspoon garlic powder
- 1 teaspoon onion powder
- 1/2 teaspoon dried oregano
- 1/4 teaspoon red pepper flakes (optional, for a little heat)
- Salt and freshly ground black pepper to taste
- 1/2 cup grated Parmesan cheese
- 1/4 cup breadcrumbs (panko breadcrumbs work best for extra crispiness)
- 2 cloves garlic, minced
- 2 tablespoons melted butter
- 1 tablespoon chopped fresh parsley (optional, for garnish and flavor)
- Lemon wedges, for serving
- Your favorite side dishes (pasta, roasted vegetables, salad, etc.)
Instructions
- Pound the Chicken: Place each chicken breast between two sheets of plastic wrap or in a large resealable bag. Use a meat mallet or rolling pin to pound the chicken to an even thickness of about 1/2 inch.
- Season the Chicken: In a small bowl, combine the olive oil, garlic powder, onion powder, oregano, red pepper flakes (if using), salt, and pepper. Mix well. Rub this mixture all over the chicken breasts, ensuring they are evenly coated.
- Let the Chicken Rest (Optional): If you have time, let the seasoned chicken rest for at least 15 minutes (or up to an hour) in the refrigerator.
- Combine the Coating Ingredients: In a medium bowl, combine the grated Parmesan cheese, breadcrumbs, minced garlic, melted butter, and parsley (if using). Mix well.
- Taste and Adjust (Optional): Give the coating a taste and adjust the seasoning as needed.
- Preheat the Oven: Preheat your oven to 400°F (200°C).
- Prepare a Baking Sheet: Line a baking sheet with parchment paper or aluminum foil.
- Coat the Chicken: Take each seasoned chicken breast and press it firmly into the garlic Parmesan coating, ensuring that both sides are completely covered.
- Place on Baking Sheet: Place the coated chicken breasts on the prepared baking sheet, making sure they are not touching each other.
- Bake the Chicken: Bake in the preheated oven for 20-25 minutes, or until the chicken is cooked through and the coating is golden brown and crispy. The internal temperature of the chicken should reach 165°F (74°C).
- Broil for Extra Crispiness (Optional): If you want an even crispier coating, you can broil the chicken for the last 1-2 minutes of cooking time. Keep a close eye on it to prevent the coating from burning.
- Let Rest: Once the chicken is cooked through, remove it from the oven and let it rest for a few minutes before serving.
- Serve Immediately: Serve the garlic Parmesan chicken immediately while it’s hot and crispy.
- Garnish (Optional): Garnish with fresh parsley or a squeeze of lemon juice for added flavor and visual appeal.
- Pair with Sides: This chicken pairs well with a variety of side dishes, such as pasta, roasted vegetables, or salad.
- Lemon Wedges: Serve with lemon wedges for squeezing over the chicken.
Notes
- Pounding the chicken ensures even cooking.
- Resting the seasoned chicken enhances flavor.
- Panko breadcrumbs provide extra crispiness.
- Adjust seasoning of the coating to your preference.
- Use a meat thermometer to ensure the chicken is cooked through.
- Broiling adds extra crispiness but watch carefully to prevent burning.
- Serve immediately for the best taste and texture.
- Experiment with different cheeses and herbs in the coating.
- Air fryer option: Cook at 375°F (190°C) for 12-15 minutes.
- Use gluten-free breadcrumbs for a gluten-free version.
- Leftovers can be stored in the refrigerator for up to 3 days.