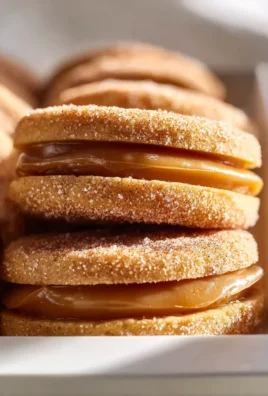
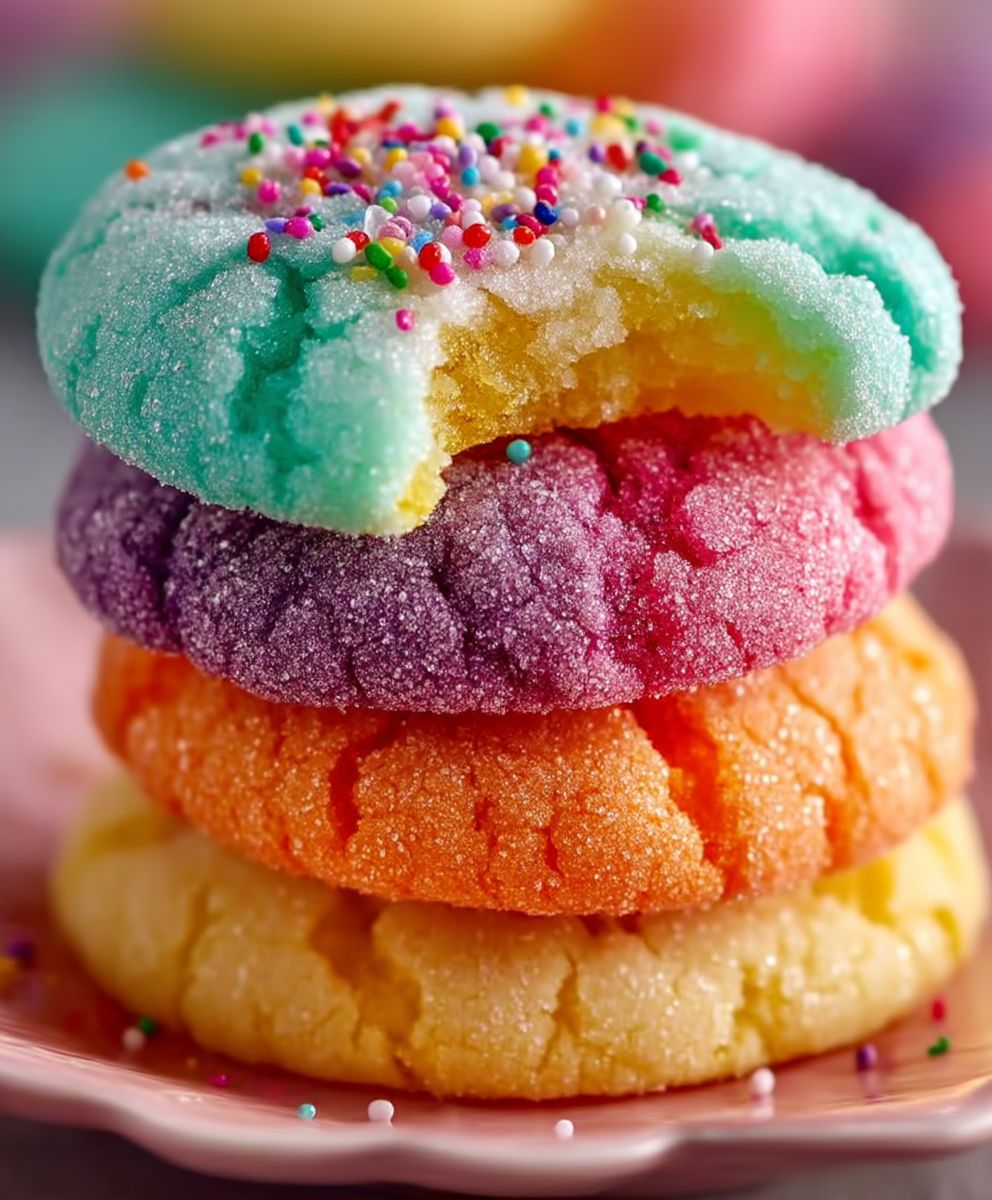
Jello Sugar Cookies: Prepare to be amazed! These aren’t your grandma’s sugar cookies (unless your grandma was a culinary genius experimenting with vibrant colors and melt-in-your-mouth textures!). Imagine a cookie that’s both delightfully chewy and subtly fruity, a treat that practically begs to be paired with a cold glass of milk or a scoop of vanilla ice cream. That’s precisely what you get with these delightful cookies.
While the exact origins of adding gelatin to sugar cookies are a bit hazy, the concept likely emerged from home bakers seeking to enhance the texture and add a playful twist to a classic recipe. The addition of Jell-O not only imparts a beautiful hue but also contributes to an incredibly soft and tender crumb. It’s a clever technique that transforms a simple sugar cookie into something truly special.
People adore Jello Sugar Cookies for several reasons. First, the taste is undeniably appealing – a delicate sweetness with a hint of fruity flavor that’s not overpowering. Second, the texture is simply divine – soft, chewy, and almost cake-like. And finally, they’re incredibly fun to make! The vibrant colors make them perfect for holidays, parties, or simply brightening up a gloomy day. So, if you’re looking for a unique and delicious twist on a classic cookie, look no further. These cookies are guaranteed to be a hit!

Ingredients:
- 1 cup (2 sticks) unsalted butter, softened
- 1 ½ cups granulated sugar
- 1 large egg
- 1 teaspoon vanilla extract
- 1 (3 ounce) package Jell-O gelatin, any flavor (I’m using strawberry today!)
- 3 cups all-purpose flour
- 1 teaspoon baking powder
- ½ teaspoon salt
- Optional: Sprinkles for decorating
Preparing the Dough: The Foundation of Deliciousness
- Creaming the Butter and Sugar: In a large bowl, or the bowl of your stand mixer, cream together the softened butter and granulated sugar until light and fluffy. This usually takes about 3-5 minutes. Don’t rush this step! Properly creaming the butter and sugar incorporates air into the dough, which will result in a lighter, more tender cookie. You’ll know it’s ready when the mixture is pale and almost doubled in volume. Scrape down the sides of the bowl occasionally to ensure everything is evenly mixed.
- Adding the Egg and Vanilla: Beat in the egg and vanilla extract until well combined. Make sure the egg is fully incorporated before moving on to the next step. Again, scrape down the sides of the bowl to ensure even distribution. The vanilla extract enhances the overall flavor of the cookies, complementing the Jell-O.
- Incorporating the Jell-O: Add the Jell-O gelatin powder to the butter and sugar mixture. Beat until the Jell-O is evenly distributed and the mixture is a uniform color. This is where the magic happens! The Jell-O not only adds flavor but also contributes to the cookies’ soft and chewy texture. The color will depend on the flavor of Jell-O you choose, so get creative!
- Combining Dry Ingredients: In a separate medium bowl, whisk together the all-purpose flour, baking powder, and salt. Whisking ensures that the baking powder and salt are evenly distributed throughout the flour, which is crucial for proper leavening and flavor.
- Gradually Adding Dry Ingredients to Wet Ingredients: Gradually add the dry ingredients to the wet ingredients, mixing on low speed until just combined. Be careful not to overmix the dough! Overmixing develops the gluten in the flour, which can result in tough cookies. Mix until the flour is just incorporated, and then stop. A few streaks of flour are okay at this point.
- Forming the Dough into a Disc and Chilling: Turn the dough out onto a lightly floured surface. Gently form the dough into a disc, about 1 inch thick. Wrap the disc tightly in plastic wrap and refrigerate for at least 2 hours, or preferably overnight. Chilling the dough is essential for several reasons. It allows the gluten to relax, which results in a more tender cookie. It also firms up the butter, which prevents the cookies from spreading too much during baking. Finally, chilling the dough makes it easier to roll out and cut.
Rolling, Cutting, and Baking: Bringing the Cookies to Life
- Preheating the Oven and Preparing Baking Sheets: Preheat your oven to 375°F (190°C). Line baking sheets with parchment paper or silicone baking mats. Parchment paper prevents the cookies from sticking to the baking sheets and makes cleanup a breeze. Silicone baking mats provide even heat distribution and help prevent the cookies from browning too quickly on the bottom.
- Rolling Out the Dough: On a lightly floured surface, roll out the chilled dough to about ¼ inch thickness. Work quickly, as the dough will start to soften as it warms up. If the dough becomes too sticky, return it to the refrigerator for a few minutes to firm up.
- Cutting Out the Cookies: Use your favorite cookie cutters to cut out shapes from the rolled-out dough. Get creative with your shapes! You can use classic shapes like circles, stars, and hearts, or you can use more elaborate shapes like animals, flowers, or holiday-themed designs.
- Placing Cookies on Baking Sheets: Carefully transfer the cut-out cookies to the prepared baking sheets, leaving about 1 inch of space between each cookie. This allows for proper air circulation and prevents the cookies from sticking together during baking.
- Decorating (Optional): If desired, sprinkle the cookies with sprinkles before baking. The sprinkles will adhere to the dough during baking and add a festive touch. You can use a variety of sprinkles, such as colored sugar, nonpareils, or jimmies.
- Baking the Cookies: Bake for 8-10 minutes, or until the edges are lightly golden brown. The baking time will vary depending on the size and thickness of the cookies, so keep a close eye on them. You want the cookies to be baked through but still soft in the center.
- Cooling the Cookies: Remove the baking sheets from the oven and let the cookies cool on the baking sheets for a few minutes before transferring them to a wire rack to cool completely. This prevents the cookies from breaking as they cool.
Decorating (Optional, but Highly Recommended!): Adding the Finishing Touches
While these cookies are delicious on their own, decorating them can take them to the next level! Here are a few ideas:
- Simple Glaze: Mix powdered sugar with a little milk or lemon juice until you have a smooth, pourable glaze. Drizzle the glaze over the cooled cookies and let it set. You can add food coloring to the glaze to match the flavor of the Jell-O.
- Royal Icing: Royal icing is a classic choice for decorating sugar cookies. It’s made from powdered sugar, meringue powder, and water. You can use different consistencies of royal icing for outlining and flooding the cookies.
- Buttercream Frosting: A simple buttercream frosting is always a crowd-pleaser. You can tint the frosting with food coloring and pipe it onto the cookies using a piping bag and tips.
- Sprinkles, Sprinkles, Sprinkles!: Never underestimate the power of sprinkles! They add color, texture, and a touch of whimsy to any cookie.
Tips for Success:
- Use softened butter: Make sure your butter is softened to room temperature before creaming it with the sugar. This will ensure that the mixture is light and fluffy.
- Don’t overmix the dough: Overmixing the dough will develop the gluten in the flour, which can result in tough cookies. Mix until the flour is just incorporated.
- Chill the dough: Chilling the dough is essential for preventing the cookies from spreading too much during baking.
- Bake until lightly golden brown: The cookies are done when the edges are lightly golden brown.
- Let the cookies cool completely before decorating: This will prevent the frosting from melting.
Storage:
Store the cookies in an airtight container at room temperature for up to 3 days. You can also freeze the cookies for up to 2 months. Thaw the cookies at room temperature before serving.
Enjoy your delicious Jell-O sugar cookies! I hope you have as much fun making them as I do!
Conclusion:
So, there you have it! These Jello sugar cookies are truly something special, and I genuinely believe they’re a must-try for anyone who loves baking or simply enjoys a delightful, colorful treat. The unique texture, the subtle fruity flavor, and the vibrant appearance all combine to create a cookie experience that’s unlike anything you’ve probably tasted before. They’re not just cookies; they’re little bursts of happiness!
Why are these cookies a must-try? Well, beyond the sheer deliciousness, they’re surprisingly easy to make. The recipe is straightforward, and the ingredients are readily available. Plus, they’re incredibly versatile! You can customize the flavor and color by simply swapping out the Jello flavor. Imagine lemon Jello for a tangy, sunshine-yellow cookie, or lime Jello for a refreshing, vibrant green one. The possibilities are endless! And let’s not forget the fun factor – these cookies are a fantastic activity to do with kids. They’ll love helping to mix the dough, roll it out, and use cookie cutters to create fun shapes.
But the real magic lies in the texture. These aren’t your typical crispy or chewy sugar cookies. They have a soft, almost melt-in-your-mouth quality that’s incredibly addictive. The Jello adds a subtle chewiness that’s just perfect. And the flavor? It’s a delicate balance of sweetness and fruity goodness that will leave you wanting more.
Serving suggestions and variations? Oh, where do I even begin? These cookies are perfect on their own, enjoyed with a glass of cold milk or a cup of hot tea. But you can also get creative! Try sandwiching them with a light buttercream frosting for an extra layer of sweetness. Or, dip them in melted white chocolate and sprinkle them with colorful sprinkles for a festive touch. For a more sophisticated twist, try adding a hint of citrus zest to the dough to complement the Jello flavor. Orange zest with orange Jello, or lime zest with lime Jello, would be absolutely divine!
Another fun variation is to use different cookie cutters to create themed cookies for holidays or special occasions. Heart-shaped cookies for Valentine’s Day, shamrock-shaped cookies for St. Patrick’s Day, or star-shaped cookies for the Fourth of July – the possibilities are endless! You could even use edible markers to decorate the cookies with intricate designs or personalized messages.
And if you’re feeling adventurous, try experimenting with different types of Jello. Sugar-free Jello works just as well and allows you to reduce the sugar content of the cookies. You could also try using Jello with added fruit pieces for an extra burst of flavor and texture. Just be sure to adjust the amount of flour accordingly to maintain the desired consistency of the dough.
I truly hope you’ll give these Jello sugar cookies a try. I’m confident that you’ll love them as much as I do. They’re a fun, easy, and delicious way to add a little bit of sweetness to your day. And who knows, they might just become your new favorite cookie recipe!
So, go ahead, gather your ingredients, preheat your oven, and get ready to bake some magic. And when you do, please, please, please share your experience with me! I’d love to hear what you think of the recipe, what variations you tried, and how your cookies turned out. You can leave a comment below, tag me on social media, or send me an email. I can’t wait to see your creations! Happy baking!
Jello Sugar Cookies: The Ultimate Guide to Baking Fun
Soft, chewy sugar cookies infused with Jell-O gelatin for a burst of flavor and color. Fun to decorate and perfect for any occasion!
Ingredients
- 1 cup (2 sticks) unsalted butter, softened
- 1 ½ cups granulated sugar
- 1 large egg
- 1 teaspoon vanilla extract
- 1 (3 ounce) package Jell-O gelatin, any flavor (strawberry recommended)
- 3 cups all-purpose flour
- 1 teaspoon baking powder
- ½ teaspoon salt
- Optional: Sprinkles for decorating
Instructions
- Cream Butter and Sugar: In a large bowl, cream together the softened butter and granulated sugar until light and fluffy (3-5 minutes). Scrape down the sides of the bowl as needed.
- Add Egg and Vanilla: Beat in the egg and vanilla extract until well combined. Scrape down the sides of the bowl.
- Incorporate Jell-O: Add the Jell-O gelatin powder to the butter and sugar mixture. Beat until evenly distributed and a uniform color.
- Combine Dry Ingredients: In a separate medium bowl, whisk together the all-purpose flour, baking powder, and salt.
- Gradually Add Dry to Wet: Gradually add the dry ingredients to the wet ingredients, mixing on low speed until just combined. Do not overmix.
- Chill Dough: Form the dough into a disc, about 1 inch thick. Wrap tightly in plastic wrap and refrigerate for at least 2 hours, or preferably overnight.
- Preheat Oven: Preheat oven to 375°F (190°C). Line baking sheets with parchment paper or silicone baking mats.
- Roll Out Dough: On a lightly floured surface, roll out the chilled dough to about ¼ inch thickness.
- Cut Out Cookies: Use cookie cutters to cut out shapes from the rolled-out dough.
- Place on Baking Sheets: Transfer the cut-out cookies to the prepared baking sheets, leaving about 1 inch of space between each cookie.
- Decorate (Optional): Sprinkle the cookies with sprinkles before baking, if desired.
- Bake: Bake for 8-10 minutes, or until the edges are lightly golden brown.
- Cool: Remove the baking sheets from the oven and let the cookies cool on the baking sheets for a few minutes before transferring them to a wire rack to cool completely.
- Decorate (Optional): Decorate with glaze, royal icing, buttercream frosting, or more sprinkles.
Notes
- Use softened butter for best results.
- Do not overmix the dough.
- Chilling the dough is essential for preventing spreading.
- Bake until lightly golden brown.
- Let the cookies cool completely before decorating.
- Store in an airtight container at room temperature for up to 3 days, or freeze for up to 2 months.