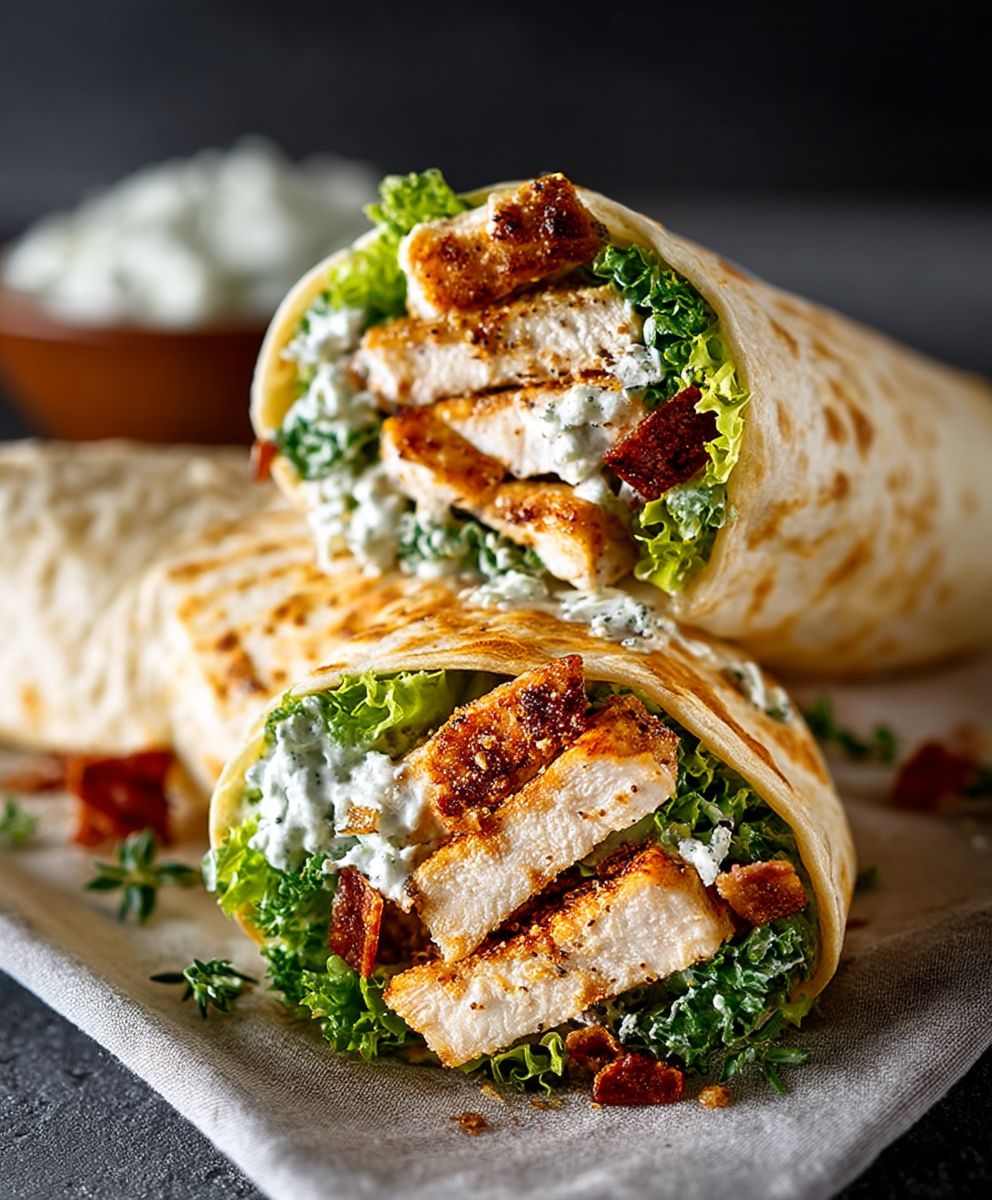
Chicken Caesar Wrap: The perfect lunch doesn’t exi—oh wait, yes it does! Imagine sinking your teeth into a warm, toasted tortilla filled with juicy, seasoned chicken, crisp romaine lettuce, creamy Caesar dressing, and a sprinkle of Parmesan cheese. It’s a symphony of flavors and textures that will leave you completely satisfied.
While the Caesar salad itself boasts a fascinating history, rumored to have originated in Tijuana, Mexico, in the 1920s, the Chicken Caesar Wrap is a more modern adaptation. It takes all the beloved elements of the classic salad and transforms them into a convenient and portable meal. Think of it as the busy person’s gourmet lunch!
What makes this wrap so irresistible? It’s the delightful combination of savory and fresh. The chicken provides a hearty protein boost, while the romaine adds a refreshing crunch. The Caesar dressing, with its tangy and garlicky notes, ties everything together beautifully. Plus, it’s incredibly easy to customize! Add a dash of hot sauce for a kick, some crispy bacon for extra flavor, or swap out the romaine for spinach. The possibilities are endless. So, ditch the boring sandwich and get ready to experience the ultimate lunchtime upgrade with this fantastic Chicken Caesar Wrap!

Ingredients:
- For the Chicken:
- 1.5 lbs boneless, skinless chicken breasts
- 1 tbsp olive oil
- 1 tsp garlic powder
- 1 tsp onion powder
- 1/2 tsp paprika
- 1/4 tsp black pepper
- 1/4 tsp salt
- For the Caesar Dressing:
- 1/2 cup mayonnaise
- 2 tbsp grated Parmesan cheese
- 1 tbsp lemon juice
- 1 tsp Dijon mustard
- 1 clove garlic, minced
- 1/4 tsp Worcestershire sauce
- 1/4 tsp black pepper
- For the Wraps:
- 4 large flour tortillas (10-12 inch)
- 4 cups chopped romaine lettuce
- 1/2 cup grated Parmesan cheese, extra for sprinkling
- 1/2 cup croutons, coarsely crushed
Preparing the Chicken:
- Prep the Chicken: First, I like to make sure my chicken breasts are relatively even in thickness. If they’re super thick on one end, I’ll gently pound them with a meat mallet to flatten them out a bit. This helps them cook evenly. Pat the chicken breasts dry with paper towels. This is important because it helps them get a nice sear.
- Season the Chicken: In a small bowl, combine the garlic powder, onion powder, paprika, salt, and pepper. Sprinkle this mixture evenly over both sides of the chicken breasts, making sure they’re well coated. Don’t be shy with the seasoning!
- Cook the Chicken: Heat the olive oil in a large skillet over medium-high heat. Once the oil is shimmering and hot, carefully place the seasoned chicken breasts in the skillet. Be careful not to overcrowd the pan; you might need to cook the chicken in batches. Cook for about 5-7 minutes per side, or until the chicken is cooked through and the internal temperature reaches 165°F (74°C). Use a meat thermometer to ensure accuracy.
- Rest and Shred: Once the chicken is cooked, remove it from the skillet and place it on a cutting board. Let it rest for about 5-10 minutes before shredding it with two forks. Resting the chicken allows the juices to redistribute, resulting in more tender and flavorful shredded chicken.
Making the Caesar Dressing:
- Combine Ingredients: In a medium bowl, whisk together the mayonnaise, Parmesan cheese, lemon juice, Dijon mustard, minced garlic, and Worcestershire sauce.
- Season to Taste: Add black pepper to taste. I usually start with 1/4 teaspoon and then adjust as needed. You can also add a pinch of salt if you like, but be mindful that Parmesan cheese is already salty.
- Adjust Consistency (Optional): If you prefer a thinner dressing, you can add a tablespoon or two of water or milk until you reach your desired consistency.
- Chill (Optional): For the best flavor, cover the bowl and refrigerate the dressing for at least 30 minutes before using. This allows the flavors to meld together.
Assembling the Chicken Caesar Wraps:
- Warm the Tortillas (Optional): I like to warm my tortillas slightly before assembling the wraps. This makes them more pliable and less likely to tear. You can warm them in a dry skillet over medium heat for a few seconds per side, or wrap them in a damp paper towel and microwave for about 15-20 seconds.
- Spread the Dressing: Lay a tortilla flat on a clean surface. Spread a generous amount of Caesar dressing (about 2-3 tablespoons) evenly over the tortilla, leaving a small border around the edges.
- Add the Lettuce: Place a bed of chopped romaine lettuce (about 1 cup) on top of the dressing.
- Add the Chicken: Top the lettuce with a generous portion of shredded chicken (about 1/4 of the total amount).
- Sprinkle with Parmesan and Croutons: Sprinkle the chicken with grated Parmesan cheese and crushed croutons.
- Wrap it Up: To wrap, fold in the sides of the tortilla towards the center. Then, tightly roll the tortilla from the bottom up, like a burrito.
- Cut and Serve: Cut the wrap in half diagonally (optional) and serve immediately.
- Repeat: Repeat steps 2-7 for the remaining tortillas and ingredients.
Tips and Variations:
- Add Avocado: For a creamier and healthier wrap, add sliced avocado.
- Spice it Up: Add a pinch of red pepper flakes to the Caesar dressing or sprinkle some on top of the chicken for a little heat.
- Use Different Greens: If you’re not a fan of romaine lettuce, you can use other greens like spinach or mixed greens.
- Add Bacon: Crispy bacon bits are a delicious addition to these wraps.
- Make it Vegetarian: Substitute the chicken with grilled halloumi cheese or chickpeas for a vegetarian option.
- Meal Prep: You can prepare the chicken and Caesar dressing ahead of time and store them separately in the refrigerator. Assemble the wraps just before serving to prevent the tortillas from getting soggy.
- Grilling the Chicken: Instead of pan-frying, you can grill the chicken for a smoky flavor. Marinate the chicken in the Caesar dressing for at least 30 minutes before grilling.
- Homemade Croutons: For the best flavor, make your own croutons. Toss cubed bread with olive oil, garlic powder, and Parmesan cheese, then bake in a preheated oven at 350°F (175°C) until golden brown and crispy.
- Anchovy Paste: For a more authentic Caesar dressing flavor, add a small amount of anchovy paste (about 1/2 teaspoon) to the dressing.
- Lemon Zest: Add a teaspoon of lemon zest to the Caesar dressing for a brighter flavor.
Serving Suggestions:
- Side Salad: Serve the Chicken Caesar Wraps with a simple side salad for a complete meal.
- Sweet Potato Fries: Pair the wraps with sweet potato fries for a satisfying and flavorful combination.
- Coleslaw: Coleslaw is a refreshing and crunchy side dish that complements the richness of the Caesar dressing.
- Fruit Salad: A light and refreshing fruit salad is a great way to balance out the savory flavors of the wraps.
- Soup: Serve the wraps with a bowl of tomato soup or chicken noodle soup for a comforting and hearty meal.
Storage Instructions:
- Refrigerating Leftovers: If you have leftover Chicken Caesar Wraps, wrap them tightly in plastic wrap or store them in an airtight container in the refrigerator. They are best consumed within 1-2 days.
- Preventing Soggy Wraps: To prevent the wraps from getting soggy, store the filling (chicken, lettuce, dressing) separately from the tortillas. Assemble the wraps just before serving.
- Freezing: I don’t recommend freezing the assembled wraps, as the lettuce and dressing will become soggy and the tortillas may become brittle. However, you can freeze the cooked chicken separately for up to 2-3 months. Thaw it in the refrigerator before using.
Conclusion:
This Chicken Caesar Wrap isn’t just another lunch option; it’s a flavor explosion waiting to happen, and I truly believe you’ll be hooked from the very first bite. The creamy, tangy Caesar dressing perfectly complements the juicy chicken and crisp lettuce, all nestled within a soft, pliable wrap. It’s quick, it’s easy, and it’s infinitely customizable, making it a weeknight winner and a fantastic meal prep solution.
Why is this a must-try? Because it elevates the humble wrap to something truly special. It’s a satisfying and balanced meal that doesn’t compromise on taste or convenience. Forget boring sandwiches; this wrap is packed with protein, healthy fats, and vibrant flavors that will keep you feeling full and energized. Plus, it’s a fantastic way to use up leftover grilled or rotisserie chicken, making it a budget-friendly choice as well.
But the best part? The possibilities are endless! Feel free to experiment with different variations to suit your taste. For a spicier kick, add a dash of hot sauce or a pinch of red pepper flakes to the dressing. Craving some extra crunch? Toss in some toasted croutons or crispy bacon bits. Vegetarian? Swap the chicken for grilled halloumi cheese or chickpeas for a protein-packed alternative. You could even add some sliced avocado for extra creaminess and healthy fats.
Serving Suggestions and Variations:
* For a lighter option: Use a whole wheat wrap and reduce the amount of dressing.
* For a heartier meal: Add a side of sweet potato fries or a small salad.
* For a party: Cut the wraps into smaller pinwheels for an easy and elegant appetizer.
* For a picnic: Wrap each wrap tightly in plastic wrap or parchment paper to keep them fresh.
* For a Mediterranean twist: Add some sun-dried tomatoes, Kalamata olives, and feta cheese.
* For an Italian flair: Add some roasted red peppers and provolone cheese.
I’ve personally made this Chicken Caesar Wrap countless times, and it’s always a hit. My family loves it, my friends request it, and I’m confident you’ll love it too. It’s the perfect solution for busy weeknights, quick lunches, or even a light and refreshing dinner. It’s a versatile recipe that can be adapted to suit any occasion and any palate.
So, what are you waiting for? Grab your ingredients, fire up your grill (or grab that rotisserie chicken!), and get ready to experience the best Chicken Caesar Wrap you’ve ever had. I’m so excited for you to try this recipe and discover just how delicious and easy it is to make.
And most importantly, I want to hear about your experience! Did you try any variations? Did you add any special ingredients? What did you think of the recipe? Please, share your thoughts and photos in the comments below. I can’t wait to see your creations and hear your feedback. Happy wrapping! Let me know if you have any questions, and I’ll do my best to answer them. Enjoy!
Chicken Caesar Wrap: The Ultimate Recipe & Guide
Easy Chicken Caesar Wraps: juicy chicken, crisp romaine, creamy dressing, crunchy croutons in a warm tortilla. Perfect for lunch or dinner!
Ingredients
Instructions
Recipe Notes
- Add Avocado: For a creamier and healthier wrap, add sliced avocado.
- Spice it Up: Add a pinch of red pepper flakes to the Caesar dressing or sprinkle some on top of the chicken for a little heat.
- Use Different Greens: If you’re not a fan of romaine lettuce, you can use other greens like spinach or mixed greens.
- Add Bacon: Crispy bacon bits are a delicious addition to these wraps.
- Make it Vegetarian: Substitute the chicken with grilled halloumi cheese or chickpeas for a vegetarian option.
- Meal Prep: You can prepare the chicken and Caesar dressing ahead of time and store them separately in the refrigerator. Assemble the wraps just before serving to prevent the tortillas from getting soggy.
- Grilling the Chicken: Instead of pan-frying, you can grill the chicken for a smoky flavor. Marinate the chicken in the Caesar dressing for at least 30 minutes before grilling.
- Homemade Croutons: For the best flavor, make your own croutons. Toss cubed bread with olive oil, garlic powder, and Parmesan cheese, then bake in a preheated oven at 350°F (175°C) until golden brown and crispy.
- Anchovy Paste: For a more authentic Caesar dressing flavor, add a small amount of anchovy paste (about 1/2 teaspoon) to the dressing.
- Lemon Zest: Add a teaspoon of lemon zest to the Caesar dressing for a brighter flavor.