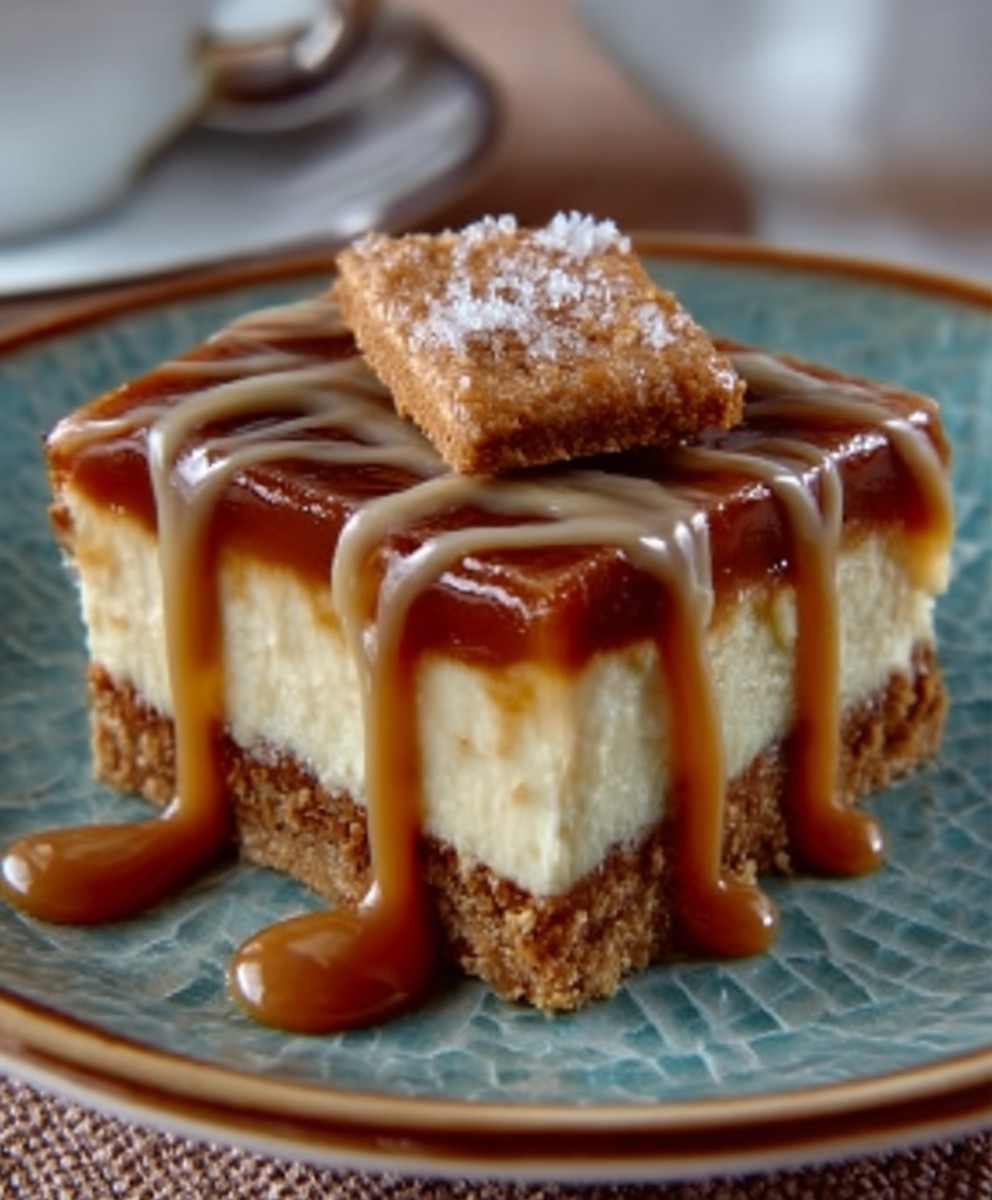
Dulce de Leche Cheesecake Bars: Prepare to be utterly captivated! Imagine sinking your teeth into a creamy, dreamy cheesecake, infused with the rich, caramel notes of dulce de leche, all nestled on a buttery, crumbly crust. These aren’t just dessert bars; they’re an experience, a symphony of textures and flavors that will leave you craving more.
Dulce de leche, meaning “sweet milk,” has a fascinating history, deeply rooted in Latin American culture. Legend has it that it was accidentally discovered in Argentina in the 19th century when a cook left milk and sugar simmering on the stove for too long. The result? A luscious, caramelized confection that quickly became a beloved staple. Its popularity spread throughout Latin America and beyond, finding its way into countless desserts, including, of course, these irresistible dulce de leche cheesecake bars.
What makes these bars so universally adored? It’s the perfect balance of sweet and tangy, the smooth, melt-in-your-mouth cheesecake filling contrasted with the slightly chewy, intensely flavored dulce de leche. Plus, they’re incredibly convenient! Perfect for potlucks, parties, or simply a delightful treat to brighten your day, these bars are easy to make, easy to transport, and even easier to devour. Get ready to create a dessert that will have everyone begging for the recipe!

Ingredients:
- For the Crust:
- 1 ½ cups graham cracker crumbs
- 5 tablespoons unsalted butter, melted
- ¼ cup granulated sugar
- Pinch of salt
- For the Cheesecake Filling:
- 24 ounces cream cheese, softened to room temperature
- 1 cup granulated sugar
- ½ cup sour cream, at room temperature
- 2 large eggs, at room temperature
- 1 teaspoon vanilla extract
- ¼ teaspoon salt
- For the Dulce de Leche Swirl:
- 1 cup dulce de leche, store-bought or homemade
- For the Optional Topping:
- Sea salt flakes, for sprinkling
Preparing the Graham Cracker Crust
- Preheat your oven to 350°F (175°C). This is crucial for even baking of the crust and cheesecake.
- In a medium bowl, combine the graham cracker crumbs, melted butter, granulated sugar, and salt. Make sure the butter is evenly distributed so the crust holds together well. I like to use a fork to mix it all together.
- Press the mixture firmly into the bottom of a 9×13 inch baking pan. I find that using the bottom of a measuring cup helps to create an even and compact crust. This will prevent it from crumbling too much when you cut the bars.
- Bake the crust for 8-10 minutes, or until lightly golden brown. Keep a close eye on it, as it can burn easily. Remove from the oven and let it cool slightly while you prepare the cheesecake filling. This pre-baking step ensures a crisp and sturdy base for the creamy cheesecake.
Making the Cheesecake Filling
- In a large bowl, beat the softened cream cheese with an electric mixer until smooth and creamy. This is probably the most important step for a lump-free cheesecake. Make sure your cream cheese is truly at room temperature. If it’s not, you’ll end up with little lumps that are hard to get rid of. I usually leave mine out for at least an hour, sometimes longer depending on the weather.
- Gradually add the granulated sugar and continue to beat until well combined. Scrape down the sides of the bowl as needed to ensure everything is incorporated evenly.
- Add the sour cream and mix until just combined. Don’t overmix at this stage, as it can incorporate too much air into the batter, which can cause the cheesecake to crack during baking.
- Add the eggs one at a time, mixing well after each addition. Again, be careful not to overmix. Just mix until the egg is fully incorporated.
- Stir in the vanilla extract and salt. This adds a lovely depth of flavor to the cheesecake.
Assembling and Baking the Cheesecake Bars
- Pour the cheesecake filling over the cooled graham cracker crust, spreading it evenly.
- Warm the dulce de leche slightly in the microwave for about 15-20 seconds, or until it’s easily pourable. This will make it easier to swirl into the cheesecake.
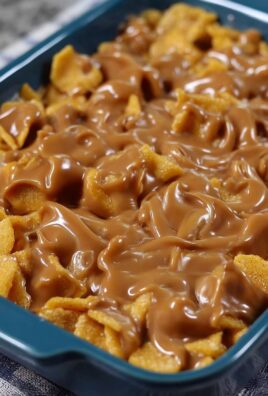
- Drizzle the warmed dulce de leche over the cheesecake filling.
- Use a knife or skewer to create swirls in the cheesecake filling. Be creative! You can make figure eights, zigzags, or any pattern you like. Just be careful not to overmix, as this can muddy the colors.
- Bake in the preheated oven for 30-35 minutes, or until the edges are set and the center is slightly jiggly. The cheesecake will continue to set as it cools.
- Turn off the oven and let the cheesecake bars cool in the oven with the door slightly ajar for about an hour. This helps prevent cracking.
- Remove the cheesecake bars from the oven and let them cool completely at room temperature.
- Cover the baking pan with plastic wrap and refrigerate for at least 4 hours, or preferably overnight. This allows the cheesecake to fully set and the flavors to meld together.
Cutting and Serving
- Once the cheesecake bars are thoroughly chilled, lift them out of the pan using the edges of the parchment paper (if you lined the pan). If you didn’t line the pan, you can carefully cut around the edges with a knife to loosen them.
- Cut the cheesecake into bars using a sharp knife. For clean cuts, run the knife under hot water and wipe it clean between each cut.
- Sprinkle with sea salt flakes, if desired. The salt enhances the sweetness of the dulce de leche and adds a nice textural contrast.
- Serve and enjoy! These Dulce de Leche Cheesecake Bars are best served cold. They’re perfect for parties, potlucks, or just a special treat for yourself.
Tips for Success
- Room Temperature Ingredients: Using room temperature cream cheese, sour cream, and eggs is essential for a smooth and creamy cheesecake filling. It prevents lumps and ensures that the ingredients blend together properly.
- Don’t Overmix: Overmixing the cheesecake batter can incorporate too much air, which can cause the cheesecake to crack during baking. Mix just until the ingredients are combined.
- Baking Time: The baking time may vary depending on your oven. Keep a close eye on the cheesecake and bake until the edges are set and the center is slightly jiggly.
- Cooling Process: The cooling process is just as important as the baking process. Letting the cheesecake cool slowly in the oven with the door ajar helps prevent cracking.
- Chilling Time: Chilling the cheesecake for at least 4 hours, or preferably overnight, allows it to fully set and the flavors to meld together.
- Dulce de Leche: You can use store-bought dulce de leche or make your own. Homemade dulce de leche is delicious, but store-bought is a convenient option.
- Variations: Feel free to experiment with different toppings, such as chopped nuts, chocolate shavings, or a drizzle of caramel sauce.
Troubleshooting
- Cracked Cheesecake: If your cheesecake cracks, don’t worry! It’s still delicious. You can cover the cracks with whipped cream or a layer of dulce de leche. To prevent cracking, make sure to use room temperature ingredients, don’t overmix the batter, and cool the cheesecake slowly in the oven.
- Lumpy Cheesecake: If your cheesecake is lumpy, it’s likely because the cream cheese wasn’t at room temperature. Make sure to soften the cream cheese completely before mixing.
- Soggy Crust: If your crust is soggy, make sure to pre-bake it for the recommended time. You can also try using a slightly thicker crust.
Storage Instructions
- Store leftover Dulce de Leche Cheesecake Bars in an airtight container in the refrigerator for up to 5 days.
- You can also freeze the cheesecake bars for up to 2 months. Wrap them tightly in plastic wrap and then in aluminum foil. Thaw in the refrigerator overnight before serving.
Conclusion:
And there you have it! These Dulce de Leche Cheesecake Bars are truly something special, and I genuinely believe they deserve a spot on your baking rotation. Why? Because they perfectly balance creamy, tangy cheesecake with the rich, caramel-like sweetness of dulce de leche, all nestled on a buttery, crumbly crust. It’s a symphony of textures and flavors that will have everyone reaching for seconds (and maybe thirds!).
But beyond the incredible taste, these bars are surprisingly easy to make. The recipe is straightforward, and even if you’re not a seasoned baker, you’ll find it manageable. Plus, they’re a fantastic make-ahead dessert. You can bake them a day or two in advance, allowing the flavors to meld and deepen, making them perfect for parties or potlucks.
Serving Suggestions and Variations:
The possibilities are endless when it comes to serving and customizing these bars. For a simple yet elegant presentation, dust them with a light coating of powdered sugar just before serving. Or, for a more decadent touch, drizzle them with extra dulce de leche and sprinkle with chopped pecans or walnuts.
If you’re feeling adventurous, consider these variations:
* Chocolate Lover’s Dream: Add a layer of melted dark chocolate on top of the cheesecake filling before baking. The bitterness of the chocolate will beautifully complement the sweetness of the dulce de leche.
* Coffee Infusion: Mix a tablespoon of instant espresso powder into the cheesecake filling for a subtle coffee flavor that enhances the caramel notes of the dulce de leche.
* Seasonal Twist: During the fall, add a teaspoon of cinnamon and a pinch of nutmeg to the crust for a warm, autumnal flavor. In the summer, top the bars with fresh berries for a refreshing contrast.
* Individual Servings: Instead of baking in a square pan, use muffin tins to create individual cheesecake bites. This is perfect for portion control and makes them easy to grab and go.
These Dulce de Leche Cheesecake Bars are not just a dessert; they’re an experience. They’re the perfect treat to share with loved ones, to bring to a gathering, or to simply enjoy on a quiet evening with a cup of coffee. They are guaranteed to impress and satisfy.
I truly hope you’ll give this recipe a try. I’m confident that you’ll love them as much as I do. And when you do, please, please, please come back and share your experience! Let me know what you thought of the recipe, what variations you tried, and how they turned out. Your feedback is invaluable, and I love hearing from you. Did you add a secret ingredient? Did you find a new way to present them? I’m all ears!
So, grab your ingredients, preheat your oven, and get ready to bake up a batch of these irresistible Dulce de Leche Cheesecake Bars. I can’t wait to hear all about your baking adventures! Happy baking!
Dulce de Leche Cheesecake Bars: The Ultimate Dessert Recipe
Creamy cheesecake bars with a buttery graham cracker crust and a decadent dulce de leche swirl. Perfect for parties or a special treat!
Ingredients
Instructions
Recipe Notes
- Room Temperature Ingredients: Essential for a smooth filling.
- Don’t Overmix: Avoid overmixing the batter to prevent cracking.
- Baking Time: Keep a close eye on the cheesecake, baking until the edges are set and the center is slightly jiggly.
- Cooling Process: Cool slowly in the oven with the door ajar to prevent cracking.
- Chilling Time: Chill for at least 4 hours, or preferably overnight, to allow the cheesecake to fully set and the flavors to meld together.
- Dulce de Leche: Use store-bought or homemade.
- Variations: Experiment with different toppings.
- Storage: Store leftovers in an airtight container in the refrigerator for up to 5 days. Freeze for up to 2 months.