Copycat Zebra Cakes, those iconic striped treats from our childhood, are surprisingly easy to recreate at home! Forget scouring the snack aisle; with this recipe, you can whip up a batch of these nostalgic goodies that taste even better than the original. Remember trading Zebra Cakes in the lunchroom, savoring each bite of that soft, vanilla cake and sweet, creamy filling?
While Zebra Cakes don’t boast a long, storied history like some classic desserts, they hold a special place in the hearts of many as a quintessential American snack. Introduced by Little Debbie in 1967, they quickly became a beloved treat, instantly recognizable by their distinctive fudge stripes. Their enduring popularity lies in their perfect combination of textures and flavors: the moist, tender cake, the smooth, rich creme filling, and the satisfying crunch of the fudge coating.
What makes these Copycat Zebra Cakes so irresistible? It’s the delightful contrast of the soft cake with the creamy filling and the slightly crisp chocolate stripes. Plus, making them at home allows you to control the ingredients, ensuring a fresh and delicious result. Get ready to impress your friends and family with these homemade versions of a classic favorite – they’re guaranteed to bring back sweet memories and create new ones!

Ingredients:
- For the Cake:
- 1 ½ cups all-purpose flour
- 1 ½ teaspoons baking powder
- ½ teaspoon baking soda
- ¼ teaspoon salt
- ½ cup (1 stick) unsalted butter, softened
- 1 cup granulated sugar
- 2 large eggs
- 1 teaspoon vanilla extract
- ¾ cup buttermilk
- For the Filling:
- ½ cup (1 stick) unsalted butter, softened
- 3 cups powdered sugar
- ¼ cup vegetable shortening
- 2 tablespoons milk
- 1 teaspoon vanilla extract
- For the Chocolate Coating:
- 12 ounces semi-sweet chocolate chips
- 2 tablespoons vegetable shortening
- For the White Chocolate Stripes:
- 4 ounces white chocolate chips
- 1 tablespoon vegetable shortening
Preparing the Cake Batter:
- First, let’s get started on the cake! Preheat your oven to 350°F (175°C). Grease and flour a 9×13 inch baking pan. This will prevent the cakes from sticking and make them easy to remove later. I like to use baking spray with flour already in it for extra insurance.
- In a medium bowl, whisk together the flour, baking powder, baking soda, and salt. This ensures that all the dry ingredients are evenly distributed, which is crucial for a consistent cake texture. Set this aside for now.
- In a large bowl, cream together the softened butter and granulated sugar until light and fluffy. This usually takes about 3-5 minutes with an electric mixer. The mixture should be pale and airy, which incorporates air into the batter and makes the cake tender.
- Beat in the eggs one at a time, then stir in the vanilla extract. Make sure each egg is fully incorporated before adding the next. The vanilla extract adds a lovely flavor that complements the chocolate and cream filling.
- Gradually add the dry ingredients to the wet ingredients, alternating with the buttermilk, beginning and ending with the dry ingredients. Start by adding about a third of the dry ingredients, then half of the buttermilk, then another third of the dry ingredients, the remaining buttermilk, and finally the last of the dry ingredients. Mix until just combined. Be careful not to overmix, as this can develop the gluten in the flour and result in a tough cake.
- Pour the batter into the prepared baking pan and spread it evenly.
Baking the Cake:
- Bake for 20-25 minutes, or until a wooden skewer inserted into the center comes out clean. The baking time may vary depending on your oven, so keep an eye on it.
- Let the cake cool in the pan for 10 minutes before inverting it onto a wire rack to cool completely. Make sure the cake is completely cool before frosting, or the frosting will melt.
Making the Cream Filling:
- While the cake is cooling, let’s make the cream filling. In a large bowl, cream together the softened butter and vegetable shortening until smooth and creamy. The vegetable shortening helps to stabilize the filling and prevent it from melting too quickly.
- Gradually add the powdered sugar, one cup at a time, beating well after each addition. This prevents the powdered sugar from flying everywhere.
- Add the milk and vanilla extract and beat until the filling is light and fluffy. If the filling is too thick, add a little more milk, one teaspoon at a time, until it reaches the desired consistency.
Assembling the Zebra Cakes:
- Once the cake is completely cool, use a 3-inch round cookie cutter to cut out circles from the cake. You should be able to get about 12-15 circles, depending on how closely you cut them.
- Spread a generous amount of cream filling onto the flat side of half of the cake circles.
- Top with the remaining cake circles, flat side down, to create little sandwiches. Gently press them together to help the filling adhere.
Preparing the Chocolate Coating:
- In a heatproof bowl set over a saucepan of simmering water (or in the microwave in 30-second intervals, stirring in between), melt the semi-sweet chocolate chips and vegetable shortening until smooth. The vegetable shortening helps to thin the chocolate and gives it a nice shine. Be careful not to overheat the chocolate, or it will seize up.
- Dip each cake into the melted chocolate, coating it completely. Place the dipped cakes onto a wire rack lined with parchment paper to allow the excess chocolate to drip off.
Adding the White Chocolate Stripes:
- While the chocolate coating is still wet, melt the white chocolate chips and vegetable shortening in a separate heatproof bowl set over a saucepan of simmering water (or in the microwave in 30-second intervals, stirring in between) until smooth.
- Transfer the melted white chocolate to a piping bag or a zip-top bag with a small corner snipped off.
- Drizzle the white chocolate over the chocolate-covered cakes in a zebra-like pattern. You can create straight lines or wavy lines, depending on your preference.
- Let the chocolate set completely before serving. This usually takes about 30 minutes at room temperature or 15 minutes in the refrigerator.
Tips and Tricks for Perfect Zebra Cakes:
- Don’t Overmix the Batter: Overmixing develops the gluten in the flour, resulting in a tough cake. Mix until just combined.
- Use Room Temperature Ingredients: Room temperature butter and eggs emulsify better, creating a smoother batter and a more tender cake.
- Cool the Cake Completely: Make sure the cake is completely cool before frosting to prevent the frosting from melting.
- Chill the Filling: If the filling seems too soft, chill it in the refrigerator for 15-20 minutes before using.
- Work Quickly with the Chocolate: The chocolate coating sets quickly, so work efficiently when dipping the cakes and adding the white chocolate stripes.
- Get Creative with the Stripes: Experiment with different patterns and colors for the stripes. You can use dark chocolate, milk chocolate, or even colored candy melts.
- Storage: Store the Zebra Cakes in an airtight container at room temperature for up to 3 days or in the refrigerator for up to 5 days.
Variations:
- Chocolate Cake: For a richer flavor, add ¼ cup of cocoa powder to the dry ingredients.
- Peanut Butter Filling: Add ½ cup of peanut butter to the cream filling for a delicious peanut butter and chocolate combination.
- Mint Chocolate: Add a few drops of peppermint extract to the chocolate coating for a refreshing mint chocolate flavor.
- Different Shapes: Use different cookie cutters to create different shapes for the cakes. Hearts, stars, or squares would be fun!
Enjoy your homemade Zebra Cakes! They’re a fun and delicious treat that everyone will love.
Conclusion:
So, there you have it! My take on homemade Copycat Zebra Cakes. I truly believe this recipe is a must-try for anyone who loves that classic snack cake but wants a fresher, more flavorful experience. Forget the preservatives and artificial tastes; these homemade versions are bursting with real vanilla, moist cake, and that signature chocolate stripe that makes them so iconic.
But why is this recipe a game-changer? It’s simple: control. You control the ingredients, ensuring a higher quality and, dare I say, healthier treat (well, healthier-ish!). You control the sweetness, adjusting it to your preference. And you control the fun! Baking these Copycat Zebra Cakes is a fantastic activity for kids and adults alike. The swirling of the chocolate is surprisingly therapeutic, and the anticipation of that first bite is pure joy.
Beyond the superior taste and the fun factor, this recipe offers incredible versatility. While I’ve presented my version, feel free to experiment! Want to amp up the vanilla flavor? Add a teaspoon of vanilla bean paste to the batter. Craving a richer chocolate experience? Use dark chocolate for the stripes. You could even try adding a hint of espresso powder to the chocolate for a mocha twist.
Serving Suggestions and Variations:
* Classic Style: Enjoy them as is, straight from the fridge, for that authentic Zebra Cake experience.
* Dessert Upgrade: Warm them slightly and serve with a scoop of vanilla ice cream and a drizzle of chocolate sauce.
* Party Perfect: Cut them into smaller squares and arrange them on a platter for a delightful party snack.
* Lunchbox Treat: Individually wrap them for a special surprise in your loved one’s lunchbox.
* Frosting Fun: While the original doesn’t have frosting, a light vanilla buttercream would be a delicious addition.
* Different Shapes: Use different shaped pans for a unique presentation. Mini muffin tins work great!
I’m confident that once you try this recipe, you’ll never go back to the store-bought version. The taste is simply incomparable. The satisfaction of creating something delicious from scratch is incredibly rewarding. And the smiles on the faces of those who get to enjoy your homemade Copycat Zebra Cakes will be priceless.
So, what are you waiting for? Gather your ingredients, preheat your oven, and get ready to embark on a baking adventure. I promise you won’t regret it. And please, please, please, don’t be shy! Once you’ve tried this recipe, I’d love to hear about your experience. Share your photos, your variations, and your tips in the comments below. Let’s create a community of Zebra Cake enthusiasts! I can’t wait to see what you create. Happy baking! Let me know if you have any questions, and I’ll do my best to help. I hope you enjoy making these as much as I do!
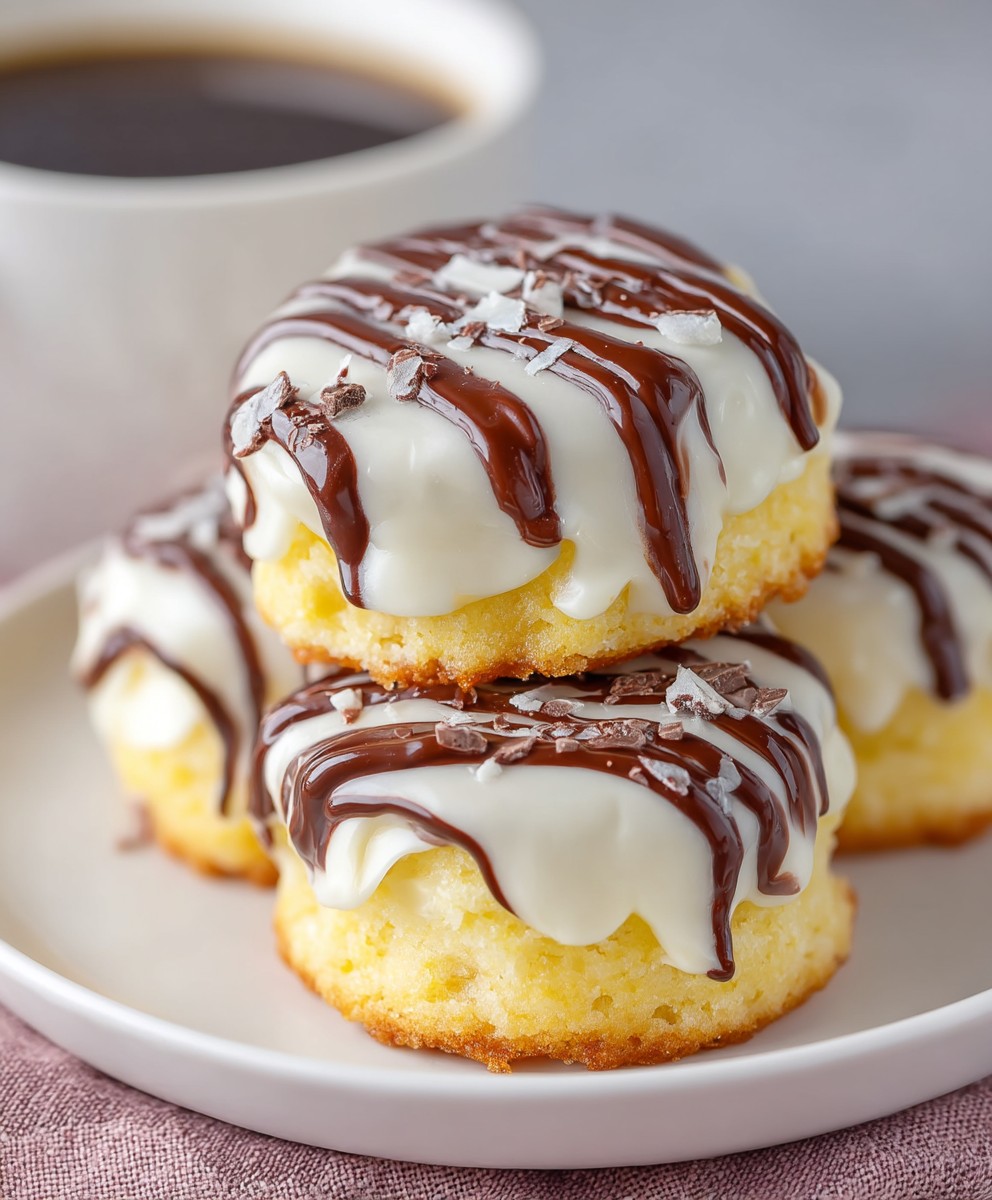
Copycat Zebra Cakes: The Ultimate Homemade Recipe
Tender vanilla cakes with creamy filling, rich chocolate coating, and signature white chocolate stripes. A fun and delicious homemade dessert!
Ingredients
Instructions
Recipe Notes
- Don’t Overmix the Batter: Overmixing develops the gluten in the flour, resulting in a tough cake. Mix until just combined.
- Use Room Temperature Ingredients: Room temperature butter and eggs emulsify better, creating a smoother batter and a more tender cake.
- Cool the Cake Completely: Make sure the cake is completely cool before frosting to prevent the frosting from melting.
- Chill the Filling: If the filling seems too soft, chill it in the refrigerator for 15-20 minutes before using.
- Work Quickly with the Chocolate: The chocolate coating sets quickly, so work efficiently when dipping the cakes and adding the white chocolate stripes.
- Get Creative with the Stripes: Experiment with different patterns and colors for the stripes. You can use dark chocolate, milk chocolate, or even colored candy melts.
- Storage: Store the Zebra Cakes in an airtight container at room temperature for up to 3 days or in the refrigerator for up to 5 days.