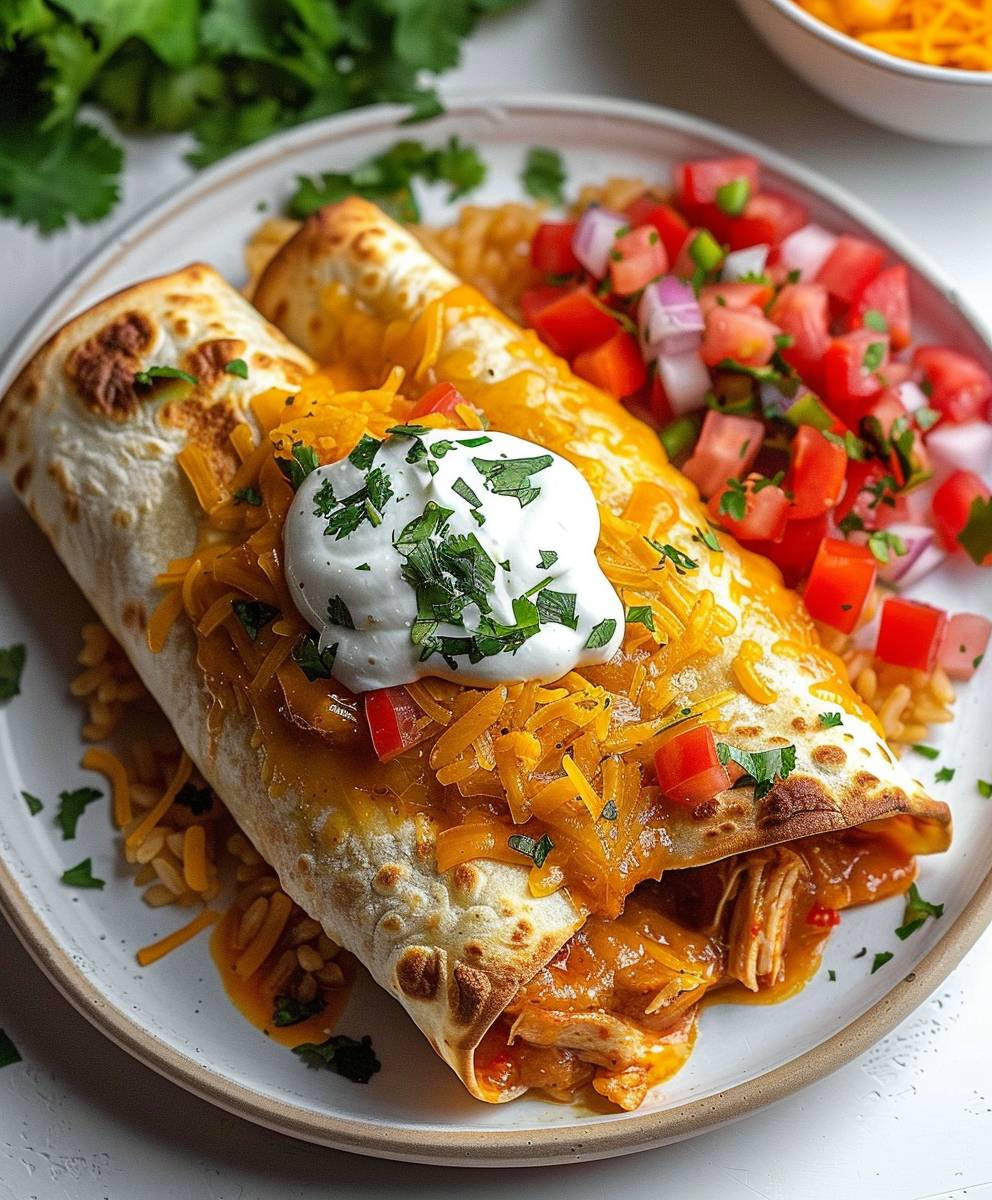
Chicken Chimichangas: A Flavor Explosion in Every Bite
Chicken Chimichangas: Just the name conjures up images of crispy, golden-brown tortillas overflowing with savory chicken and melted cheese. But these aren’t just any old rolled-up tacos; they’re a culinary adventure, a delightful fusion of Mexican flavors and textures that will leave you craving more.
While the exact origins of chimichangas are debated, the story often points to a happy accident in a Sonoran desert restaurant. Legend has it that a cook accidentally dropped a filled tortilla into hot oil, creating this crispy, delicious treat. Regardless of their precise beginnings, Chicken Chimichangas have quickly become a beloved staple of Mexican-American cuisine, a testament to their irresistible appeal.
What makes these so incredibly popular? It’s the perfect combination of factors, really. The crispy, shatteringly delicate tortilla provides a delightful contrast to the tender, juicy chicken filling. The rich, melty cheese adds a creamy indulgence, while the optional additions of salsa, sour cream, guacamole, and other toppings allow for endless customization and flavor exploration. Whether you prefer a simple classic or a more elaborate creation, Chicken Chimichangas offer a satisfying meal that’s both incredibly flavorful and surprisingly easy to make at home. You’ll find yourself making them again and again!
So, are you ready to embark on this culinary journey with me? Let’s dive into the recipe and create some truly unforgettable Chicken Chimichangas!

Ingredients:
- 1.5 lbs boneless, skinless chicken breasts
- 1 tbsp olive oil
- 1 medium onion, chopped
- 2 cloves garlic, minced
- 1 (10 ounce) can diced tomatoes and green chilies (Rotel), undrained
- 1 (4 ounce) can chopped green chilies
- 1 tsp chili powder
- 1/2 tsp cumin
- 1/4 tsp cayenne pepper (optional, for extra heat)
- 1/2 tsp salt
- 1/4 tsp black pepper
- 1 cup chicken broth
- 12 (6-inch) flour tortillas
- 2 cups shredded cheddar cheese
- 1 cup shredded Monterey Jack cheese
- Vegetable oil, for frying (about 2 inches deep)
- Optional toppings: Sour cream, guacamole, salsa, pico de gallo
Preparing the Chicken Filling:
- I like to start by cutting the chicken breasts into bite-sized pieces. This ensures they cook evenly and are easy to incorporate into the chimichangas.
- Heat the olive oil in a large skillet over medium-high heat. Once hot, add the chicken and cook, stirring occasionally, until browned and cooked through, about 6-8 minutes. Make sure the chicken is fully cooked before proceeding!
- Add the chopped onion to the skillet and cook until softened, about 3-5 minutes. I find that a little patience here really pays off in the final flavor.
- Stir in the minced garlic and cook for another minute, until fragrant. Don’t let the garlic burn; it’ll become bitter.
- Now, it’s time for the flavor explosion! Add the Rotel (undrained!), chopped green chilies, chili powder, cumin, cayenne pepper (if using), salt, and pepper to the skillet. Stir well to combine all the spices and ingredients.
- Pour in the chicken broth and bring the mixture to a simmer. Reduce heat to low, cover, and let it simmer for about 10-15 minutes, or until the sauce has thickened slightly and the flavors have melded beautifully. This slow simmering is key to developing a rich and complex flavor profile.
Assembling the Chimichangas:
- While the chicken filling simmers, warm the flour tortillas. You can do this in a few ways: I often heat them in a dry skillet over medium heat for about 30 seconds per side, or you can microwave them wrapped in a damp paper towel for 15-20 seconds. Just be careful not to overcook them, as they can become brittle.
- Lay a warm tortilla flat on a clean surface. Place about 1/3 cup of the chicken filling in the center of the tortilla. Don’t overload it; you want to be able to fold it easily without it bursting open.
- Sprinkle about 2 tablespoons of the shredded cheddar and Monterey Jack cheese over the chicken filling. I like to use a mix of cheeses for a more complex flavor and texture.
- Fold the sides of the tortilla inward, then tightly roll it up from the bottom to create a burrito-like shape. Make sure the filling is securely sealed inside.
- Repeat steps 7-10 with the remaining tortillas and filling.
Frying the Chimichangas:
- Pour about 2 inches of vegetable oil into a large, heavy-bottomed skillet or pot. Heat the oil over medium-high heat to 350°F (175°C). Use a candy thermometer to monitor the oil temperature for consistent results. Hot oil is crucial for crispy chimichangas!
- Carefully place 2-3 chimichangas into the hot oil, ensuring not to overcrowd the skillet. Frying too many at once will lower the oil temperature and result in soggy chimichangas.
- Fry the chimichangas for about 2-3 minutes per side, or until they are golden brown and crispy. Use tongs to gently turn them. Be careful, the oil is very hot!
- Remove the fried chimichangas from the oil and place them on a wire rack or paper towel-lined plate to drain excess oil. This helps them stay crispy.
- Repeat steps 13-15 with the remaining chimichangas.
Serving Suggestions:
- Serve the chimichangas immediately while they are hot and crispy. They are delicious on their own, but even better with your favorite toppings!
- I love to serve mine with a dollop of sour cream, a generous helping of guacamole, some fresh salsa, and a sprinkle of pico de gallo. Feel free to get creative and add your own favorite toppings!
Conclusion:
So there you have it – my recipe for the ultimate Chicken Chimichangas! I truly believe this recipe is a must-try for several reasons. First, it’s incredibly flavorful. The blend of savory chicken, spicy peppers, and rich cheese is simply irresistible. Second, it’s surprisingly easy to make, even for beginner cooks. The step-by-step instructions are designed to be clear and concise, guiding you through each stage of the process without any unnecessary complications. Third, and perhaps most importantly, it’s incredibly versatile. You can easily adapt this recipe to suit your own tastes and preferences, making it a perfect choice for weeknight dinners or special occasions.
Speaking of versatility, let me share a few serving suggestions and variations to inspire your culinary creativity. For a truly authentic experience, serve your Chicken Chimichangas with a side of creamy guacamole, a dollop of sour cream, and a sprinkle of fresh cilantro. The cool, creamy textures perfectly complement the crispy, savory chimichangas. Alternatively, you could add a side of Mexican rice and refried beans for a more substantial meal. For a spicier kick, add a dash of your favorite hot sauce or a few slices of jalapeño peppers to the chicken filling. If you prefer a milder flavor, you can reduce the amount of chili powder or omit it altogether.
Feeling adventurous? Why not experiment with different fillings? Shredded beef, carnitas, or even black beans and vegetables would all make delicious variations. You could also try different cheeses, such as Monterey Jack or pepper jack, to change up the flavor profile. The possibilities are truly endless! Don’t be afraid to get creative and personalize this recipe to create your own signature Chicken Chimichangas.
Serving Suggestions for a Crowd:
Planning a party? These Chicken Chimichangas are a fantastic crowd-pleaser! Prepare them ahead of time and simply reheat them in the oven or microwave before serving. Set up a self-serve chimichanga bar with various toppings, such as shredded lettuce, diced tomatoes, onions, different salsas, and sour cream. This allows your guests to customize their chimichangas to their liking, ensuring everyone enjoys their meal.
Dietary Adaptations:
Want to make these Chicken Chimichangas healthier? Use whole wheat tortillas for a boost of fiber. You can also reduce the amount of oil used for frying by baking the chimichangas instead. Simply place them on a baking sheet lined with parchment paper and bake at 375°F (190°C) for about 15-20 minutes, or until golden brown and crispy. For a gluten-free option, use gluten-free tortillas.
Ready to embark on a culinary adventure?
I wholeheartedly encourage you to try this recipe and experience the deliciousness of homemade Chicken Chimichangas. It’s a dish that’s sure to become a family favorite. Once you’ve made them, I’d love to hear about your experience! Share your photos and feedback on social media using #ChickenChimichangasRecipe – I can’t wait to see your creations! Remember, cooking should be fun and enjoyable, so relax, have fun, and savor every bite of these amazing Chicken Chimichangas.
Happy cooking!
Chicken Chimichangas: A Step-by-Step Recipe Guide
Crispy fried chimichangas filled with flavorful chicken, Rotel, and cheese. A fun and satisfying meal!
Ingredients
Instructions
Recipe Notes
- Ensure chicken is fully cooked before proceeding.
- Don’t overcrowd the skillet when frying to maintain oil temperature.
- Hot oil is crucial for crispy chimichangas.
- Adjust cayenne pepper to your desired level of heat.
- Leftovers can be stored in the refrigerator for up to 3 days. Reheat in the oven or microwave. They may not be as crispy as when freshly fried.