Halloween Oreo Bark: A Spooktacularly Delicious Treat
Halloween Oreo Bark – just the name conjures up images of spooky fun and deliciousness! This recipe isn’t just about satisfying a sweet craving; it’s about creating a festive and memorable treat perfect for Halloween gatherings, parties, or even a cozy night in. I’ve always loved the ease and versatility of bark recipes, and this Halloween Oreo Bark takes it to a whole new level of delightful simplicity.
While the precise origins of chocolate bark are difficult to pinpoint, its popularity has spanned centuries, evolving from simple chocolate shards to the elaborate creations we see today. This particular recipe draws inspiration from the classic combination of chocolate and Oreos, a pairing beloved by many. The addition of festive Halloween sprinkles and candies elevates it to a truly special occasion treat.
What makes Halloween Oreo Bark so irresistible? It’s the perfect blend of textures – the crisp snap of the chocolate, the satisfying crunch of the Oreos, and the delightful bursts of colorful candy. The rich, decadent chocolate complements the sweet and slightly creamy Oreos beautifully. Beyond the taste, its ease of preparation is a huge draw. With minimal ingredients and simple steps, even novice bakers can create this stunning and delicious Halloween treat. It’s also incredibly adaptable; feel free to swap out candies and sprinkles to match your personal preferences or create a themed bark.
So, gather your ingredients and let’s embark on this fun and delicious Halloween baking adventure together! You’ll be amazed at how quickly and easily you can whip up a batch of this Halloween Oreo Bark that will be the star of your Halloween spread.

Ingredients:
- 1 package (16 ounces) Oreo cookies
- 1 cup (2 sticks) unsalted butter
- 1 package (12 ounces) semi-sweet chocolate chips
- 1 package (12 ounces) white chocolate chips
- 1/2 cup candy melts (orange, purple, green – your favorite Halloween colors)
- 1/4 cup sprinkles (Halloween themed)
- Miniature marshmallows
- Small gummy candies (Halloween shapes)
- Plastic knife or offset spatula
- Baking sheet lined with parchment paper
- Microwave-safe bowl
- Rubber spatula or wooden spoon
Preparing the Oreo Crumbs:
- First, I like to get started by crushing the Oreos. I find the easiest way is to place them in a zip-top bag and use a rolling pin to crush them into fine crumbs. You can also pulse them in a food processor if you prefer a more consistent crumb. Don’t worry about making them perfectly fine; some larger pieces add texture!
- Once you have your Oreo crumbs, set them aside in a bowl. We’ll be adding them to the melted chocolate later.
Melting the Chocolate:
- Now, let’s melt the chocolate! I prefer using the microwave for this step. Place the semi-sweet chocolate chips in a microwave-safe bowl. Microwave in 30-second intervals, stirring after each interval, until the chocolate is completely melted and smooth. Be careful not to overheat the chocolate, as this can cause it to seize up and become grainy.
- Once the semi-sweet chocolate is melted, I gently stir in the melted butter until it’s fully incorporated and the mixture is smooth and glossy. This will help the bark set up nicely.
- Repeat the melting process for the white chocolate chips in a separate microwave-safe bowl. Again, microwave in 30-second intervals, stirring until smooth and melted.
- For the candy melts, I usually melt them according to the package instructions. This might involve a double boiler or the microwave, depending on the brand. Keep an eye on them to prevent burning.
Assembling the Halloween Oreo Bark:
- Line a baking sheet with parchment paper. This makes cleanup a breeze later on!
- Pour the melted semi-sweet chocolate mixture onto the prepared baking sheet. Spread it evenly using an offset spatula or the back of a spoon to create a relatively thin and even layer. Aim for about 1/8 inch thickness.
- This is where the fun begins! Sprinkle the Oreo crumbs evenly over the semi-sweet chocolate layer. Gently press them down slightly to adhere them to the chocolate.
- Next, drizzle the melted white chocolate over the Oreo layer in a zig-zag pattern or any design you like. I often use a spoon to create swirls and patterns.
- Now for the colorful candy melts! Drizzle the orange, purple, and green melted candy melts over the white chocolate in a similar fashion. Get creative with your designs!
- Sprinkle the Halloween sprinkles generously over the entire bark. Don’t be shy!
- Finally, add your miniature marshmallows and gummy candies. Arrange them in a fun Halloween design. I like to cluster them together in some areas and leave other areas more sparsely decorated.
- Once you’re happy with your design, place the baking sheet in the refrigerator for at least 2 hours, or until the chocolate is completely set and firm. This ensures a nice, crisp bark.
Breaking and Serving:
- Once the bark is completely set, carefully lift it from the baking sheet using the parchment paper. Place it on a cutting board.
- Using a sharp knife or pizza cutter, break the bark into irregular pieces. This adds to the rustic charm of the bark. If you prefer more uniform pieces, you can use a ruler and a sharp knife to cut it into squares or rectangles.
- Store the Halloween Oreo Bark in an airtight container at room temperature for up to a week. It’s best enjoyed fresh, though!
Tips and Variations:
- For a richer flavor, use dark chocolate instead of semi-sweet chocolate.
- Feel free to experiment with different types of candy melts and sprinkles. The possibilities are endless!
- Add other Halloween-themed candies, such as candy corn or chocolate coins.
- If you don’t have candy melts, you can use food coloring to tint white chocolate.
- For a nuttier flavor, add chopped nuts to the Oreo crumb mixture.
- To make it easier to spread the chocolate, slightly warm the melted chocolate in the microwave for short intervals before spreading.
- If you want a thinner bark, spread the chocolate over a larger area.
Conclusion:
So there you have it – my incredibly easy and utterly delicious Halloween Oreo Bark recipe! I truly believe this recipe is a must-try for several reasons. First, it’s unbelievably simple. Even the most novice baker can whip up a batch in under 30 minutes, making it perfect for a last-minute Halloween treat or a fun activity to do with kids. Second, the flavor combination is irresistible. The classic crunch of Oreos paired with the creamy sweetness of white chocolate and the festive Halloween sprinkles is a match made in candy heaven. It’s the perfect balance of sweet and salty, crunchy and smooth – a textural and flavor explosion in every bite!
Third, and perhaps most importantly, it’s incredibly customizable! This Halloween Oreo Bark recipe is your blank canvas for creativity. Want to add a spooky twist? Try incorporating crushed candy corn, mini chocolate chips shaped like ghosts, or even some finely chopped pretzels for an extra salty kick. Feeling adventurous? Swap out the white chocolate for milk chocolate or dark chocolate for a completely different flavor profile. You could even experiment with different types of Oreos – think mint Oreos for a refreshing twist or even the limited-edition seasonal flavors for a truly unique treat.
Beyond the endless possibilities for customization, this recipe is also incredibly versatile. It makes a fantastic addition to any Halloween party, whether you’re hosting a spooky gathering or just want to impress your friends and family with a simple yet impressive dessert. It’s also perfect for gifting – simply break the bark into smaller pieces and package them in cellophane bags tied with festive ribbon. Imagine the delight on your friends’ faces when they receive this delicious and beautifully presented treat!
Serving Suggestions:
Serve your Halloween Oreo Bark at room temperature for the best flavor and texture. It’s delicious on its own, but it also pairs wonderfully with a glass of cold milk, a cup of hot cocoa, or even a scoop of vanilla ice cream for an extra decadent treat. For a truly spooky presentation, serve it on a platter surrounded by dry ice for a dramatic effect (always supervise children around dry ice). You can also break it into smaller pieces and use it as a topping for cupcakes or ice cream sundaes.
Variations to Try:
- Pumpkin Spice Oreo Bark: Use pumpkin spice Oreos and add a sprinkle of pumpkin pie spice to the melted white chocolate.
- Ghostly White Chocolate Bark: Use white chocolate melts and drizzle melted dark chocolate to create spooky ghost shapes.
- Candy Corn Bark: Use a combination of white, orange, and yellow candy melts to create a candy corn design.
- Nutty Halloween Bark: Add chopped pecans or walnuts to the melted chocolate for added crunch and flavor.
I genuinely hope you give this Halloween Oreo Bark recipe a try. It’s a guaranteed crowd-pleaser, and I’m confident it will become a new Halloween tradition in your household. Don’t forget to share your creations with me! Tag me on social media and let me know how yours turned out. I’d love to see your spooky and delicious Halloween Oreo Bark masterpieces! Happy baking (and happy haunting!)
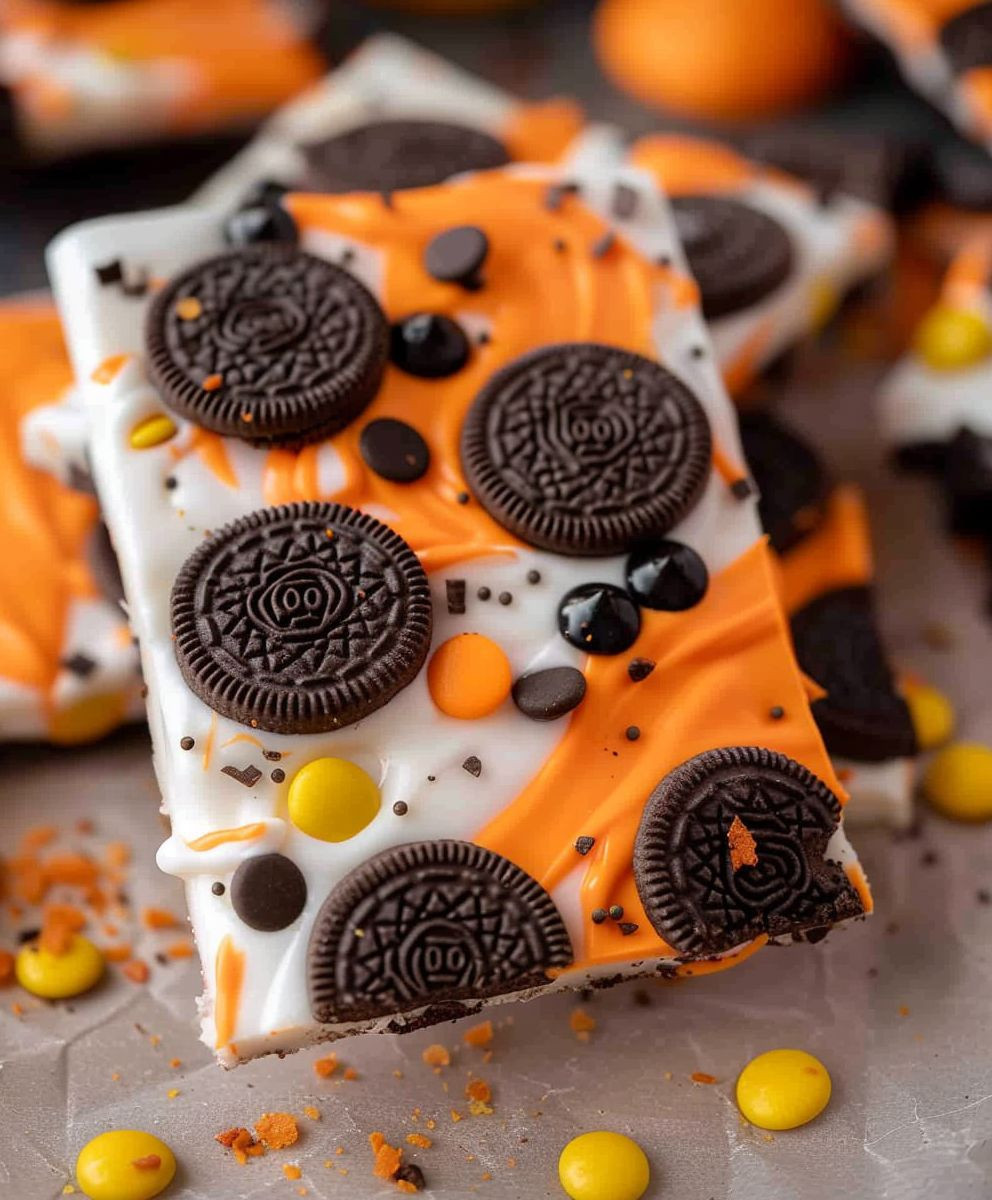
Halloween Oreo Bark: Easy No-Bake Recipe for Spooky Treats
Festive Halloween treat with Oreo cookie crumbles, melted chocolate, and colorful candy decorations.
Ingredients
Instructions
Recipe Notes
- For a richer flavor, use dark chocolate instead of semi-sweet.
- Experiment with different candy melts, sprinkles, and Halloween candies.
- If you don’t have candy melts, tint white chocolate with food coloring.
- Add chopped nuts to the Oreo crumbs for extra flavor.
- Slightly warm melted chocolate before spreading for easier application.
- Spread chocolate over a larger area for thinner bark.