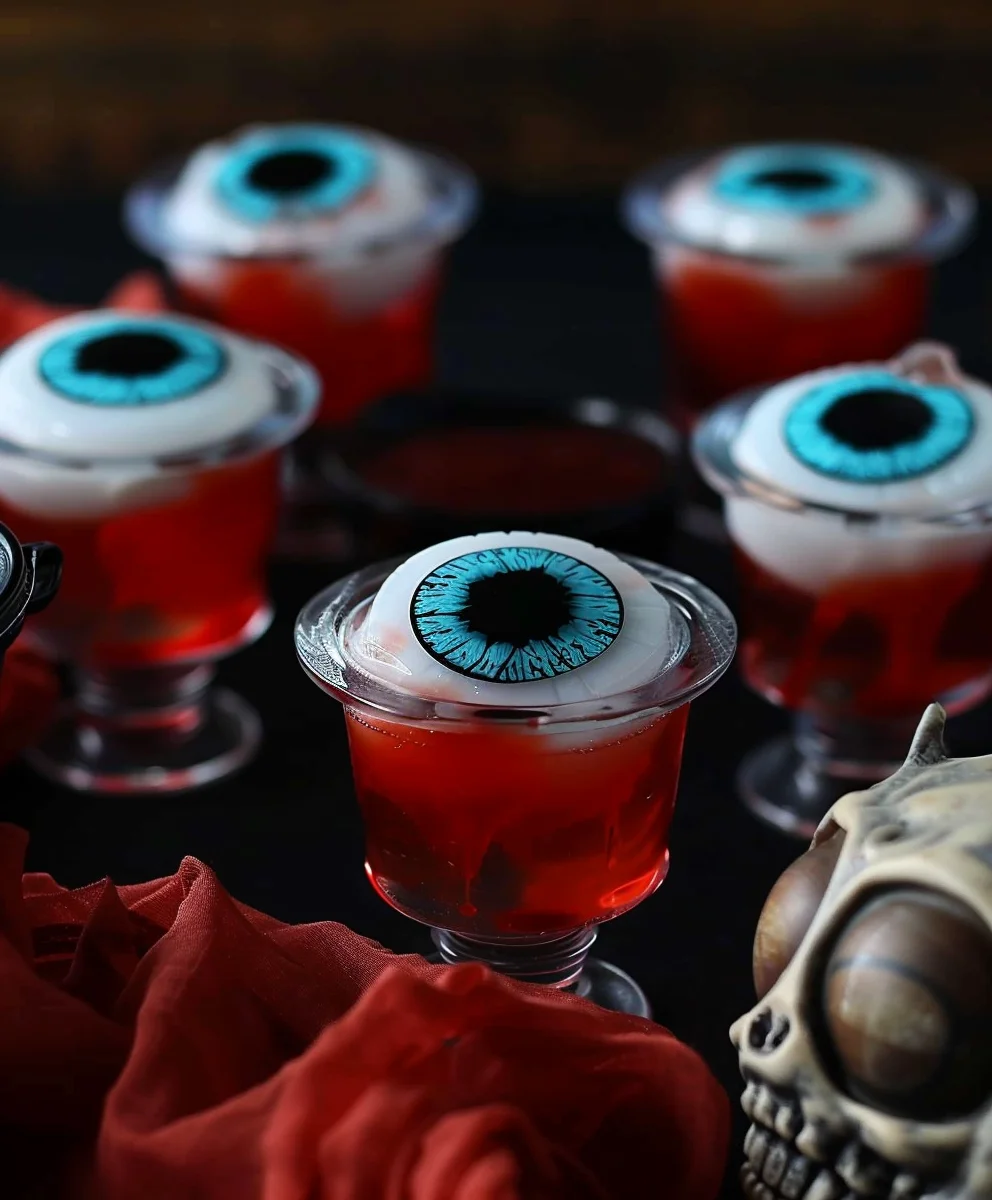
Halloween Eyeball Jello Shots are undoubtedly the most strikingly eerie and utterly delightful concoction you can bring to any adult Halloween celebration. Imagine the gasps of delight and amusement as your guests encounter these wobbly, ghastly-but-gorgeous treats, each one a miniature, edible work of spooky art. While Jello shots have long been a quintessential party staple, their transformation into these ghoulishly good eyeballs elevates them to a new level of festive fun, perfectly encapsulating the playful spirit of the season.
I find that crafting these spooky, jiggly delights instantly injects an unmatched level of cheer and a delightfully eerie atmosphere into any adult gathering. People absolutely adore them not just for their vibrant, shockingly realistic appearance, which makes them an instant conversation starter, but also for their refreshing fruity taste and that wonderfully satisfying, jiggly texture. They are incredibly convenient to prepare ahead of time, allowing you to focus on enjoying the festivities. Get ready to impress and entertain with these memorable Halloween Eyeball Jello Shots, proving that spooky can also be incredibly scrumptious!

Ingredients:
-
For the Eyeballs:
- Two (2) cans (approximately 15 oz or 425g each) of whole peeled lychees in syrup, drained and rinsed. It’s crucial that these are whole lychees, not halves or diced, for the best eyeball effect.
- One (1) pint of fresh blueberries. Look for blueberries that are relatively firm and round, as they will form the pupils.
-
For the Jello Shots Base:
- Three (3) to four (4) boxes (3 oz or 85g each) of flavored gelatin. I love using a mix of eerie colors like lime green, orange, and red for a truly Halloween vibe. You could also opt for a blue or purple!
- Three (3) to four (4) cups of boiling water (one cup per box of gelatin).
- Two (2) to three (3) cups of cold vodka or light rum. The exact amount depends on your desired potency and the number of jello boxes you’re using. I usually go for a 1:1 ratio with the cold liquid component.
- Optional: 1/2 cup of a clear, unflavored liqueur like triple sec or a fruit-flavored liqueur that complements your jello, for an extra layer of flavor complexity.
-
For Decoration & Presentation:
- Approximately twenty-four (24) to thirty-six (36) 2-ounce plastic or glass shot cups with lids (if transporting). The number will vary based on how many boxes of jello you prepare.
- Red gel food coloring (in a tube with a fine tip applicator or a small brush) for creating realistic “bloodshot” veins. This is where the magic truly happens!
- A small, clean paintbrush or a toothpick for applying the red gel if your food coloring doesn’t have a fine tip.
- A baking sheet or large tray to hold the shot cups, making it easier to transport them to and from the refrigerator.
Preparing Your Eyeballs: The Creepy Gaze
Let’s kick things off with crafting the most striking part of our Halloween Eyeball Jello Shots: the eerie, lifelike eyeballs! This step is simple but requires a little patience and a delicate touch to achieve the best effect. Trust me, these little details make all the difference for a truly spooky presentation.
- Drain and Rinse the Lychees: Carefully open your cans of whole lychees. Using a colander, thoroughly drain all the syrup. I like to give them a quick rinse under cold running water afterwards to remove any stickiness, then let them drain completely again. You want them as dry as possible to ensure the blueberries adhere well and don’t introduce excess moisture into your jello. Gently pat them dry with a paper towel if needed. We’re aiming for a pristine white canvas for our pupils.
- Insert the Blueberry Pupils: Now for the fun part! Take one drained lychee and carefully insert a single blueberry into its hollow core. Lychees naturally have a cavity where the pit used to be, which is absolutely perfect for our blueberry pupil. Push the blueberry in just enough so that it’s snug and peeking out, resembling an iris. Choose blueberries that fit well – not too big that they split the lychee, and not too small that they disappear entirely. If you find a lychee that’s too small or damaged, set it aside; we only want the best eyeballs for our ghoulish creation. Repeat this process until all your lychees are transformed into terrifying little eyeballs.
- Chill the Eyeballs (Optional but Recommended): Once all your lychees have their blueberry pupils, I recommend placing them on a small plate or in a shallow container and popping them into the refrigerator for at least 15-20 minutes. This helps them firm up slightly, making them easier to handle when we embed them into the jello later, and ensures they hold their shape perfectly. It’s a small step that pays off in the final presentation.
Crafting the Jello Base: A Ghoulish Glow
Now that our eyeballs are chilling, it’s time to prepare the vibrant, wiggly jello base that will cradle our ghastly gazers. This step involves dissolving the gelatin and, of course, incorporating our spirited adult twist! The key here is precision and patience to ensure perfectly set, deliciously boozy jello shots.
- Boil Water and Prepare Gelatin: Bring your water to a rolling boil. For each 3 oz box of gelatin, you’ll need 1 cup of boiling water. In a large heat-proof bowl, empty the contents of one box of flavored gelatin. Pour 1 cup of boiling water over the gelatin powder. Whisk vigorously for at least 2-3 minutes until the gelatin powder is completely dissolved. You want absolutely no undissolved granules at the bottom; a clear, consistent liquid is our goal. Repeat this process for each color of gelatin you plan to use, keeping them in separate bowls if you want distinct layers or colors for your shots.
- Add the Cold Alcohol: Once the gelatin is fully dissolved and the mixture is still hot, it’s time to add the cold alcohol. For each box of gelatin that used 1 cup of boiling water, I like to add 1 cup of cold vodka or light rum. This ensures a good balance of flavor and potency. Pour the cold alcohol directly into the dissolved gelatin mixture and whisk thoroughly for another minute. Adding cold alcohol helps to cool the mixture down quickly, preventing the alcohol from evaporating and ensuring a stronger jello set. If you’re using an optional clear liqueur, you can add about 1/4 cup of it along with your vodka/rum per box of jello for an extra layer of flavor.
- Cool Down the Jello Mixture: This is a critical, often overlooked step! Before pouring into your shot cups, you need to allow the jello mixture to cool down significantly, but not set. If you pour hot jello, it can melt your plastic cups or, more importantly, create condensation that affects the texture of your jello. I usually let it sit at room temperature for about 15-20 minutes, or until it’s cool to the touch but still liquid. Alternatively, you can place the bowl in an ice bath for 5-10 minutes, stirring occasionally, until it’s nicely chilled. This also helps ensure your layers will set cleanly if you’re doing multiple colors.
- Consider Multiple Colors (Optional Layering): If you’re using multiple colors, repeat steps 1-3 for each color, ensuring each batch is prepared in a separate bowl. For example, you might make a batch of green, then orange, then red. This allows you to create striking layered effects in your shot cups, adding even more visual appeal to your Halloween treats. Just be sure to keep each color separate and ready for pouring when you get to the assembly phase.
Assembly and Chilling: Bringing Your Monsters to Life
With our eerie eyeballs prepped and our ghoulish jello base ready to go, it’s time to bring these elements together into their final, chilling form. This is where your Halloween Eyeball Jello Shots truly start to take shape! Patience during the chilling phases is paramount for success, so resist the urge to peek too early.
- Prepare Your Shot Cups: Arrange your 2-ounce shot cups on a baking sheet or large tray. This makes them easy to move in and out of the refrigerator without disturbing the setting jello. Ensure they are clean and dry. Depending on how many colors of jello you made and how full you plan to fill each cup, you might need more or fewer cups than anticipated. I find it’s always better to have a few extra on hand.
- Pour the First Jello Layer (Optional): If you’re going for a layered look, pour a small amount of your first jello color (e.g., green or orange) into the bottom of each shot cup, filling it about one-third of the way. Place the tray carefully into the refrigerator for approximately 20-30 minutes, or until this first layer is mostly set but still slightly tacky to the touch. It shouldn’t be completely firm, as you want the next layer to adhere well without creating a visible seam. This partial set is crucial for preventing your eyeball from sinking straight to the bottom.
- Position the Eyeballs: Once your first layer of jello has slightly set (or if you’re doing a single-layer shot, right after the jello has cooled), it’s time to add our prepared lychee eyeballs. Carefully place one blueberry-filled lychee eyeball into each shot cup. Position it so that the blueberry pupil is facing upwards and centered. Don’t press it down too hard; just let it rest gently on the surface of the partially set jello or suspended if you’re working with a single, un-set layer. You want the eyeball to float slightly or be half-submerged, giving it that perfect creepy, peering-out-of-the-jello look.
- Pour the Remaining Jello: Now, carefully pour the remaining jello mixture (either the same color or your next chosen color for layering) over and around each eyeball, filling the cup almost to the top. Pour slowly to avoid dislodging the eyeball or creating too many air bubbles. If you’re doing another layer, make sure the jello is cool enough not to melt the previous layer. If you’re doing a single layer, ensure the jello is cool so the eyeball doesn’t float too much or sink. A good technique is to pour over the back of a spoon to gently disperse the liquid.
- Final Chill: Once all your shot cups are filled and their eyeballs are nestled, carefully transfer the entire tray back into the refrigerator. These need to chill for at least 3-4 hours, but ideally, I like to leave them overnight. This extended chilling time ensures that the jello is perfectly firm, the alcohol is fully integrated, and the eyeballs are securely suspended. There’s nothing worse than a wobbly jello shot that hasn’t fully set! If your shot cups came with lids, you can cover them once they’ve begun to set (after about an hour in the fridge) to prevent them from absorbing refrigerator odors.
Adding the Finishing Touches: Bloodshot Details and Presentation
Your Halloween Eyeball Jello Shots are almost complete! Now for the final, most artistic and wonderfully grotesque step: adding the bloodshot veins. This small detail elevates them from just a fun treat to a truly unsettling and memorable Halloween masterpiece. This is where your inner mad scientist truly shines through!
- Gather Your “Blood”: Once your jello shots are completely firm and well-chilled, carefully remove them from the refrigerator. Have your red gel food coloring ready. I highly recommend using a tube of red gel food coloring with a fine tip applicator, as it provides the most control for drawing delicate lines. If you don’t have one, a small, clean, food-safe paintbrush or even a toothpick dipped in a tiny bit of gel food coloring will work just fine.
- Draw the Bloodshot Veins: This is where you get creative! Carefully use your fine-tip applicator or paintbrush to draw thin, squiggly red lines radiating out from the blueberry pupil onto the white lychee “eyeball.” Think of the tiny capillaries in a bloodshot eye. Start with light pressure and build up the intensity if needed. Some lines can be thicker, some thinner, some can branch out – imperfection here actually adds to the realistic, creepy effect. Don’t overdo it; a few well-placed veins are often more effective than a messy blob of red. Repeat this process for all your eyeballs.
- Allow the Gel to Set: After you’ve drawn all your bloodshot veins, place the tray of decorated jello shots back into the refrigerator for another 15-30 minutes. This allows the gel food coloring to slightly dry and set, preventing it from smearing when handling the shots. It helps to ensure your artistic efforts remain pristine until serving time.
-
Final Presentation and Serving Suggestions:
- Arrangement: Arrange your finished Halloween Eyeball Jello Shots artfully on a serving platter. You can place them on a bed of “graveyard dirt” (crushed Oreo cookies), surrounded by plastic spiders, or dry ice for an added spooky fog effect (use caution with dry ice!).
- Lighting: Dim lighting and some strategically placed LED tea lights can enhance the eerie glow of your jello shots.
- Serving: Remind your guests that these are adult treats! They are best served very cold. Offer small spoons or encourage guests to slurp them down for maximum jello shot enjoyment.
- Storage: Any leftover jello shots should be kept covered in the refrigerator. They typically remain good for up to 3-5 days, though I find they are best enjoyed within the first 24-48 hours for optimal texture and freshness.
Congratulations, you’ve created a truly unforgettable Halloween treat that is sure to be the talk of any spooky gathering! These creepy concoctions are not only delicious but also incredibly fun to make and present. Enjoy watching your guests’ reactions as they encounter these terrifyingly tasty eyeballs!
Conclusion:
And there you have it, my friends! We’ve reached the grand finale of our spooky culinary adventure, and I truly hope you’re as excited as I am about what we’ve created. This isn’t just another recipe; it’s an invitation to elevate your Halloween festivities from simply fun to absolutely unforgettable. Trust me, the moment your guests lay eyes on these delightfully ghoulish treats, you’ll understand exactly why I call them a must-try. They aren’t just a dessert or a party favor; they are a conversation starter, a centerpiece, and a testament to your commitment to throwing the most spectacular Halloween bash on the block. The vivid, unsettlingly realistic “eyeball” suspended in shimmering, colorful jello is pure genius – a perfect blend of creepy aesthetic and utterly delicious flavor that will have everyone reaching for more, despite their initial shivers!
I genuinely believe that the magic of this recipe lies in its unexpected combination of macabre presentation and vibrant, fruity taste. It’s a playful paradox that perfectly encapsulates the spirit of Halloween. What other treat can simultaneously evoke a gasp of surprise and a groan of delight? The simplicity of the preparation belies the impressive visual impact, meaning you don’t need to be a seasoned chef or a master sculptor to achieve stunning results. Just follow my easy steps, and I promise you’ll be basking in compliments all night long. Imagine the collective “oohs” and “ahhs” as you present a platter of these shimmering, eye-catching concoctions – it’s a moment of pure culinary triumph, and I want you to experience it firsthand.
Unleash Your Creativity: Serving Suggestions & Variations
Now that you’ve mastered the basic technique, let’s talk about how you can truly make these Halloween Eyeball Jello Shots your own. Presentation is key, especially when dealing with such a visually striking treat. For an extra eerie effect, consider serving them on a dark, mysterious platter, perhaps nestled among some artificial cobwebs or plastic spiders. A shallow bowl of dry ice placed strategically nearby can create a mesmerizing, fog-laden atmosphere, giving your jello shots the appearance of floating in a spooky, ethereal mist. For individual servings, small, clear plastic cups or even shot glasses arranged on a multi-tiered stand can create an impressive display that’s both practical and aesthetically pleasing.
But why stop there? The beauty of jello shots is their incredible versatility. While our classic recipe is a winner, don’t hesitate to experiment with different flavor combinations. Imagine lime-green jello with a cherry “pupil” for a truly monstrous look, or perhaps a grape-flavored jello for a darker, more sinister vibe. You can even layer different colored jellos for a rainbow of horrors! For the “pupil,” get creative beyond the basic chocolate chip. Small gummy candies, such as a single gummy worm curled into a pupil shape or a tiny sour candy, could add another layer of texture and surprise. For a truly gruesome touch, a single drop of red food coloring gently swirled into the jello around the “eyeball” can create a bloodshot effect that will send delightful shivers down spines.
And for those who want to include younger goblins and ghosts in the fun, fear not! A non-alcoholic version is incredibly simple to create. Just omit the spirits entirely and use a flavored sparkling water or an extra splash of juice in place of the alcohol. These non-boozy Halloween Eyeball Jello Shots are perfect for kids’ parties, school events, or for designated drivers who still want to partake in the spooky fun. You could even make them larger, in small dessert bowls, to create a substantial, wobbly dessert that’s just as much of a showstopper. Think about adding a dollop of whipped cream on top, with a tiny gummy bat perched on the rim for an extra touch of whimsy. The possibilities are truly endless, limited only by your imagination!
Your Turn to Conjure Some Magic!
I’ve given you all the tools and inspiration you need to create something truly spectacular this Halloween. Now, it’s your turn to step into the kitchen and unleash your inner mad scientist. These Halloween Eyeball Jello Shots are more than just a recipe; they are an experience waiting to happen, a guaranteed way to inject an extra dose of fun and fright into your celebrations. I wholeheartedly encourage you to try this recipe for yourself. Don’t be shy – embrace the spooky, the silly, and the sensational!
Once you’ve conjured your own batch of these delightfully eerie treats, I would absolutely love to hear about your experience. Did your guests scream with delight (or perhaps a little fear)? What creative variations did you come up with? Did you find a particularly gruesome serving suggestion that stole the show? Please, don’t keep your triumphs (or even your comical mishaps!) to yourself. Share your photos, your stories, and your tips in the comments section below. Let’s build a community of Halloween culinary enthusiasts who aren’t afraid to get a little spooky in the kitchen. Your feedback and creativity inspire me, and I can’t wait to see the incredible, eye-popping creations you all bring to life. Happy haunting, and happy jello-shot making!
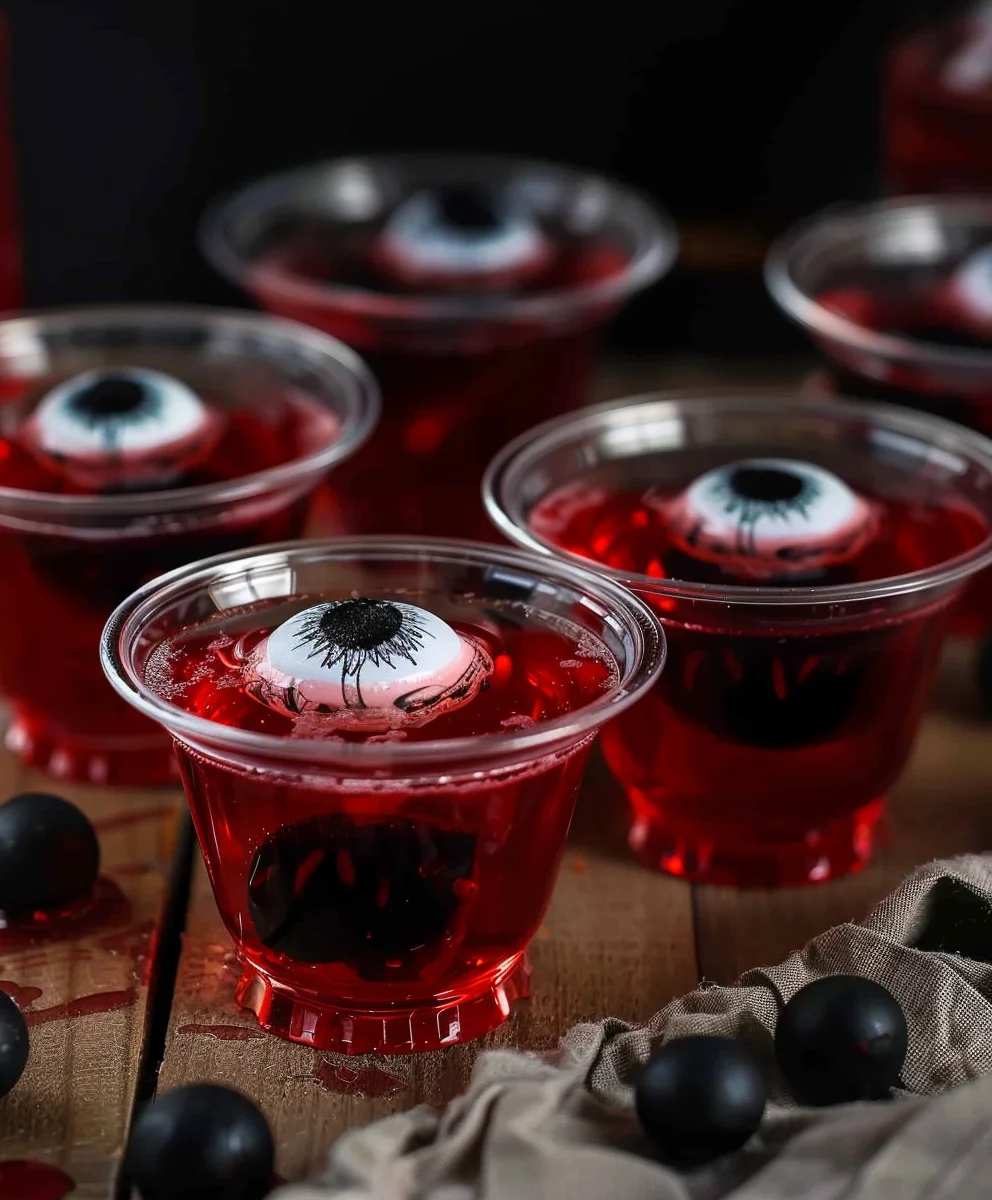
Halloween Eyeball Jello Non-Alcoholic Party Shots!
Create strikingly eerie and utterly delightful Halloween Eyeball Jello Non-Alcoholic Shots! These wobbly, ghastly-but-gorgeous treats are a miniature, edible work of spooky art, perfect for any adult Halloween celebration. They’re an instant conversation starter with a refreshing fruity taste and fun jiggly texture, easily prepared ahead of time to impress and entertain your guests.
Ingredients
-
1 (3 oz) box strawberry flavored gelatin
-
1¼ cups boiling water
-
¾ cup cold red berry flavored sparkling water (non-alcoholic)
-
9 bloodshot eye candies
Instructions
-
Step 1
Boil 1¼ cups of water. In a heat-proof bowl, empty the gelatin powder. Pour the boiling water over the powder and whisk vigorously for 2-3 minutes until completely dissolved. -
Step 2
Add the ¾ cup cold red berry flavored sparkling water (non-alcoholic) to the dissolved gelatin mixture and whisk thoroughly for another minute. -
Step 3
Allow the jello mixture to cool at room temperature for 15-20 minutes, or until it’s cool to the touch but still liquid. This prevents the mixture from melting cups or affecting texture. -
Step 4
Arrange 9 small shot cups on a tray. Pour the cooled jello mixture into each cup, filling almost to the top. Immediately place one bloodshot eye candy into the center of each jello shot. -
Step 5
Carefully transfer the tray to the refrigerator and chill for at least 3-4 hours, or preferably overnight, until the jello is completely firm and the eye candies are securely set. Serve cold and enjoy!
Important Information
Nutrition Facts (Per Serving)
It is important to consider this information as approximate and not to use it as definitive health advice.
Allergy Information
Please check ingredients for potential allergens and consult a health professional if in doubt.