Mummy Rice Krispie Treats are an absolute showstopper, bringing smiles and a touch of playful spookiness to any occasion. As the autumn leaves begin to fall and the air grows crisp, our minds naturally turn to festive gatherings and delightful confections that perfectly capture the spirit of the season. I find these treats to be a truly magical way to celebrate, offering not just a delicious snack, but a fun, engaging activity for all ages.
Why These Treats Are Universally Adored
There’s a reason these crispy, marshmallowy delights have remained a beloved classic for generations. Their irresistible combination of sweet, gooey marshmallow and satisfyingly crisp rice cereal creates a texture that is both wonderfully chewy and delightfully crunchy. When transformed into adorable little mummies, they become more than just a treat; they’re a miniature work of edible art that perfectly embodies the whimsy of Halloween. They are an absolute delight for both makers and eaters alike, offering a no-bake convenience that is simply unmatched, making them ideal for busy schedules.
Whether you are hosting a ghoulish gathering, preparing for a school bake sale, or simply looking for a fun and easy kitchen project with the children, these Mummy Rice Krispie Treats are the perfect solution. Their simple construction and charming appearance make them an instant hit, leaving everyone reaching for “just one more.”

Ingredients:
- For the Classic Rice Krispie Treat Base:
- 6 tablespoons (85g) unsalted butter: I always opt for unsalted so I can control the salt level in my treats. It melts beautifully and forms the rich foundation for our delectable creations. If you only have salted, you can use it, but then omit the extra pinch of salt I suggest later.
- 10 ounces (about 40 large marshmallows or 6 cups mini marshmallows): Mini marshmallows melt faster and more evenly, which I personally find makes the process a bit smoother, but large ones work just as wonderfully if that’s what you have on hand. Using fresh marshmallows is absolutely key here! Stale marshmallows can lead to a tougher, less pliable treat, and we’re aiming for that perfectly soft, chewy texture.
- 1/2 teaspoon pure vanilla extract: This little splash of vanilla might seem small, but trust me, it elevates the flavor profile significantly. It adds a wonderful warmth and depth that really complements the sweet marshmallows and crisp cereal. Don’t skip it; it’s a game-changer!
- 6 cups (about 150g) Rice Krispies cereal: The undisputed star of our “Mummy Rice Krispie Treats”! Make sure your cereal is fresh and, most importantly, crispy. Stale cereal will result in treats that lack that satisfying crunch we all love. I usually buy a new box just for special treats like these to guarantee optimal crispness.
- Pinch of salt (optional, but highly recommended): Just a tiny pinch of fine sea salt, perhaps a quarter teaspoon, really helps to balance the sweetness of the marshmallows and butter. It’s that secret ingredient that makes people wonder why your treats taste so much better!
- For the Mummy Decoration:
- 12 ounces (about 2 cups) white chocolate chips or white candy melts: This will be our “bandages” for our adorable mummies. White chocolate chips are delicious and readily available, but white candy melts are often easier to work with for drizzling as they tend to melt smoother and set harder and faster, giving you that perfect clean mummy wrap. You can find candy melts in the baking aisle of most grocery stores or craft stores.
- 24-36 edible candy eyeballs: These are absolutely essential for bringing your Mummy Rice Krispie Treats to life! They add so much character and fun. You can usually find them in the baking aisle, especially around holidays, or at specialty craft stores. Make sure to have enough for at least two eyes per treat, plus a few extra just in case!
- 1-2 teaspoons vegetable shortening or coconut oil (optional): If you’re using white chocolate chips (which can sometimes be a bit thick when melted), adding a tiny bit of vegetable shortening or coconut oil can help make the melted chocolate smoother, more fluid, and much easier to drizzle evenly over your treats. This step is usually not necessary if you are using candy melts.
Preparing the Rice Krispie Treats Base
- Prepare Your Pan: First things first, we need to get our pan ready. I typically use a 9×13-inch baking pan, which is the perfect size for yielding a good batch of treats. Take a sheet of parchment paper and line the pan, allowing some overhang on the sides. This overhang will act as handles later, making it super easy to lift the entire slab of treats out of the pan. If you don’t have parchment paper, a thorough greasing with butter or non-stick cooking spray will work, but I find parchment paper makes cleanup and removal a breeze.
- Melt the Butter: In a large, heavy-bottomed pot or Dutch oven, melt the 6 tablespoons of unsalted butter over low to medium-low heat. The key here is to go slow and steady; we don’t want to brown the butter unless we’re aiming for a different flavor profile, which for these classic Mummy Rice Krispie Treats, we are not. We just want it nicely melted and shimmering. Keep the heat gentle to ensure even melting and prevent scorching.
- Add the Marshmallows: Once the butter is fully melted, add all 10 ounces of marshmallows to the pot. Stir constantly with a heat-resistant spatula or wooden spoon until the marshmallows are completely melted and smooth. This step requires a little patience and consistent stirring. If the heat is too high, the marshmallows can seize up and become tough, resulting in hard treats. If you stir constantly over low heat, you’ll achieve that perfectly gooey, stretchy marshmallow base.
- Stir in Flavor Enhancers: As soon as the marshmallows are smooth and fully melted, remove the pot from the heat. This prevents the marshmallow mixture from cooking too much and becoming stiff. Now, quickly stir in the 1/2 teaspoon of pure vanilla extract and that crucial pinch of salt. The vanilla adds aromatic depth, and the salt balances the sweetness beautifully, making every bite more complex and satisfying. Stir until they are thoroughly combined into the warm marshmallow mixture.
- Incorporate the Cereal: This is where our “Rice Krispie” part comes in! Add all 6 cups of Rice Krispies cereal to the marshmallow mixture in the pot. Using your spatula, gently but quickly fold the cereal into the marshmallow mixture until it’s evenly coated. It’s important not to overmix here! Overmixing can crush the cereal and reduce its delightful crispiness, which is the whole point of a Rice Krispie treat. Just mix enough so that all the cereal pieces are glistening with that sweet, sticky marshmallow goodness.
- Press into the Pan: Transfer the warm, sticky cereal mixture into your prepared 9×13-inch pan. Now, this is a delicate step. You want to press the mixture down firmly enough so it holds together, but not too firmly. If you compact it too much, your Mummy Rice Krispie Treats will end up dense and hard instead of delightfully chewy. I often lightly butter my hands or the back of my spatula to prevent sticking, and then gently but evenly press the mixture into the pan. Aim for an even layer from corner to corner.
- Cool Completely: Now for the hardest part – waiting! Allow the treats to cool completely at room temperature for at least 1-2 hours. You can also pop them into the refrigerator for about 30-45 minutes to speed up the cooling process, especially if you’re in a hurry to get to the decorating stage. Ensuring they are fully cooled and set is vital before you attempt to cut and decorate them, otherwise, they will be too soft and sticky to handle.
Decorating Your Mummy Rice Krispie Treats
This is where the fun really begins and we transform our classic treats into adorable, spooky Mummy Rice Krispie Treats!
- Cut Your Treats: Once your Rice Krispie treats are completely cooled and firm, use the parchment paper overhang to lift the entire slab out of the pan and place it onto a cutting board. Using a sharp, lightly greased knife, cut the slab into individual rectangular shapes. I usually aim for about 12-16 treats from a 9×13-inch pan, making them roughly 2×3 inches each. You can make them larger or smaller depending on your preference, but try to keep them uniform for easier decorating. Clean your knife between cuts if it gets too sticky.
- Melt the White Chocolate or Candy Melts: Place your 12 ounces of white chocolate chips or white candy melts into a microwave-safe bowl. If using white chocolate chips, this is also the time to add 1-2 teaspoons of vegetable shortening or coconut oil to aid in smooth melting. Microwave on 50% power in 30-second intervals, stirring thoroughly after each interval, until the chocolate is completely melted and smooth. This low-and-slow melting prevents the chocolate from seizing or burning. Alternatively, you can use a double boiler method for a gentler melt. If using candy melts, you’ll find they usually melt more quickly and smoothly without any additions. The goal is a pourable, drippy consistency.
- Prepare for Drizzling: Transfer the melted white chocolate or candy melts into a piping bag with a small round tip (or simply snip off a tiny corner of a Ziploc bag for a makeshift piping bag). If you don’t have a bag, a fork or spoon will also work for drizzling, but a bag gives you more control for those intricate mummy “bandages.”
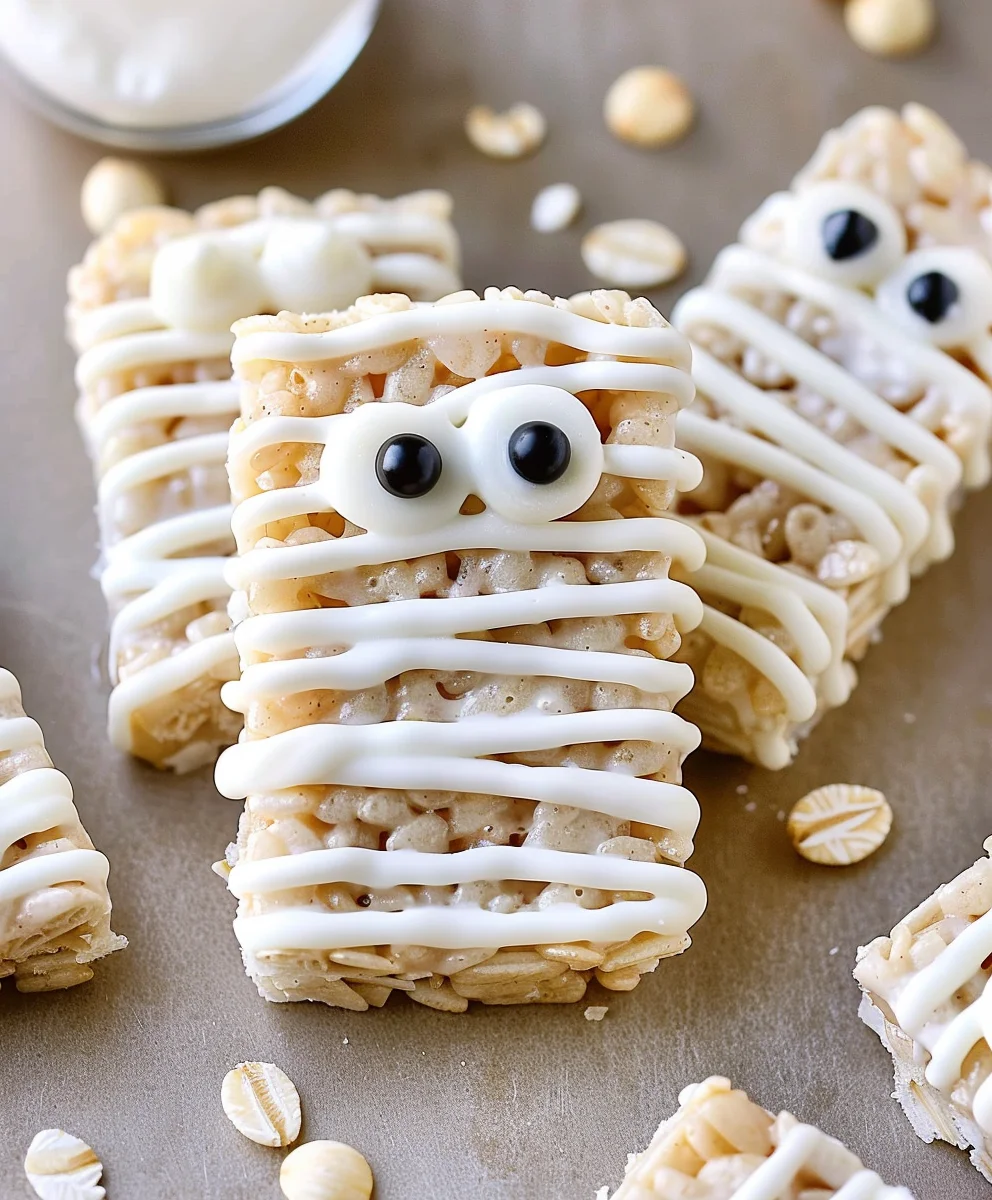
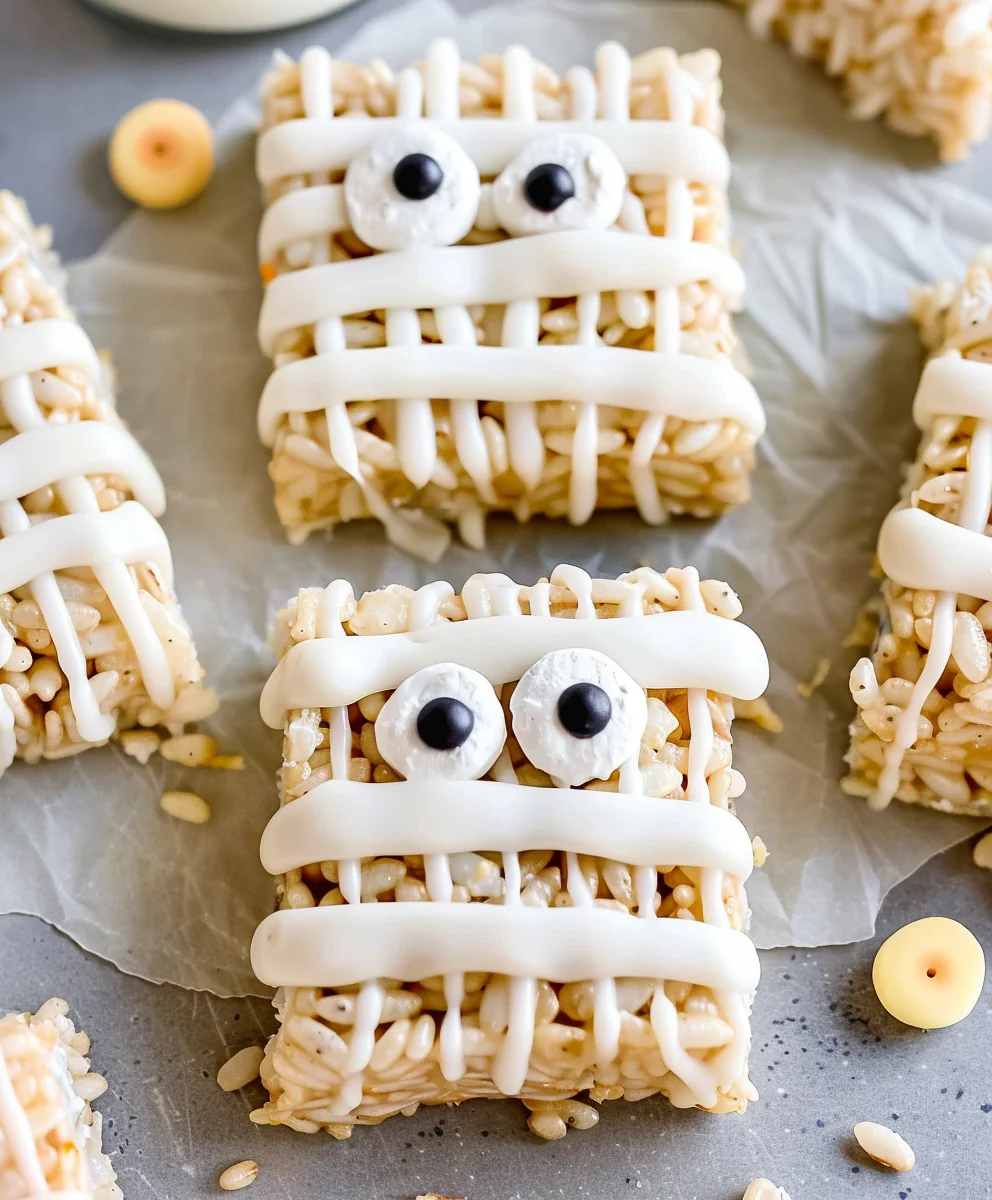
- Drizzle the Mummy “Bandages”: Lay your cut Rice Krispie treats out on a parchment-lined baking sheet or wire rack. Now, unleash your inner artist! Drizzle the melted white chocolate or candy melts back and forth across each treat in a zig-zag pattern, creating the look of mummy bandages. Don’t worry about perfection; uneven lines add to the charming, rustic mummy effect. Leave a small gap towards the top where the eyes will go, as if the mummy’s peeking out from its wrappings. Cover most of the treat, creating distinct lines but also some solid patches to mimic layered cloth.
- Attach the Edible Eyeballs: Immediately after drizzling each treat (before the chocolate sets), carefully place two edible candy eyeballs onto the area you left clear near the top. The wet chocolate will act as an adhesive, holding the eyes firmly in place. If your chocolate starts to set too quickly, you can dab a tiny bit of fresh melted chocolate on the back of the eyeballs before placing them. The googly eyes are what truly bring these Mummy Rice Krispie Treats to life and make them so incredibly fun!
- Allow to Set: Once all your Mummy Rice Krispie Treats are decorated, let them sit at room temperature for about 30-60 minutes, or until the white chocolate has fully set and hardened. If you’re short on time or your kitchen is warm, you can transfer the baking sheet to the refrigerator for about 15-20 minutes to speed up the setting process. Make sure the chocolate is completely firm before handling or storing them to avoid smudges and messy fingers.
Tips for Perfect Mummy Rice Krispie Treats
To ensure your Mummy Rice Krispie Treats are the best they can be, here are some friendly tips I’ve picked up along the way:
- Don’t Over-Compact: As I mentioned earlier, when pressing the mixture into the pan, be gentle. Over-compressing the treats makes them hard and dense, losing that desirable soft and chewy texture. A light, even pressure is all you need to ensure they hold together.
- Fresh Ingredients Matter: Always use fresh marshmallows and fresh Rice Krispies cereal. Stale ingredients will yield a less appealing texture. Fresh marshmallows melt smoothly and give you that perfect stretch, while fresh cereal maintains its crunch.
- Grease Your Tools: To combat stickiness, lightly butter your spatula or hands when pressing the mixture into the pan. You can also lightly grease your knife before cutting the treats. This will make the process much smoother and less frustrating.
- Melting Chocolate Wisdom: When melting white chocolate or candy melts, go slow. Overheating chocolate can cause it to seize and become thick and unusable. If using the microwave, use 50% power and stir frequently. If using a double boiler, ensure the water in the pot doesn’t touch the bottom of the bowl holding the chocolate.
- Control Your Drizzle: For cleaner “bandages,” use a piping bag with a small hole. If using a spoon or fork, aim for thin, quick movements across the treats to create distinct lines rather than thick blobs. Practice makes perfect, and even imperfect lines look great on these fun Mummy Rice Krispie Treats!
- Storage for Freshness: Once your Mummy Rice Krispie Treats are fully set, store them in an airtight container at room temperature. They are best enjoyed within 2-3 days for optimal freshness and chewiness. Avoid refrigerating them for extended periods, as it can sometimes make them a bit too firm.
- Variations for Fun: While these are classic Mummy Rice Krispie Treats, you can always experiment! Consider adding a drop or two of food coloring to a small portion of the white chocolate for colorful eyes or accents. You could even use different colored candy melts for more vibrant mummies. For a slightly different flavor profile in the base, you could add a sprinkle of sprinkles or miniature chocolate chips to the cereal mixture before pressing.
- Make Them Ahead: These are fantastic to make ahead for parties or events. Prepare and decorate them a day in advance, store them properly, and they’ll be ready to impress your guests without any last-minute stress.
- Kid-Friendly Activity: Decorating Mummy Rice Krispie Treats is a wonderful activity to do with kids! Let them help with the drizzling and placing of the candy eyes. It’s a fun, creative, and relatively mess-free way to get them involved in the kitchen. Just be sure to supervise the melting chocolate step.
I hope these detailed instructions and tips help you create the most adorable and delicious Mummy Rice Krispie Treats for your next spooky gathering or just for a fun treat at home! Enjoy every bite of these delightfully crispy, chewy, and charmingly decorated sweets.
Conclusion:
And there you have it, my friends! We’ve journeyed through the simple, joyful process of creating one of the most adorably spooky treats imaginable. These aren’t just any ordinary crispy cereal squares; they are the enchanting, the delightful, the absolutely irresistible Mummy Rice Krispie Treats. If you’re looking for a recipe that combines ease of preparation with maximum visual impact and utterly delicious results, then trust me, this is your golden ticket. They stand out not only for their charming, handcrafted appearance but also for that beloved, chewy, marshmallowy goodness we all adore. They’re a nostalgic nod to childhood fun, perfectly updated with a dash of Halloween whimsy, making them an essential addition to any autumnal gathering or simply a fantastic way to brighten an ordinary afternoon.
Why These Are Unmissable!
What truly makes this recipe a must-try? It’s the perfect blend of simplicity and creativity. You don’t need to be a seasoned baker to whip up a batch that looks like it came straight from a professional bakery. The minimal ingredient list and straightforward steps mean less time stressing in the kitchen and more time enjoying the process, especially when little hands are involved. They offer that satisfying crisp-chewy texture, a comforting sweetness, and a playful visual appeal that instantly brings a smile to anyone’s face. Imagine the delight on your guests’ faces, young and old, as they encounter these charming, googly-eyed mummies on your dessert table. They are a conversation starter, a mood lifter, and an undeniable crowd-pleaser, delivering maximum impact with minimal effort. This recipe is more than just making a treat; it’s about creating a memorable experience and fostering a little bit of magic right in your own kitchen.
Get Creative: Serving & Variation Ideas
Now, while these mummies are fantastic as is, don’t be afraid to let your imagination run wild! When it comes to serving, arrange them on a dark, contrasting platter to really make those white bandages pop. A few scattered candy corn pieces or mini plastic spiders around the edge can enhance the spooky vibe. For a Halloween party, consider making a “graveyard” display with crushed chocolate cookies as dirt and your mummies standing tall among them. They also make fantastic lunchbox surprises, after-school snacks, or even a fun, themed breakfast for a special day!
Endless Possibilities!
But the fun doesn’t stop there. The beauty of this recipe lies in its adaptability. Want to add an extra layer of flavor? Try folding in a teaspoon of vanilla extract or almond extract into your melted marshmallow mixture. For a richer, more decadent mummy, consider dipping the cooled treats halfway into melted dark or white chocolate before adding the candy eyes and “bandages.” You could even add a few drops of food coloring to your marshmallow mixture to create colorful mummies – imagine vibrant green or orange bodies peeking through the white strips! Another exciting variation is to use different types of cereal. Cocoa Krispies would give you a delicious chocolate mummy, or even a blend of regular and chocolate for a striped effect. You can experiment with different sizes and colors of candy eyes for varied expressions, or even use tiny chocolate chips for eyes if you can’t find specific candy eyes. For a super-sized treat, press the mixture into a larger pan and cut out giant mummies! Or, for party convenience, insert a lollipop stick into the base of each treat before the marshmallow sets completely, turning them into adorable mummy pops. The possibilities truly are endless, and each tweak allows you to put your unique spin on this already fantastic recipe.
Your Turn to Create!
So, what are you waiting for? I wholeheartedly encourage you to roll up your sleeves, gather your ingredients, and dive into the delightful world of crafting these fun, festive treats. Whether it’s for a holiday celebration, a school bake sale, or simply a cozy evening with loved ones, these will undoubtedly be a hit. The joy of seeing them come to life, stripe by stripe, eye by eye, is incredibly rewarding. Once you’ve made your batch (or ten!), please, please, please come back and share your creations with me! I absolutely adore seeing your culinary adventures. Did you try a new variation? Did your kids have a blast decorating? I’m so excited to hear about your experience. Your feedback and photos truly make my day. So go forth, create some edible mummies, and let the fun begin!
Happy making, and may your Halloween (or any day!) be filled with sweet, spooky delight!
Easy Mummy Rice Krispie Treats: Spooktacular Halloween Fun!
Mummy Rice Krispie Treats are a delightful, no-bake Halloween treat. These crispy, marshmallowy squares are transformed into adorable mummies with white chocolate drizzles and candy eyeballs, perfect for parties, bake sales, or a fun kitchen activity with kids. Their irresistible combination of sweet and crunchy textures makes them a beloved classic that’s easy to make and universally adored.
Ingredients
-
3 Tbsp. butter
-
5 1/2 cups mini marshmallows (or 1 10 oz. bag)
-
6 cups Rice Krispies cereal
-
8 oz. white chocolate (melted or candy melts)
-
20 candy eyeballs (or mini chocolate chips)
Instructions
-
Step 1
Line a 9×13-inch baking pan with parchment paper or grease well. -
Step 2
In a large pot, melt butter over low heat. Add marshmallows and stir until completely smooth. Remove from heat. -
Step 3
Quickly add Rice Krispies cereal to melted marshmallow mixture. Gently fold until evenly coated, being careful not to overmix. -
Step 4
Transfer mixture to the prepared pan. Lightly press into an even layer. Let cool completely at room temperature for 1-2 hours, or refrigerate for 30-45 minutes until set. -
Step 5
Once firm, lift the slab out of the pan. Using a lightly greased knife, cut into 12-16 rectangular shapes. -
Step 6
In a microwave-safe bowl, melt white chocolate or candy melts at 50% power in 30-second intervals, stirring until smooth and pourable. -
Step 7
Transfer melted chocolate to a piping bag (or use a fork/spoon). Drizzle in a zig-zag pattern over each treat, leaving a small space for eyes. -
Step 8
Immediately place two candy eyeballs onto the clear space on each treat. -
Step 9
Let decorated treats sit at room temperature for 30-60 minutes, or refrigerate for 15-20 minutes, until chocolate is fully set. Store in an airtight container at room temperature.
Important Information
Nutrition Facts (Per Serving)
It is important to consider this information as approximate and not to use it as definitive health advice.
Allergy Information
Please check ingredients for potential allergens and consult a health professional if in doubt.