Peanut Butter Spider Cookies – just hearing those words brings a smile to my face and a delightful shiver down my spine, especially as the autumn leaves begin to fall and the air grows crisp. These aren’t just any cookies; they are the quintessential treat that marries the beloved creamy, nutty flavor of peanut butter with a playful, spooky aesthetic perfect for the Halloween season or any fun gathering. I find that there’s an undeniable charm in creating edible creatures, and these cookies are a masterpiece of whimsical baking.
Why Everyone Falls in Love with These Spooky-Sweet Treats
While these delightful morsels may not boast centuries of ancient history, their cultural significance truly shines in their ability to bring immense joy and boundless creativity to modern holiday celebrations. They stand as a testament to how simple, wholesome ingredients can miraculously transform into something truly magical and memorable. People universally adore these Peanut Butter Spider Cookies not only for their irresistible combination of sweet and savory – that timeless, classic pairing of rich peanut butter and smooth chocolate – but also for the pure delight and whimsy they spark. The soft, chewy texture, the iconic peanut butter kiss nestled invitingly on top, and those charming edible candy eyes peering out from their chocolate legs make them an instant hit with both children and adults. They are incredibly fun to make, surprisingly simple, and even more enjoyable to share, ensuring every bite is a little celebration in itself.

Ingredients:
- 1 cup (2 sticks) unsalted butter, softened to room temperature. I always make sure my butter is perfectly soft, but not melted, as this is crucial for achieving that light, fluffy texture when creamed with sugar. It allows for optimal air incorporation, which gives our Peanut Butter Spider Cookies their delightful chewiness.
- 1 cup creamy peanut butter. For this recipe, I highly recommend using a processed, creamy peanut butter like Jif or Skippy. Natural peanut butter, while delicious, tends to separate and can make the dough too oily or crumbly, which we want to avoid for the perfect cookie consistency.
- 1 cup granulated sugar. This sugar will contribute to the cookie’s sweetness and helps create a beautiful, golden-brown crust.
- 1 cup packed light brown sugar. The brown sugar adds a wonderful depth of flavor, a hint of caramel, and helps keep our cookies soft and moist. Make sure it’s firmly packed into the measuring cup!
- 2 large eggs, at room temperature. Room temperature eggs emulsify better with the other ingredients, leading to a smoother, more uniform batter. If you forget to take them out ahead of time, a quick trick is to place them in a bowl of warm (not hot!) water for 5-10 minutes.
- 2 ½ cups all-purpose flour. I always measure my flour using the spoon-and-level method: spoon the flour into your measuring cup until it overflows, then level it off with a straight edge. This prevents over-measuring, which can lead to dry, dense cookies.
- 1 teaspoon baking soda. This is our leavening agent, helping the cookies rise and achieve that classic soft texture.
- ½ teaspoon salt. A little salt balances the sweetness and enhances all the flavors in the cookie dough. Don’t skip it!
- ½ cup granulated sugar for rolling (optional, but highly recommended for a nice crunch and sparkle).
- For the Spiders:
- Approximately 36 chocolate covered peanut butter cups (mini or snack size, like Reese’s Peanut Butter Cups). We’ll use these as the spider bodies!
- 1 cup chocolate chips (semi-sweet or milk chocolate, your preference). This will be melted down to create the spider legs.
- 1 ½ – 2 ounces candy eyes (available at most craft stores or online). These are absolutely essential for bringing our adorable spiders to life!
Preparing the Peanut Butter Cookie Dough
- Preheat your oven and prepare baking sheets: First things first, let’s get the oven ready. Preheat your oven to 375°F (190°C). While it’s heating up, line two large baking sheets with parchment paper or silicone baking mats. I find that silicone mats are a game-changer for even baking and preventing sticking, but parchment paper works beautifully too. Having everything ready before you start mixing makes the process so much smoother.
- Cream the butter and sugars: In the bowl of a stand mixer fitted with the paddle attachment, or using a large bowl with an electric hand mixer, combine the softened unsalted butter, granulated sugar, and light brown sugar. Beat on medium speed for about 2 to 3 minutes, or until the mixture is light in color and incredibly fluffy. This step is super important because it incorporates air into the butter, which will give our Peanut Butter Spider Cookies their soft and tender texture. You should see a noticeable change in volume and lightness.
- Incorporate the peanut butter: Add the creamy peanut butter to the butter and sugar mixture. Continue to beat on medium speed for another 1 to 2 minutes, scraping down the sides of the bowl as needed, until the peanut butter is thoroughly combined and the mixture is smooth. I always make sure there are no streaks of unmixed peanut butter left behind.
- Add the eggs: With the mixer on low speed, add the eggs one at a time, mixing well after each addition. It’s crucial to let each egg fully incorporate before adding the next. Scrape down the sides of the bowl again to ensure everything is evenly mixed. The mixture might look a little curdled after adding the first egg, but it will come together as you add the second and continue to mix. This step helps create a stable emulsion, leading to a more consistent dough.
- Combine dry ingredients: In a separate medium bowl, whisk together the all-purpose flour, baking soda, and salt. Whisking ensures that the leavening agent and salt are evenly distributed throughout the flour, preventing pockets of unmixed ingredients in your final cookies. This simple step makes a big difference in the final bake.
- Gradually add dry to wet ingredients: With the mixer on low speed, gradually add the dry ingredients to the wet ingredients, mixing until just combined. Be careful not to overmix the dough! Overmixing can develop the gluten in the flour too much, resulting in tough, dry cookies. As soon as you no longer see streaks of dry flour, stop the mixer. I usually finish the last few stirs by hand with a spatula to ensure I don’t overdo it. The dough will be quite thick and somewhat stiff.
- Chill the dough (optional, but recommended): While you can technically bake these cookies immediately, I find that chilling the dough for at least 30 minutes (or even up to an hour) in the refrigerator makes a significant difference. Chilling helps the butter solidify, which prevents the cookies from spreading too much in the oven, and also deepens the flavors. It also makes the dough much easier to handle when it’s time to roll. Cover the bowl with plastic wrap before chilling.
Baking the Peanut Butter Spider Cookies
- Prepare for rolling: If you chose to chill your dough, take it out of the refrigerator a few minutes before you’re ready to bake so it softens just enough to be manageable. Pour the optional ½ cup of granulated sugar for rolling into a shallow dish or small bowl.
- Form the cookies: Using a 1 ½ to 2-tablespoon cookie scoop (or just roll by hand), scoop out portions of dough and roll them into smooth, uniform balls. Consistency in size is key for even baking. I aim for balls that are roughly 1 inch in diameter.
- Roll in sugar: Roll each dough ball in the granulated sugar until it’s lightly coated. This sugar coating not only adds a lovely sparkle and a pleasant crunch to the edges but also helps create that classic crinkled texture that peanut butter cookies are known for.
- Place on baking sheets and flatten: Arrange the sugar-coated dough balls about 2 inches apart on your prepared baking sheets. Now, for the signature peanut butter cookie look: gently flatten each dough ball with the tines of a fork, pressing down once in one direction and then again perpendicularly to create a crisscross pattern. This not only gives them a charming appearance but also helps them bake more evenly.
- Bake the cookies: Place the baking sheets in your preheated oven. Bake for 9 to 12 minutes, or until the edges are lightly golden brown and the centers are just set. The exact baking time can vary depending on your oven, so keep a close eye on them. You want them to be slightly soft in the middle when you take them out, as they will continue to set as they cool. Do not overbake them, or they will become dry and hard! I usually rotate my baking sheets halfway through the baking time for even results.
- Cool the cookies: Once baked, remove the cookies from the oven and let them cool on the baking sheets for about 5 minutes. They are quite delicate when hot, so this cooling period helps them firm up before you move them. After 5 minutes, carefully transfer the cookies to a wire rack to cool completely. It’s crucial that the cookies are completely cool before we start assembling our spiders, otherwise, the chocolate will melt and slide off.
Assembling Your Peanut Butter Spider Cookies
-
Prepare the chocolate for legs: While the cookies are cooling, it’s time to prepare the chocolate for our spider legs. There are a couple of ways to do this:
- Microwave Method: Place the chocolate chips in a microwave-safe bowl. Microwave on high power in 30-second intervals, stirring well after each interval, until the chocolate is smooth and completely melted. Be careful not to overheat the chocolate, as it can seize and become unusable. It usually takes 1-2 minutes total.
- Double Boiler Method: If you prefer, or if you’re working with a larger batch, you can melt the chocolate over a double boiler. Place the chocolate chips in a heatproof bowl set over a saucepan of simmering water (make sure the bottom of the bowl doesn’t touch the water). Stir constantly until the chocolate is smooth and melted. This method gives you more control over the temperature.
Once melted, transfer the chocolate to a piping bag with a very small round tip, or a heavy-duty ziplock bag with a tiny corner snipped off. This will be our tool for drawing the delicate spider legs.
- Attach the spider bodies: Once the cookies are completely cool, unwrap your mini chocolate peanut butter cups. Gently place one peanut butter cup in the center of each peanut butter cookie, pressing down very slightly to secure it. This forms the adorable “body” of our Peanut Butter Spider Cookies. If your cookies are a little uneven, you can use a tiny dab of melted chocolate on the bottom of the peanut butter cup to help it adhere better.
- Adhere the candy eyes: Dip the back of two candy eyes into the melted chocolate (the same chocolate you prepared for the legs). Carefully place these “glued” eyes onto the front of each peanut butter cup, positioning them to look like the spider’s eyes. You can get creative here – some spiders might have eyes close together, others wider apart, giving each one a unique personality!
- Draw the spider legs: Now for the fun part! Using your piping bag or ziplock bag filled with melted chocolate, carefully pipe eight small lines (four on each side) extending outwards from the base of the chocolate peanut butter cup onto the cookie. These will be your spider’s legs. I like to make them slightly curved to give the impression of movement, but straight lines work just fine too. Take your time with this step, especially for the first few cookies, to get the hang of the piping.
- Allow the chocolate to set: Once all your spiders have their legs and eyes, let them sit at room temperature for about 30-60 minutes, or until the chocolate has completely set and hardened. If you’re in a hurry, you can carefully place the cookies in the refrigerator for 10-15 minutes to speed up the setting process.
- Serve and enjoy: Once the chocolate is set, your charming and delicious Peanut Butter Spider Cookies are ready to be served! These are always a huge hit, especially around Halloween, but they’re so fun, I sometimes make them just to bring a smile to people’s faces. Store any leftovers in an airtight container at room temperature for up to 3-4 days.

Conclusion:
Well, my fellow dessert enthusiasts, we’ve reached the sweet finale of our delicious journey! I truly hope you’re as excited as I am about trying out this incredible recipe. What makes these Peanut Butter Spider Cookies an absolute must-try isn’t just their adorable, spooky charm, but the incredible taste sensation they deliver with every single bite. Imagine that perfect balance: the rich, creamy depth of peanut butter, the satisfying chewiness of a perfectly baked cookie, and the delightful sweetness of chocolate. It’s a symphony of textures and flavors that will undoubtedly become a staple in your baking repertoire, especially when you’re looking to add a touch of playful fun to your dessert spread. They are incredibly easy to make, yet they look like you’ve spent hours crafting them, making them ideal for busy parents, aspiring bakers, or anyone who loves a delicious treat without the fuss.
Beyond their undeniable cuteness and simple preparation, these cookies truly stand out because they tap into a universal love for classic flavors. The aroma alone, as they bake in your oven, is enough to draw everyone into the kitchen, creating a warm and inviting atmosphere. There’s something inherently comforting about a homemade peanut butter cookie, and when you add the element of surprise and whimsy with the “spider” design, you elevate it to an entirely new level of enjoyment. They’re not just cookies; they’re conversation starters, smile generators, and a delightful way to celebrate any occasion, from a casual family evening to a vibrant holiday party. The rich, nutty notes of the peanut butter perfectly complement the sweet, melting chocolate, creating an irresistible combination that’s hard to beat.
Serving Up Sweetness: Ideas for Enjoying Your Creations
Now that you’ve got a fresh batch of these fantastic cookies, how should you enjoy them? While they are absolutely phenomenal on their own, perhaps with a tall glass of cold milk, I have a few suggestions to take your experience to the next level. For a truly decadent treat, try serving them alongside a scoop of vanilla bean or chocolate ice cream. The warmth of a freshly baked cookie meeting the coolness of the ice cream is pure bliss. They also make a fantastic addition to any dessert platter, standing out with their unique design. If you’re a coffee or tea lover, these cookies are the perfect accompaniment to your morning or afternoon brew, offering a satisfying bite that complements the warmth of your drink. Consider packing them in lunchboxes for a delightful midday surprise, or bringing them to a potluck where they’re sure to be a talking point.
But don’t stop there – let your creativity shine! You can easily vary these Peanut Butter Spider Cookies to suit your taste or the occasion. Instead of standard chocolate kisses for the spider’s body, why not experiment with mini Reese’s Peanut Butter Cups for an extra layer of peanut butter goodness? Or use different types of chocolate, like dark chocolate kisses for a more intense flavor, or even white chocolate for a striking visual contrast against the peanut butter cookie base. You could also add a pinch of flaky sea salt to the cookie dough to really make those flavors pop, offering a sophisticated sweet-and-salty profile. For an even richer experience, dip half of the cooled cookie in melted milk chocolate and let it set before adding the spider details. For those who enjoy a bit of crunch, consider mixing in some chopped roasted peanuts or even a handful of mini chocolate chips into the cookie dough itself. Or, for a truly festive twist, use different colored icing for the “legs” to match a party theme, perhaps orange and black for Halloween, or bright primary colors for a child’s birthday. The possibilities are endless, and that’s one of the things I love most about this versatile recipe – it truly invites you to make it your own and personalize it to your heart’s content.
Your Turn! Bake, Share, and Inspire!
So, what are you waiting for? I wholeheartedly encourage you to roll up your sleeves, gather your ingredients, and dive into making these delightful cookies. I promise you, the process is just as enjoyable as the outcome. The aroma filling your kitchen, the simple joy of shaping the dough, and the magic of watching them transform in the oven – it’s all part of the wonderful baking experience. There’s a real sense of accomplishment that comes with creating something delicious from scratch, and these cookies are particularly rewarding because they’re not only tasty but visually charming. And once they’re baked and cooled, and those charming spiders are looking back at you, I guarantee you’ll feel a sense of pure delight. This recipe is designed to be accessible and fun, ensuring that even novice bakers can achieve spectacular results, while seasoned pros will appreciate its simplicity and adaptability, leaving plenty of room for personal touches.
Once you’ve whipped up your batch of these irresistible treats, I would absolutely love to hear all about your experience! Did you stick to the classic design, or did you get creative with your spider variations? What was your favorite part of making them? Perhaps you discovered a new serving suggestion or a unique twist that made them even more special. Please don’t hesitate to share your thoughts, your tips, and most importantly, your beautiful creations! Snap a photo of your finished cookies and share them with me – I get such a thrill from seeing what you all bake in your kitchens. Your feedback and shared experiences not only make my day but also inspire other readers to try the recipe and perhaps even add their own unique twists. Let’s build a community around the joy of baking and delicious treats. Happy baking, everyone! I can’t wait to see your fantastic Peanut Butter Spider Cookies!
Peanut Butter Spider Cookies
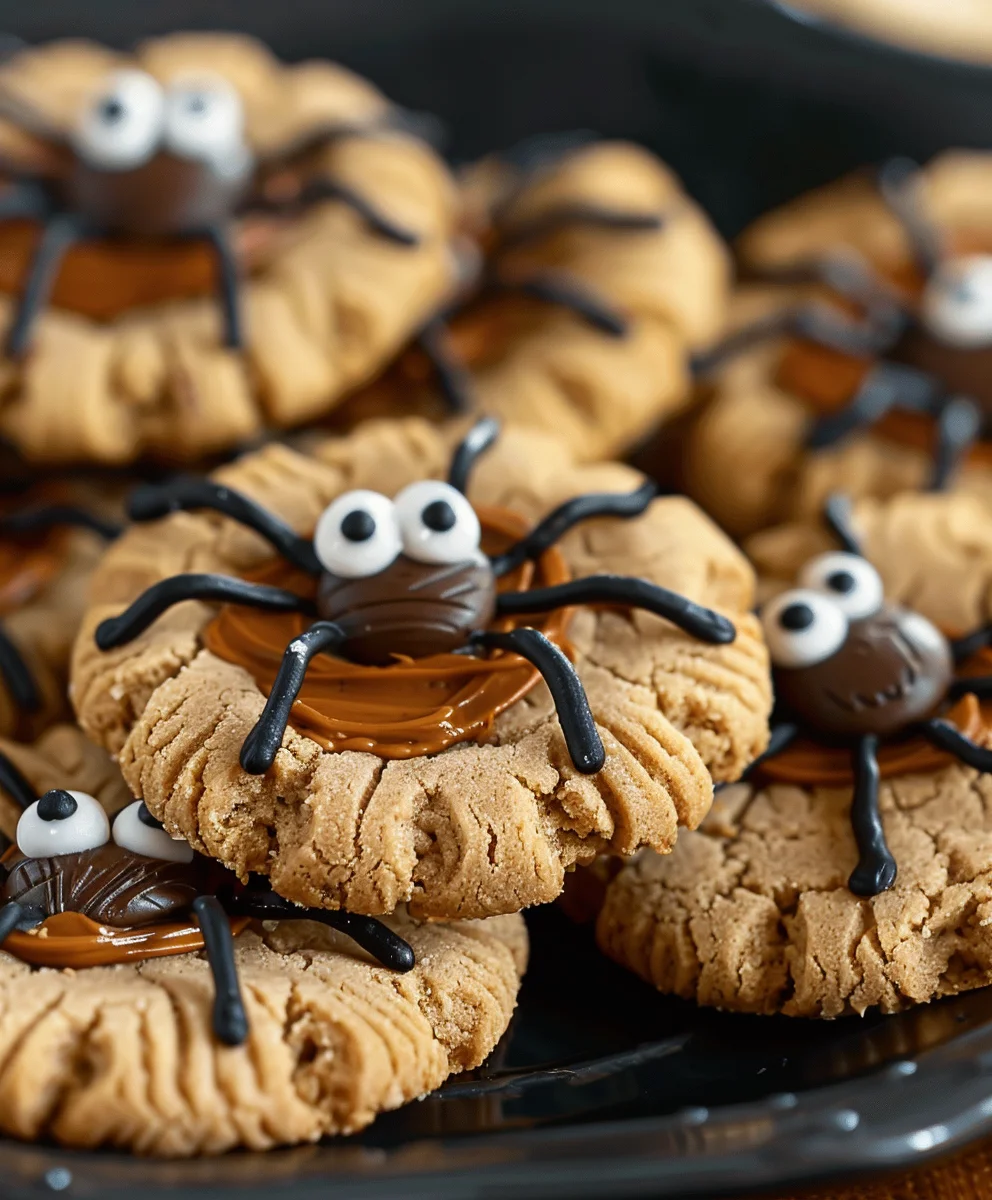
These delightful Peanut Butter Spider Cookies combine the classic sweet and savory flavors of peanut butter and chocolate with a whimsical, spooky design perfect for Halloween or any fun gathering. Soft, chewy, and topped with a mini chocolate peanut butter cup, candy eyes, and piped chocolate legs, they are an instant hit with all ages.
Ingredients
-
½ cup (113g) unsalted butter, 1 stick
-
½ cup (107g) brown sugar
-
⅓ cup (66g) granulated sugar
-
¾ cup (201g) creamy peanut butter
-
1 large egg
-
1 tsp vanilla extract
-
1 ½ cups (180g) all-purpose flour
-
1 tsp baking soda
-
½ tsp baking powder
-
½ tsp salt
-
Granulated sugar, for rolling
-
Mini Reese’s Peanut Butter Cups
-
½ cup (85g) semi-sweet chocolate chips
-
Candy eye balls
Instructions
-
Step 1
Preheat oven to 375°F (190°C). Line two large baking sheets with parchment paper or silicone mats. -
Step 2
In a stand mixer, cream softened butter, brown sugar, and ⅓ cup granulated sugar on medium speed for 2-3 minutes until light and fluffy. -
Step 3
Beat in creamy peanut butter until well combined (1-2 minutes). Add the large egg and vanilla extract, mixing until just incorporated. Scrape down bowl sides. -
Step 4
In a separate bowl, whisk together all-purpose flour, baking soda, baking powder, and salt. -
Step 5
Gradually add dry ingredients to wet, mixing on low speed until just combined. Do not overmix. -
Step 6
For best results, cover and chill the dough in the refrigerator for at least 30 minutes, or up to an hour. -
Step 7
Scoop or roll dough into 1-inch balls. Roll each ball in granulated sugar until lightly coated. -
Step 8
Place dough balls 2 inches apart on prepared sheets. Flatten each with a fork to create a crisscross pattern. Bake for 9-12 minutes, or until edges are lightly golden and centers are just set. -
Step 9
Let cookies cool on baking sheets for 5 minutes, then transfer to a wire rack to cool completely. Cookies must be completely cool before assembly. -
Step 10
Melt ½ cup chocolate chips using a microwave (30-second intervals, stirring) or double boiler method until smooth. Transfer melted chocolate to a piping bag with a small tip or a heavy-duty ziplock bag with a tiny corner snipped off. -
Step 11
Once cookies are cool, place one mini Reese’s Peanut Butter Cup in the center of each cookie, pressing slightly. Dip the back of two candy eyes into melted chocolate and attach them to the front of each peanut butter cup. -
Step 12
Using the piping bag, carefully pipe eight small lines (four on each side) extending from the base of the chocolate peanut butter cup onto the cookie to create spider legs. -
Step 13
Let the cookies sit at room temperature for 30-60 minutes, or refrigerate for 10-15 minutes, until the chocolate is completely set. Serve and store leftovers in an airtight container at room temperature for up to 3-4 days.
Important Information
Nutrition Facts (Per Serving)
It is important to consider this information as approximate and not to use it as definitive health advice.
Allergy Information
Please check ingredients for potential allergens and consult a health professional if in doubt.