Delectable Gilmore Girls Coffee Cake Cookies. Oh, how I adore the idea of combining the comfort of a warm coffee cake with the undeniable convenience of a cookie, especially when infused with the spirit of Stars Hollow. For anyone who has ever dreamed of sipping coffee at Luke’s Diner alongside Lorelai and Rory, this recipe offers a truly special piece of that beloved world you can hold right in your hand.
The iconic series, Gilmore Girls, is practically synonymous with coffee – a constant companion for our favorite mother-daughter duo through every witty banter, heartfelt moment, and late-night study session. This particular dish takes that deep-rooted cultural love for a good brew and a sweet treat, translating it into an absolutely unforgettable baked good.
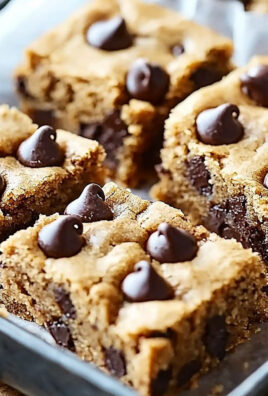
Imagine the soft, tender crumb of a perfect coffee cake, subtly swirling with notes of cinnamon and brown sugar, all crowned with a buttery, irresistible streusel topping. Now, picture all of that in a delightful, portable cookie form! It’s the ultimate treat for a morning pick-me-up, an afternoon indulgence, or a cozy evening. The familiar, comforting flavors evoke warmth and nostalgia, making each bite a truly delightful escape. I’ve meticulously crafted this recipe to capture the very essence of a classic coffee cake, transforming it into these single-serving wonders. Get ready to fall completely in love with these Delectable Gilmore Girls Coffee Cake Cookies, a perfect tribute to one of television’s most cherished duos and their enduring love for coffee and conversation.

Ingredients:
Creating these Delectable Gilmore Girls Coffee Cake Cookies is a true joy, and gathering all your ingredients before you begin makes the process incredibly smooth. Trust me, having everything measured out and ready to go will make you feel like a seasoned baker!
-
For the Cinnamon Streusel Topping:
- ½ cup (113g) unsalted butter, melted
- ½ cup (100g) granulated sugar
- ¼ cup (50g) light brown sugar, packed
- 1½ teaspoons ground cinnamon
- ½ teaspoon ground nutmeg (optional, but I think it adds a lovely warmth!)
- 1½ cups (180g) all-purpose flour
- ¼ teaspoon salt
-
For the “Delectable Gilmore Girls Coffee Cake Cookies” Base:
- 1 cup (226g) unsalted butter, softened to room temperature
- ¾ cup (150g) granulated sugar
- ½ cup (100g) light brown sugar, packed
- 2 large eggs, at room temperature
- 1 tablespoon pure vanilla extract (I love using good quality vanilla here for maximum flavor!)
- 2¾ cups (330g) all-purpose flour
- 1 teaspoon baking soda
- ½ teaspoon baking powder
- 1 teaspoon ground cinnamon
- ½ teaspoon salt
- ¼ cup (60ml) whole milk, at room temperature
-
For the Vanilla Glaze:
- 2 cups (240g) powdered sugar, sifted
- 3-4 tablespoons whole milk or heavy cream, at room temperature (start with 3, add more if needed)
- 1 teaspoon pure vanilla extract
- A tiny pinch of salt (to balance the sweetness!)
For the Streusel Topping:
Let’s kick things off with the star of any coffee cake: the streusel! This crumbly, buttery, cinnamon-sugar goodness is what truly transforms these cookies into their coffee cake inspiration. I find that preparing this first not only gets it out of the way but also allows the flavors to meld just a little bit before it hits the cookies.
- First, in a medium-sized mixing bowl, I combine the granulated sugar, light brown sugar, ground cinnamon, and the optional (but highly recommended!) ground nutmeg. I give these a quick whisk with a fork to ensure they’re nicely mixed. This step ensures an even distribution of spice throughout our topping.
- Next, I add the all-purpose flour and salt to the sugar and spice mixture. Using my fork again, I gently stir these together until everything looks well-integrated. You don’t want any pockets of just flour or just sugar; consistency is key for the perfect streusel texture.
- Now for the magic touch: I slowly pour in the melted unsalted butter. As I pour, I use my fork or a spoon to mix everything together. At first, it might look a little wet, but as you continue to stir, the mixture will start to clump together, forming those beautiful, irresistible crumbs we’re aiming for. It’s important not to overmix here; we want distinct crumbs, not a paste. I love seeing the different sizes of crumbs forming, from tiny specks to larger, satisfying clusters.
- Once I’m happy with the crumbly texture, I set the streusel aside. You can even pop it in the refrigerator for about 10-15 minutes if your kitchen is particularly warm, which helps solidify the butter and keeps the crumbs from melting too quickly when they hit the cookie dough. This extra step ensures our streusel stays nice and defined during baking, giving us that characteristic coffee cake texture.
For the “Delectable Gilmore Girls Coffee Cake Cookies” Base:
Now, onto the heart of our creation – the incredibly soft and flavorful cookie base. This part requires a little patience and attention to detail, but I promise, the results are well worth it! A good cookie base is fundamental to making these truly Delectable Gilmore Girls Coffee Cake Cookies.
- Creaming Butter and Sugars: In a large mixing bowl, I start by combining the softened unsalted butter with both the granulated sugar and the light brown sugar. This is where an electric mixer, either a stand mixer with the paddle attachment or a hand mixer, really shines. I beat these ingredients together on medium-high speed for a good 3 to 5 minutes. My goal here is to achieve a mixture that is wonderfully light, fluffy, and visibly pale. This creaming process incorporates air into the butter, which is crucial for giving our cookies their tender texture and contributes significantly to their overall lift. I sometimes scrape down the sides of the bowl a couple of times during this step to ensure everything is evenly mixed. Don’t rush this; it’s the foundation of a great cookie!
- Adding Eggs and Vanilla: Once the butter and sugars are perfectly creamed, I crack in one large egg at a time, beating well after each addition. I make sure each egg is fully incorporated before adding the next. This allows the eggs to emulsify properly with the butter mixture, preventing a curdled appearance and ensuring a smooth batter. After both eggs are in and mixed, I pour in the generous tablespoon of pure vanilla extract. The vanilla adds such a comforting depth of flavor that complements the coffee cake theme beautifully. I beat for another minute or so until everything is well combined and fragrant.
- Combining Dry Ingredients: In a separate, medium-sized bowl, I gently whisk together all of our essential dry ingredients: the all-purpose flour, baking soda, baking powder, ground cinnamon, and a pinch of salt. Whisking them thoroughly ensures that the leavening agents (baking soda and baking powder) and the salt are evenly distributed throughout the flour. This seemingly small step is actually quite significant, as it prevents any pockets of unmixed ingredients that could lead to an uneven rise or inconsistent flavor in our cookies. A well-aerated and evenly combined dry mixture is the secret to a consistently tender crumb in these coffee cake inspired treats.
- Alternating Wet and Dry: Now it’s time to bring the two mixtures together! I typically add the dry ingredients to the wet ingredients in three separate additions, alternating with the whole milk. I begin by adding about a third of the dry mixture to the butter-sugar-egg mixture, mixing on low speed until just combined. Then, I pour in half of the milk, mixing until absorbed. I repeat this process: another third of the dry ingredients, the remaining milk, and finally, the last third of the dry ingredients. The key here is to mix on low speed and only until just combined after each addition. Overmixing at this stage can lead to tough cookies, and we definitely want ours to be wonderfully soft and delicate. I usually stop mixing when I can still see a few streaks of flour; a final quick stir by hand with a spatula ensures everything is incorporated without developing too much gluten.
- Dough Consistency Check: The dough should be soft, slightly sticky, and easily scoopable. If for any reason your dough feels too soft to handle, especially if your kitchen is warm, you can cover the bowl with plastic wrap and chill it in the refrigerator for 20-30 minutes. This isn’t always necessary but can make scooping a bit easier and helps prevent too much spreading during baking, ensuring your cookies hold their delightful shape.
Baking the Cookies:
This is where our delightful dough and flavorful streusel come together to create something truly special. Get ready for your kitchen to smell absolutely incredible as these Delectable Gilmore Girls Coffee Cake Cookies bake to perfection!
- Preheat and Prepare: Before I even think about scooping, I always preheat my oven to 375°F (190°C). This ensures the oven is at a consistent temperature when the cookies go in, which is crucial for even baking. While the oven heats, I line two large baking sheets with parchment paper or silicone baking mats. This prevents sticking and makes cleanup a breeze – an important detail for any busy baker!
- Scooping and Topping: Using a 1.5 to 2-tablespoon cookie scoop (or just two spoons), I scoop rounded mounds of cookie dough and place them about 2 inches apart on the prepared baking sheets. I find that this spacing allows the cookies to spread without touching, creating beautifully shaped treats. Once all the dough is scooped, I generously sprinkle a good amount of the prepared cinnamon streusel topping over the top of each cookie dough ball. I gently press the streusel into the dough a little bit to ensure it adheres during baking. Don’t be shy with the streusel; the more, the merrier, in my opinion! It’s what gives these cookies their signature coffee cake charm.
- Baking Time: I bake the cookies, one sheet at a time, for 10-13 minutes. The exact baking time can vary depending on your oven, so I always keep a close eye on them. You’ll know they’re ready when the edges are set and a very light golden brown, but the centers still look soft and slightly underbaked. They will continue to set up as they cool. Overbaking can lead to dry cookies, and we want these to be moist and tender!
- Cooling Process: Once they come out of the oven, I let the cookies cool on the baking sheets for about 5 minutes. They are quite delicate when hot, so this brief cooling period allows them to firm up slightly. After 5 minutes, I carefully transfer the cookies to a wire cooling rack to cool completely. This is a critical step because placing them on a wire rack allows air to circulate around them, preventing them from becoming soggy on the bottom and ensuring they cool evenly. It’s absolutely essential that the cookies are completely cool before glazing them; otherwise, the glaze will simply melt right off. This might be the hardest part – resisting the urge to eat them warm – but trust me, it’s worth the wait!
For the Vanilla Glaze:
No coffee cake-inspired cookie would be complete without a luscious drizzle of vanilla glaze! This simple glaze adds another layer of sweetness and a beautiful finish to our Delectable Gilmore Girls Coffee Cake Cookies, tying all the flavors together perfectly.
- In a medium bowl, I combine the sifted powdered sugar, pure vanilla extract, and a tiny pinch of salt. Sifting the powdered sugar beforehand is a small but important step that prevents any lumps in your glaze, giving you a wonderfully smooth consistency. The pinch of salt might seem counterintuitive, but it actually helps to enhance the other flavors and keeps the glaze from being too cloyingly sweet.
- I start by adding 3 tablespoons of whole milk or heavy cream. Using a whisk, I mix everything together until it’s smooth and free of any lumps. I watch the consistency closely here. I’m looking for a glaze that is thick enough to coat the back of a spoon and hold its shape when drizzled, but still thin enough to flow smoothly.
- If the glaze appears too thick, I add the remaining tablespoon of milk or cream, a tiny bit at a time, whisking well after each addition, until I reach my desired consistency. It’s always easier to add more liquid than to fix a glaze that’s too thin, so I err on the side of caution. If, by some chance, your glaze becomes too thin, you can simply whisk in a little more sifted powdered sugar until it thickens up.
- Once the glaze is perfectly smooth and glossy, I set it aside, ready for the final step of assembling our magnificent cookies!
Assembling and Finishing Your “Delectable Gilmore Girls Coffee Cake Cookies”:
The final flourish! This is where all our hard work comes together, and these already delightful cookies transform into truly magnificent Delectable Gilmore Girls Coffee Cake Cookies that are as beautiful to look at as they are to eat.
- Ensure Cookies are Completely Cool: This step cannot be stressed enough! Before you even think about glazing, please make absolutely certain that your cookies have cooled completely on the wire racks. If they are even slightly warm, the glaze will simply melt and run off, creating a messy situation instead of a lovely drizzle. I usually allow at least an hour for cooling, sometimes longer if my kitchen is warm. Patience truly is a virtue in baking!
- Glazing Technique: Once the cookies are cool, it’s time for the glaze. I have a few favorite methods for this:
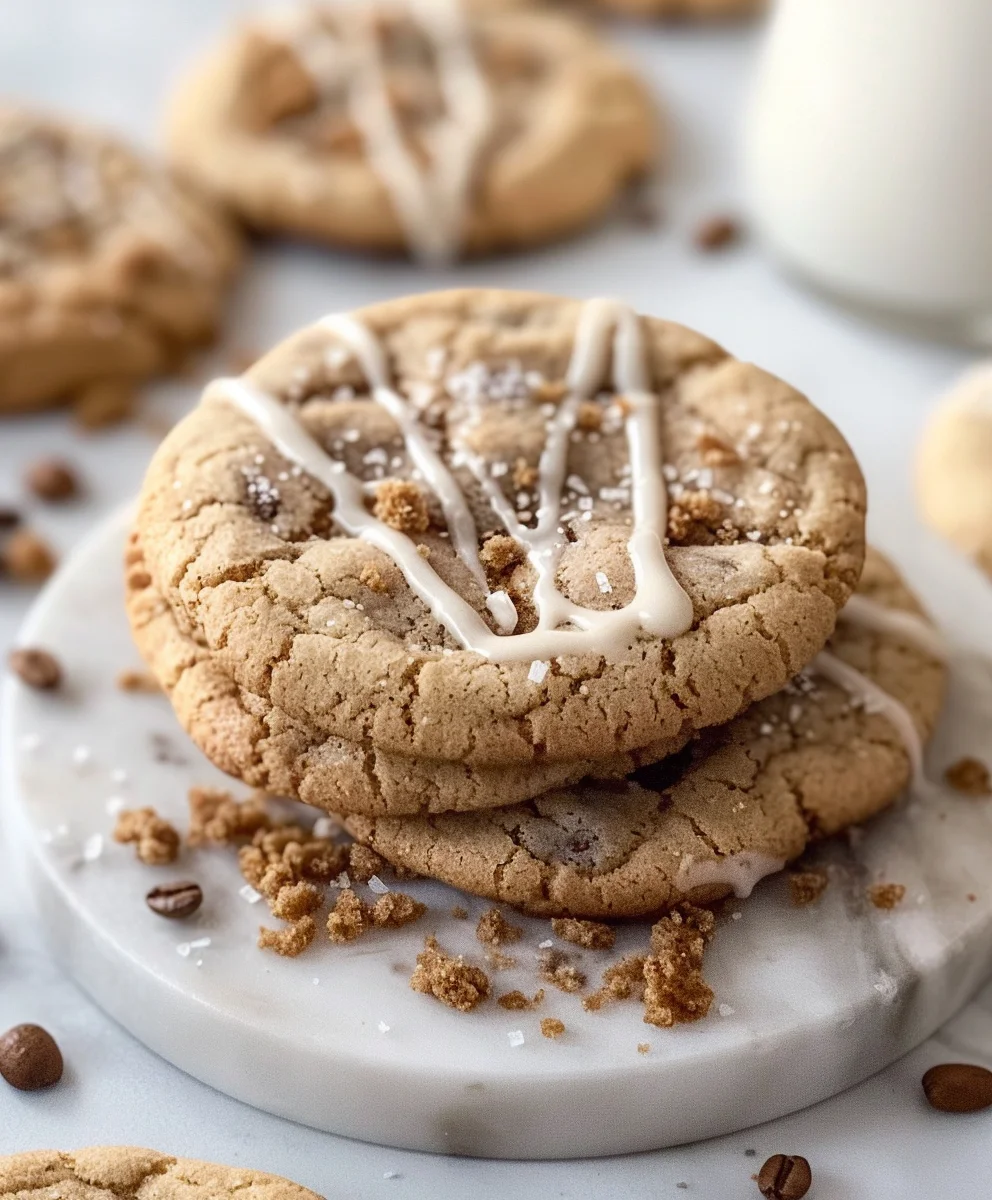
- The Drizzle Method (My personal favorite!): I like to place the wire rack of cooled cookies over a sheet of parchment paper or aluminum foil. This catches any drips and makes cleanup much easier. Then, using a spoon, I simply drizzle the vanilla glaze back and forth over the top of each cookie in a random pattern. The beauty of this method is its rustic charm; no need for perfection here!
- The Dipping Method: For a more uniform coating, you can gently dip the top of each cookie into the bowl of glaze, allowing any excess to drip off before placing it back on the wire rack. If using this method, ensure your glaze isn’t too thick, or it will be difficult to dip cleanly.
- The Piping Bag Method: If you want very precise lines or a more intricate design, you can transfer the glaze to a small piping bag (or a Ziploc bag with a tiny corner snipped off) and pipe the glaze over the cookies.
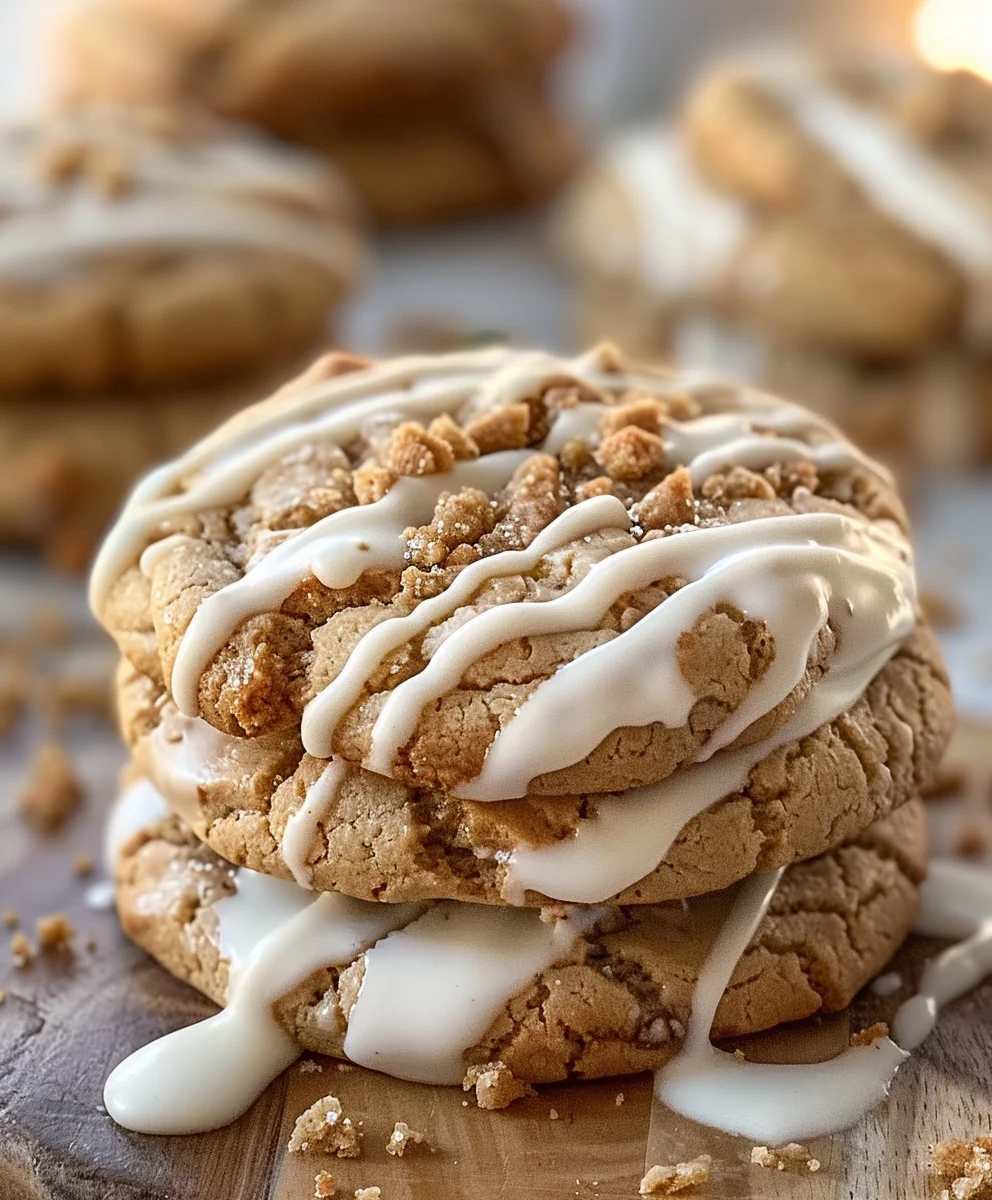
Whichever method you choose, the goal is to get that lovely, sweet vanilla layer over the streusel. The contrast between the soft cookie, crumbly streusel, and smooth glaze is simply divine!
- Setting the Glaze: After glazing, I let the cookies sit undisturbed on the wire rack for about 15-30 minutes, or until the glaze has fully set. This allows the glaze to harden slightly, preventing stickiness and making the cookies much easier to handle and stack. You’ll know it’s set when you can gently touch the glaze without it sticking to your finger.
- Serving and Storage: Once the glaze is set, your Delectable Gilmore Girls Coffee Cake Cookies are ready to be enjoyed! They are absolutely perfect with a cup of coffee or tea, just like Lorelai and Rory would appreciate. These cookies are best enjoyed fresh, within 2-3 days. I store them in an airtight container at room temperature. If stacking, I sometimes place a small piece of parchment paper between layers to prevent any slight stickiness from the glaze, although once fully set, this usually isn’t an issue. They make a wonderful treat to share with friends, bring to a brunch, or simply savor during a quiet moment of blissful indulgence. Enjoy every single bite of these comforting, coffee cake-inspired delights!
Conclusion:
And there you have it, my friends! We’ve journeyed together through the delightful process of creating what I truly believe is one of the most heartwarming and utterly satisfying treats you’ll ever bake. This isn’t just another cookie; it’s an experience, a little slice of comforting nostalgia, and a perfect testament to how two beloved desserts can unite to form something even greater than the sum of their parts. If you’ve been looking for a recipe that combines the chewy, soft texture of a perfect cookie with the spiced, crumbly goodness of a classic coffee cake, then your search emphatically ends here. Trust me, once you take that first bite, sinking your teeth through the sweet, buttery crumb topping and into the moist, vanilla-kissed cookie base, you’ll understand exactly why I’m so passionate about this particular creation. It’s a guaranteed crowd-pleaser, an ideal pick-me-up for a quiet afternoon, and simply a joyous baking project from start to finish. The aroma alone, wafting through your kitchen as these bake to golden perfection, is enough to lift spirits and invite smiles.
But how best to enjoy these little marvels once they’ve cooled enough to handle? While they are undeniably exquisite straight off the cooling rack, still slightly warm with that intoxicating cinnamon scent, I have a few suggestions to elevate your experience. Of course, the classic pairing is with a steaming cup of your favorite coffee or a robust tea. Imagine a lazy Sunday morning, a gentle breeze drifting through your window, and one of these beauties alongside your morning brew – pure bliss! They also make an absolutely splendid addition to any brunch spread, offering a delightful alternative to traditional pastries. For an indulgent dessert, try warming one slightly and serving it with a scoop of vanilla bean ice cream; the contrast between the warm cookie and cold, creamy ice cream is simply divine. Or, for a touch of elegance, a light dusting of powdered sugar or a delicate drizzle of a simple vanilla glaze (made with powdered sugar and a touch of milk or cream) can add both visual appeal and an extra layer of sweetness. They also travel incredibly well, making them perfect for sharing with neighbors, bringing to a potluck, or gifting to a friend who needs a little pick-me-up. Just tuck them into a pretty box or cellophane bag, and you’ve got a homemade gift that truly speaks from the heart.
Now, while I’ve given you my perfected recipe, the beauty of baking often lies in personalization! Don’t be afraid to put your own unique spin on these cookies. For those who love a bit of texture, consider adding finely chopped pecans or walnuts to your crumb topping; the nutty crunch would be a fantastic counterpoint to the soft cookie. A pinch of nutmeg or cardamom alongside the cinnamon in the crumb mixture could introduce an extra layer of aromatic warmth. If you’re feeling adventurous, a subtle citrus zest – perhaps orange or lemon – could brighten the cookie dough beautifully, offering a zesty hint that complements the rich spices. You could even experiment with different extracts in the dough; almond extract, for instance, could add a sophisticated depth. For chocolate lovers, a handful of mini chocolate chips folded into the cookie dough would transform them into a decadent twist on the original. And for those with dietary considerations, many great gluten-free all-purpose flour blends can be swapped in for the regular flour, and plant-based butters can often be used successfully in both the cookie and the crumb topping, allowing almost everyone to enjoy this delightful treat. The possibilities are truly endless, limited only by your imagination and what you have in your pantry.
A Call to Action for Your Kitchen: Embrace the Joy of Baking!
So, what are you waiting for? This is more than just a recipe; it’s an invitation to create something truly special in your own kitchen. I wholeheartedly encourage you to roll up your sleeves, gather your ingredients, and immerse yourself in the joyful process of baking these Delectable Gilmore Girls Coffee Cake Cookies. You’ll find the steps straightforward and the reward absolutely magnificent. And please, please, please – once you’ve had a chance to bake and taste them, come back and share your experience with me! I absolutely adore hearing about your kitchen adventures. Did you try a variation? Did they disappear in minutes? What was your favorite part? Your feedback and your stories are what make this community so vibrant and inspiring. Snap a photo, tell us about your serving suggestions, or share any creative twists you came up with. Let’s spread the joy of these incredible cookies far and wide! Happy baking, everyone, and get ready to fall in love with your new favorite treat.
Delectable Gilmore Girls Coffee Cake Cookies
Delectable Gilmore Girls Coffee Cake Cookies. Combining the comfort of a warm coffee cake with the convenience of a cookie, infused with the spirit of Stars Hollow. A perfect tribute to one of television’s most cherished duos and their enduring love for coffee and conversation.
Ingredients
-
1 cup softened Butter
-
1/4 cup Vegetable Oil
-
1 cup Brown Sugar
-
1 large Egg
-
1 tsp Vanilla Extract
-
1 tsp Cinnamon
-
1 tsp Baking Soda
-
1 tsp Baking Powder
-
1/2 tsp Salt
-
2 cups All-Purpose Flour
-
For Streusel: 1/4 cup softened Butter
-
For Streusel: 1/4 cup Brown Sugar
-
For Streusel: 1/4 cup Flour
-
For Streusel: 1/2 tsp Cinnamon
-
For Streusel: 1/4 tsp Salt
Instructions
-
Step 1
In a medium bowl, combine 1/4 cup brown sugar, 1/4 cup flour, 1/2 tsp cinnamon, and 1/4 tsp salt. Add 1/4 cup softened butter and cut it into the dry mixture with a fork or pastry blender until coarse crumbs form. Set aside. -
Step 2
In a large mixing bowl, cream 1 cup softened butter, 1/4 cup vegetable oil, and 1 cup brown sugar together until light and fluffy. Beat in 1 large egg and 1 tsp vanilla extract until well combined. In a separate bowl, whisk together 2 cups all-purpose flour, 1 tsp cinnamon, 1 tsp baking soda, 1 tsp baking powder, and 1/2 tsp salt. Gradually add the dry ingredients to the wet mixture, mixing on low speed until just combined. Do not overmix. -
Step 3
Preheat oven to 375°F (190°C). Line two large baking sheets with parchment paper. Scoop rounded mounds of cookie dough (1.5 to 2 tablespoons each) onto the prepared baking sheets, spacing them about 2 inches apart. Generously sprinkle the prepared streusel topping over the top of each cookie dough ball, gently pressing it in. Bake for 10-13 minutes, one sheet at a time, until the edges are set and lightly golden brown, but the centers still look soft. -
Step 4
Once baked, let the cookies cool on the baking sheets for about 5 minutes. Carefully transfer the cookies to a wire cooling rack to cool completely. Ensure cookies are fully cooled before serving.
Important Information
Nutrition Facts (Per Serving)
It is important to consider this information as approximate and not to use it as definitive health advice.
Allergy Information
Please check ingredients for potential allergens and consult a health professional if in doubt.