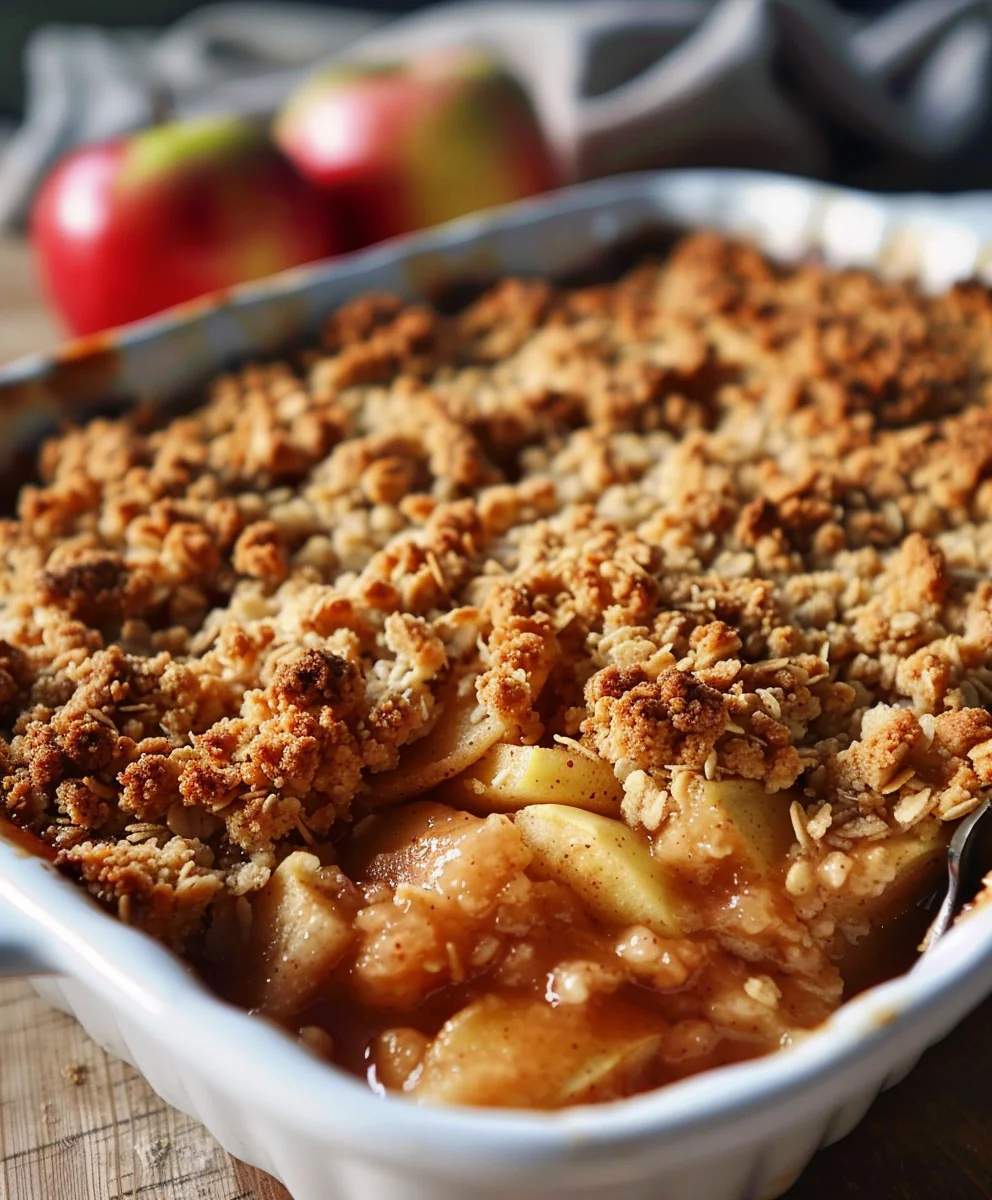
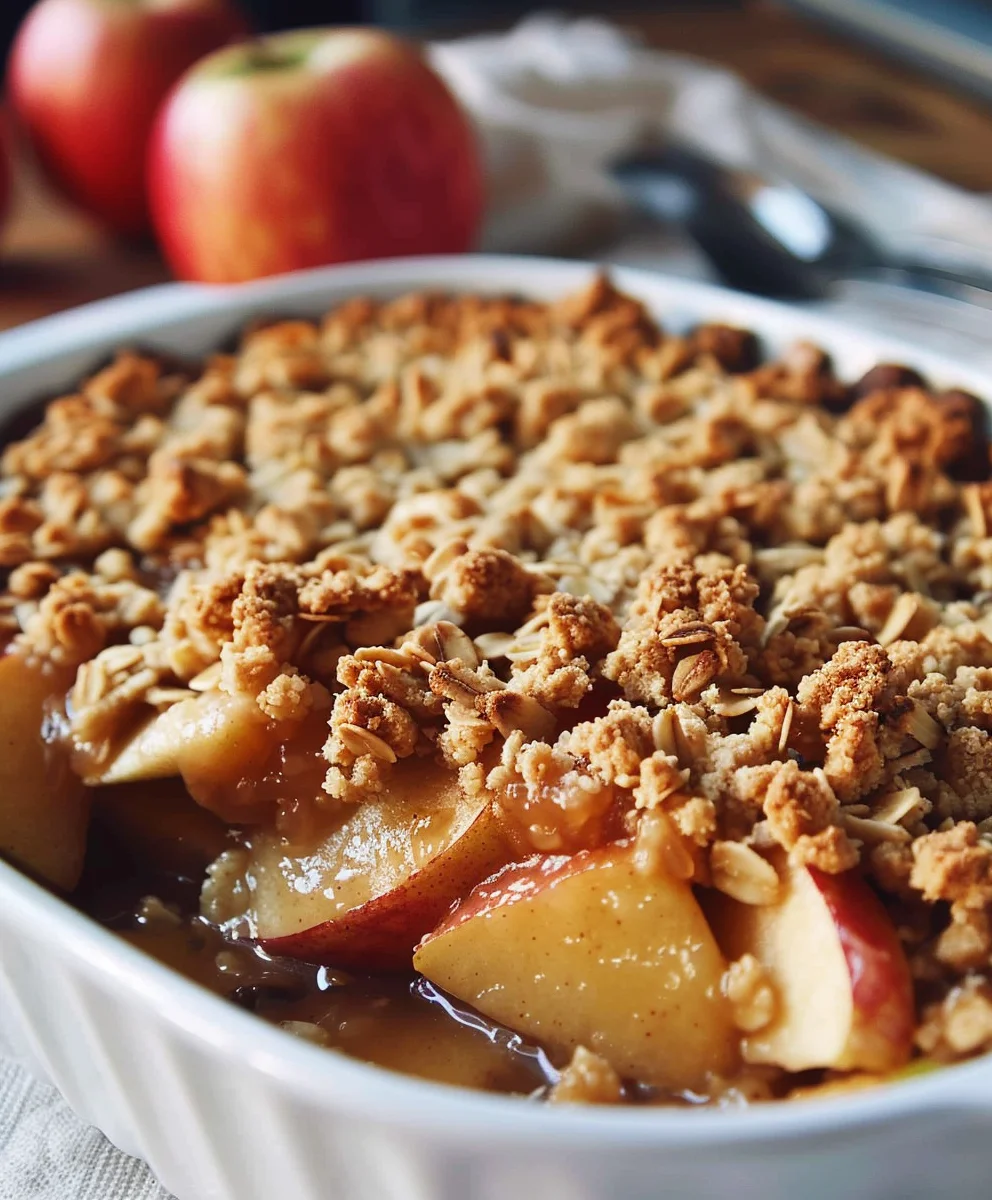
Pioneer Woman Apple Crisp Recipe Easy Dessert is more than just a dish; it’s a quintessential taste of home, a warm hug that brings comfort and joy with every single bite. Imagine the delightful aroma of cinnamon-spiced apples bubbling gently beneath a golden, buttery, oat-studded topping wafting through your kitchen – that’s the promise of this truly irresistible dessert!
For generations, apple crisp has held a special place in the hearts and homes of many, particularly in American culinary tradition. It emerged as a beloved, fuss-free alternative to the more intricate apple pie, offering all the delightful flavors without the demanding pastry work. It’s a dish synonymous with autumn harvests, cozy family gatherings, and simple, wholesome pleasures that evoke cherished memories.
Why This Apple Crisp Will Be Your New Favorite
People absolutely adore apple crisp for its incredible balance of textures and flavors: the tender, sweet-tart apples playing perfectly against the rich, crunchy crisp topping. It’s wonderfully versatile, pairing beautifully with a scoop of vanilla bean ice cream or a generous dollop of freshly whipped cream. What truly sets this particular recipe apart, making it the perfect Pioneer Woman Apple Crisp Recipe Easy Dessert, is its remarkable simplicity and foolproof execution. I’ve refined this classic to ensure you can achieve that perfect balance of gooey fruit and crisp crumble with absolute ease, making it an ideal choice for both seasoned bakers and newcomers alike. Prepare to fall in love with a dessert that delivers maximum flavor with minimal fuss!

Ingredients:
- For the Juicy Apple Filling:
- 6-8 medium Granny Smith apples, approximately 2.5-3 pounds, or a delightful mix of Granny Smith and Honeycrisp for a balance of tart and sweet. We’ll be peeling, coring, and slicing these beauties about 1/4-inch thick. This thickness is crucial – thin enough to get tender but substantial enough to hold its shape and offer a satisfying bite.
- 1/2 cup granulated sugar. You might want to adjust this slightly based on the natural sweetness of your chosen apples and your personal preference for sweetness.
- 1/4 cup packed light brown sugar. This adds a lovely caramel note and depth to the filling.
- 2 tablespoons all-purpose flour. This is our secret weapon for a perfectly thickened, not watery, apple filling. It helps absorb excess moisture released by the apples during baking.
- 1 teaspoon ground cinnamon. The quintessential apple pie spice!
- 1/4 teaspoon ground nutmeg. A warm, aromatic complement to cinnamon.
- 1/8 teaspoon ground cloves (optional, but trust me, it adds an incredible layer of warmth and complexity that truly elevates the flavor profile).
- 2 tablespoons fresh lemon juice. Don’t skip this! It not only prevents your apple slices from browning but also brightens the entire flavor of the filling, cutting through the sweetness with a much-needed zest.
- 1 teaspoon pure vanilla extract. Another flavor enhancer that brings all the spices and fruit together beautifully.
- A generous pinch of salt. Even in sweet dishes, salt is vital for balancing and enhancing flavors.
- For the Golden Crispy Crumble Topping:
- 1 cup (2 sticks) unsalted butter, absolutely very cold and cut into small, 1/2-inch cubes. This is perhaps the most important detail for achieving that perfectly flaky, distinct crumble texture. Warm butter melts too quickly and results in a less distinct crumble.
- 1 1/2 cups all-purpose flour. The structure of our crumble.
- 1 cup packed light brown sugar. This gives the topping a rich, molasses-like sweetness and helps it brown beautifully.
- 1/2 cup granulated sugar. For additional crispness and sweetness.
- 1 cup old-fashioned rolled oats. Please ensure these are not instant oats; we’re looking for that hearty, chewy texture that only old-fashioned oats can provide.
- 1 teaspoon ground cinnamon. To echo the flavors in the filling and create a cohesive taste experience.
- 1/2 teaspoon ground nutmeg. Again, for that warm spice note that screams comfort.
- 1/4 teaspoon salt. Essential for balancing the sweetness and enhancing all the other flavors.
- 1/2 cup chopped pecans or walnuts (optional, but highly recommended if you love an added layer of crunch and a delightful nutty flavor. They toast beautifully as the crisp bakes!).
Preparing the Apples: The Heart of Your Pioneer Woman Apple Crisp
- Preheat Your Oven and Prepare Your Baking Dish: First things first, let’s get that oven ready. Preheat your oven to 375°F (190°C). This allows the oven to reach a consistent, stable temperature, which is crucial for even baking and achieving that perfect golden-brown crisp. While it’s heating, take out a sturdy 9×13-inch baking dish. You don’t necessarily need to grease it, as the buttery apple filling will naturally prevent sticking, but a quick spray with non-stick cooking spray can offer extra peace of mind, especially if your dish tends to be particularly sticky or has seen many years of loyal service. A ceramic or glass dish works beautifully for this recipe, ensuring even heat distribution and a lovely presentation.
- Peel, Core, and Slice Your Apples with Care: Now for the star of the show! Begin by meticulously peeling all your apples. I find a good quality swivel peeler makes this task much more enjoyable. Once peeled, core each apple. You can use an apple corer for speed, or simply slice the apple into quarters and carefully cut out the core with a paring knife. Finally, slice your apples into uniform 1/4-inch thick pieces. Aim for consistency here; uniform slices ensure that all the apple pieces cook evenly and become tender at the same rate, preventing some from being mushy while others are still firm. A mandoline can be a great tool for this if you have one, but a steady hand and a sharp knife work just as well.
- Dress Your Apples in Flavor: Transfer all your beautifully sliced apples into a large mixing bowl. Now, let’s infuse them with all those wonderful flavors! Sprinkle the granulated sugar, light brown sugar, all-purpose flour, cinnamon, nutmeg, and optional ground cloves evenly over the apples. Pour in the fresh lemon juice and vanilla extract, and add that crucial pinch of salt.
- Toss Gently to Coat: With clean hands or a large sturdy spoon, gently toss the apple slices until they are thoroughly and evenly coated with all the sugars, spices, and flour. You want every single apple slice to be glistening and fragrant. This step not only distributes the flavors but also ensures that the flour gets a chance to mix with the natural apple juices, preparing it to thicken beautifully in the oven. The lemon juice will also work its magic, preventing any unsightly browning while you move on to the next step. Set this bowl aside for a few minutes; the apples will start to release some of their delicious juices.
Crafting the Crumble Topping: The Golden Crown of Your Dessert
- Combine the Dry Topping Ingredients: In a separate, medium-sized mixing bowl, combine all the dry ingredients for your crumble topping. This includes the 1 1/2 cups of all-purpose flour, 1 cup of packed light brown sugar, 1/2 cup of granulated sugar, 1 cup of old-fashioned rolled oats, 1 teaspoon of ground cinnamon, 1/2 teaspoon of ground nutmeg, and 1/4 teaspoon of salt. If you’re using them, now is the time to add your 1/2 cup of chopped pecans or walnuts. Give these dry ingredients a good whisk or stir to ensure they are thoroughly combined and evenly distributed. This pre-mixing helps prevent pockets of unmixed spice or sugar later on.
- Incorporate the Cold Butter: Now for the magic! Add your very cold, cubed unsalted butter to the dry crumble mixture. There are a few excellent ways to do this:
- Using a Pastry Blender: This is my preferred method for consistent results. Press the pastry blender down into the mixture, twisting and cutting through the butter and dry ingredients. Continue until the mixture resembles coarse crumbs, with some pieces of butter still visible, ranging from the size of small peas to tiny pebbles.
- Using Your Fingertips: If you don’t have a pastry blender, your fingertips work wonderfully. Just be quick about it! Work the butter into the flour mixture by rubbing it between your thumb and forefingers. The key here is to work quickly to avoid melting the butter with the warmth of your hands. You’re aiming for that same coarse, pebbly texture.
- Using a Food Processor (with caution!): For a super-fast approach, you can pulse the ingredients in a food processor. Add the dry ingredients first, then scatter the cold butter cubes over the top. Pulse in short bursts, about 1-second each, until the mixture forms coarse crumbs. Be very careful not to over-process, or you’ll end up with a paste instead of a crumble! You want that distinct, crumbly texture, not a uniform dough.
The goal is to leave small pieces of butter intact. These tiny pockets of butter are what will melt during baking, creating those irresistible pockets of crispness and flakiness in your topping. This step is what truly sets apart a good crisp from a magnificent one. The finished crumble should look wonderfully rustic and ready to be scattered.
Assembling and Baking: Bringing Your Pioneer Woman Apple Crisp to Life
- Fill Your Baking Dish: Take your bowl of perfectly coated apple slices. Give them one last gentle toss to redistribute any settled juices. Now, carefully spoon the apple filling into your prepared 9×13-inch baking dish. Spread the apples evenly across the bottom of the dish, forming a nice, consistent layer. Don’t press them down too firmly; let them have a little breathing room to cook and release their juices. You’ll notice the delightful aroma of cinnamon and apples already filling your kitchen – a promise of the deliciousness to come!
- Crown with the Crumble Topping: Now for the grand finale before baking! Take your bowl of buttery, oat-filled crumble topping. Using your hands, generously sprinkle the entire crumble mixture evenly over the top of the apple filling. Don’t be shy here – cover those apples from edge to edge. If there are any larger clumps of topping, gently break them apart to ensure even distribution. You want a thick, glorious layer of crumble; this is where all that satisfying crunch comes from. Resist the urge to press the topping down too firmly, as this can inhibit its ability to crisp up beautifully. Let it remain loose and crumbly.
- Bake to Golden Perfection: Carefully place your assembled apple crisp into your preheated 375°F (190°C) oven. It’s going to bake for approximately 45-60 minutes.
- Initial Bake: For the first 30-40 minutes, you’ll want to keep an eye on it. The apples will soften and bubble, and the topping will begin to turn a beautiful golden brown.
- Checking for Doneness: You’ll know it’s ready when the apple filling is visibly bubbling up around the edges and even through the topping in some spots. More importantly, the topping should be a rich, deep golden brown and feel wonderfully crisp to the touch. To be absolutely sure the apples are tender, you can carefully insert a thin, sharp knife into the center of the crisp (through a gap in the topping) – it should slide in easily with minimal resistance.
- Preventing Over-Browning: If you notice the topping is browning too quickly before the apples are fully tender, don’t panic! Simply tent the dish loosely with aluminum foil for the remainder of the baking time. This will protect the topping from burning while allowing the apples to finish cooking.
The aroma that will fill your home during this baking period is truly heavenly, a classic sign that something wonderful is happening in your oven.
Serving and Storing Your Pioneer Woman Apple Crisp: The Delicious Aftermath
- The Art of Cooling and Serving: Once your Pioneer Woman Apple Crisp emerges from the oven, bubbling and golden, the hardest part begins: waiting! It is absolutely crucial to let the crisp cool for at least 20-30 minutes before serving. During this cooling period, the hot, luscious apple filling will set up beautifully, preventing it from being a watery, soupy mess when you scoop it. The flavors will also meld and intensify. While it’s still warm, it’s undeniably at its absolute best.
- Classic Accompaniments: Serve generous portions in bowls. For the ultimate indulgence, I always recommend a scoop (or two!) of creamy vanilla bean ice cream. The cold, melting ice cream against the warm, spiced apples and crunchy topping is a match made in culinary heaven. If ice cream isn’t your fancy, a dollop of freshly whipped cream, perhaps lightly sweetened with a touch of vanilla or cinnamon, makes for an equally delightful pairing. A drizzle of warm caramel sauce is also never a bad idea!
- Casual Comfort: For a simpler, more rustic experience, it’s perfectly delicious on its own with a cup of coffee or tea. This crisp embodies comfort, so enjoy it however brings you the most joy.
- Storing Leftovers (If There Are Any!): If by some miracle you have any leftover apple crisp – which is a rare occurrence in my house – it stores remarkably well.
- At Room Temperature: You can cover the baking dish tightly with plastic wrap or aluminum foil and leave it at room temperature for up to 1 day. The topping might lose a tiny bit of its initial crispness, but the flavors will remain excellent.
- In the Refrigerator: For longer storage, transfer any leftovers to an airtight container or keep it in the covered baking dish in the refrigerator for up to 3-4 days.
- Reheating: To re-crisp the topping and warm the apples, preheat your oven to 350°F (175°C) and bake individual portions or the entire dish (if covered loosely with foil) for about 15-20 minutes, or until thoroughly heated through and the topping is crisp again. A quick zap in the microwave will warm the apples, but the topping won’t regain its crispness.
- Creative Variations and Tips: This “Pioneer Woman Apple Crisp Easy Dessert” is incredibly versatile!
- Fruit Mix-ins: Feel free to add a handful of dried cranberries or fresh raspberries to the apple mixture for an extra burst of flavor and color. A couple of sliced pears can also be lovely alongside the apples.
- Spice It Up: Experiment with different spice combinations. A touch of cardamom can be surprisingly delightful.
- Nutty Notes: If you’re a nut-lover, increase the amount of pecans or walnuts in the topping, or even try adding slivered almonds for a different texture.
- Gluten-Free Option: For a gluten-free version, simply substitute a 1:1 gluten-free all-purpose flour blend for the regular flour in both the filling and the topping. Ensure your oats are certified gluten-free.
- Make Ahead: You can prepare both the apple filling and the crumble topping a day in advance. Store the apple mixture covered in the refrigerator and the crumble topping in an airtight container in the refrigerator (or even freeze it for longer!). Assemble and bake fresh when you’re ready to enjoy.
This recipe is more than just a dessert; it’s an experience. The comforting aroma, the tender spiced apples, and that irresistible crunchy, buttery topping all come together to create a dish that feels like a warm hug from the heartland. Enjoy every single bite!
Conclusion:
So, there you have it! We’ve journeyed through the simple magic of creating a truly unforgettable dessert, and I genuinely hope you’re feeling inspired to roll up your sleeves and get baking. This isn’t just any apple crisp; it’s a delightful interpretation that encapsulates everything wonderful about home baking. What makes this recipe an absolute must-try, in my humble opinion, is its perfect synergy of textures and flavors. Imagine: the tender, sweet-tart apples, softened just right and fragrant with warming spices, cradled beneath a golden, buttery, oat-filled topping that delivers an irresistible crunch with every spoonful. It’s that contrast – the yielding fruit against the crispy streusel – that makes it so utterly addictive. There’s a comforting familiarity to it, a taste of autumn and cozy evenings, yet it’s elegant enough for any dinner party. It’s the kind of dessert that fills your home with an aroma that instantly evokes warmth and happiness, drawing everyone into the kitchen long before it’s even out of the oven. Truly, this is the ultimate Pioneer Woman Apple Crisp Recipe Easy Dessert experience, designed to bring joy without any culinary fuss.
But the beauty of a classic like this doesn’t stop at its perfection straight from the oven; it’s also incredibly versatile! While I’m a staunch advocate for serving it warm with a generous scoop of good quality vanilla bean ice cream, allowing the cold creaminess to melt slightly into the warm, gooey apples, there are so many other delightful ways to enjoy it. For an extra touch of decadence, a dollop of freshly whipped cream, perhaps infused with a whisper of cinnamon or vanilla, is simply divine. If you prefer a tangier counterpoint, a spoonful of crème fraîche or even a dollop of plain Greek yogurt can cut through the sweetness beautifully, offering a sophisticated contrast that elevates the entire experience. Don’t be shy about experimenting with drizzles either – a swirl of warm caramel sauce or a maple syrup reduction can add another layer of rich flavor.
Creative Twists and Serving Suggestions:
- Spice It Up: Feel free to add a pinch of freshly grated nutmeg or a touch of allspice to your apple mixture for an even deeper, more complex flavor profile.
- Nutty Variations: Stir in toasted pecans, walnuts, or slivered almonds to your oat topping for added crunch and a nutty aroma that complements the apples wonderfully.
- Fruity Companions: While apples are the star, a handful of cranberries, blackberries, or even thinly sliced pears can be mixed in with the apples before baking, adding beautiful color and a slightly different tartness. Just be sure to adjust the sugar content if adding very tart fruits.
- A Dash of Spirit: For an adult-friendly version, a tablespoon or two of bourbon, Calvados, or apple brandy mixed with the apples can add a sophisticated depth of flavor that’s truly special.
- Individual Servings: For a charming presentation, bake the crisp in individual ramekins. This makes for elegant single servings perfect for dinner parties.
- Savoury Pairing: For those who love a classic New England tradition, serve a small, thin slice of sharp cheddar cheese alongside your warm apple crisp. The salty, tangy cheese with the sweet, spiced apples is an unexpected but utterly harmonious combination.
Now, it’s your turn! I truly hope you feel empowered and excited to recreate this delightful dessert in your own kitchen. There’s nothing quite like the satisfaction of baking something from scratch and seeing the pure joy it brings to your loved ones, or indeed, to yourself. Gather your ingredients, put on some music, and let the comforting process of baking fill your home with warmth and delicious anticipation. I promise you, the effort is minimal, and the rewards are absolutely enormous. Once you’ve pulled that golden, bubbly crisp from the oven and savored its incredible flavors, I would be absolutely thrilled to hear all about your experience! Did you stick to the classic? Did you venture into one of the variations I suggested? Or perhaps you invented a new twist of your own? Please, don’t keep it a secret! Share your stories, your triumphs, and even your photos with me. Your culinary adventures inspire me, and I love seeing how these recipes come to life in your homes. Happy baking, my friends, and may your kitchen always be filled with the sweet aroma of freshly baked goods!
Pioneer Woman’s Easy Apple Crisp Recipe – Perfect Dessert
Pioneer Woman Apple Crisp is a quintessential taste of home, a warm hug that brings comfort and joy with every single bite. This recipe ensures a perfect balance of gooey fruit and crisp crumble with absolute ease.
Ingredients
-
6 cups peeled and sliced apples
-
1 cup granulated sugar
-
1 tbsp lemon juice
-
1 tsp ground cinnamon
-
1/2 tsp ground nutmeg
-
1 cup all-purpose flour
-
1 cup packed brown sugar
-
1/2 cup rolled oats
-
1/2 cup cold butter, cubed
Instructions
-
Step 1
Preheat your oven to 375°F (190°C). Grease a 9×13-inch baking dish. -
Step 2
Peel, core, and slice apples 1/4-inch thick. In a large mixing bowl, combine the sliced apples with granulated sugar, lemon juice, and cinnamon. Toss gently to ensure apples are evenly coated. -
Step 3
In a separate medium bowl, combine all-purpose flour, packed brown sugar, rolled oats, and nutmeg. Add the very cold, cubed butter. Cut the butter into the dry ingredients using a pastry blender, your fingertips, or a food processor until the mixture resembles coarse crumbs with small pieces of butter remaining. -
Step 4
Spoon the apple filling evenly into the prepared baking dish. Generously sprinkle the crumble topping over the apples, covering them from edge to edge. -
Step 5
Bake for approximately 45-60 minutes, or until the apple filling is visibly bubbling around the edges and through the topping, and the topping is a rich golden brown and crisp. If the topping browns too quickly, loosely tent the dish with aluminum foil. Apples should be tender when pierced with a knife. -
Step 6
Let the apple crisp cool for at least 20-30 minutes before serving. This allows the filling to set. Serve warm with a scoop of vanilla bean ice cream or a dollop of whipped cream.
Important Information
Nutrition Facts (Per Serving)
It is important to consider this information as approximate and not to use it as definitive health advice.
Allergy Information
Please check ingredients for potential allergens and consult a health professional if in doubt.