Salted Honey Pie, oh where do I begin with this utterly divine creation? Imagine a pie that dances on your taste buds, hitting all the right notes with a symphony of sweet, rich honey, perfectly balanced by a delicate whisper of sea salt. It’s a sophisticated twist on classic comfort, promising an unforgettable dessert experience that will captivate anyone lucky enough to try a slice. I’m so excited for you to discover its unique charm and understand why it has quickly become a beloved favorite in my home and countless others!
While not possessing the centuries-old lineage of some traditional desserts, this particular gem emerges from a modern culinary appreciation for the magic of contrast. It draws inspiration from the simple elegance of custard and sugar pies, staples of American baking, but elevates them with an intentional, sophisticated edge. The inclusion of salt isn’t just a trend; it’s a technique that intensifies and rounds out the deep, amber sweetness of the honey, much like how a pinch of salt can transform a simple caramel into something extraordinary. This pie truly showcases how thoughtful ingredients can create something truly special and deeply satisfying.
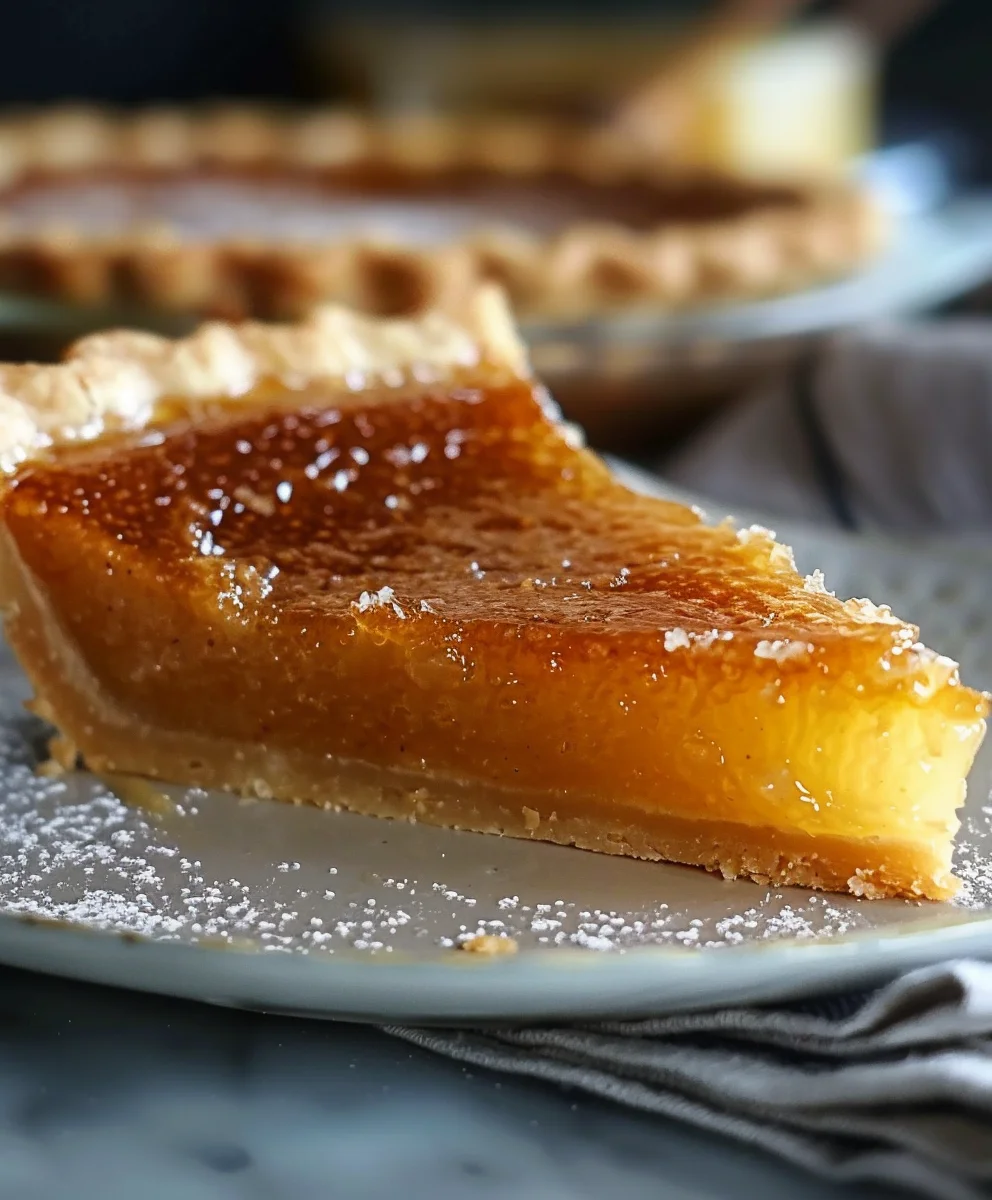
People adore this pie for its unexpected complexity and satisfying simplicity. The filling is a dream – a silky, custardy texture that practically melts in your mouth, encased in a perfectly flaky crust. It’s truly a showstopper, impressive enough for any special occasion yet comforting enough for a quiet evening treat. Every bite of this Salted Honey Pie is a testament to the power of perfect balance, offering a comforting warmth with a delightful, intriguing edge that keeps you coming back for more. Prepare to fall in love with its unique blend of flavors and textures!

Ingredients:
For the Homemade Flaky Pie Crust (or 1 store-bought 9-inch pie crust):
- 2 ½ cups (300g) all-purpose flour, plus more for dusting
- 1 teaspoon fine sea salt
- 1 cup (226g) unsalted butter, very cold and cut into ½-inch cubes
- ½ cup (120ml) ice water, plus more if needed
For the Irresistible Salted Honey Pie Filling:
- 1 cup (340g) good quality honey (I prefer a light, floral honey, but use what you love!)
- ½ cup (100g) granulated sugar
- ½ cup (120ml) light corn syrup (this helps prevent crystallization and keeps the pie silky smooth)
- ½ cup (113g) unsalted butter, melted
- 3 large eggs, at room temperature
- 2 tablespoons heavy cream
- 1 teaspoon vanilla extract
- 1 teaspoon fine sea salt, plus extra for finishing (I love flaky sea salt for garnish!)
For the Garnish (Optional):
- Flaky sea salt (like Maldon) for sprinkling
- A dollop of fresh whipped cream or a scoop of vanilla bean ice cream
Preparing the Pie Crust
If making homemade pie crust:
- Combine Dry Ingredients: In a large mixing bowl, whisk together the 2 ½ cups of all-purpose flour and 1 teaspoon of fine sea salt. This ensures the salt is evenly distributed throughout the crust, contributing to the overall flavor of your Salted Honey Pie.
- Cut in the Cold Butter: Add the very cold, ½-inch cubes of unsalted butter to the flour mixture. Using a pastry blender, your fingertips, or a food processor, cut the butter into the flour until the mixture resembles coarse meal with some pea-sized pieces of butter remaining. The key here is to work quickly to keep the butter as cold as possible. Cold butter creates steam in the oven, leading to those wonderful flaky layers we all adore in a perfect pie crust.
- Add Ice Water Gradually: Gradually add the ½ cup of ice water, one tablespoon at a time, mixing gently until the dough just comes together. Be careful not to overmix, as this can develop the gluten too much and result in a tough crust. You want the dough to be shaggy but hold together when squeezed. If it’s too dry, add a tiny bit more ice water, but aim for minimal liquid.
- Form and Chill the Dough: Turn the dough out onto a lightly floured surface. Gently gather it into a flat disc. Wrap the disc tightly in plastic wrap and refrigerate for at least 1 hour, or preferably 2 hours. Chilling the dough is absolutely crucial as it allows the gluten to relax, which prevents shrinkage during baking, and re-chills the butter, ensuring maximum flakiness for your future Salted Honey Pie. You can even make this dough a day or two in advance.
- Roll Out the Dough: On a lightly floured surface, roll out the chilled dough into a 12-inch circle, about ⅛-inch thick. Periodically lift and rotate the dough to prevent sticking, adding a tiny sprinkle of flour underneath if needed.
- Transfer to Pie Plate: Carefully transfer the rolled-out dough to a 9-inch pie plate. Trim the edges, leaving about a ½-inch overhang. Fold the overhang under itself and crimp the edges decoratively using your fingers or a fork.
- Chill Again: Place the pie crust-lined plate back into the refrigerator for another 30 minutes. This second chill helps to ensure the crust holds its shape beautifully during blind baking and further minimizes shrinkage.
- Blind Bake the Crust: Preheat your oven to 400°F (200°C). Line the chilled pie crust with parchment paper or aluminum foil, making sure it covers the edges to prevent them from burning. Fill the liner with pie weights, dried beans, or rice, distributing them evenly.
- First Bake: Bake for 15 minutes. Carefully remove the pie weights and parchment/foil. Prick the bottom of the crust all over with a fork. This prevents air bubbles from forming and keeps the crust flat.
- Second Bake: Return the crust to the oven and bake for another 10-12 minutes, or until the crust is lightly golden brown and dry. The bottom should look cooked through to prevent a soggy crust once the filling is added. Remove from the oven and let cool completely on a wire rack while you prepare the filling for your Salted Honey Pie.
If using a store-bought 9-inch pie crust:
- Prepare for Blind Baking: If your store-bought crust is frozen, allow it to thaw slightly according to package directions. Prick the bottom of the crust all over with a fork. This helps to prevent bubbles and ensures an even bake.
- Blind Bake the Crust: Preheat your oven to 400°F (200°C). Line the pie crust with parchment paper or aluminum foil, ensuring it covers the edges to prevent them from burning. Fill the liner with pie weights, dried beans, or rice.
- First Bake: Bake for 12-15 minutes. Carefully remove the pie weights and parchment/foil.
- Second Bake: Return the crust to the oven and bake for another 8-10 minutes, or until the crust is lightly golden brown and looks dry. This step is crucial for preventing a soggy bottom once the delectable Salted Honey Pie filling is poured in. Remove from the oven and let cool completely on a wire rack.
Crafting the Irresistible Salted Honey Pie Filling
- Whisk Wet Ingredients: In a large mixing bowl, whisk together the 3 large eggs, 2 tablespoons of heavy cream, and 1 teaspoon of vanilla extract until well combined and slightly frothy. Set aside.
- Combine Sweeteners and Butter: In a medium saucepan over medium heat, combine the 1 cup of honey, ½ cup of granulated sugar, ½ cup of light corn syrup, and ½ cup of melted unsalted butter. Stir continuously until the sugar is fully dissolved and the mixture is smooth and warm. Do not let it boil vigorously; a gentle simmer is fine. This process warms everything up and ensures a consistent texture for the filling of your Salted Honey Pie.
- Temper the Eggs: This is a critical step to prevent the eggs from scrambling. Slowly drizzle about half of the warm honey mixture into the egg mixture while continuously whisking. This gradually raises the temperature of the eggs without cooking them instantly.
- Combine All Ingredients: Once the eggs are tempered, pour the tempered egg mixture back into the saucepan with the remaining warm honey mixture. Whisk continuously until everything is thoroughly combined and smooth.
- Add Salt: Stir in the 1 teaspoon of fine sea salt. Taste a tiny bit of the filling (carefully, it’s warm!) and adjust salt if desired. The salt is what truly makes this a “Salted Honey Pie,” balancing the sweetness and enhancing the complex flavors of the honey.
- Strain the Filling: For an incredibly silky-smooth filling, pour the entire mixture through a fine-mesh sieve into a clean bowl or directly into your cooled, blind-baked pie crust. This removes any tiny bits of cooked egg or undissolved sugar, ensuring a perfect texture every time.
Baking Your Salted Honey Pie to Golden Perfection
- Preheat Oven: Adjust your oven rack to the lower-middle position and preheat your oven to 350°F (175°C).
- Pour Filling into Crust: Carefully pour the strained Salted Honey Pie filling into your cooled, blind-baked pie crust. Fill it almost to the very top, leaving just a tiny bit of space.
- Prepare for Baking: If your pie crust edges are getting too dark too quickly, you can cover them loosely with aluminum foil or use a pie shield. This prevents over-browning of the crust while the filling bakes.
- Bake the Pie: Carefully transfer the pie to the preheated oven. Bake for 45-60 minutes. The exact baking time can vary depending on your oven and the specific depth of your pie plate.
- Check for Doneness: The pie is done when the edges are set and slightly puffed, but the very center still has a slight wobble, like a firm gelatin. If you insert a thin knife or skewer about an inch from the edge, it should come out clean. The internal temperature in the center should register around 180°F (82°C) if you have an instant-read thermometer. Be careful not to overbake, as this can make the pie tough and prone to cracking. The residual heat will continue to cook the center as it cools.
- Prevent Over-Browning: If the pie crust or the top of the filling starts to brown too much before the center is set, loosely tent the entire pie with aluminum foil.
Cooling and Finishing Your Salted Honey Pie
- Cool Completely: Once baked, carefully remove the Salted Honey Pie from the oven and place it on a wire rack to cool completely. This is perhaps the most crucial step for achieving the perfect consistency. The pie needs several hours to set properly at room temperature – at least 3-4 hours, but ideally even longer, up to 6 hours. Resist the temptation to cut into it too early! If you slice it while it’s still warm, the filling will be too runny.
- Optional Refrigeration: If you prefer, after cooling for a few hours at room temperature, you can refrigerate the pie for another hour or two to firm it up even more, especially on a very warm day. However, it’s often best enjoyed at room temperature for the fullest flavor.
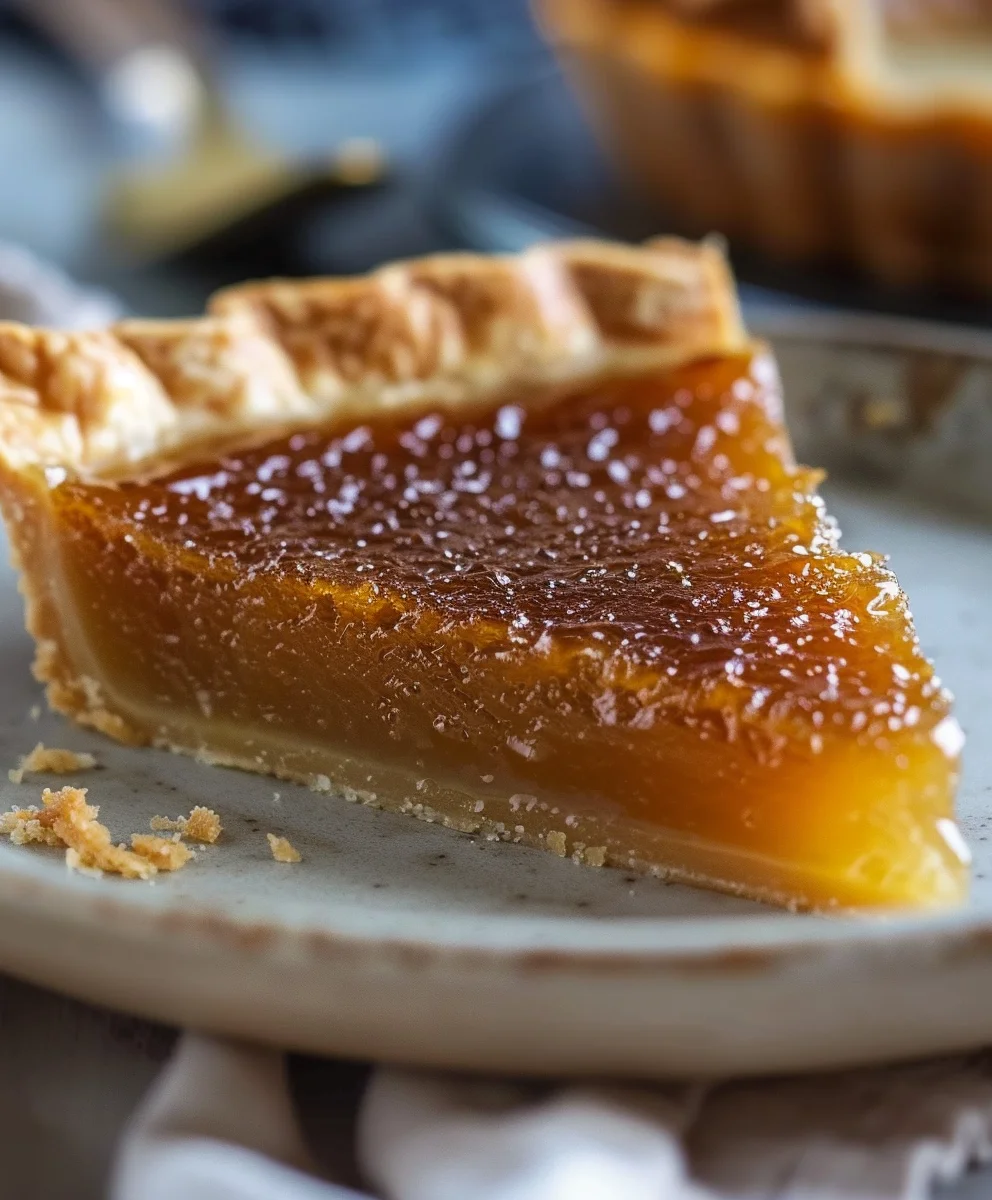
- Garnish and Serve: Just before serving, if desired, sprinkle a pinch of flaky sea salt over the top of each slice. This extra salt really elevates the flavor profile and adds a beautiful textural contrast to the sweet, smooth filling. Serve slices of your beautiful Salted Honey Pie on its own, or with a dollop of fresh whipped cream or a scoop of vanilla bean ice cream. The creamy complements pair wonderfully with the rich honey flavor.
- Storage: Leftover Salted Honey Pie can be stored covered at room temperature for up to 2 days, or in the refrigerator for up to 4 days. I find it tastes best within the first two days, as the crust remains crispest.
Conclusion:
If there’s one recipe I truly implore you to try, it’s this incredible creation. We’ve journeyed through the steps, imagined the golden crust and the shimmering, custardy filling, and now it’s time to bring it all to life in your own kitchen. This isn’t just any dessert; it’s an experience, a symphony of flavors that will surprise and delight every single person lucky enough to get a slice. The magic of this pie lies in its perfect balance – that exquisite dance between the deep, comforting sweetness of honey and the sharp, intriguing counterpoint of sea salt. It transforms humble ingredients into something truly extraordinary, something that feels both deeply familiar and wonderfully novel all at once. I promise you, once you taste the rich, almost caramel-like depth of the filling, encased in a flaky, buttery crust, you’ll understand why I’m so passionate about it. This isn’t merely a pie; it’s a revelation, an instant classic that will have your friends and family begging for the recipe. It’s comforting, sophisticated, and undeniably memorable, making it the perfect showstopper for any gathering, or simply a luxurious treat for a quiet evening at home. Preparing this Salted Honey Pie is a truly rewarding endeavor, and the aroma alone will make your kitchen the most inviting place on earth.
Serving Suggestions & Delightful Pairings
Once your magnificent creation has cooled and set, allowing all those beautiful flavors to meld, the moment of truth arrives. While this pie is absolutely divine served just as it is, perhaps slightly warmed to bring out its gooey, luscious texture, there are a few ways to elevate the experience even further. A generous scoop of vanilla bean ice cream melting gently into a warm slice is a classic pairing for a reason – the cool creaminess perfectly complements the rich pie. Alternatively, a dollop of freshly whipped cream, perhaps infused with a hint of vanilla or a whisper of bourbon, adds an elegant lightness. For an extra touch of sophistication, consider garnishing each slice with a few additional flakes of sea salt, or a delicate drizzle of your favorite honey, perhaps a darker varietal to contrast with the pie’s filling. A scattering of toasted pecans or candied walnuts can also introduce a delightful textural crunch. Don’t forget about the beverage pairing! A robust cup of coffee, a fragrant Earl Grey tea, or even a delightful dessert wine like a late-harvest Riesling would all make for perfect companions to this sweet and salty masterpiece. The versatility of this Salted Honey Pie means it adapts beautifully to your preference, whether you prefer it simple or adorned.
Creative Variations to Make It Your Own
While the classic version is undeniably perfect, part of the joy of baking is experimenting and making a recipe truly your own. If you’re feeling adventurous, there are several fantastic variations you can explore. For a truly grown-up twist, try adding a tablespoon or two of good quality bourbon or dark rum to the filling mixture – the alcohol adds a wonderful depth and warmth that plays beautifully with the honey. Citrus zest is another excellent addition; a teaspoon of finely grated orange or lemon zest can brighten the flavor profile beautifully, cutting through the richness with a zesty spark. Consider experimenting with different types of honey as well. While a good clover or wildflower honey is excellent, a darker, more robust honey like buckwheat or chestnut honey will lend a deeper, more molasses-like flavor to your pie. You could also play with the crust; a spiced crust with a touch of cinnamon or nutmeg, or even a nutty crust using finely ground almonds or pecans, would add another layer of complexity. For individual servings, bake the filling in smaller tartlet shells – they’re adorable, easy to serve, and perfect for dinner parties. Don’t be afraid to get creative; this recipe is robust enough to handle a little playful experimentation!
So, there you have it – my heartfelt encouragement to dive into your kitchen and create this spectacular dessert. You absolutely have to try this Salted Honey Pie! It’s more than just a recipe; it’s a gateway to creating unforgettable moments and truly incredible flavors. I guarantee it will become a cherished addition to your baking repertoire, and a pie that your loved ones will request again and again. Once you’ve baked it, please don’t keep the experience to yourself! I’d absolutely love to hear about your baking adventures and see your beautiful creations. Share your thoughts, your photos, and any creative twists you tried in the comments below. Let’s celebrate the joy of baking together!
Salted Honey Pie
A pie that dances on your taste buds, hitting all the right notes with a symphony of sweet, rich honey, perfectly balanced by a delicate whisper of sea salt. It’s a sophisticated twist on classic comfort, promising an unforgettable dessert experience.
Ingredients
-
2 ½ cups (300g) all-purpose flour
-
1 teaspoon fine sea salt (for crust)
-
1 cup (226g) unsalted butter, very cold and cut into ½-inch cubes
-
½ cup (120ml) ice water, plus more if needed
-
1 cup (340g) good quality honey
-
½ cup (100g) granulated sugar
-
½ cup (120ml) light corn syrup
-
½ cup (113g) unsalted butter, melted (for filling)
-
3 large eggs, at room temperature
-
2 tablespoons heavy cream
-
1 teaspoon vanilla extract
-
1 teaspoon fine sea salt (for filling)
-
Flaky sea salt (like Maldon) for sprinkling (optional)
-
Fresh whipped cream or vanilla bean ice cream (optional)
Instructions
-
Step 1
For Homemade: Whisk 2½ cups flour with 1 tsp salt. Cut in 1 cup cold cubed butter until pea-sized. Gradually add ½ cup ice water, mixing until dough forms. Form a disc, wrap, and chill 1-2 hours. Roll dough to 12-inch circle, transfer to 9-inch pie plate, trim, crimp edges, and chill 30 mins. For Store-Bought: Thaw if frozen and prick bottom. -
Step 2
Preheat oven to 400°F (200°C). Line crust with parchment/foil, fill with pie weights. Bake 15 mins (homemade) or 12-15 mins (store-bought). Remove weights/liner, prick crust, then bake another 10-12 mins (homemade) or 8-10 mins (store-bought) until lightly golden. Cool completely. -
Step 3
In a bowl, whisk 3 eggs, 2 tbsp heavy cream, and 1 tsp vanilla. In a medium saucepan, combine 1 cup honey, ½ cup granulated sugar, ½ cup light corn syrup, and ½ cup melted butter; heat over medium, stirring until sugar dissolves. -
Step 4
Slowly drizzle half of warm honey mixture into egg mixture, whisking constantly. Pour tempered egg mixture back into saucepan; whisk until smooth. Stir in 1 tsp fine sea salt. -
Step 5
Pour filling through a fine-mesh sieve into the cooled, blind-baked pie crust. -
Step 6
Preheat oven to 350°F (175°C). Carefully transfer pie to oven. Bake 45-60 minutes. Pie is done when edges are set with a slight wobble in the center (internal temp ~180°F/82°C). Loosely tent with foil if crust or top browns too quickly. -
Step 7
Cool completely on a wire rack for 3-6 hours to set. Do not cut early. Garnish with flaky sea salt, whipped cream, or vanilla bean ice cream before serving. -
Step 8
Store leftovers covered at room temperature for up to 2 days, or refrigerated for up to 4 days.
Important Information
Nutrition Facts (Per Serving)
It is important to consider this information as approximate and not to use it as definitive health advice.
Allergy Information
Please check ingredients for potential allergens and consult a health professional if in doubt.