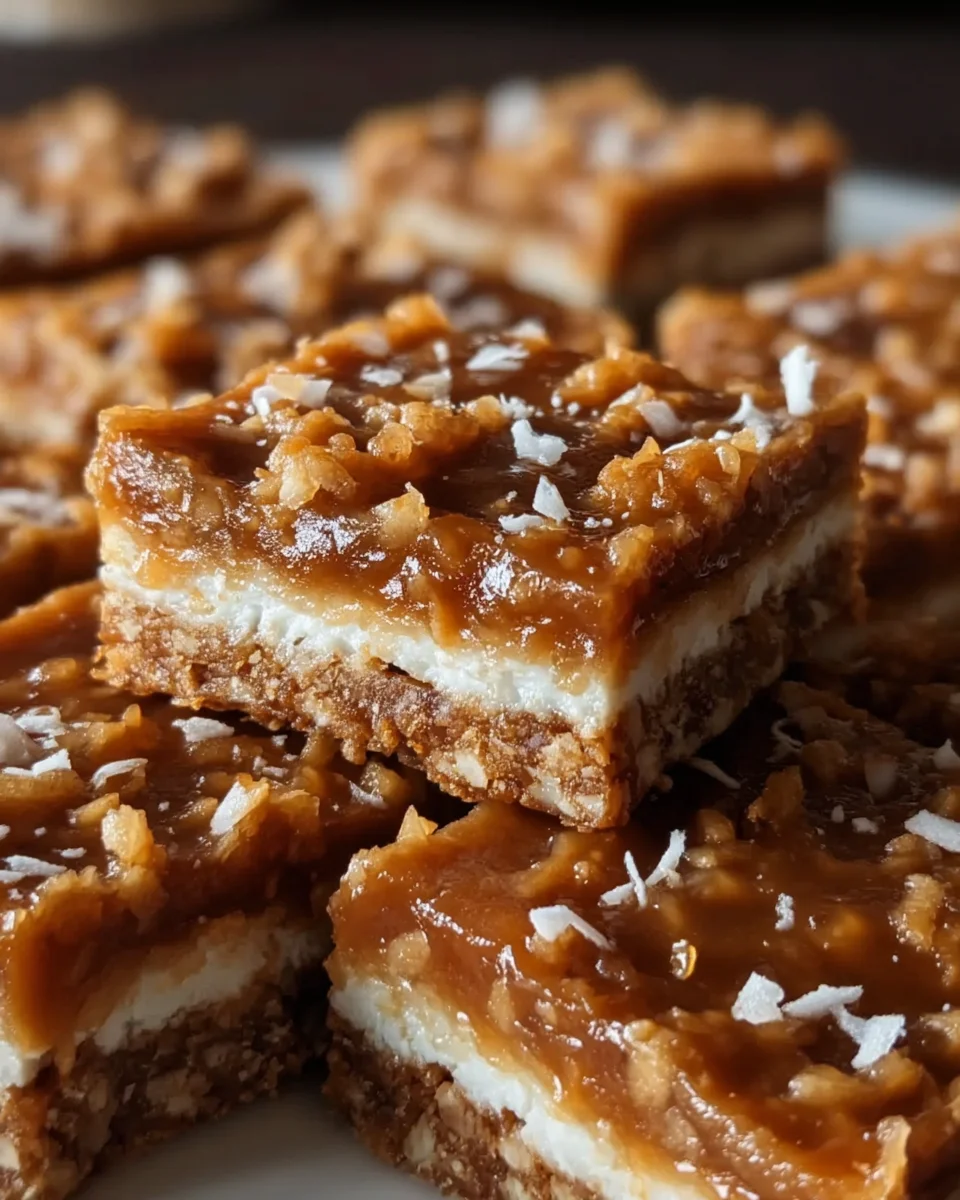
Coconut Toffee Bars are more than just a dessert; they are a symphony of textures and flavors that promise pure indulgence with every single bite. Imagine a rich, buttery shortbread crust providing the perfect foundation for a gooey, caramel-like toffee layer, all crowned with a generous sprinkle of golden, toasted coconut. While classic toffee has a comforting history rooted in British confectionery traditions, this delightful iteration introduces a wonderful tropical elegance, expertly marrying the familiar sweetness of toffee with the exotic chewiness and aroma of coconut.
People absolutely adore this dish because it masterfully balances contrasting textures – the crispness of the base, the satisfying chew of the toffee, and the delicate flakiness of the coconut – creating an unforgettable sensory experience. It’s a remarkably convenient treat to prepare, yet it consistently delivers a sophisticated taste that’s perfect for sharing at potlucks, holiday gatherings, or simply elevating an afternoon coffee break. I promise you, once you bake your first batch of these incredible Coconut Toffee Bars, they will undoubtedly become a much-loved staple in your recipe collection.

Ingredients:
Oh, my dear baking enthusiast, get ready to gather these glorious components for your magnificent Coconut Toffee Bars! Each ingredient plays a crucial role in creating layers of pure bliss.
For the Buttery Shortbread Crust:
- 1 ½ cups (180g) all-purpose flour: The foundation of our bar, providing structure and a tender crumb.
- ½ cup (100g) granulated sugar: Just enough sweetness to balance the richness.
- ¼ teaspoon salt: A pinch to enhance all the other flavors.
- ¾ cup (1 ½ sticks or 170g) unsalted butter, very cold and cut into small cubes: The secret to a perfectly flaky and tender shortbread. Cold butter is non-negotiable!
For the Irresistible Coconut Filling:
- 1 (14-ounce / 397g) can full-fat sweetened condensed milk: This is the magic binder that makes our coconut filling wonderfully gooey and sweet.
- 4 cups (340g) sweetened shredded coconut: The star of the show, delivering that unmistakable tropical flavor and chewy texture.
- 1 teaspoon pure vanilla extract: A fragrant hug that complements the coconut beautifully.
For the Rich Homemade Toffee Topping:
- ¾ cup (1 ½ sticks or 170g) unsalted butter: The base for our luscious toffee, giving it that incredibly rich mouthfeel.
- ½ cup (100g) granulated sugar: For sweetness and to achieve that beautiful glassy texture when cooked.
- ¼ cup (50g) packed light brown sugar: Adds a deeper, more complex caramel note to the toffee.
- ¼ cup (60ml) heavy cream (36% fat or higher): Essential for creaminess and to help prevent the toffee from becoming too hard.
- ½ teaspoon salt: Just a touch to balance the sweetness and deepen the toffee flavor.
- 1 teaspoon pure vanilla extract: Added at the very end to preserve its delicate flavor.
Optional Garnish:
- ¼ cup (about 30g) finely chopped pecans or walnuts: For a delightful crunch and nutty counterpoint, sprinkled on top of the warm toffee.
- 2 ounces (56g) dark chocolate, melted: For a decadent drizzle, if you’re feeling extra fancy!
Equipment You’ll Need:
Having the right tools makes all the difference, my friend!
- 9×13 inch baking pan: The perfect size for these bars.
- Parchment paper: Absolutely crucial for easy lifting and clean cutting.
- Large mixing bowls: For combining ingredients for each layer.
- Electric mixer (stand or hand-held): Helpful for the crust, but a pastry blender or even your fingertips work too.
- Measuring cups and spoons: Precision is key in baking!
- Saucepan (heavy-bottomed is best): For making the toffee topping.
- Whisk or rubber spatula: For stirring the toffee.
- Candy thermometer: Highly recommended for consistent toffee results.
- Offset spatula or butter knife: For spreading the topping.
- Wire rack: For cooling the bars completely.
Phase 1: Crafting the Buttery Shortbread Crust
Let’s begin with the foundation, a tender and buttery shortbread crust that will perfectly cradle our other layers. This step is all about achieving that delightful crumbly texture.
- Preheat and Prepare Your Pan: First things first, preheat your oven to 350°F (175°C). Then, line your 9×13 inch baking pan with parchment paper, making sure to leave an overhang on the longer sides. This overhang acts as “handles” later on, allowing you to lift the entire batch of bars out of the pan with glorious ease for clean slicing. Trust me, this little trick is a game-changer!
- Combine Dry Ingredients: In a large mixing bowl, whisk together the 1 ½ cups of all-purpose flour, ½ cup of granulated sugar, and ¼ teaspoon of salt. Give it a good whisk to ensure everything is evenly distributed. We’re creating the dry base for our shortbread.
- Incorporate the Cold Butter: Now for the fun part! Add the ¾ cup of very cold, cubed unsalted butter to your dry ingredients. Here’s a little secret: cold butter is your best friend for a tender shortbread. You can use a pastry blender, a fork, or even your fingertips to cut the butter into the flour mixture. Work quickly to prevent the butter from getting too warm. You’re aiming for a mixture that resembles coarse crumbs, almost like wet sand, with some pea-sized pieces of butter still visible. These little bits of butter are what create steam during baking, giving us that wonderfully flaky texture.
- Press into the Pan: Once your mixture is ready, pour it into your prepared parchment-lined baking pan. Using your hands or the bottom of a flat glass, press the mixture down firmly and evenly across the bottom of the pan. Pay special attention to the corners and edges to ensure a consistent crust thickness. A dense, compact crust is what we’re after here.
- Bake the Crust: Pop the pan into your preheated oven and bake for 15-18 minutes, or until the edges are just beginning to turn a beautiful light golden brown. It should smell wonderfully buttery in your kitchen! This pre-baking step is crucial as it helps set the crust and prevents it from becoming soggy once the filling is added. When it’s done, carefully remove the pan from the oven and set it aside. Leave the oven on, as we’ll be using it again very soon!
Phase 2: Preparing the Irresistible Coconut Filling
While our crust is doing its thing, let’s get the star of our show ready: the sweet, chewy, and utterly irresistible coconut filling. This layer provides that tropical escape in every bite.
- Mix the Filling Ingredients: In a separate medium-sized mixing bowl, combine the entire 14-ounce can of full-fat sweetened condensed milk, 4 cups of sweetened shredded coconut, and 1 teaspoon of pure vanilla extract. Use a sturdy spoon or a rubber spatula to mix everything together thoroughly. You want every strand of coconut to be glistening with that sweet condensed milk. This ensures an even distribution of flavor and moisture throughout the filling.
- Spread Over the Warm Crust: Carefully and evenly spread the coconut filling mixture over the warm, pre-baked shortbread crust. Take your time to gently spread it all the way to the edges of the pan. It might seem like a lot of coconut, but trust me, it will bake down into a perfectly thick and satisfying layer. You can use the back of a spoon or an offset spatula to smooth it out.
Phase 3: Baking the Bars to Golden Perfection
Now, let’s bring these layers together in the oven, allowing them to meld into a cohesive, golden-brown delight. Patience is a virtue here, as we want that coconut to toast up just right.
- Bake the Assembled Bars: Return the pan to your 350°F (175°C) oven. Bake for another 25-30 minutes, or until the coconut topping is beautifully golden brown and the edges are bubbling slightly. Keep a close eye on it during the last 10 minutes, as coconut can go from perfectly golden to burnt very quickly due to its high sugar content. The filling should also appear set in the center. Once it’s beautifully golden, remove the pan from the oven.
- Cool Completely (Crucial!): This is arguably one of the most important steps for success, my friend! Allow the bars to cool completely in the pan on a wire rack. I mean completely. This could take anywhere from 2 to 3 hours, or even longer, depending on your kitchen’s temperature. You can even pop them in the refrigerator for about an hour once they’ve reached room temperature to speed up the process. Resist the urge to add the toffee topping until the bars are fully cooled and firm. If you try to add warm toffee to warm bars, you’ll end up with a messy, gooey disaster instead of distinct layers. We want clean lines and set layers!
Phase 4: Whipping Up the Homemade Toffee Topping
While the bars are cooling, we’ll dive into creating the crown jewel of this recipe: a rich, buttery, homemade toffee topping. This step requires a little focus, but the reward is immense!
- Prepare Your Toffee Base: In a heavy-bottomed 2-quart saucepan, combine the ¾ cup of unsalted butter, ½ cup of granulated sugar, ¼ cup of packed light brown sugar, ¼ cup of heavy cream, and ½ teaspoon of salt. A heavy-bottomed pan is best as it distributes heat more evenly, reducing the risk of scorching.
- Melt and Stir: Place the saucepan over medium heat. Stir constantly with a whisk or rubber spatula as the butter melts and the sugars dissolve. You want to make sure the sugars don’t stick to the bottom of the pan and burn. Continue stirring until the mixture comes to a full, rolling boil.
- Cook to Temperature: Once boiling, reduce the heat slightly to medium-low, just enough to maintain a steady boil. Insert your candy thermometer, making sure it doesn’t touch the bottom of the pan. Continue to cook, stirring frequently (don’t stop stirring!), until the mixture reaches 235-240°F (113-116°C). This is the “soft-ball” stage, which will give our toffee a wonderfully chewy, yet firm texture when cooled. Consistency is key here; don’t rush it and don’t stray far from the stove! If you don’t have a candy thermometer, you can test it by dropping a small amount of the hot mixture into a cup of very cold water. If it forms a soft, pliable ball that can be squished between your fingers, it’s ready. If it dissolves, it needs more cooking. If it’s hard, you’ve overcooked it.
- Remove from Heat and Add Vanilla: As soon as the toffee mixture reaches the target temperature, immediately remove the saucepan from the heat. Stir in the 1 teaspoon of pure vanilla extract. Be careful, as it might bubble up vigorously! Stir until the vanilla is fully incorporated. The aroma filling your kitchen right now will be absolutely heavenly.
Phase 5: Assembling and Finishing Your Coconut Toffee Bars
The final stretch! Now we bring all our magnificent components together to create the showstopping Coconut Toffee Bars. This is where your patience truly pays off.
- Pour and Spread the Toffee: Once your baked coconut bars are completely cool and firm, carefully pour the warm toffee topping evenly over them. Work relatively quickly here, as the toffee will start to set as it cools. Use an offset spatula or the back of a spoon to gently spread the toffee all the way to the edges, ensuring a smooth, glistening layer. If you’re adding optional chopped pecans or walnuts, sprinkle them over the warm toffee right after spreading. They will adhere beautifully as the toffee cools.
- Allow Toffee to Set: Let the bars sit at room temperature for at least 1-2 hours, or until the toffee topping is completely set and firm to the touch. You can also place the pan in the refrigerator for about 30-45 minutes to speed up the setting process. Again, complete setting is vital for clean cuts.
- Lift and Cut: Once the toffee is fully set, use the parchment paper overhang “handles” to carefully lift the entire slab of bars out of the pan and onto a cutting board. This is where that parchment paper trick truly shines!
- Slice Your Bars: Using a very sharp knife, carefully cut the slab into desired bar sizes. I usually aim for about 24 squares (3×8 cuts). For really clean cuts, especially with the toffee layer, you can gently warm your knife under hot water and wipe it dry between each cut. This helps prevent the toffee from cracking too much. Be gentle, but firm, with your cuts.
- Optional Chocolate Drizzle: If you’re opting for a chocolate drizzle, melt your dark chocolate gently (either in a microwave in 30-second increments, stirring between each, or over a double boiler). Drizzle it artistically over the cut bars. Let the chocolate set at room temperature or in the fridge for a few minutes before serving.
Tips for Success with Your Coconut Toffee Bars:
I want you to succeed spectacularly with these bars, so here are a few extra nuggets of wisdom!
-
Embrace the Cold Butter:
For the shortbread crust, always use very cold butter. This creates pockets of steam during baking, leading to a tender, crumbly texture. If your butter gets too warm while mixing, pop the bowl into the fridge for 10-15 minutes to firm it up before pressing it into the pan.
-
Patience with Cooling:
I know it’s hard to wait, but allowing the bars to cool completely before adding the toffee, and then allowing the toffee to set completely before cutting, is non-negotiable. This ensures beautiful, distinct layers and clean, non-sticky cuts. Warm bars or soft toffee will result in a messy situation.
-
Candy Thermometer is Your Friend:
For the toffee, a candy thermometer takes the guesswork out of achieving the perfect soft-ball stage. If you don’t have one, the cold water test works, but it requires a bit more practice and keen observation. If your toffee doesn’t set, it might not have been cooked long enough. If it’s too hard, it was overcooked past the soft-ball stage.
-
Don’t Overlook the Parchment Paper:
Using parchment paper with an overhang in the baking pan is a small step with a huge payoff. It makes lifting the whole slab of bars out for cutting incredibly easy and minimizes mess.
-
Storage:
Store your finished Coconut Toffee Bars in an airtight container at room temperature for up to 4-5 days. If it’s particularly humid, you might find they keep better in the refrigerator, but let them come to room temperature for the best flavor and texture before serving.
-
Personalize Your Bars:
Feel free to experiment! While pecans or walnuts are classic, you could also sprinkle a pinch of sea salt on the warm toffee for a delightful sweet and salty kick. A drizzle of melted white chocolate would also be fantastic and create a beautiful contrast. Make them your own!
Conclusion:
Well, my friends, we’ve reached the sweet finale, and I truly hope you’re as excited as I am about the prospect of sinking your teeth into these absolutely divine treats. From the moment you pull them from the oven, filling your kitchen with an intoxicating aroma, you’ll understand why this recipe for Coconut Toffee Bars isn’t just another dessert; it’s an experience. They strike that perfect balance – a buttery, crumbly shortbread base, a chewy, golden toffee layer, and the irresistible crunch of toasted coconut. It’s a symphony of textures and flavors that makes them incredibly addictive and undeniably impressive, yet surprisingly simple to make. Trust me, the minimal effort required yields maximum delight, making them an ideal candidate for any baker, novice or seasoned, looking to create something truly memorable. Each bite offers a delightful escape, a moment of pure, unadulterated pleasure that you’ll want to revisit again and again. They are truly a testament to how simple ingredients can come together to create something profoundly delicious and comforting.
Now, let’s talk about enjoying these masterpieces. While they are utterly fabulous on their own, a warm batch of these bars begs for companionship. Imagine them alongside a steaming mug of your favorite coffee, perhaps a dark roast to cut through the sweetness, or a delicate cup of herbal tea for a more subtle pairing. For an elevated dessert experience, try serving a square of a Coconut Toffee Bar slightly warmed, nestled next to a scoop of vanilla bean ice cream or a dollop of freshly whipped cream. The contrast of the warm, chewy bar and the cold, creamy topping is simply magical, creating a dessert that feels both rustic and refined. They’re also magnificent contenders for your next potluck or family gathering; arrange them artfully on a platter, and watch them disappear faster than you can say “more, please!” For a delightful afternoon treat, consider packaging a few individually in cellophane bags tied with a pretty ribbon – they make thoughtful, homemade gifts that are always appreciated and bring smiles to everyone’s faces. Consider enjoying them outdoors on a lovely afternoon, perhaps with a tall glass of iced tea or a refreshing lemonade, adding a touch of sophisticated sweetness to your al fresco moments. They’re versatile enough for any occasion, from casual snacking to elegant entertaining.
Make It Your Own: Delightful Variations!
One of the things I adore most about baking is the opportunity for creativity, and these Coconut Toffee Bars are wonderfully adaptable. Don’t be afraid to experiment! If you’re a chocolate lover, a sprinkle of mini chocolate chips over the toffee layer before baking adds another dimension of richness. Dark chocolate, milk chocolate, or even white chocolate would all be fantastic choices, each offering a unique flavor profile to complement the toffee and coconut. For an extra nutty crunch beyond the coconut, consider adding finely chopped pecans or walnuts to the toffee mixture, or sprinkling them on top along with the coconut. A pinch of sea salt flaked over the warm bars just after they come out of the oven can beautifully enhance the toffee’s sweetness and create a lovely sweet-and-salty dynamic that truly elevates the taste. You could also infuse the shortbread base with a hint of almond extract for a slightly different flavor profile, or a touch of vanilla bean paste for an even richer depth. Think about seasonal twists too; a touch of cinnamon or cardamom could add a festive warmth during colder months. The possibilities are truly endless, allowing you to tailor this recipe to your specific tastes or to surprise your guests with a new twist each time you bake them. Have fun with it; that’s what homemade treats are all about, making them uniquely yours!
So, what are you waiting for? I wholeheartedly encourage you to carve out some time in your kitchen this week and whip up a batch of these extraordinary Coconut Toffee Bars. I promise you, the aroma alone is worth the effort, and the taste? Well, that’s a whole other level of bliss that will have you reaching for just one more. Don’t keep this deliciousness a secret! Once you’ve made them, I would absolutely love to hear about your experience. Did you stick to the original recipe, or did you venture into your own creative variations? What was your favorite part of making and enjoying them? Share your photos and your feedback – let’s build a community of enthusiastic bakers who appreciate the simple joy of a truly great homemade treat. Your insights and adventures inspire me and fellow bakers alike. Happy baking, and get ready to fall in love with your new favorite dessert!
Coconut Toffee Bars
Coconut Toffee Bars are more than just a dessert; they are a symphony of textures and flavors that promise pure indulgence with every single bite. Imagine a rich, buttery shortbread crust providing the perfect foundation for a gooey, caramel-like toffee layer, all crowned with a generous sprinkle of golden, toasted coconut. This delightful iteration introduces a wonderful tropical elegance, expertly marrying the familiar sweetness of toffee with the exotic chewiness and aroma of coconut.
Ingredients
Instructions
Important Information
Nutrition Facts (Per Serving)
It is important to consider this information as approximate and not to use it as definitive health advice.
Allergy Information
Please check ingredients for potential allergens and consult a health professional if in doubt.