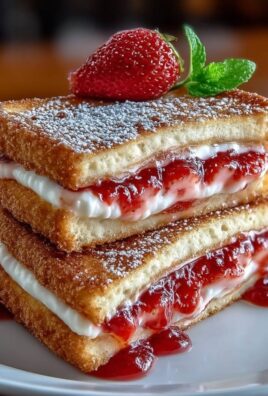
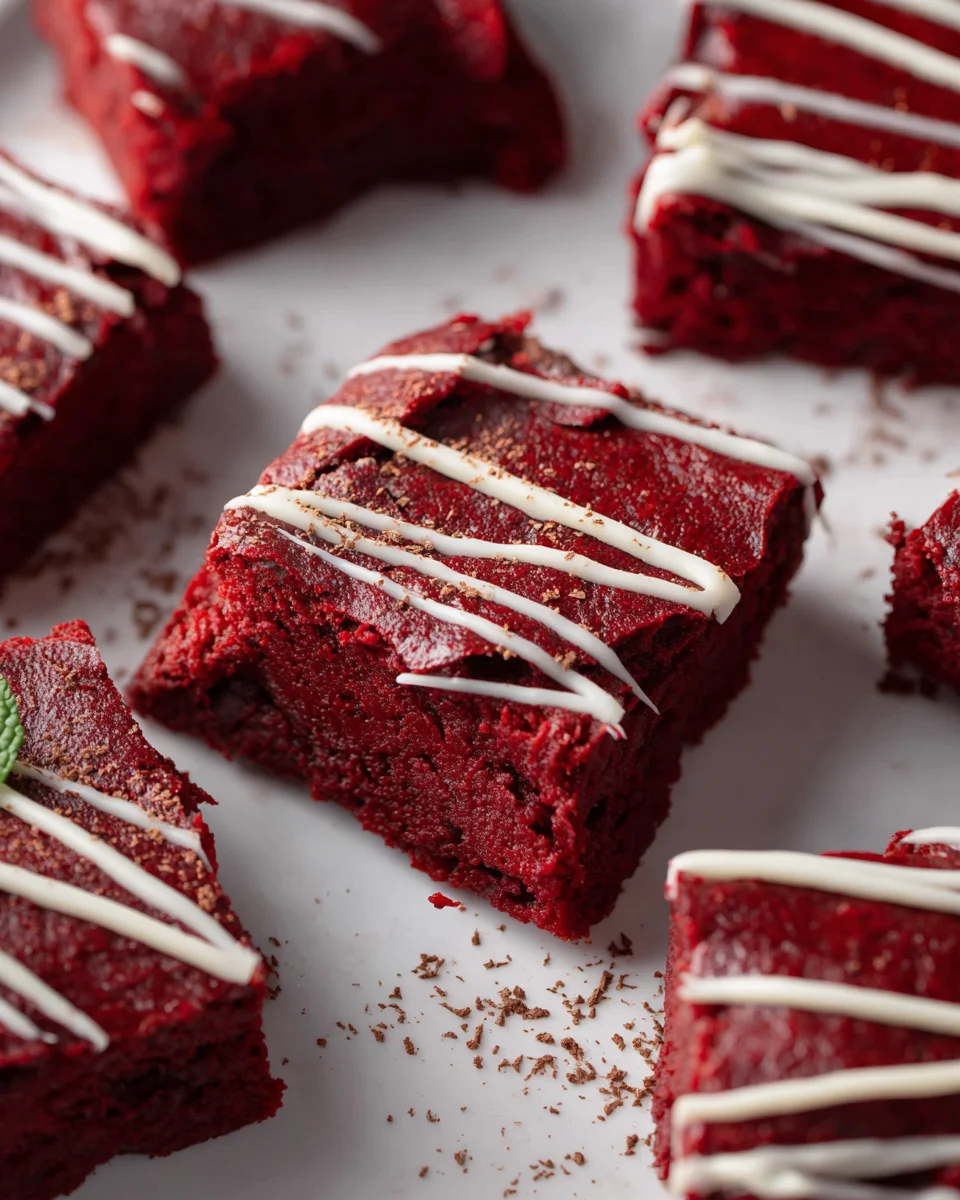
Red Velvet Brownies are more than just a dessert; they are an invitation to a truly decadent experience. For me, they represent the perfect fusion of two beloved classics. Imagine the rich, fudgy texture of your favorite brownie seamlessly married with the elegant, cocoa-kissed tang of a classic red velvet cake, all swirled into one vibrant, irresistible bite. This isn’t merely about combining two beloved treats; it’s about elevating them into something truly spectacular and unforgettable.
Historically, red velvet cake emerged as a culinary icon in the American South, captivating palates with its distinctive crimson hue and subtle chocolate notes, often enhanced by buttermilk and a touch of vinegar. Brownies, in contrast, stand as a quintessential American comfort food, cherished for their satisfying simplicity and gloriously chewy decadence. When these two legends unite, as they do in these magnificent Red Velvet Brownies, you unlock a dessert that is both visually stunning and profoundly delicious. I find that people adore this dish not only for its captivating appearance but also for its perfect balance of fudgy chewiness, moist crumb, and that sophisticated flavor profile that satisfies every craving. I am so excited to guide you through creating your own!

Ingredients:
-
For the Red Velvet Brownies:
- 1 cup (2 sticks or 226g) unsalted butter, melted
- 2 cups (400g) granulated sugar
- 4 large eggs, at room temperature
- 2 teaspoons pure vanilla extract
- 2 tablespoons unsweetened cocoa powder (natural, not Dutch-processed, for that authentic red velvet tang)
- 1 teaspoon red gel food coloring (I find gel works best for a vibrant color)
- 1 ¾ cups (210g) all-purpose flour
- ½ teaspoon baking powder
- ¼ teaspoon salt
- 1 cup (170g) white chocolate chips (or regular chocolate chips, if you prefer)
-
For the Cream Cheese Frosting:
- 8 ounces (226g) cream cheese, softened to room temperature
- ½ cup (1 stick or 113g) unsalted butter, softened to room temperature
- 4 cups (480g) powdered sugar, sifted
- 1 teaspoon pure vanilla extract
- 2-3 tablespoons milk or heavy cream, as needed (whole milk works wonderfully)
- Pinch of salt (optional, to balance the sweetness)
Preparing the Red Velvet Brownie Batter
- Preheat and Prepare Your Pan: First things first, let’s get our oven ready. Preheat your oven to 350°F (175°C). Then, grab a 9×13 inch baking pan. This is a crucial step for achieving the perfect brownie thickness and ensuring even baking. I always like to generously grease it with butter or cooking spray and then line it with parchment paper, leaving an overhang on the sides. This little trick acts as a sling, making it incredibly easy to lift the entire batch of brownies out of the pan once they’ve cooled. Trust me, it saves a lot of hassle and ensures clean slices!
- Melt the Butter: In a large, microwave-safe bowl or a saucepan over low heat, gently melt your 1 cup of unsalted butter. Once it’s fully melted and smooth, remove it from the heat and set it aside to cool slightly. We don’t want it to be scorching hot when we add the other ingredients, especially the eggs, as that could inadvertently cook them – and we definitely don’t want scrambled eggs in our brownies!
- Combine Wet Ingredients (Phase 1): Once your melted butter has cooled a bit, pour it into a very large mixing bowl. Add the 2 cups of granulated sugar to the butter. Using a whisk, stir them together until they are well combined. You’ll notice a slightly grainy, sandy texture at this stage, and that’s perfectly normal. This initial mixing helps dissolve some of the sugar and creates a foundation for our rich brownie base.
- Incorporate Eggs and Vanilla: Now, let’s bring in the eggs. Add the 4 large eggs, one at a time, to the butter and sugar mixture. After each egg addition, whisk vigorously for about 30 seconds until it’s fully incorporated and the mixture looks smooth and glossy before adding the next. This careful process emulsifies the mixture, creating a stable base and contributing to the brownies’ chewy texture. Follow this by stirring in the 2 teaspoons of pure vanilla extract. Vanilla is a flavor enhancer here, truly bringing out the richness of the red velvet profile.
- Add the Iconic Red Color and Cocoa: This is where the magic really starts to happen for our “Red Velvet Brownies”! In a small separate bowl, combine the 2 tablespoons of unsweetened cocoa powder with the 1 teaspoon of red gel food coloring. Stir them together until you form a thick, vibrant red paste. Adding the food coloring this way, directly to the cocoa, ensures that the color is evenly dispersed and incredibly intense. Once you have your paste, add it to the wet ingredients in the large bowl. Stir it in thoroughly until the entire mixture transforms into a beautiful, deep red hue. Make sure there are no streaks of unmixed color remaining. The cocoa powder is essential for that signature red velvet flavor – it’s not just about the color, but also the subtle chocolatey depth.
- Sift Dry Ingredients: In another medium-sized bowl, whisk together the 1 ¾ cups of all-purpose flour, ½ teaspoon of baking powder, and ¼ teaspoon of salt. I highly recommend sifting these dry ingredients together, especially the flour and baking powder. Sifting helps to aerate them and remove any lumps, ensuring that they are evenly distributed throughout the batter. This step is key to preventing pockets of unmixed flour and contributes to a uniform, tender crumb in your finished brownies.
- Combine Wet and Dry: Gradually add the dry ingredient mixture to the wet red velvet mixture in the large bowl. Use a spatula or a wooden spoon and fold them together gently. The most important tip here is do not overmix! Overmixing can develop the gluten in the flour too much, leading to tough, dense brownies instead of the fudgy, chewy texture we’re aiming for. Stop mixing as soon as you see no more dry streaks of flour. A few small lumps are perfectly fine.
- Fold in Chocolate Chips: Finally, gently fold in the 1 cup of white chocolate chips. These add an extra layer of sweetness and a lovely textural contrast to our “Red Velvet Brownies.” If you’re a dark chocolate fan, feel free to use semi-sweet chips here for a different flavor dynamic. Once again, fold just until they are evenly distributed throughout the batter.
- Prepare for Baking: Pour the luscious red velvet brownie batter into your prepared 9×13 inch baking pan. Use your spatula to spread the batter evenly across the pan, making sure it reaches all corners. A smooth, even surface will ensure consistent baking.
Baking the Brownies
- Bake to Perfection: Carefully place the baking pan into your preheated 350°F (175°C) oven. Bake for 28-32 minutes. Baking times can vary slightly depending on your oven, so keep a close eye on them. The key to perfect fudgy brownies is knowing when to pull them out. You want the edges to look set and slightly firm, but the center should still look a little gooey and moist.
- Test for Doneness: To check if your brownies are done, insert a wooden skewer or a toothpick into the center of the pan. When you pull it out, you want it to have moist crumbs attached, but no wet batter. If it comes out completely clean, your brownies are likely overbaked and might be dry. If it’s pure wet batter, they need more time. Aim for that perfect sweet spot of moist crumbs.
- Cool Completely: Once baked, remove the pan from the oven and place it on a wire rack to cool completely. This step is absolutely critical. Do not try to frost warm brownies! The cream cheese frosting will simply melt into a messy puddle, ruining all your hard work. Allow at least 1-2 hours, or even longer, for the brownies to cool down to room temperature. Patience is truly a virtue here. You can even pop them in the fridge for about 30 minutes once they’ve cooled mostly, just to speed up the process slightly and ensure they are firm enough for frosting.
Making the Cream Cheese Frosting
- Cream Butter and Cream Cheese: While your “Red Velvet Brownies” are cooling, you can start on our heavenly cream cheese frosting. In a large mixing bowl, using an electric mixer (either a stand mixer with the paddle attachment or a handheld mixer), beat the 8 ounces of softened cream cheese and ½ cup of softened unsalted butter together on medium speed until the mixture is incredibly smooth and creamy, with no lumps of cream cheese visible. This should take about 2-3 minutes. Make sure both ingredients are truly at room temperature; this is essential for a lump-free, silky frosting.
- Add Powdered Sugar: Reduce the mixer speed to low. Gradually add the 4 cups of sifted powdered sugar, one cup at a time, mixing well after each addition until fully incorporated. If you dump it all in at once, you’ll end up with a cloud of sugar dust in your kitchen! Sifting the powdered sugar beforehand is highly recommended as it prevents lumps and ensures a super smooth frosting.
- Incorporate Vanilla and Liquid: Once all the powdered sugar is mixed in, add the 1 teaspoon of pure vanilla extract and a tiny pinch of salt (if using). Then, slowly add the 2-3 tablespoons of milk or heavy cream, starting with 2 tablespoons. Beat on medium-high speed for another 1-2 minutes until the frosting is light, fluffy, and perfectly smooth. Adjust the consistency with the remaining milk or cream as needed – if it’s too thick, add a little more milk, a teaspoon at a time; if it’s too thin, you can add a bit more sifted powdered sugar. You’re looking for a spreadable, yet firm, consistency that will hold its shape beautifully on top of your brownies.
Assembling and Serving Your Red Velvet Brownies
- Frosting the Brownies: Once your “Red Velvet Brownies” are completely cool – and I mean completely! – it’s time for the crowning glory: the cream cheese frosting. Using the parchment paper overhangs, carefully lift the cooled brownie slab out of the baking pan and transfer it to a cutting board or a serving platter. Spread the cream cheese frosting evenly over the top of the brownies using an offset spatula or the back of a spoon. You can create beautiful swirls or keep it smooth, depending on your preference. I love a rustic swirl, it adds a homemade charm!
- Chill for Setting: For the cleanest cuts and to allow the frosting to set slightly, I highly recommend chilling the frosted brownies in the refrigerator for at least 30 minutes. This step makes slicing much easier and prevents the frosting from smearing.
- Slice and Serve: After chilling, remove the brownies from the refrigerator. Using a sharp knife, slice your “Red Velvet Brownies” into squares. For extra clean cuts, wipe your knife with a warm, damp cloth between each slice. This keeps the frosting from sticking to the knife and ensures every piece looks picture-perfect.
- Optional Garnish and Storage: These brownies are absolutely divine as they are, but if you want to add a little extra flair, consider sprinkling some leftover red velvet brownie crumbs (if you trimmed the edges), finely chopped white chocolate, or a few festive sprinkles on top. Store any leftover “Red Velvet Brownies” in an airtight container in the refrigerator for up to 3-4 days. The cream cheese frosting necessitates refrigeration to keep it fresh and delicious. They are actually fantastic when enjoyed cold, straight from the fridge, or allowed to come to room temperature for about 15-20 minutes for a softer frosting. Every bite is a delightful combination of moist, chocolatey red velvet and tangy, sweet cream cheese – a truly irresistible treat that is perfect for any occasion, from a casual dessert to a festive gathering. Enjoy the fruits of your labor!
Conclusion:
Well, my friends, we’ve reached the sweet end of our journey, and I genuinely hope you’re as excited as I am about what we’ve discovered. This isn’t just another brownie recipe; it’s a vibrant celebration of flavor and texture that truly stands out. I’ve found that the sheer joy of biting into one of these incredibly rich, supremely fudgy squares is unparalleled. Imagine that perfect balance: the deep, subtle cocoa notes dancing with the delicate tang of buttermilk, all wrapped up in an impossibly moist and tender crumb. It’s an elevated classic, bringing all the beloved charm of red velvet cake into a more accessible, intensely satisfying brownie form. This recipe isn’t just about creating a dessert; it’s about crafting an experience that delights the senses and brings a smile to every face lucky enough to try a piece. The visual appeal alone, with its stunning ruby hue, makes it an instant showstopper at any gathering, promising an unforgettable treat even before the first bite.
What makes this particular recipe a true must-try is its remarkable ability to deliver maximum impact with relatively minimal effort. You don’t need to be a pastry chef to achieve these spectacular results. The process is straightforward, forgiving, and incredibly rewarding, making it perfect for both seasoned bakers and eager beginners. There’s a magic in seeing that batter transform, in smelling the rich aroma filling your kitchen, and finally, in pulling out a perfectly baked tray of pure deliciousness. These aren’t just brownies; they are a statement. They’re a testament to how simple ingredients, when combined with a little care and a fantastic recipe, can produce something truly extraordinary. Trust me, once you experience the deep, chocolatey richness and the signature red velvet tang in this fudgy format, you’ll wonder how you ever lived without them.
Now, let’s talk about enjoying your magnificent creation. While these brownies are absolutely divine on their own, a warm square served with a generous scoop of good quality vanilla bean ice cream is a classic pairing that’s hard to beat. The cold, creamy ice cream beautifully contrasts with the warm, rich brownie, creating a symphony of temperatures and textures. For a simpler touch, a dusting of powdered sugar or a dollop of freshly whipped cream can elevate them instantly. Feeling a bit fancy? Try serving them alongside a vibrant raspberry coulis or a handful of fresh berries – the tartness cuts through the richness beautifully. And don’t forget the perfect beverage! A glass of cold milk is always a comforting choice, but a robust cup of coffee or even a light dessert wine can make for an elegant accompaniment. These brownies are incredibly versatile, perfect for birthday parties, holiday gatherings, a cozy night in, or even as a thoughtful homemade gift for friends and family.
But why stop there? The beauty of baking is in experimentation! While the base recipe is perfect, you can absolutely personalize your batch. For an extra layer of decadence, consider swirling in some homemade cream cheese frosting before baking – that classic red velvet flavor gets an irresistible tangy boost. Or, if you’re a chocoholic like me, fold in some white chocolate chips, dark chocolate chunks, or even a mix of both for varying textures and bursts of sweetness. Nuts, like toasted pecans or walnuts, would also provide a lovely crunch and depth of flavor. A tiny hint of almond extract alongside the vanilla can add another dimension, or even a swirl of peppermint extract if you’re making them for the holidays. Don’t be afraid to make them your own – that’s part of the fun! No matter how you choose to serve or adapt them, the core deliciousness of these Red Velvet Brownies will shine through.
So, my fellow baking enthusiasts, what are you waiting for? I wholeheartedly encourage you to dive into your kitchen, gather your ingredients, and whip up a batch of these incredible brownies. Experience the joy of baking them, the anticipation as they cool, and most importantly, the sheer delight of tasting your first bite. I promise, it’s a truly rewarding endeavor. Once you’ve made them, I would absolutely love to hear about your experience! Did you add a special twist? How did your family and friends react? Please share your thoughts, your photos, and your triumphs with us. Let’s celebrate the magic of homemade treats together. Happy baking, and get ready to fall in love with your new favorite dessert!
Ultimate Red Velvet Brownies: Fudgy, Rich & Easy Recipe
Red Velvet Brownies are more than just a dessert; they are an invitation to a truly decadent experience. Imagine the rich, fudgy texture of your favorite brownie seamlessly married with the elegant, cocoa-kissed tang of a classic red velvet cake, all swirled into one vibrant, irresistible bite.
Ingredients
Instructions
Important Information
Nutrition Facts (Per Serving)
It is important to consider this information as approximate and not to use it as definitive health advice.
Allergy Information
Please check ingredients for potential allergens and consult a health professional if in doubt.