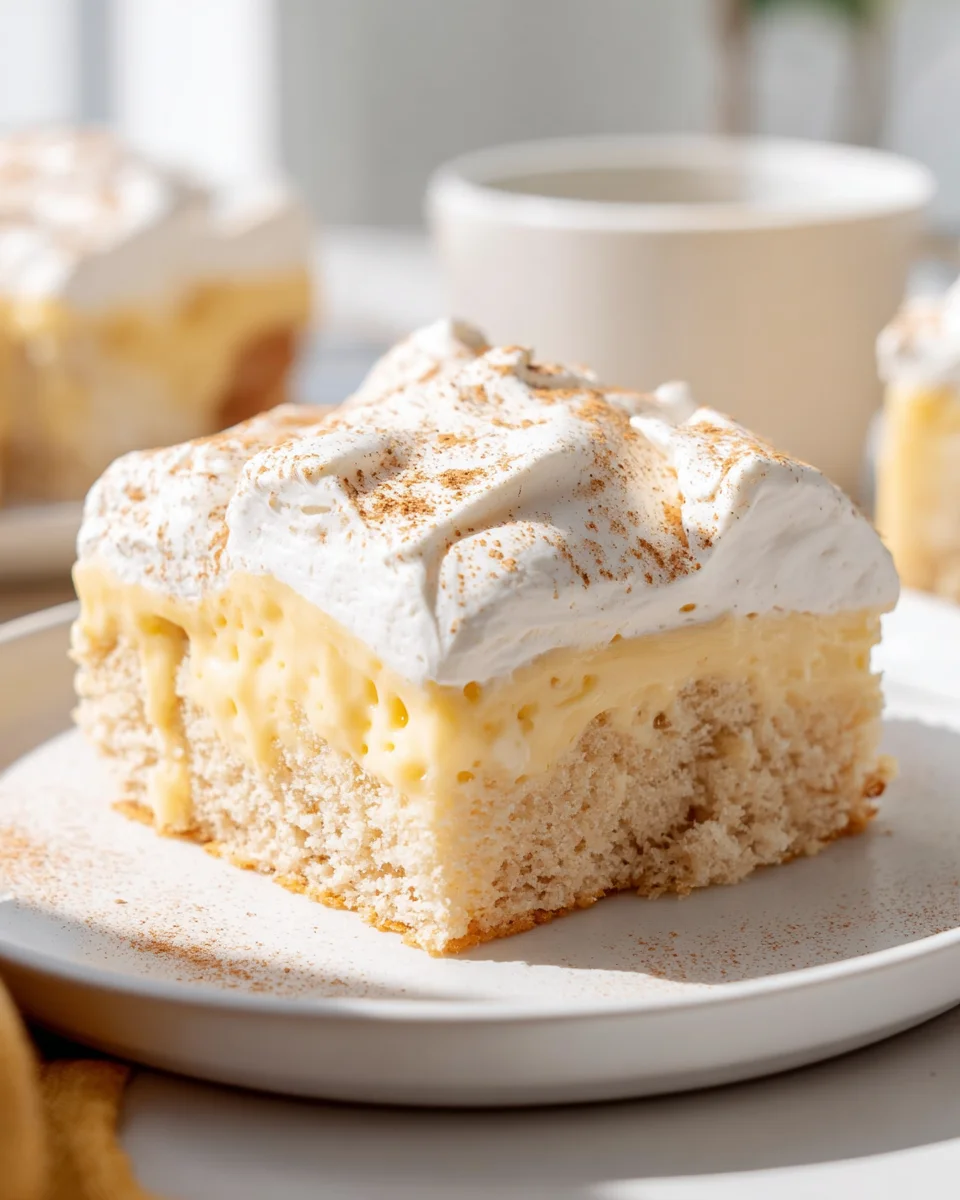
Eggnog Poke Cake is an absolute showstopper, promising to be the undisputed star of your holiday dessert table this season. Imagine a delightfully moist, tender cake infused with the creamy, spiced richness of classic eggnog, all topped with a luscious, fluffy frosting that simply melts in your mouth. This isn’t just a cake; it’s a festive experience that beautifully captures the essence of the holidays in every single bite!
A Beloved Holiday Classic, Reimagined
While eggnog itself boasts a storied history dating back to medieval Europe, evolving into the beloved holiday beverage we cherish today, the poke cake brings a wonderfully modern and convenient twist to these traditional flavors. I find that combining the deep, nostalgic warmth of eggnog with the incredible moisture-delivery system of a poke cake creates something truly magical and utterly irresistible. It’s a brilliant way to enjoy all the festive flavors of the season in an exciting, easy-to-love format.
People absolutely adore this dish for so many wonderful reasons. Firstly, the taste is undeniably festive and comforting – a perfect balance of sweet, creamy, and warm spices like nutmeg and cinnamon that evoke cherished holiday memories. Secondly, the texture is out of this world; thanks to the generous eggnog ‘poke’ infusion, every bite is incredibly moist, tender, and decadent. And perhaps best of all, the simplicity of preparing such an impressive dessert makes the Eggnog Poke Cake a go-to for busy holiday hosts who still want to deliver that cherished homemade touch. I’m thrilled to guide you through creating this unforgettable treat!

Ingredients:
-
For the Cake Base:
- 1 (15.25 ounce) package yellow or vanilla cake mix – I find a classic yellow cake mix provides the perfect comforting canvas for our eggnog flavors, but a vanilla cake mix works beautifully too.
- 3 large eggs – Make sure these are at room temperature. Room temperature eggs emulsify better with other ingredients, leading to a more uniform and tender cake texture.
- 1 cup whole milk – While most cake mixes call for water, I always substitute whole milk to enrich the flavor and create a moister crumb. It’s a game-changer!
- 1/2 cup vegetable oil – Any neutral-flavored oil like canola or sunflower oil will work just fine here.
- 1/2 teaspoon ground nutmeg – This tiny addition to the cake batter itself is a secret weapon, providing a subtle hint of the festive flavor that will blossom later. Freshly grated is always superior if you have it!
- 1/4 teaspoon ground cinnamon (optional) – If you love a little extra spice, feel free to add this to the cake batter.
-
For the Eggnog Poke Filling:
- 2 cups high-quality full-fat eggnog – The richer the eggnog, the more decadent your cake will be. Avoid low-fat versions for this recipe, as they won’t provide the same luscious consistency and flavor.
- 1 (14 ounce) can sweetened condensed milk – This magical ingredient is the heart of our poke filling, providing both sweetness and a wonderfully creamy, thick texture that soaks beautifully into the cake.
- 1/2 teaspoon ground nutmeg – Again, freshly grated is highly recommended for the most vibrant flavor. This is crucial for truly highlighting the eggnog experience.
- 1/4 teaspoon rum extract (optional, but highly recommended) – For that authentic “spiked” eggnog taste without the alcohol, rum extract is your best friend. Start with 1/4 teaspoon and add a tiny bit more if you prefer a stronger flavor.
-
For the Dreamy Whipped Topping:
- 2 cups heavy whipping cream – Ensure this is very cold straight from the refrigerator. Cold cream whips up faster and holds its shape much better.
- 1/2 cup powdered sugar (confectioners’ sugar) – Sifted, if possible, to prevent any lumps in your smooth topping.
- 1 teaspoon pure vanilla extract – Good quality vanilla makes a huge difference in any whipped cream.
- 1/4 teaspoon rum extract (optional) – To further enhance the eggnog theme, a touch of rum extract in the topping is absolutely delightful.
-
For Garnish:
- Freshly grated nutmeg – This is non-negotiable for that final touch of beauty and aroma!
- Cinnamon sticks (optional) – A few strategically placed cinnamon sticks can make for a beautiful presentation.
Baking Your Perfect Cake Base
-
Prepare Your Pan and Oven:
First things first, let’s get our oven ready. Preheat your oven to 350°F (175°C). Then, grab a 9×13 inch baking pan. I like to lightly grease and flour my pan, or you can use a baking spray with flour. This ensures your beautiful cake releases easily once it’s baked, preventing any heartbreaking sticking incidents. You want that cake to slide right out!
-
Combine Wet Ingredients:
In a large mixing bowl, crack your three large room-temperature eggs. To them, add the 1 cup of whole milk and 1/2 cup of vegetable oil. Give these a good whisk until they are well combined and slightly frothy. Using room-temperature eggs is a trick I swear by; it helps create a smoother batter and a more tender final cake.
-
Introduce the Dry Ingredients and Spices:
Now, pour the entire package of yellow or vanilla cake mix into your wet ingredients. Don’t forget our secret weapon: the 1/2 teaspoon of ground nutmeg and the optional 1/4 teaspoon of ground cinnamon. These spices are subtle in the cake base but lay down an excellent foundation for the eggnog flavor explosion to come.
-
Mix to Perfection (but don’t overmix!):
Using an electric mixer on low speed, begin to mix the ingredients together. Once the dry ingredients are mostly incorporated, increase the speed to medium and beat for about 2 minutes. The goal here is to get a smooth batter, but be careful not to overmix. Overmixing can develop the gluten too much, leading to a tough, dry cake – and we definitely don’t want that for our moist Eggnog Poke Cake! Scrape down the sides of the bowl with a spatula to ensure everything is thoroughly combined.
-
Pour and Bake:
Carefully pour your perfectly mixed cake batter into your prepared 9×13 inch baking pan. Gently tap the pan on your counter a couple of times to release any large air bubbles. Pop it into your preheated oven. Bake for approximately 28-32 minutes, or until a wooden skewer or toothpick inserted into the center comes out clean. Ovens vary, so keep a close eye on it, especially around the 28-minute mark. The top should be golden brown and spring back when lightly touched.
-
Cooling is Crucial:
Once baked, remove the cake from the oven and place it on a wire rack to cool. This is a critical step! Allow the cake to cool in the pan for about 15-20 minutes. It needs to be warm, but not piping hot, when we add the poke filling. If it’s too hot, the filling might just sit on top; if it’s too cold, it won’t absorb as well. This short cooling period also allows the cake to set slightly, making it more resilient for the poking process.
Crafting the Irresistible Eggnog Filling
-
Combine the Stars:
While your cake is cooling, let’s get started on the truly magical part: the eggnog filling! In a medium bowl or a large liquid measuring cup, combine the 2 cups of full-fat eggnog with the entire 14-ounce can of sweetened condensed milk. These two ingredients form the glorious base of our rich and creamy poke mixture.
-
Infuse with Flavor:
Now, let’s add those essential festive flavors. Stir in the 1/2 teaspoon of freshly grated nutmeg. Trust me, the aroma alone will transport you! If you’re using it, add the 1/4 teaspoon of rum extract now. Give everything a good whisk until it’s completely smooth and homogeneous. You want no streaks of condensed milk remaining.
-
Gently Heat (Optional, but Recommended for Absorption):
Although some recipes skip this, I find that gently warming the eggnog filling ever so slightly (just barely lukewarm) helps it to soak into the cake even more beautifully. You can do this by placing the bowl over a pot of simmering water (bain-marie style) for a few minutes, stirring occasionally, or very carefully in the microwave for short bursts (30 seconds at a time, stirring between) until just warm to the touch. Do not boil this mixture, we just want to take the chill off and slightly thin it out for better absorption. This step makes a noticeable difference in how deeply the flavor penetrates the cake.
-
The Art of Poking:
Once your cake has cooled for 15-20 minutes, it’s time for the “poke” part of our Eggnog Poke Cake! Grab something to make your holes. A wooden spoon handle is my go-to, but a chopstick or even the blunt end of a skewer works wonderfully. You want holes that are about 1/2 to 3/4 inch in diameter. Carefully and evenly poke holes all over the surface of the cake, aiming for about 1 inch apart. Try to go almost all the way to the bottom of the cake, but not through it. The more holes you have, the more pockets of delicious eggnog filling you’ll create!
-
Pouring the Golden Filling:
With your holes all ready, slowly and evenly pour the eggnog mixture all over the warm, poked cake. Take your time with this. You’ll see the liquid seep into the holes and across the top. Use a spatula to gently spread any excess liquid to ensure it covers the entire surface and finds all the little crevices. Don’t rush this step; allow the cake to slowly absorb all that deliciousness. You’ll literally see the cake “drink up” the filling.
-
Chilling for Maximum Absorption:
Now comes the hardest part: waiting! Cover the cake pan loosely with plastic wrap and refrigerate it for at least 4 hours, but ideally overnight. This extended chilling time is absolutely essential. It allows the cake to fully absorb the eggnog filling, transforming it into an incredibly moist and flavorful treat. The flavors will also meld and deepen beautifully. Patience truly is a virtue here!
Whipping Up a Dreamy Topping
-
Chill Your Equipment for Success:
Before you start, pop your mixing bowl (preferably a metal one) and your whisk attachment (if using a stand mixer) or beaters (if using a hand mixer) into the freezer for about 10-15 minutes. This step is crucial for perfectly whipped cream! Cold equipment helps the cream whip up faster and achieve those desirable stiff peaks that hold their shape beautifully.
-
Combine Cream, Sugar, and Extracts:
Once your equipment is chilled, pour the 2 cups of very cold heavy whipping cream into the cold bowl. Add the 1/2 cup of sifted powdered sugar, 1 teaspoon of pure vanilla extract, and the optional 1/4 teaspoon of rum extract. The rum extract here really ties the topping into our eggnog theme and adds another layer of festive flavor.
-
Whip to Stiff Peaks:
Using your electric mixer, start on low speed to prevent splattering, then gradually increase to high speed. Whip the mixture until it forms firm peaks. This means when you lift the whisk, the peaks of cream stand straight up and hold their shape. This typically takes about 3-5 minutes, but keep an eye on it! Be careful not to over-whip, or you’ll end up with butter! The texture should be light, airy, and luscious, not grainy.
-
Spreading the Topping Evenly:
Once your cake has had its long chill and is beautifully saturated with the eggnog filling, retrieve it from the refrigerator. Dollop spoonfuls of your freshly whipped cream all over the top of the cake. Using an offset spatula or the back of a spoon, gently spread the whipped topping evenly across the entire surface of the cake, creating a smooth, inviting layer. You can create soft swirls or a perfectly smooth finish, whatever look you prefer!
The Grand Finale: Assembling and Garnishing Your Eggnog Poke Cake
-
Final Chill (if time allows):
For the absolute best results and a truly stable cake, I recommend giving your fully assembled Eggnog Poke Cake one last chill in the refrigerator for at least 30 minutes after adding the topping. This helps the topping set firmly and ensures the cake is perfectly cold when served. It also allows the flavors to meld just a little bit more, creating a cohesive and harmonious dessert experience. Cold cake is key for this recipe!
-
Garnish with Spices:
Just before serving, grab your grater and a whole nutmeg. Generously grate fresh nutmeg all over the top of the whipped cream. This isn’t just for looks; the fresh nutmeg adds an incredible aroma and a vibrant burst of flavor that really elevates the eggnog experience. You can also sprinkle a tiny bit of ground cinnamon if you like that combination.
-
Optional Garnishes:
To make your Eggnog Poke Cake truly show-stopping, consider adding a few extra garnishes. A couple of whole cinnamon sticks placed strategically on the top can add a beautiful rustic touch. You could also pipe small rosettes of extra whipped cream around the edges or sprinkle with some festive sprinkles if you’re feeling extra celebratory. These small details can make a big impact on presentation.
-
Serving Tips:
When you’re ready to serve, use a sharp knife that has been run under hot water and wiped clean between each slice. This will give you nice, clean cuts and prevent the whipped topping from sticking too much. Serve slices immediately, perhaps with an extra sprinkle of nutmeg on each individual plate. Everyone will be delighted by how moist and flavorful this cake is!
-
Storage Recommendations:
Any leftover Eggnog Poke Cake needs to be stored in an airtight container in the refrigerator. Due to the dairy components, especially the whipped cream and eggnog filling, it’s essential to keep it chilled. It will stay wonderfully moist and delicious for 3-4 days. While the cake might get even moister over time, the whipped topping is best enjoyed within the first day or two. Enjoy every single festive bite of your homemade Eggnog Poke Cake!
Conclusion:
If you’ve been following along, I sincerely hope your kitchen is already filled with the delightful aromas of nutmeg, vanilla, and that unmistakable holiday cheer! This isn’t just any dessert; it’s an experience, a memory waiting to be made, and truly, a masterpiece of festive baking that’s surprisingly simple to achieve. I wholeheartedly believe this recipe is an absolute must-try for anyone looking to bring a touch of magic to their table, whether it’s for a special holiday gathering, a cozy family dinner, or simply a treat for yourself on a chilly evening.
What makes this particular creation so incredibly special, you ask? Well, for starters, it perfectly captures the rich, creamy, and subtly spiced essence of traditional eggnog, transforming it into a moist, tender cake that practically melts in your mouth. The genius of the “poke cake” method ensures that every single bite is infused with incredible flavor and an unbeatable moistness that you just won’t find in a regular cake. It’s the kind of dessert that elicits gasps of delight and immediate requests for the recipe. You get all the comfort and joy of a classic holiday drink, but in a sliceable, shareable, utterly irresistible form. Forget dry, crumbly cakes; this one stays perfectly moist for days, making it ideal for preparing ahead of time – a huge win during busy seasons! It’s also incredibly versatile, appealing to both seasoned bakers and newcomers alike, offering impressive results without requiring hours of complicated techniques. The visual appeal alone, with its luscious topping and inviting golden hue, is enough to make it the star of any dessert spread. The delightful texture, a perfect harmony between fluffy cake and creamy filling, truly sets it apart, creating a luxurious mouthfeel that is both comforting and indulgent.
Now, let’s talk about making this delightful creation even more uniquely yours! While the classic presentation with a sprinkle of fresh nutmeg is utterly charming, there are so many ways to elevate or adapt your Eggnog Poke Cake. For a truly decadent serving experience, I highly recommend pairing a slice with a generous dollop of freshly whipped cream, perhaps infused with a hint of vanilla or a whisper of rum extract. A light dusting of cocoa powder or a few delicate chocolate shavings could also add an elegant touch and a lovely contrasting flavor. If you’re serving it to adults, consider offering a tiny shot of quality spiced rum or brandy on the side – a delightful complement that really brings out the deeper notes of the eggnog. For a different textural element, crushed candied pecans or walnuts sprinkled over the top just before serving would be divine, adding a satisfying crunch.
Thinking about variations? The beauty of this recipe lies in its adaptability. While I adore the yellow cake base, you could absolutely experiment with a spice cake mix for an even deeper, more complex flavor profile, or even a vanilla cake mix for a lighter, more classic taste that lets the eggnog truly shine. For individual servings, consider baking the cake in cupcake tins; simply adjust the baking time and then poke and pour the eggnog mixture into each cupcake for adorable, personal-sized treats that are perfect for a party. Another fun idea for a sophisticated touch would be to lightly toast some coconut flakes and sprinkle them over the top for a tropical twist that surprisingly complements the rich eggnog flavors. You could also swirl a little bit of caramel sauce into the topping before it sets for an extra layer of sweetness and a beautiful marbled effect. Imagine a sprinkle of toasted shredded coconut over the top for an unexpected, yet delightful, textural contrast and a hint of tropical flair! And for those who love a bit of sparkle, edible glitter or festive sprinkles can transform this already stunning cake into a show-stopping centerpiece, especially during the holidays.
So, what are you waiting for? This truly is the perfect opportunity to embrace a little baking joy. I truly encourage you to roll up your sleeves, gather your ingredients, and dive into making this incredible Eggnog Poke Cake. I promise you, the smiles and compliments you’ll receive will make every moment worthwhile. Once you’ve had a chance to bake and taste this wondrous dessert, please don’t keep your experience to yourself! I would absolutely love to hear from you. Share your baking triumphs, your creative variations, or any serving suggestions you discover in the comments below or by tagging me on your favorite social media platform. Seeing your creations truly makes my day, and your insights help inspire our whole community of home bakers. Happy baking, and enjoy every single delightful bite!
Best Non-Alcohol Eggnog Poke Cake: Festive & Easy!
Eggnog Poke Cake is an absolute showstopper, promising to be the undisputed star of your holiday dessert table this season. Imagine a delightfully moist, tender cake infused with the creamy, spiced richness of classic eggnog, all topped with a luscious, fluffy frosting that simply melts in your mouth. This isn’t just a cake; it’s a festive experience that beautifully captures the essence of the holidays in every single bite!
Ingredients
Instructions
Important Information
Nutrition Facts (Per Serving)
It is important to consider this information as approximate and not to use it as definitive health advice.
Allergy Information
Please check ingredients for potential allergens and consult a health professional if in doubt.