Red Velvet Strawberry Cheesecake
Oh my goodness, where do I even begin with this masterpiece? If you’re anything like me, you adore the rich, cocoa-kissed moistness of a classic red velvet cake, and you can’t resist the creamy, tangy indulgence of a perfect cheesecake. Well, guess what? I’ve found a way to bring those two dessert titans together in one show-stopping creation: this Red Velvet Strawberry Cheesecake!
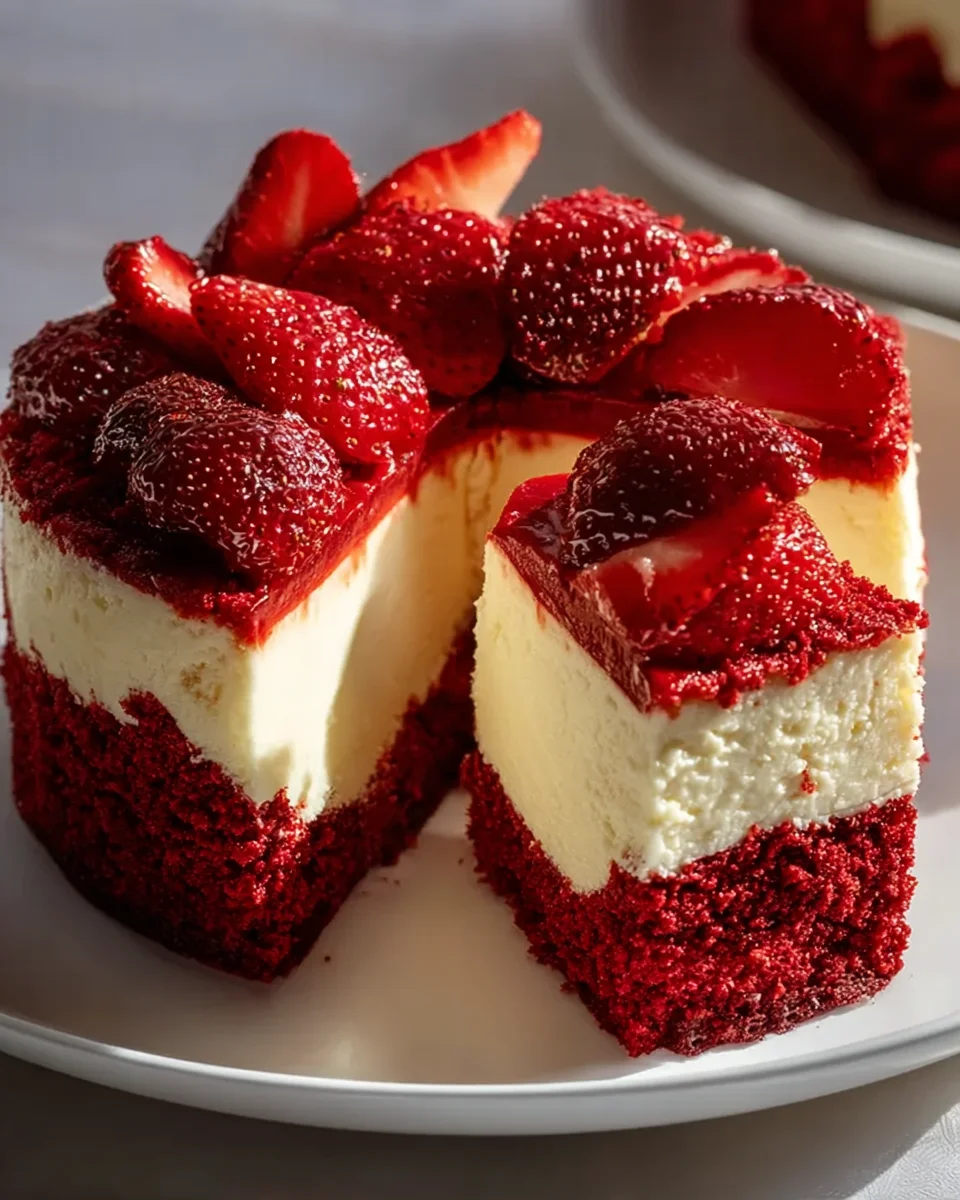
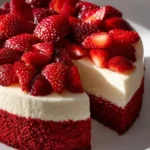
What makes this recipe so incredibly special? It’s truly the best of both worlds, offering an unparalleled flavor experience. Imagine sinking your fork into a vibrant, deep red velvet cake layer – moist and tender, with that signature hint of cocoa. Then, just above that, you hit a layer of smooth, luscious strawberry-infused cheesecake, bursting with fresh fruit flavor and that irresistible cream cheese tang. And to crown it all? A delicate topping, perhaps a cloud of whipped cream or a glossy strawberry glaze, making it an absolute feast for the eyes and the palate.
You’re going to absolutely fall in love with this one because it’s not just a dessert; it’s an experience. It’s decadent, it’s visually stunning with its vibrant layers, and it offers that perfect balance of textures and flavors – from the slightly tart cream cheese to the sweet, fresh strawberries and the comforting red velvet cake. Whether you’re making it for a special celebration, a romantic dinner, or just because you deserve an extraordinary treat, this Red Velvet Strawberry Cheesecake is guaranteed to impress and satisfy every single time. Get ready to bake something truly unforgettable!

Hello, fellow bakers! Today, I’m thrilled to share with you the secrets to creating a show-stopping Red Velvet Strawberry Cheesecake. This recipe combines the classic tang and vibrant hue of red velvet with the creamy indulgence of a cheesecake and the fresh sweetness of strawberries. It’s a truly irresistible dessert that’s perfect for any occasion, promising a delightful surprise in every bite.
Ingredient Notes
Crafting the perfect Red Velvet Strawberry Cheesecake relies on having the right ingredients and understanding their roles. Here are some key components and my top tips for choosing them:
- Full-Fat Cream Cheese: This is the backbone of your cheesecake. Always opt for full-fat block cream cheese, not the spreadable kind in a tub. It provides the essential richness, creaminess, and stability that makes a cheesecake truly spectacular. Ensure it’s at room temperature for smooth mixing and to prevent lumps.
- Granulated Sugar: Besides sweetness, sugar contributes to the cheesecake’s tender texture. Feel free to adjust slightly to your preference, but stick to the recommended amount for the best structural integrity.
- Large Eggs: Eggs act as a binder, helping the cheesecake set beautifully. Like the cream cheese, they should be at room temperature. This helps them incorporate more evenly into the batter, reducing the risk of overmixing which can lead to cracks.
- Unsweetened Cocoa Powder: For the signature red velvet flavor, a touch of unsweetened cocoa powder is essential. It provides a subtle chocolatey depth that complements the cream cheese and red coloring. I prefer natural unsweetened cocoa for its slightly brighter flavor.
- Red Food Coloring: This is where the “red” in red velvet comes from! Gel food coloring is my go-to choice as it delivers a more vibrant and concentrated color with less liquid compared to liquid food coloring. You can adjust the amount to achieve your desired shade of deep red.
- Buttermilk: Buttermilk adds a distinctive tang and helps create that tender, moist crumb typical of red velvet. If you don’t have buttermilk on hand, you can make a quick substitute by adding one tablespoon of white vinegar or lemon juice to a measuring cup, then filling the rest with regular milk to equal one cup. Let it sit for 5-10 minutes until it slightly curdles.
- Vanilla Extract: A good quality vanilla extract enhances all the other flavors in the cheesecake, adding warmth and depth.
- Sour Cream or Heavy Cream: Adding either sour cream or heavy cream to your cheesecake filling contributes to an incredibly smooth, rich texture and helps prevent cracks during baking. Make sure it’s also at room temperature.
- Chocolate Sandwich Cookies (e.g., Oreos): For the crust, I love using chocolate sandwich cookies. Their deep chocolate flavor perfectly complements the red velvet and strawberry notes. You can use the entire cookie, including the cream filling, for extra richness. For a more intense red velvet crust experience, you could even try crushing red velvet flavored cookies if you can find them!
- Unsalted Butter: Melted butter binds the cookie crumbs together for a sturdy and flavorful crust.
- Fresh Strawberries: The star of our topping! Choose ripe, firm, and vibrant red strawberries. These will provide the best flavor and visual appeal. You can slice them, halve them, or even make a simple strawberry compote or glaze for extra flair.
Step-by-Step Instructions
Let’s get baking! Follow these steps carefully to create your magnificent Red Velvet Strawberry Cheesecake:
Step 1: Prepare the Crust
- Preheat your oven to 325°F (160°C). Grease a 9-inch springform pan.
- In a food processor, pulse the chocolate sandwich cookies until they form fine crumbs. Alternatively, place them in a zip-top bag and crush them with a rolling pin.
- Transfer the crumbs to a medium bowl and stir in the melted unsalted butter until fully combined.
- Press the mixture firmly and evenly into the bottom of the prepared springform pan. You can use the bottom of a glass or your fingers to achieve a compact base.
- Bake the crust for 8-10 minutes. This helps set it and prevents it from becoming soggy. Remove from the oven and let it cool completely while you prepare the filling.
- Wrap the outside of the springform pan tightly with heavy-duty aluminum foil. This is crucial if you plan to use a water bath (which I highly recommend!).
Step 2: Make the Red Velvet Cheesecake Filling
- In a large mixing bowl, using an electric mixer on medium speed, beat the room temperature full-fat cream cheese until it’s completely smooth and creamy, about 2-3 minutes. Scrape down the sides of the bowl as needed.
- Gradually add the granulated sugar to the cream cheese, beating on medium-low speed until just combined and smooth. Be careful not to overmix.
- Beat in the unsweetened cocoa powder until no streaks remain.
- Next, add the buttermilk, sour cream (or heavy cream), and vanilla extract. Mix on low speed until just incorporated.
- Now for the color! Add the red gel food coloring. Start with a generous amount (e.g., 1-2 teaspoons) and mix on low speed until the desired vibrant red color is achieved. Add more if needed.
- Finally, add the room temperature eggs, one at a time, mixing on very low speed just until each egg is incorporated. Stop mixing as soon as the last egg is combined. Overmixing at this stage can incorporate too much air, which can lead to cracks.
Step 3: Bake the Cheesecake
- Pour the red velvet cheesecake filling over the cooled crust in the prepared springform pan. Gently tap the pan on the counter a few times to release any air bubbles.
- Place the foil-wrapped springform pan into a larger roasting pan. Carefully pour hot water into the roasting pan until it comes about halfway up the sides of the springform pan. This water bath (bain-marie) creates a moist, even baking environment, preventing cracks and ensuring a creamy texture.
- Carefully transfer the roasting pan with the cheesecake to the preheated oven.
- Bake for 55-70 minutes, or until the edges are set but the center (about 2-3 inches in diameter) still jiggles slightly when you gently shake the pan.
- Turn off the oven, prop the oven door open slightly with a wooden spoon, and let the cheesecake cool in the water bath inside the oven for 1 hour. This slow cooling also helps prevent cracks.
- Remove the cheesecake from the water bath and roasting pan. Carefully remove the foil. Let it cool completely on a wire rack at room temperature.
Step 4: Chill and Decorate
- Once completely cooled to room temperature, cover the cheesecake loosely with plastic wrap and refrigerate for at least 6-8 hours, or preferably overnight. Chilling is essential for the cheesecake to fully set and achieve its perfect dense, creamy texture.
- Before serving, carefully run a thin knife around the edge of the pan before releasing the springform sides.
- Wash and slice your fresh strawberries. Arrange them decoratively over the top of the chilled cheesecake. You can also add a dusting of powdered sugar or a dollop of whipped cream if desired.
- Slice and serve!
Tips & Suggestions
- Room Temperature is Key: I cannot stress this enough! Ensure your cream cheese, eggs, and sour cream/heavy cream are all at room temperature. This allows them to blend smoothly without lumps and prevents overmixing, which can introduce too much air and cause cracks.
- Don’t Overmix: Once you add the eggs, mix only until just combined. Overmixing develops gluten in the eggs and can make your cheesecake tough or prone to cracking. We want a smooth, creamy texture, not an airy one.
- The Water Bath is Your Friend: While an extra step, a water bath (bain-marie) is truly the secret to a perfectly smooth, crack-free cheesecake with an incredibly creamy texture. It insulates the cheesecake and provides a moist, gentle baking environment. Don’t skip it!
- Gel Food Coloring for Best Results: For that truly vibrant, deep red velvet color, opt for gel food coloring over liquid. It’s more concentrated, so you’ll use less and achieve a richer hue without thinning your batter.
- Chill Time is Non-Negotiable: I know the wait is hard, but resist the urge to cut into your cheesecake too early. A minimum of 6-8 hours (or overnight) in the refrigerator is essential for the cheesecake to fully set, firm up, and develop its best flavor and texture.
- Fresh and Ripe Strawberries: The quality of your strawberries will significantly impact the final taste. Choose berries that are bright red, firm, and fragrant for the best fresh topping.
- Flavor Variations: While delicious as is, you could lightly sweeten some pureed strawberries and swirl them into a portion of the cheesecake batter before baking for an extra burst of strawberry flavor throughout. Or, add a hint of almond extract to the filling for a slightly different aromatic profile.
Storage
Proper storage ensures your Red Velvet Strawberry Cheesecake stays fresh and delicious for days:
- Refrigeration: This cheesecake must be stored in the refrigerator. Cover it loosely with plastic wrap or aluminum foil. It will stay fresh and delicious for 4-5 days. If you’ve already sliced it, covering the cut edges with plastic wrap helps prevent them from drying out.
- Strawberry Topping: If you’re topping the entire cheesecake with strawberries, it’s best to do so just before serving, or within a few hours of serving. Strawberries can release moisture over time, which might make the crust soggy or alter the texture of the cheesecake if left on for too long. If you’ve only topped individual slices, that’s perfectly fine.
- Freezing: Red Velvet Strawberry Cheesecake freezes beautifully! For best results, freeze the cheesecake without the fresh strawberry topping.
- Whole Cheesecake: Once the cheesecake is completely chilled and firm, remove it from the springform pan. Place it on a freezer-safe plate or cardboard round. Freeze uncovered for 1-2 hours until solid. Then, wrap it tightly in several layers of plastic wrap, followed by a layer of aluminum foil. Label with the date. It can be frozen for up to 1-2 months.
- Individual Slices: Cut the cheesecake into individual slices. Place them on a baking sheet and freeze until firm. Once frozen, wrap each slice tightly in plastic wrap, then in foil. Store in an airtight container or freezer bag.
- Thawing: To thaw a frozen cheesecake (whole or slices), transfer it to the refrigerator and let it thaw slowly overnight. Once thawed, you can add your fresh strawberry topping before serving.
Final Thoughts
And there you have it! I truly believe this Red Velvet Strawberry Cheesecake is more than just a dessert; it’s an experience waiting to unfold in your kitchen. Imagine: the rich, cocoa-infused red velvet base, a lusciously creamy cheesecake layer, and the bright, fresh burst of strawberries, all perfectly harmonized. This isn’t just any cheesecake; it’s a masterpiece that balances deep flavors with refreshing notes, making it absolutely irresistible.
I promise, once you take that first bite of this Red Velvet Strawberry Cheesecake, you’ll understand why it’s a must-try. It’s beautiful to behold and even more delightful to savor. Whether you’re celebrating a special moment or simply treating yourself to something truly spectacular, this Red Velvet Strawberry Cheesecake is the perfect choice. Go ahead, gather your ingredients and prepare to create something truly memorable!
Red Velvet Strawberry Cheesecake: Easy & Irresistible
- Total Time: 1 hour 40 minutes
- Yield: 12 servings
Description
This Red Velvet Strawberry Cheesecake combines the rich flavors of red velvet cake with the creamy indulgence of cheesecake and the freshness of strawberries. It’s a visually stunning dessert that’s perfect for any occasion.
Ingredients
- Full-Fat Cream Cheese
- Granulated Sugar
- Large Eggs
- Unsweetened Cocoa Powder
- Red Food Coloring
- Buttermilk
- Vanilla Extract
- Sour Cream or Heavy Cream
- Chocolate Sandwich Cookies (e.g., Oreos)
- Unsalted Butter
- Fresh Strawberries
Instructions
- Preheat your oven to 325°F (160°C). Grease a 9-inch springform pan.
- In a food processor, pulse the chocolate sandwich cookies until they form fine crumbs. Alternatively, place them in a zip-top bag and crush them with a rolling pin.
- Transfer the crumbs to a medium bowl and stir in the melted unsalted butter until fully combined.
- Press the mixture firmly and evenly into the bottom of the prepared springform pan. You can use the bottom of a glass or your fingers to achieve a compact base.
- Bake the crust for 8-10 minutes. This helps set it and prevents it from becoming soggy. Remove from the oven and let it cool completely while you prepare the filling.
- Wrap the outside of the springform pan tightly with heavy-duty aluminum foil. This is crucial if you plan to use a water bath (which I highly recommend!).
- In a large mixing bowl, using an electric mixer on medium speed, beat the room temperature full-fat cream cheese until it's completely smooth and creamy, about 2-3 minutes. Scrape down the sides of the bowl as needed.
- Gradually add the granulated sugar to the cream cheese, beating on medium-low speed until just combined and smooth. Be careful not to overmix.
- Beat in the unsweetened cocoa powder until no streaks remain.
- Next, add the buttermilk, sour cream (or heavy cream), and vanilla extract. Mix on low speed until just incorporated.
- Add the red gel food coloring. Start with a generous amount (e.g., 1-2 teaspoons) and mix on low speed until the desired vibrant red color is achieved. Add more if needed.
- Finally, add the room temperature eggs, one at a time, mixing on very low speed just until each egg is incorporated. Stop mixing as soon as the last egg is combined. Overmixing at this stage can incorporate too much air, which can lead to cracks.
- Pour the red velvet cheesecake filling over the cooled crust in the prepared springform pan. Gently tap the pan on the counter a few times to release any air bubbles.
- Place the foil-wrapped springform pan into a larger roasting pan. Carefully pour hot water into the roasting pan until it comes about halfway up the sides of the springform pan.
- Carefully transfer the roasting pan with the cheesecake to the preheated oven.
- Bake for 55-70 minutes, or until the edges are set but the center (about 2-3 inches in diameter) still jiggles slightly when you gently shake the pan.
- Turn off the oven, prop the oven door open slightly with a wooden spoon, and let the cheesecake cool in the water bath inside the oven for 1 hour.
- Remove the cheesecake from the water bath and roasting pan. Carefully remove the foil. Let it cool completely on a wire rack at room temperature.
- Once completely cooled to room temperature, cover the cheesecake loosely with plastic wrap and refrigerate for at least 6-8 hours, or preferably overnight.
- Before serving, carefully run a thin knife around the edge of the pan before releasing the springform sides.
- Wash and slice your fresh strawberries. Arrange them decoratively over the top of the chilled cheesecake.
- Slice and serve!
- Prep Time: 30 mins
- Cook Time: 70 mins
- Category: Dessert
- Method: Baking
- Cuisine: American
Nutrition
- Serving Size: 1 slice
- Calories: 450
- Sugar: 30 g
- Sodium: 300 mg
- Fat: 25 g
- Saturated Fat: 15 g
- Unsaturated Fat: 5 g
- Trans Fat: 0 g
- Carbohydrates: 45 g
- Fiber: 2 g
- Protein: 6 g
- Cholesterol: 100 mg
Keywords: Ensure your cream cheese, eggs, and sour cream/heavy cream are all at room temperature for smooth mixing. Avoid overmixing after adding eggs to prevent cracks.