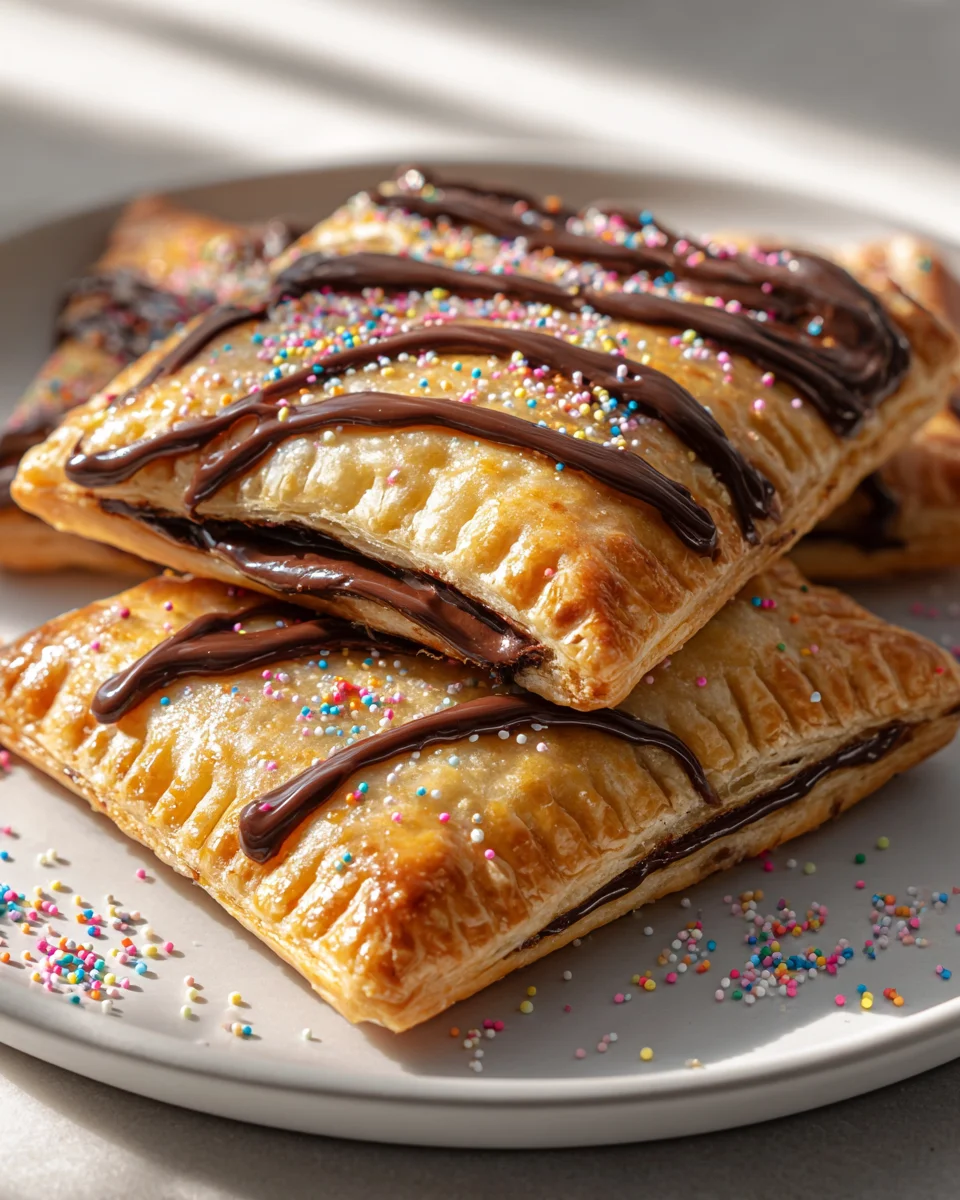
Chocolate Fudge Pop Tarts
Oh my goodness, get ready to dive headfirst into a world of pure chocolate bliss! I’m so excited to share my take on Chocolate Fudge Pop Tarts because, let’s be honest, we all deserve a breakfast (or dessert, I’m not judging!) that feels truly special. What makes these homemade beauties absolutely incredible? It’s all about transforming that nostalgic, store-bought treat into something utterly divine and gourmet. We’re talking about a buttery, impossibly flaky golden pastry, baked to perfection, that cradles a generous, warm, and unbelievably rich molten chocolate fudge filling. Forget thin, barely-there chocolate; this is a luxurious, melt-in-your-mouth experience in every single bite!
You are going to absolutely adore these because they are pure comfort food, a delicious journey back to childhood, but elevated with all the luxuriousness of a high-end bakery creation. They’re perfect for a cozy morning, an impressive brunch treat, or even a decadent late-night snack. Imagine the joy of pulling one of these warm, chocolate-filled delights from the toaster or oven, perhaps drizzled with a simple sweet glaze. These aren’t just Pop Tarts; they’re an irresistible celebration of chocolate fudge, reimagined and ready to bring smiles to everyone who tries them. Get ready to fall in love!

Ingredient Notes
Creating your own delicious Chocolate Fudge Pop Tarts at home is such a rewarding experience, and it all starts with understanding the stars of our show – the ingredients! I’ve carefully chosen these to give you that classic Pop Tart feel with an elevated, homemade fudge flavor.
For the Pastry Dough
- All-Butter Pie Crust: This is my absolute go-to for Chocolate Fudge Pop Tarts. You’ll need two sheets, either homemade or store-bought. Store-bought, all-butter pie crust is a fantastic shortcut that doesn’t compromise on flavor or flakiness. The butter creates incredible layers and a tender crumb, which is exactly what we want to encase our rich fudge filling.
- Substitution: If you’re looking for a gluten-free option, many brands offer excellent gluten-free pie crusts that work wonderfully. You can also experiment with puff pastry for an even flakier, lighter crust, though it will give a slightly different texture than the traditional Pop Tart.
- Egg (for egg wash, optional): A single beaten egg with a splash of water or milk provides that beautiful golden-brown sheen and helps achieve a perfectly crisp crust.
- Substitution: For an egg-free wash, simply brush your Chocolate Fudge Pop Tarts with milk (dairy or non-dairy) or a little melted butter before baking.
For the Chocolate Fudge Filling
This is where the magic happens for our Chocolate Fudge Pop Tarts! We’re aiming for a rich, intensely chocolatey, and somewhat thick fudge that won’t make our pastry soggy.
- Unsweetened Cocoa Powder: Opt for a good quality unsweetened cocoa powder. This provides the deep, robust chocolate flavor without adding extra sugar, allowing us to control the sweetness. Dutch-processed cocoa works beautifully for a darker, smoother flavor.
- Granulated Sugar: For sweetness and to help create that classic fudge texture.
- Whole Milk: The fat content in whole milk contributes to a creamy, luscious fudge.
- Substitution: You can absolutely use non-dairy milk alternatives like almond milk or oat milk. Just be aware that the final richness might vary slightly, but the flavor will still be fantastic.
- Unsalted Butter: Essential for richness, flavor, and that melt-in-your-mouth texture. Always use good quality butter here.
- Vanilla Extract: A crucial ingredient that enhances and complements the chocolate flavor, adding depth and warmth to the fudge.
- Pinch of Salt: Don’t skip this! A small pinch of salt balances the sweetness and makes the chocolate flavor pop even more.
- Cornstarch or All-Purpose Flour: A small amount of either helps thicken the fudge filling, ensuring it stays put inside your Chocolate Fudge Pop Tarts during baking and doesn’t become too runny.
For the Chocolate Glaze (Optional but highly recommended!)
A true Chocolate Fudge Pop Tart isn’t complete without a sweet, slightly crackly glaze on top!
- Powdered Sugar: The base for our smooth, quick-setting glaze. It dissolves easily without creating a gritty texture.
- Unsweetened Cocoa Powder: Again, for that lovely chocolate flavor and color.
- Milk (or cream): Just a tablespoon or two to thin the glaze to the perfect drizzly consistency.
- Substitution: Any milk, dairy or non-dairy, will work. Heavy cream will make the glaze a bit richer.
- Vanilla Extract: Another little flavor boost for our glaze.
- Sprinkles (Optional): Because what’s a Pop Tart without a fun topping? Chocolate sprinkles are classic here!
Step-by-Step Instructions
Let’s get baking! Follow these steps to create your very own batch of irresistible Chocolate Fudge Pop Tarts.
Step 1: Prepare the Fudge Filling
First, we need to make our rich chocolate fudge filling. In a medium saucepan, combine the unsweetened cocoa powder, granulated sugar, cornstarch (or flour), and a pinch of salt. Whisk these dry ingredients together to eliminate any lumps. Gradually whisk in the milk until smooth. Add the unsalted butter. Place the saucepan over medium heat, stirring constantly, until the mixture thickens and comes to a gentle boil. Continue to stir and cook for about 1-2 minutes until it’s visibly thick like a pudding. Remove from heat, stir in the vanilla extract, and transfer the fudge to a bowl. Cover with plastic wrap, pressing it directly onto the surface to prevent a skin from forming, and let it cool completely in the refrigerator (at least 1-2 hours) until firm. This is crucial for preventing soggy Chocolate Fudge Pop Tarts!
Step 2: Prepare the Pastry Dough
Preheat your oven to 375°F (190°C). Line two baking sheets with parchment paper. If using store-bought pie crusts, unroll them gently on a lightly floured surface. If making your own, roll out the dough to about 1/8-inch thickness. Using a sharp knife or a pastry wheel, cut each pie crust into approximately 3×4-inch rectangles. You should get about 6 rectangles per crust, totaling 12 rectangles from two crusts. This will give you 6 Chocolate Fudge Pop Tarts.
Step 3: Assemble the Chocolate Fudge Pop Tarts
Take your chilled fudge filling out of the refrigerator. On half of your pastry rectangles, place about 1-2 tablespoons of the cooled fudge filling in the center, leaving a clear 1/2-inch border around the edges. Be careful not to overfill, as this can lead to leaks during baking! Lightly brush the edges of these filled rectangles with a little water or your egg wash. Place a plain pastry rectangle on top of each filled rectangle, carefully aligning the edges. Use your fingertips to gently press down around the filling to seal the two layers of pastry together, pushing out any air bubbles. Then, use the tines of a fork to firmly crimp all four edges of each Chocolate Fudge Pop Tart. This creates a decorative edge and, more importantly, a strong seal to keep that delicious fudge inside.
Step 4: Egg Wash and Prick
Carefully transfer the assembled Chocolate Fudge Pop Tarts to your prepared baking sheets. In a small bowl, whisk together the egg with a tablespoon of water or milk to create your egg wash. Lightly brush the tops of each Chocolate Fudge Pop Tart with the egg wash. Finally, use a fork to gently prick the top of each tart 4-5 times. This creates vents for steam to escape during baking, preventing the tarts from puffing up excessively and ensuring a crisp crust.
Step 5: Bake the Pop Tarts
Bake the Chocolate Fudge Pop Tarts for 15-20 minutes, or until the pastry is golden brown and looks flaky. Keep an eye on them, as oven temperatures can vary. Once baked, carefully remove the baking sheets from the oven and transfer the tarts to a wire rack to cool completely before glazing. Resist the urge to glaze them while warm, as the glaze will simply melt off.
Step 6: Prepare the Glaze (Optional)
While your Chocolate Fudge Pop Tarts are cooling, prepare the glaze. In a small bowl, whisk together the powdered sugar, cocoa powder, 1 tablespoon of milk (or cream), and vanilla extract until smooth. If the glaze is too thick, add more milk a teaspoon at a time until you reach a drizzly, yet opaque consistency. If it’s too thin, whisk in a little more powdered sugar.
Step 7: Glaze and Serve
Once the Chocolate Fudge Pop Tarts are completely cool, spread a thin layer of the chocolate glaze over the top of each one. If desired, immediately decorate with sprinkles before the glaze sets. Allow the glaze to set for about 15-20 minutes before serving. Enjoy your homemade Chocolate Fudge Pop Tarts!
Tips & Suggestions
To ensure your Chocolate Fudge Pop Tarts are absolutely perfect every time, I’ve gathered some of my best tips and tricks:
- Keep the Dough Cold: This is a golden rule for pastry! Cold dough is easier to handle, less sticky, and results in a flakier crust. If your kitchen is warm, you can pop the assembled (but unbaked) Chocolate Fudge Pop Tarts back into the fridge for 10-15 minutes before baking.
- Don’t Overfill: It’s tempting to load up on that delicious fudge, but overfilling is the main culprit for leaky Pop Tarts. Stick to the recommended 1-2 tablespoons, ensuring you have enough room for a good seal.
- Seal Firmly: Take your time when pressing the pastry edges together and crimping with a fork. A good, firm seal is essential to prevent the fudge from oozing out during baking.
- Cool the Fudge Completely: I can’t stress this enough! Warm fudge filling will make your pastry soggy and difficult to work with. It absolutely needs to be firm and cold before assembling. You can even make the fudge filling a day ahead and store it in the fridge.
- Even Baking: If you’re baking on two sheets, rotate them halfway through the baking time to ensure all your Chocolate Fudge Pop Tarts brown evenly.
- Warm Them Up: While delicious at room temperature, a quick 10-15 second zap in the microwave or a few minutes in a toaster oven (without the glaze if possible, or very carefully!) will bring back that fresh-baked warmth and gooey fudge center.
- Flavor Variations: Feel free to get creative!
- Mint Chocolate Fudge: Add 1/4 teaspoon of peppermint extract to the fudge filling for a refreshing twist.
- Spicy Chocolate Fudge: A tiny pinch of cayenne pepper in the fudge can add a delightful warmth and complexity.
- Coffee Fudge: Dissolve 1/2 teaspoon of instant espresso powder in the milk when making the fudge for a mocha flavor.
- Nutty Fudge: Add a tablespoon of finely chopped nuts (like pecans or walnuts) to the fudge filling for added texture.
Storage
Properly storing your Chocolate Fudge Pop Tarts will keep them fresh and delicious for longer!
- At Room Temperature: Once the glaze has fully set, store your Chocolate Fudge Pop Tarts in an airtight container at room temperature for up to 3-4 days. Placing a piece of parchment paper between layers can prevent sticking if you stack them.
- Refrigeration: While not strictly necessary due to the stable nature of the fudge filling, if you live in a very warm climate or just prefer them chilled, you can store them in an airtight container in the refrigerator for up to a week. They might firm up a bit, but a quick warm-up will soften them again.
- Freezing (Unbaked): If you want to prepare them ahead of time, you can freeze unbaked Chocolate Fudge Pop Tarts. Assemble them completely, omitting the egg wash. Place them on a parchment-lined baking sheet and freeze until solid (about 2-3 hours). Once frozen, transfer them to a freezer-safe bag or container, separating layers with parchment paper. They can be stored for up to 1 month. When ready to bake, you can bake them from frozen (add an extra 5-10 minutes to the baking time), or thaw them in the refrigerator overnight before baking as usual. Apply the egg wash just before baking.
- Freezing (Baked): You can also freeze baked (and unglazed) Chocolate Fudge Pop Tarts. Let them cool completely, then wrap each one individually in plastic wrap and then in aluminum foil, or place them in a freezer-safe bag. They will keep for up to 2 months. To reheat, thaw in the refrigerator overnight, then warm in a toaster oven or microwave. Glaze once thawed and warmed.
Final Thoughts
There’s just something profoundly comforting and utterly delicious about a warm, homemade pastry, and these Chocolate Fudge Pop Tarts truly embody that sentiment. I’m telling you, this recipe is an absolute must-try because it transforms a nostalgic favorite into an unbelievably decadent experience. Imagine that deep, rich, gooey chocolate fudge filling, perfectly complemented by a tender, flaky pastry crust. Every single bite of these Chocolate Fudge Pop Tarts is a moment of pure bliss, far surpassing any store-bought version. I promise you, the joy of creating and savoring these delightful treats yourself is an experience you won’t want to miss. Dive in and make them – you deserve this level of chocolatey indulgence!

Homemade Chocolate Fudge Pop Tarts Recipe – Delicious & Easy
- Total Time: 2 hours 20 minutes
- Yield: 6 servings 1x
Description
Dive into a world of pure chocolate bliss with these Homemade Chocolate Fudge Pop Tarts! Enjoy a buttery, flaky pastry filled with rich molten chocolate fudge, perfect for breakfast or dessert.
Ingredients
- 2 sheets All-Butter Pie Crust
- 1 Egg (for egg wash, optional)
- 1/2 cup Unsweetened Cocoa Powder (for filling)
- 1/2 cup Granulated Sugar
- 1/2 cup Whole Milk
- 1/4 cup Unsalted Butter
- 1 tsp Vanilla Extract
- Pinch of Salt
- 1 tbsp Cornstarch or All-Purpose Flour
- 1 cup Powdered Sugar (for glaze)
- 1/4 cup Unsweetened Cocoa Powder (for glaze)
- 1–2 tbsp Milk (or cream, for glaze)
- 1 tsp Vanilla Extract (for glaze)
- Sprinkles (Optional)
Instructions
- Step 1: Prepare the Fudge Filling – In a medium saucepan, combine the unsweetened cocoa powder, granulated sugar, cornstarch (or flour), and a pinch of salt. Whisk these dry ingredients together to eliminate any lumps. Gradually whisk in the milk until smooth. Add the unsalted butter. Place the saucepan over medium heat, stirring constantly, until the mixture thickens and comes to a gentle boil. Continue to stir and cook for about 1-2 minutes until it’s visibly thick like a pudding. Remove from heat, stir in the vanilla extract, and transfer the fudge to a bowl. Cover with plastic wrap, pressing it directly onto the surface to prevent a skin from forming, and let it cool completely in the refrigerator (at least 1-2 hours) until firm.
- Step 2: Prepare the Pastry Dough – Preheat your oven to 375°F (190°C). Line two baking sheets with parchment paper. If using store-bought pie crusts, unroll them gently on a lightly floured surface. If making your own, roll out the dough to about 1/8-inch thickness. Using a sharp knife or a pastry wheel, cut each pie crust into approximately 3×4-inch rectangles. You should get about 6 rectangles per crust, totaling 12 rectangles from two crusts.
- Step 3: Assemble the Chocolate Fudge Pop Tarts – Take your chilled fudge filling out of the refrigerator. On half of your pastry rectangles, place about 1-2 tablespoons of the cooled fudge filling in the center, leaving a clear 1/2-inch border around the edges. Lightly brush the edges of these filled rectangles with a little water or your egg wash. Place a plain pastry rectangle on top of each filled rectangle, carefully aligning the edges. Use your fingertips to gently press down around the filling to seal the two layers of pastry together. Then, use the tines of a fork to firmly crimp all four edges of each Chocolate Fudge Pop Tart.
- Step 4: Egg Wash and Prick – Carefully transfer the assembled Chocolate Fudge Pop Tarts to your prepared baking sheets. In a small bowl, whisk together the egg with a tablespoon of water or milk to create your egg wash. Lightly brush the tops of each Chocolate Fudge Pop Tart with the egg wash. Finally, use a fork to gently prick the top of each tart 4-5 times.
- Step 5: Bake the Pop Tarts – Bake the Chocolate Fudge Pop Tarts for 15-20 minutes, or until the pastry is golden brown and looks flaky. Once baked, carefully remove the baking sheets from the oven and transfer the tarts to a wire rack to cool completely before glazing.
- Step 6: Prepare the Glaze (Optional) – While your Chocolate Fudge Pop Tarts are cooling, prepare the glaze. In a small bowl, whisk together the powdered sugar, cocoa powder, 1 tablespoon of milk (or cream), and vanilla extract until smooth.
- Step 7: Glaze and Serve – Once the Chocolate Fudge Pop Tarts are completely cool, spread a thin layer of the chocolate glaze over the top of each one. If desired, immediately decorate with sprinkles before the glaze sets. Allow the glaze to set for about 15-20 minutes before serving.
- Prep Time: 2 hours (including cooling time)
- Cook Time: 20 mins
- Category: Dessert
- Method: Baking
- Cuisine: American
Nutrition
- Serving Size: 1 Pop Tart
- Calories: 250
- Sugar: 20 g
- Sodium: 150 mg
- Fat: 10 g
- Saturated Fat: 5 g
- Unsaturated Fat: 3 g
- Trans Fat: 0 g
- Carbohydrates: 35 g
- Fiber: 2 g
- Protein: 3 g
- Cholesterol: 30 mg
Keywords: Keep the dough cold for a flakier crust. Don't overfill the pastries to prevent leaks. Ensure the fudge filling is completely cool before assembling.