Fried Rice Recipe That Tastes Like Takeout
Have you ever craved that glorious, savory, perfectly seasoned fried rice you get from your favorite takeout place, only to try making it at home and finding it just… isn’t quite the same? I know the feeling! But prepare to say goodbye to those disappointments, because I’ve cracked the code with this Fried Rice Recipe That Tastes Like Takeout. This isn’t just another fried rice recipe; it’s the recipe that brings that authentic, restaurant-quality flavor right to your kitchen.
What makes this recipe truly special is its ability to replicate that elusive “wok hei”—that smoky, intensely flavorful essence—without needing a commercial burner. We achieve it through smart techniques, the right balance of ingredients, and a few insider tricks that will transform your home-cooked fried rice. You’re going to love how incredibly satisfying it is to create such a beloved dish from scratch, knowing exactly what goes into it, and how much money you’ll save on delivery fees! Plus, it’s wonderfully customizable. Got leftover rice? This is its destiny!
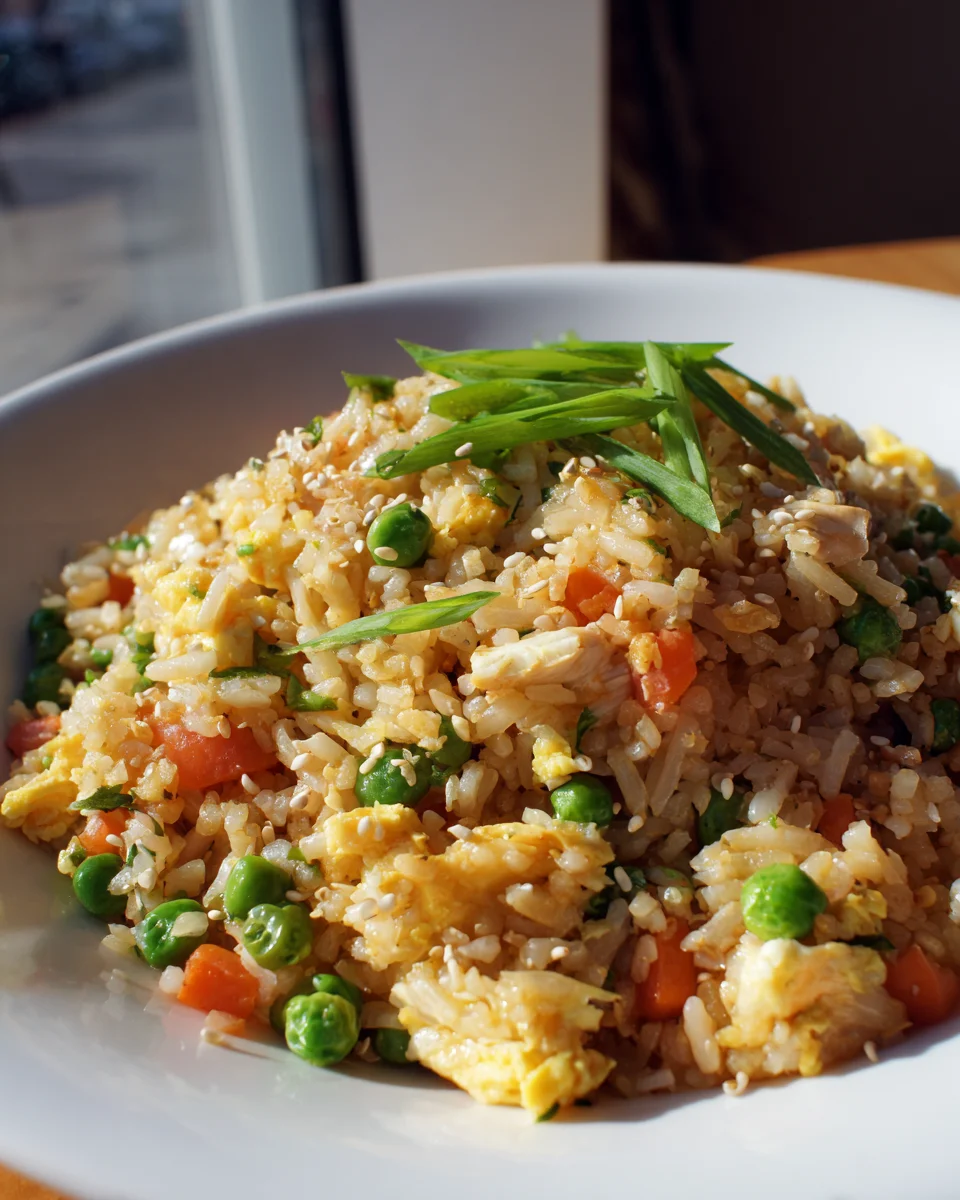
Get ready for a plate piled high with fluffy, perfectly separated grains of rice, studded with vibrant peas, carrots, and sweet corn. You’ll find tender, savory strips of beef mingling with fluffy scrambled egg, all coated in a rich, umami-packed sauce that hits all the right notes. It’s quick, it’s delicious, and it genuinely delivers on its promise to taste just like your favorite takeout. Trust me, once you try this, your fried rice cravings will be perfectly satisfied, right in your own home!

Ingredient Notes
Achieving that authentic takeout fried rice flavor at home really boils down to a few key ingredients and how you treat them. I’ve found that getting these right makes all the difference for a truly delicious, “wok hei” infused dish.
- Cold, Day-Old Cooked Rice: This is non-negotiable for me. Freshly cooked rice is too moist and will lead to a sticky, clumpy mess rather than separate, fluffy grains. I always make my rice (typically long-grain or jasmine) the day before, then spread it out on a tray to cool completely before chilling it in the fridge. This drying-out process is crucial for that perfect texture.
- High Smoke Point Oil: To get that proper stir-fry sizzle and prevent burning, you’ll want an oil that can handle high heat. Vegetable oil, canola oil, or grapeseed oil are my go-to choices.
- Beef: I love using thinly sliced beef for my fried rice, as specified. Flank steak, sirloin, or even a tender cut like tenderloin, cut against the grain, works beautifully. Marinating it briefly in a little soy sauce and a pinch of cornstarch can tenderize it further and protect it from drying out during the quick stir-fry. If beef isn’t your preference, chicken breast or thighs, shrimp, or even firm tofu are fantastic alternatives.
- Eggs: A cornerstone of most fried rice. I like to lightly scramble them and cook them separately before adding them back in. This ensures they don’t get lost or overcooked in the main stir-fry.
- Aromatics: Fresh garlic, ginger, and diced yellow onion are essential for building the foundational flavor. Don’t skip these! I also always finish with plenty of chopped green onions (scallions) for freshness and a mild oniony bite.
- Vegetables: For that classic takeout look and taste, I stick to humble but effective veggies like frozen peas and diced carrots. You can absolutely get creative here – bell peppers, corn, or even some finely chopped bok choy would be delicious additions. Just make sure they are cut small and cook quickly.
- The Sauce Blend: This is where the magic happens for that umami depth.
- Soy Sauce: I use a combination of regular (light) soy sauce for saltiness and a touch of dark soy sauce for that signature rich, dark color and a slightly sweeter, milder flavor.
- Oyster Sauce: This provides an incredible depth of umami. If you’re looking for a vegetarian alternative, there are excellent mushroom-based “vegetarian oyster sauces” available that work wonderfully.
- White Pepper: A subtle but important spice that contributes to the authentic taste.
- Sugar: Just a pinch to balance the savory flavors and add a slight caramelization.
- Toasted Sesame Oil: This is a finishing oil, added right at the very end. Its aromatic, nutty flavor is quite potent, so a little goes a long way.
- Non-Alcoholic Rice Vinegar (optional): A small dash can add a bright tang, if you desire. Ensure it’s explicitly labeled as non-alcoholic.
Step-by-Step Instructions
Getting this fried rice right is all about quick work and high heat. Here’s how I create that takeout experience right in my kitchen:
- Prepare Everything (Mise en Place): This is crucial for stir-frying. Slice your beef thinly against the grain. If marinating, do so now with a tablespoon of soy sauce and a teaspoon of cornstarch for 10-15 minutes. Dice your onion and carrots, have your peas ready, mince your garlic and ginger, and chop your green onions (separating white and green parts). In a small bowl, whisk together your sauce: 2 tablespoons light soy sauce, 1 tablespoon dark soy sauce, 1 tablespoon oyster sauce (or vegetarian alternative), 1 teaspoon sugar, and 1/2 teaspoon white pepper. Have your cold day-old rice ready to go, breaking up any large clumps.
- Cook the Eggs: Heat 1 tablespoon of your high smoke point oil in a large wok or skillet over medium-high heat. Whisk 2 large eggs with a pinch of salt. Pour into the hot pan and scramble quickly until just set but still moist. Transfer the cooked eggs to a plate and set aside.
- Sear the Beef: Return the pan to high heat and add another tablespoon of oil. Once shimmering, add your marinated beef in a single layer. Sear for 1-2 minutes per side until nicely browned but still tender. Don’t overcrowd the pan; cook in batches if necessary. Remove the beef to the plate with the eggs.
- Sauté Aromatics and Veggies: Add another tablespoon of oil to the hot pan. Toss in the diced onion, minced garlic, and ginger. Stir-fry for about 30 seconds until fragrant. Add the diced carrots and stir-fry for 1-2 minutes until they start to soften slightly. Finally, add the frozen peas and stir-fry for another minute until they are heated through.
- Introduce the Rice: Push the vegetables to one side of the pan. Add the cold day-old rice to the empty side. Break up any remaining clumps with your spatula. Let the rice sit undisturbed for about a minute to get a slight char on the bottom, then begin to stir-fry vigorously, mixing with the vegetables, for 3-4 minutes. You want to hear a dry sizzling sound, not a steaming sound. This helps dry out the rice and gives it that signature takeout texture.
- Add the Sauce: Push the rice and veggies to one side of the pan again, creating an empty space. Pour your prepared sauce mixture directly into this empty spot. Let it bubble and caramelize for 15-20 seconds before quickly incorporating it into the rice, stirring constantly until every grain is evenly coated and beautifully colored.
- Combine and Finish: Return the cooked eggs and seared beef to the pan. Add the white parts of your chopped green onions. Stir-fry for another minute to heat everything through. Remove the pan from the heat. Drizzle in 1 teaspoon of toasted sesame oil and sprinkle with the green parts of your chopped green onions. Toss everything together one last time.
- Taste and Serve: Taste the fried rice and adjust seasoning if needed (a little more soy sauce or white pepper). Serve immediately and enjoy your homemade takeout-style fried rice!
Tips & Suggestions
To truly nail that takeout fried rice experience, I’ve picked up a few tricks over the years that I swear by:
- High Heat is Your Friend: Don’t be shy with the heat! A scorching hot wok or a large, heavy-bottomed skillet is essential. This high heat prevents the ingredients from steaming and allows them to caramelize and develop that coveted “wok hei” (smoky breath of the wok) flavor.
- Don’t Overcrowd the Pan: This is a common mistake. If you put too many ingredients in at once, the temperature of your pan drops drastically, leading to steamed rather than stir-fried food. If you’re making a large batch, cook in two separate portions.
- Prep Everything Ahead: Stir-frying is a rapid process. Once you start, there’s no time to chop. Have all your ingredients measured, chopped, and ready to go (your “mise en place”) before you even turn on the heat.
- Use the Right Rice: I cannot stress enough the importance of cold, day-old rice. It’s drier and firmer, ensuring each grain stays separate and gets properly coated with sauce and slightly crisped.
- Sauce Placement: When you add the sauce, pour it into the empty space on the side of the pan, not directly over the rice. Let it bubble and thicken slightly for a few seconds; this concentrates its flavor and helps it coat the rice more effectively.
- Customization is Key: Feel free to experiment with your favorite proteins and vegetables! Chicken, shrimp, tofu, mushrooms, bell peppers, or bean sprouts are all great additions. Just adjust cooking times accordingly.
- Sesame Oil Last: Add toasted sesame oil right at the very end, off the heat. Its delicate aroma and flavor are best preserved when not subjected to high heat cooking.
- Taste, Taste, Taste: Always taste your fried rice before serving. A little extra soy sauce, a dash more white pepper, or even a tiny bit more sugar can make all the difference in balancing the flavors to your preference.
Storage
Fried rice is best enjoyed fresh, but if you have leftovers, store them properly to maintain quality and safety. Allow the fried rice to cool completely within two hours of cooking, then transfer it to an airtight container. It will keep well in the refrigerator for up to 3-4 days. While you can freeze fried rice for longer storage (up to a month), I find the texture of the rice can become a bit mushy upon thawing, so I generally recommend refrigeration. When reheating, ensure it’s piping hot throughout, whether you’re using a microwave or a stovetop, adding a splash of water or broth if it seems a little dry.
Final Thoughts
There’s just something incredibly satisfying about recreating your favorite takeout dishes right in your own kitchen, and with this Fried Rice Recipe That Tastes Like Takeout, I promise you won’t be disappointed. We’ve gone through all the steps to achieve that perfect balance of smoky wok hei, perfectly seasoned rice, and a medley of fresh ingredients.
What I truly love about this particular recipe is its versatility and how it truly delivers on its promise. Whether you’re opting for savory beef, swapping in those amazing non-alcohol alternatives to get that depth of flavor, or loading it up with your favorite veggies, this recipe adapts beautifully while maintaining that unmistakable, crave-worthy takeout taste. It’s more than just a meal; it’s an experience that brings the joy of your favorite restaurant right to your dining table.
So, go ahead and give this Fried Rice Recipe That Tastes Like Takeout a try. I’m confident it will become a go-to in your culinary repertoire, proving that incredible, restaurant-quality fried rice is absolutely achievable at home. Happy cooking!

Takeout-Style Beef Fried Rice: Restaurant Flavor at Home
- Total Time: 45 minutes
- Yield: 4 servings
Description
This Fried Rice Recipe brings that authentic, restaurant-quality flavor right to your kitchen. It’s quick, delicious, and satisfies your fried rice cravings perfectly!
Ingredients
- Cold, Day-Old Cooked Rice
- High Smoke Point Oil (Vegetable oil, canola oil, or grapeseed oil)
- Thinly sliced beef (Flank steak, sirloin, or tenderloin)
- Soy sauce
- Cornstarch
- Eggs
- Fresh garlic
- Fresh ginger
- Diced yellow onion
- Chopped green onions (scallions)
- Frozen peas
- Diced carrots
- Dark soy sauce
- Oyster sauce (or vegetarian alternative)
- White pepper
- Sugar
- Toasted sesame oil
- Non-Alcoholic rice vinegar (optional)
Instructions
- Prepare Everything (Mise en Place): Slice your beef thinly against the grain. If marinating, do so now with a tablespoon of soy sauce and a teaspoon of cornstarch for 10-15 minutes. Dice your onion and carrots, have your peas ready, mince your garlic and ginger, and chop your green onions (separating white and green parts). In a small bowl, whisk together your sauce: 2 tablespoons light soy sauce, 1 tablespoon dark soy sauce, 1 tablespoon oyster sauce (or vegetarian alternative), 1 teaspoon sugar, and 1/2 teaspoon white pepper. Have your cold day-old rice ready to go, breaking up any large clumps.
- Cook the Eggs: Heat 1 tablespoon of your high smoke point oil in a large wok or skillet over medium-high heat. Whisk 2 large eggs with a pinch of salt. Pour into the hot pan and scramble quickly until just set but still moist. Transfer the cooked eggs to a plate and set aside.
- Sear the Beef: Return the pan to high heat and add another tablespoon of oil. Once shimmering, add your marinated beef in a single layer. Sear for 1-2 minutes per side until nicely browned but still tender. Don't overcrowd the pan; cook in batches if necessary. Remove the beef to the plate with the eggs.
- Sauté Aromatics and Veggies: Add another tablespoon of oil to the hot pan. Toss in the diced onion, minced garlic, and ginger. Stir-fry for about 30 seconds until fragrant. Add the diced carrots and stir-fry for 1-2 minutes until they start to soften slightly. Finally, add the frozen peas and stir-fry for another minute until they are heated through.
- Introduce the Rice: Push the vegetables to one side of the pan. Add the cold day-old rice to the empty side. Break up any remaining clumps with your spatula. Let the rice sit undisturbed for about a minute to get a slight char on the bottom, then begin to stir-fry vigorously, mixing with the vegetables, for 3-4 minutes.
- Add the Sauce: Push the rice and veggies to one side of the pan again, creating an empty space. Pour your prepared sauce mixture directly into this empty spot. Let it bubble and caramelize for 15-20 seconds before quickly incorporating it into the rice, stirring constantly until every grain is evenly coated and beautifully colored.
- Combine and Finish: Return the cooked eggs and seared beef to the pan. Add the white parts of your chopped green onions. Stir-fry for another minute to heat everything through. Remove the pan from the heat. Drizzle in 1 teaspoon of toasted sesame oil and sprinkle with the green parts of your chopped green onions. Toss everything together one last time.
- Taste and Serve: Taste the fried rice and adjust seasoning if needed. Serve immediately and enjoy your homemade takeout-style fried rice!
- Prep Time: 15 mins
- Cook Time: 30 mins
- Category: Dinner
- Method: Stir-frying
- Cuisine: Asian
Nutrition
- Serving Size: 1 bowl
- Calories: 450
- Sugar: 2 g
- Sodium: 800 mg
- Fat: 15 g
- Saturated Fat: 3 g
- Unsaturated Fat: 10 g
- Trans Fat: 0 g
- Carbohydrates: 60 g
- Fiber: 3 g
- Protein: 20 g
- Cholesterol: 150 mg
Keywords: High heat is essential for achieving that smoky flavor. Don't overcrowd the pan and prep everything ahead of time for a smooth cooking process. Customize with your favorite proteins and vegetables!