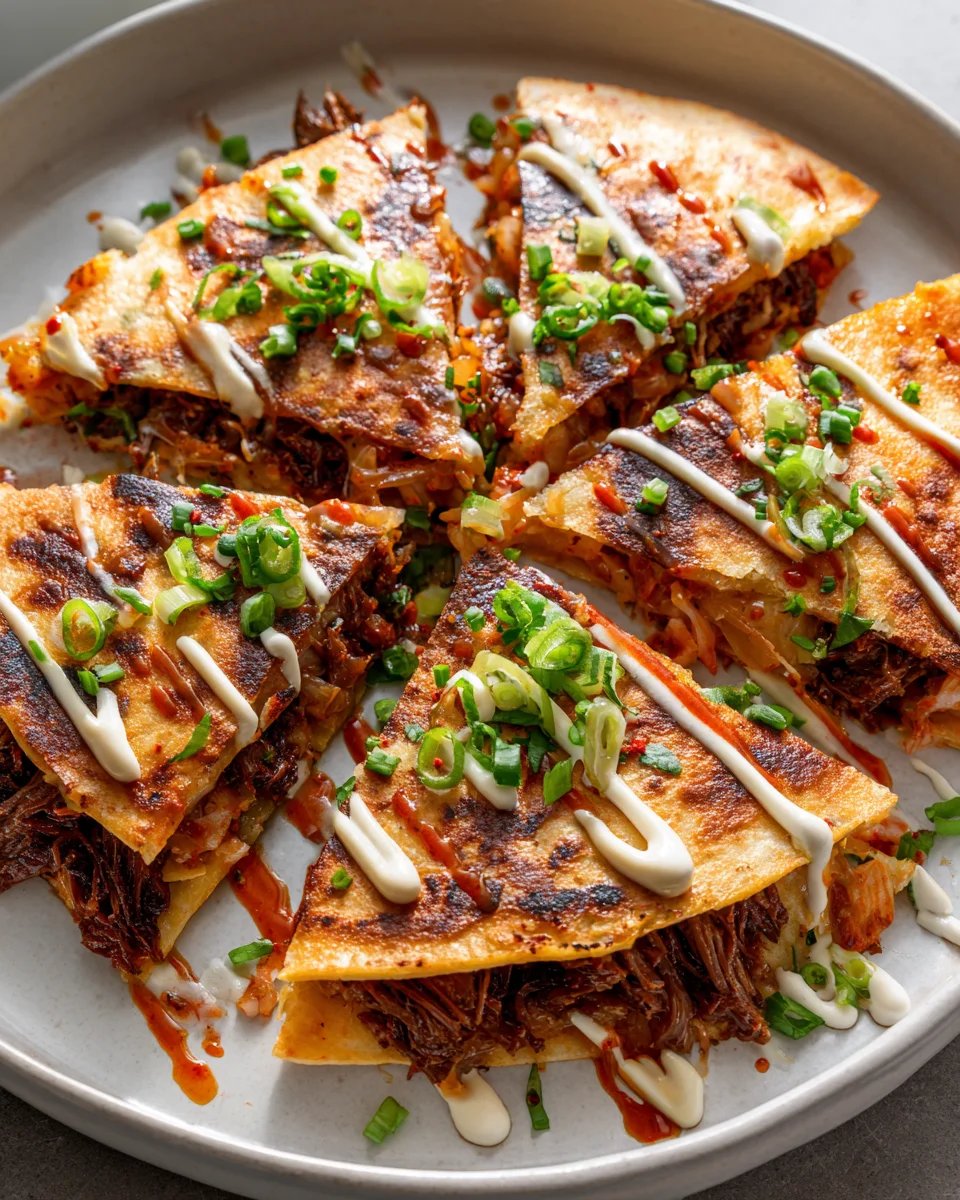
Kimchi Bulgogi Quesadillas With Spicy Crema
Oh my goodness, do I have a treat for your taste buds today! Get ready to embark on a culinary adventure that brings together the best of two worlds with our incredible Kimchi Bulgogi Quesadillas With Spicy Crema. You know those moments when you’re craving something comforting and cheesy, but also something incredibly vibrant, unique, and packed with flavor? This recipe is the answer to that very specific, very delicious conundrum.
What makes this dish so special, you ask? It’s the ultimate fusion masterpiece, a harmonious marriage of the bold, savory, and slightly sweet flavors of classic Korean bulgogi beef, perfectly complemented by the tangy, spicy crunch of fermented kimchi. All of this incredible filling is lovingly tucked inside warm, crispy tortillas with a generous helping of melty cheese, grilled to golden perfection. But wait, there’s more! We elevate this already extraordinary creation with a zesty, creamy, and spicy crema that adds the perfect cooling counterpoint and an extra layer of zing to every single bite.
You’re going to absolutely love these quesadillas because they offer an exciting new take on familiar comforts. Imagine tender, marinated beef bulgogi and flavorful kimchi sizzling together, then enveloped in cheesy goodness. It’s an explosion of sweet, savory, tangy, spicy, and cheesy all at once – a symphony of textures and flavors that will undoubtedly become a new staple in your kitchen. Forget choosing between your favorite Korean BBQ and taco night; now you can have the very best of both, in one unbelievably satisfying, absolutely crave-worthy dish. Trust me, your future self will thank you for making this!

Hey there, fellow food adventurers! Get ready to embark on a culinary journey that combines the best of Korean and Mexican flavors in one incredibly satisfying dish: Kimchi Bulgogi Quesadillas with Spicy Crema. This recipe is one of my absolute favorites because it takes the savory, slightly sweet, and wonderfully marinated bulgogi, adds the tangy, spicy kick of kimchi, all wrapped up in a cheesy tortilla, and then topped with a zesty, creamy sauce. It’s a flavor explosion that’s surprisingly easy to make and guaranteed to impress. Let’s get cooking!
Ingredient Notes
Creating these sensational quesadillas starts with understanding a few key ingredients. Here’s what you’ll need and some handy substitutions:
- For the Bulgogi:
- Beef: I always opt for thinly sliced beef for bulgogi. Ribeye or sirloin are my top choices as they’re tender and absorb the marinade beautifully. Ask your butcher to slice it thinly, or you can partially freeze a piece of beef at home for about 30 minutes, which makes slicing it super easy with a sharp knife.
- Soy Sauce: The backbone of our marinade. Use a good quality regular or low-sodium soy sauce.
- Brown Sugar: Adds a touch of sweetness and helps with caramelization. Honey or maple syrup can also work in a pinch.
- Garlic & Ginger: Freshly minced is key here for that aromatic punch. Don’t skimp!
- Sesame Oil: Toasted sesame oil brings an unmistakable nutty aroma.
- Pear or Apple Puree: This is a secret weapon for tenderizing the beef and adding a subtle natural sweetness. I just grate about half a small Asian pear or a Gala apple.
- Onion: Sliced thin, it adds flavor and texture to the bulgogi itself.
- Black Pepper: Freshly ground makes a difference.
- Non-alcoholic alternative for rice wine/mirin: Traditionally, some recipes might call for rice wine. For a non-alcoholic option that still contributes depth and a touch of sweetness, I recommend a splash of apple juice or even just a bit more pear/apple puree.
- For the Kimchi:
- Napa Cabbage Kimchi: Use well-fermented kimchi that’s a few weeks old – it has a deeper, more complex sour and spicy flavor that really shines when cooked. If your kimchi is super fresh, it might not have the same tang. You can usually find it in the refrigerated section of most grocery stores or Asian markets.
- For the Quesadillas:
- Flour Tortillas: Medium to large-sized flour tortillas work best for a satisfying quesadilla.
- Cheese: Good melting cheese is crucial! Monterey Jack, Oaxaca, or a Mexican blend are my go-to choices. Cheddar can work too, but I prefer the stretchiness and milder flavor of the others.
- For the Spicy Crema:
- Sour Cream or Mexican Crema: The creamy base. Full-fat Greek yogurt is also a fantastic healthier alternative.
- Gochujang (Korean Chili Paste): This is where the magic happens for the spicy kick! Adjust to your heat preference.
- Lime Juice: Freshly squeezed for brightness and acidity.
- Honey or Sugar: Just a touch to balance the spice and tang.
- Garnishes (Optional, but recommended): Sliced green onions, toasted sesame seeds.
Step-by-Step Instructions
Let’s get these incredible Kimchi Bulgogi Quesadillas on your plate!
Step 1: Marinate the Bulgogi
- If your beef isn’t already thinly sliced, now’s the time. Partially freeze the beef for about 30 minutes, then slice against the grain into very thin pieces, about 1/8-inch thick.
- In a medium bowl, combine the soy sauce, brown sugar, minced garlic, grated ginger, sesame oil, pear or apple puree, and the non-alcoholic alternative (like apple juice if using). Whisk until the sugar is dissolved.
- Add the thinly sliced beef and sliced onion to the marinade. Use your hands to thoroughly mix, ensuring every piece of beef is coated.
- Cover the bowl and refrigerate for at least 30 minutes, but ideally 2-4 hours, or even overnight for the best flavor.
Step 2: Prepare the Spicy Crema
- While the bulgogi is marinating, let’s whip up that delicious crema. In a small bowl, combine the sour cream (or crema/Greek yogurt), gochujang, lime juice, and honey or sugar.
- Whisk until everything is smooth and well combined. Taste and adjust the gochujang or lime juice to your preference.
- Cover and refrigerate until ready to serve. This allows the flavors to meld beautifully.
Step 3: Cook the Kimchi Bulgogi Filling
- Heat a large skillet or wok over medium-high heat. Add a tablespoon of neutral oil if your pan isn’t non-stick.
- Once hot, add the marinated beef and onion (without overcrowding the pan; you might need to do this in batches if your pan is smaller). Spread it out and cook for about 3-4 minutes, stirring occasionally, until the beef is mostly browned and cooked through.
- Add the kimchi to the pan with the bulgogi. Stir everything together and continue to cook for another 3-5 minutes, allowing the kimchi to heat through and meld its flavors with the beef. The liquid should mostly evaporate.
- Remove from heat and transfer the kimchi bulgogi filling to a bowl. Give it a taste and add a pinch more soy sauce or black pepper if you feel it needs it.
Step 4: Assemble and Cook the Quesadillas
- Wipe out your skillet and return it to medium heat (or use a separate non-stick pan or griddle).
- Place one flour tortilla in the warm pan. Sprinkle a generous amount of shredded cheese over one half of the tortilla.
- Spoon about 1/4 to 1/3 cup of the kimchi bulgogi filling over the cheese. Don’t overfill!
- Add a little more cheese on top of the filling to help everything melt and hold together.
- Fold the empty half of the tortilla over the filling, creating a half-moon shape.
- Cook for 3-5 minutes per side, or until the tortilla is golden brown and crispy, and the cheese is beautifully melted and gooey. You might need to gently press down with a spatula to ensure even contact and browning.
- Carefully remove the cooked quesadilla from the pan and place it on a cutting board.
- Repeat the process with the remaining tortillas and filling.
Step 5: Serve
- Once all your quesadillas are cooked, slice each one into wedges (usually 3 or 4 per half-moon).
- Arrange them on a platter and serve immediately with the chilled spicy crema on the side.
- Garnish with sliced green onions and a sprinkle of toasted sesame seeds for an extra touch of flavor and visual appeal. Enjoy!
Tips & Suggestions
- Slicing Beef Like a Pro: Partially freezing the beef for 20-30 minutes before slicing makes it much firmer and easier to get those super thin, even slices crucial for tender bulgogi.
- Don’t Overcrowd the Pan: When cooking the bulgogi, cook it in batches if necessary. Overcrowding the pan will steam the meat instead of searing it, preventing that delicious caramelization.
- Cheese is Your Friend: Use plenty of cheese! It acts as a delicious glue to hold the filling in place and gives that satisfying stretch with every bite.
- Heat Control is Key: Cook the quesadillas over medium heat. Too high, and the tortilla will burn before the cheese melts; too low, and it won’t get that lovely golden crisp.
- Make It Ahead: The bulgogi beef can be marinated the day before, and the spicy crema can also be made a day in advance. This makes assembly on the day of serving much quicker!
Storage
- Leftover Quesadillas: If you happen to have any quesadillas left over (it’s rare in my house!), let them cool completely before storing them. Place them in an airtight container in the refrigerator for up to 2-3 days. For the best reheating results, I recommend using a dry skillet over medium heat, a toaster oven, or an air fryer to get the tortillas crispy again. Microwaving tends to make them soft.
- Leftover Kimchi Bulgogi Filling: The cooked filling can be stored separately in an airtight container in the refrigerator for 3-4 days. It’s fantastic on its own over rice, in a lettuce wrap, or even in a breakfast scramble!
- Spicy Crema: The spicy crema will keep well in an airtight container in the refrigerator for up to 5 days. Give it a quick stir before serving if it has separated slightly.
Final Thoughts
And there you have it, my friends! We’ve embarked on a delicious adventure, culminating in a dish that truly stands out. I honestly believe that these Kimchi Bulgogi Quesadillas With Spicy Crema are a game-changer for anyone looking to excite their palate.
This recipe isn’t just a meal; it’s an experience. It masterfully brings together the irresistible savory sweetness of tender Korean beef bulgogi with the vibrant, tangy, and subtly spicy kick of kimchi, all hugged by gooey, melted cheese within a perfectly crispy tortilla. Then, that incredible spicy crema swoops in to provide a cool, creamy counterpoint, tying every incredible flavor together into a harmonious bite.
From the satisfying crunch of the tortilla to the tender beef and the fiery zing of the kimchi, every texture and taste note sings. Whether you’re seeking an exciting weeknight dinner, a show-stopping appetizer for your next gathering, or simply an extraordinary snack, these Kimchi Bulgogi Quesadillas With Spicy Crema deliver on every front. I wholeheartedly encourage you to give this recipe a try; I promise, your taste buds will be singing its praises!

Kimchi Bulgogi Quesadillas: Bold Flavor, Spicy Crema!
- Total Time: 50 minutes
- Yield: 4 servings
Description
Experience the ultimate fusion of Korean and Mexican flavors with these Kimchi Bulgogi Quesadillas. Tender bulgogi beef, spicy kimchi, and melty cheese come together with a zesty crema for a satisfying meal.
Ingredients
- Beef (thinly sliced, ribeye or sirloin)
- Soy Sauce
- Brown Sugar
- Garlic (minced)
- Ginger (grated)
- Sesame Oil
- Pear or Apple Puree
- Onion (sliced thin)
- Black Pepper (freshly ground)
- Non-alcoholic alternative for rice wine/mirin (like apple juice)
- Napa Cabbage Kimchi (well-fermented)
- Flour Tortillas (medium to large-sized)
- Cheese (Monterey Jack, Oaxaca, or Mexican blend)
- Sour Cream or Mexican Crema
- Gochujang (Korean Chili Paste)
- Lime Juice (freshly squeezed)
- Honey or Sugar
- Sliced green onions (for garnish)
- Toasted sesame seeds (for garnish)
Instructions
- If your beef isn't already thinly sliced, partially freeze the beef for about 30 minutes, then slice against the grain into very thin pieces, about 1/8-inch thick.
- In a medium bowl, combine the soy sauce, brown sugar, minced garlic, grated ginger, sesame oil, pear or apple puree, and the non-alcoholic alternative (like apple juice if using). Whisk until the sugar is dissolved.
- Add the thinly sliced beef and sliced onion to the marinade. Use your hands to thoroughly mix, ensuring every piece of beef is coated.
- Cover the bowl and refrigerate for at least 30 minutes, but ideally 2-4 hours, or even overnight for the best flavor.
- While the bulgogi is marinating, in a small bowl, combine the sour cream (or crema/Greek yogurt), gochujang, lime juice, and honey or sugar.
- Whisk until everything is smooth and well combined. Taste and adjust the gochujang or lime juice to your preference.
- Cover and refrigerate until ready to serve.
- Heat a large skillet or wok over medium-high heat. Add a tablespoon of neutral oil if your pan isn't non-stick.
- Once hot, add the marinated beef and onion (without overcrowding the pan; you might need to do this in batches if your pan is smaller). Spread it out and cook for about 3-4 minutes, stirring occasionally, until the beef is mostly browned and cooked through.
- Add the kimchi to the pan with the bulgogi. Stir everything together and continue to cook for another 3-5 minutes, allowing the kimchi to heat through and meld its flavors with the beef.
- Remove from heat and transfer the kimchi bulgogi filling to a bowl. Give it a taste and add a pinch more soy sauce or black pepper if needed.
- Wipe out your skillet and return it to medium heat (or use a separate non-stick pan or griddle).
- Place one flour tortilla in the warm pan. Sprinkle a generous amount of shredded cheese over one half of the tortilla.
- Spoon about 1/4 to 1/3 cup of the kimchi bulgogi filling over the cheese. Don't overfill!
- Add a little more cheese on top of the filling to help everything melt and hold together.
- Fold the empty half of the tortilla over the filling, creating a half-moon shape.
- Cook for 3-5 minutes per side, or until the tortilla is golden brown and crispy, and the cheese is beautifully melted and gooey.
- Carefully remove the cooked quesadilla from the pan and place it on a cutting board.
- Repeat the process with the remaining tortillas and filling.
- Once all your quesadillas are cooked, slice each one into wedges (usually 3 or 4 per half-moon).
- Arrange them on a platter and serve immediately with the chilled spicy crema on the side.
- Garnish with sliced green onions and a sprinkle of toasted sesame seeds for an extra touch of flavor and visual appeal.
- Prep Time: 30 mins
- Cook Time: 20 mins
- Category: Dinner
- Method: Cooking
- Cuisine: Korean-Mexican Fusion
Nutrition
- Serving Size: 1 quesadilla
- Calories: 450
- Sugar: 5 g
- Sodium: 800 mg
- Fat: 25 g
- Saturated Fat: 10 g
- Unsaturated Fat: 10 g
- Trans Fat: 0 g
- Carbohydrates: 40 g
- Fiber: 2 g
- Protein: 20 g
- Cholesterol: 60 mg
Keywords: Partially freezing the beef for 20-30 minutes before slicing makes it easier to get thin, even slices. Don't overcrowd the pan when cooking the bulgogi to ensure proper searing.