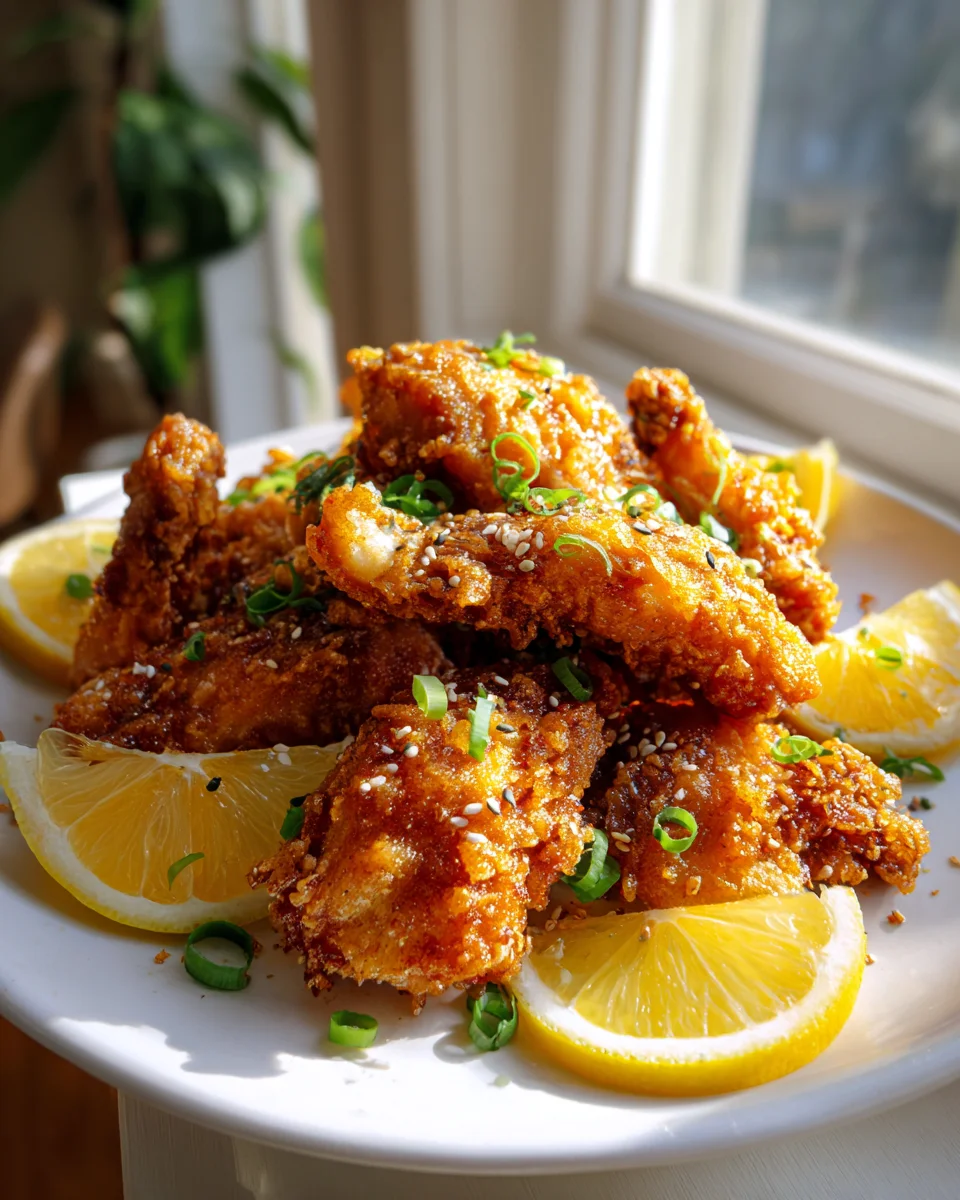
Crispy Japanese Fried Chicken With Lemon
Oh my goodness, get ready to experience something truly extraordinary! Crispy Japanese Fried Chicken With Lemon isn’t just another dinner recipe; it’s a culinary journey to the heart of comfort food, elevated to perfection. I’m absolutely thrilled to share this with you because it’s the kind of dish that lights up faces and makes everyone ask for seconds.
So, what makes this recipe so incredibly special? It all starts with the magic of Japanese frying – we achieve an unbelievably light, shatteringly crisp exterior that gives way to the most tender, intensely flavorful meat you’ve ever tasted. Each piece of boneless beef (traditionally chicken, but delicious with beef too!) is marinated in a savory, umami-rich blend of soy, ginger, and garlic, ensuring every bite bursts with incredible depth. Then, it’s expertly fried to a perfect golden hue, creating that signature delicate crunch. And the best part? A generous squeeze of fresh, vibrant lemon juice over the top! That zesty brightness isn’t just a garnish; it’s a crucial flavor component that cuts through the richness, awakening your palate and leaving you craving more.
You are going to absolutely adore making and eating this at home. It’s comforting, satisfying, and honestly, so much better than anything you’d get for takeout. Whether you’re making it for a special weekend treat or just a super delicious weeknight meal, this recipe promises pure joy in every crunchy, juicy, lemon-kissed bite. Let’s get cooking!

Ingredient Notes
Crispy Japanese Fried Chicken with Lemon, or Karaage as it’s known in Japan, is one of my absolute favorite comfort foods. The magic lies in a flavorful marinade and that incredibly crunchy, light coating. Here’s a breakdown of the key ingredients I use to get it just right, along with some handy substitutions:
- Boneless, Skinless Chicken Thighs: For me, chicken thighs are non-negotiable for the juiciest, most flavorful karaage. They stay incredibly tender during frying thanks to their higher fat content. I like to cut them into roughly 1.5 to 2-inch bite-sized pieces.
- Substitution: You can use boneless, skinless chicken breast, but be aware it tends to dry out more easily. If you opt for breast, I recommend brining it for 30 minutes in a simple saltwater solution before marinating to help retain moisture.
- Soy Sauce: A good quality Japanese soy sauce forms the savory backbone of our marinade. It imparts that essential umami flavor.
- Substitution: For a gluten-free option, use tamari, which is naturally gluten-free and has a similar rich flavor.
- Fresh Ginger: Grated fresh ginger adds a wonderful zing and aromatic warmth that cuts through the richness. Don’t skimp on this!
- Substitution: While fresh is best, if you’re in a pinch, about ½ to ¾ teaspoon of ground ginger powder can be used for every tablespoon of fresh grated ginger. The flavor won’t be as bright, but it will still contribute.
- Fresh Garlic: Similar to ginger, fresh grated garlic provides a pungent, aromatic depth to the marinade.
- Substitution: Granulated garlic powder can work in a pinch (about ¼ teaspoon for every clove), but the fresh stuff really makes a difference here.
- Fresh Lemon Juice: This is a critical ingredient for our “Crispy Japanese Fried Chicken with Lemon”! I include it directly in the marinade to tenderize the chicken slightly and infuse a subtle, bright citrus note from the inside out. Of course, we’ll also serve extra wedges with the finished dish!
- Substitution: While bottled lemon juice can be used, fresh is always superior for its vibrant flavor and aroma.
- Sugar: Just a touch of granulated sugar in the marinade helps to balance the savory flavors, promoting a beautiful caramelization during frying.
- Substitution: Brown sugar or honey can also be used, adjusting to taste.
- Non-Alcoholic Cooking Beverage: Traditional karaage often uses sake or mirin. To achieve a similar depth of flavor and subtle sweetness without alcohol, I recommend using a non-alcoholic cooking mirin alternative if available. Alternatively, you can use chicken or vegetable broth mixed with a pinch of sugar (about 1 teaspoon sugar per 2 tablespoons broth) to mimic the mild sweetness and umami that mirin provides.
- Substitution: If you prefer to omit this entirely, you can, but I find it adds a nice layer of complexity.
- Potato Starch (Katakuriko): This is the secret to that signature, incredibly light, and super crispy coating. Potato starch yields a crispier, almost shatteringly thin crust compared to cornstarch.
- Substitution: Cornstarch is your best bet if you can’t find potato starch. It will still give you a crispy coating, though perhaps slightly less delicate. All-purpose flour will work but results in a different, thicker crust that isn’t quite the classic karaage texture.
- Neutral Frying Oil: Canola, vegetable, or peanut oil are all great choices for deep frying. Choose an oil with a high smoke point.
Step-by-Step Instructions
Making truly crispy Japanese fried chicken isn’t difficult, but it does benefit from a few key techniques. Here’s how I get that perfect, golden crunch every time:
- Prepare the Chicken: Start by patting your boneless, skinless chicken thighs very dry with paper towels. This helps the marinade adhere better and prevents excess moisture from making your oil splatter. Cut the chicken into uniform 1.5 to 2-inch pieces. Uniformity is important for even cooking.
- Marinate the Chicken: In a medium bowl, combine the soy sauce, grated fresh ginger, grated fresh garlic, fresh lemon juice, sugar, and your chosen non-alcoholic cooking beverage (or broth/sugar mixture). Whisk these ingredients together until the sugar is dissolved. Add the chicken pieces to the marinade, tossing to ensure every piece is thoroughly coated. Cover the bowl and refrigerate for at least 30 minutes, but ideally 1 to 4 hours, or even overnight for the deepest flavor. The longer it marinates, the more flavorful your chicken will be.
- Prepare for Frying: When you’re ready to fry, remove the chicken from the refrigerator. Place the potato starch in a shallow dish or a resealable plastic bag. One piece at a time, or in small batches, remove the chicken from the marinade, letting any excess drip off (don’t rinse!). Dredge each piece thoroughly in the potato starch, pressing gently to ensure an even, thin coating. Shake off any excess starch. Arrange the coated chicken on a wire rack set over a baking sheet; this allows air to circulate and prevents the bottom from becoming soggy.
- First Fry (Cooking Through): Pour enough neutral oil into a large, heavy-bottomed pot or Dutch oven to reach about 2-3 inches deep. Heat the oil over medium-high heat until it reaches 340-350°F (170-175°C). If you don’t have a thermometer, you can test by dropping a tiny bit of starch into the oil; it should sizzle gently. Carefully add the chicken pieces to the hot oil in batches, ensuring you don’t overcrowd the pot. Overcrowding will lower the oil temperature and lead to soggy chicken. Fry for 2-3 minutes per batch, turning occasionally, until the chicken is lightly golden and cooked through. The internal temperature should reach 165°F (74°C). Remove the chicken with a slotted spoon or spider and transfer it to a clean wire rack set over a baking sheet to drain. Repeat with the remaining chicken.
- Rest: Let all the fried chicken rest for at least 5-10 minutes. This resting period is crucial; it allows the internal moisture to redistribute and helps achieve a crispier exterior during the second fry.
- Second Fry (Achieving Ultimate Crispness): Increase the oil temperature to 375°F (190°C). Return the rested chicken to the hot oil in batches, being careful not to overcrowd. Fry for another 60-90 seconds, or until the chicken is deeply golden brown and incredibly crispy. This second fry is the secret to that signature, irresistible crunch.
- Serve Immediately: Remove the chicken from the oil, drain briefly on a wire rack or paper towels, and serve immediately with plenty of fresh lemon wedges. A squeeze of fresh lemon over the hot, crispy chicken truly elevates the flavor!
Tips & Suggestions
To master your Crispy Japanese Fried Chicken with Lemon, I’ve gathered some extra tips and suggestions that I’ve found incredibly helpful:
- Don’t Skip the Double Fry: Seriously, this is the most important tip for achieving truly authentic karaage crispness. The first fry cooks the chicken through, and the second fry, at a higher temperature, creates that glorious, shattering crust. It makes all the difference!
- Monitor Oil Temperature: An oil thermometer is your best friend here. Maintaining the correct oil temperature (340-350°F for the first fry, 375°F for the second) is crucial for even cooking and optimal crispness. If the oil is too cold, the chicken will be greasy; if it’s too hot, the exterior will burn before the interior cooks.
- Don’t Overcrowd the Pot: Frying in small batches is essential. Adding too much chicken at once will significantly drop the oil temperature, leading to greasy, less crispy results. Patience is a virtue when frying!
- Pat Chicken Dry Before Marinating: Excess moisture on the chicken pieces can dilute your marinade and affect the crispness of your coating. Always pat the chicken thoroughly dry.
- Allow Marinade to Drip Off: Before coating the chicken in potato starch, let any excess marinade drip off. Too much liquid on the chicken will create a gummy coating.
- Serve with Fresh Lemon: Our dish name emphasizes lemon for a reason! A generous squeeze of fresh lemon juice over the hot, crispy chicken just before eating brightens all the flavors and adds a fantastic tang that cuts through the richness. Don’t be shy with it!
- Experiment with Dipping Sauces: While fantastic on its own with just lemon, karaage is also wonderful with dipping sauces. My favorites include Japanese mayonnaise (Kewpie mayo), a simple ponzu sauce, or even a homemade chili garlic sauce.
Storage
While Crispy Japanese Fried Chicken with Lemon is absolutely best enjoyed fresh and hot, you can definitely store leftovers and reheat them. Here’s how I manage it:
- Refrigeration:
- Allow any leftover karaage to cool completely to room temperature (this prevents condensation, which can make it soggy).
- Store the cooled chicken in an airtight container in the refrigerator for up to 3 days.
- Reheating:
- Oven (Recommended for Crispness): Preheat your oven or toaster oven to 375°F (190°C). Arrange the chicken in a single layer on a wire rack set over a baking sheet. Heat for 10-15 minutes, or until heated through and the exterior has regained its crispness.
- Air Fryer (Excellent for Crispness): If you have an air fryer, this is a fantastic option for reheating! Preheat your air fryer to 375°F (190°C). Place the chicken in a single layer in the basket and “fry” for 5-8 minutes, or until hot and crispy.
- Microwave (Not Recommended for Crispness): While you can microwave the chicken to heat it through, it will become soft and lose its crispy texture. I only recommend this if you prioritize speed over crunch. Heat in 30-second intervals until warmed.
- Freezing:
- Cooked karaage freezes surprisingly well! After frying and allowing the chicken to cool completely, arrange the pieces in a single layer on a baking sheet and freeze until solid (this prevents them from sticking together).
- Once frozen, transfer the chicken to a freezer-safe bag or airtight container. It can be stored in the freezer for up to 2-3 months.
- To reheat from frozen, you can follow the oven or air fryer instructions, simply adding an extra 5-10 minutes to the cooking time, or until fully heated through and crispy.
Final Thoughts
And there you have it! I truly hope you give this recipe for Crispy Japanese Fried Chicken With Lemon a try. It’s more than just fried chicken; it’s an experience of perfectly seasoned, incredibly juicy chicken encased in an ethereal crisp coating, elevated by that essential zesty burst of fresh lemon. The harmonious combination of savory umami and bright citrus creates a flavor profile that’s utterly addictive and refreshingly different from your average fried chicken.
Whether you’re looking to impress guests, treat your family, or simply indulge in a phenomenal meal, this Crispy Japanese Fried Chicken With Lemon is a guaranteed winner. It’s a dish that truly excites the taste buds and leaves a lasting impression, proving that a little lemon can make all the difference. Get ready to enjoy a culinary delight that will have everyone asking for the recipe!

Best Crispy Japanese Fried Chicken with Lemon Flavor
- Total Time: 45 minutes
- Yield: 4 servings
Description
Experience the extraordinary taste of Crispy Japanese Fried Chicken with Lemon, a dish that combines a light, shatteringly crisp exterior with tender, flavorful meat. Perfect for any occasion, this recipe will leave everyone asking for seconds.
Ingredients
- Boneless, Skinless Chicken Thighs
- Soy Sauce
- Fresh Ginger
- Fresh Garlic
- Fresh Lemon Juice
- Sugar
- Non-Alcoholic Cooking Beverage
- Potato Starch (Katakuriko)
- Neutral Frying Oil
Instructions
- Prepare the Chicken: Start by patting your boneless, skinless chicken thighs very dry with paper towels. Cut the chicken into uniform 1.5 to 2-inch pieces.
- Marinate the Chicken: In a medium bowl, combine the soy sauce, grated fresh ginger, grated fresh garlic, fresh lemon juice, sugar, and your chosen non-alcoholic cooking beverage. Whisk these ingredients together until the sugar is dissolved. Add the chicken pieces to the marinade, tossing to ensure every piece is thoroughly coated. Cover the bowl and refrigerate for at least 30 minutes, ideally 1 to 4 hours, or even overnight.
- Prepare for Frying: When you're ready to fry, remove the chicken from the refrigerator. Place the potato starch in a shallow dish or a resealable plastic bag. One piece at a time, remove the chicken from the marinade, letting any excess drip off. Dredge each piece thoroughly in the potato starch, pressing gently to ensure an even coating. Shake off any excess starch and arrange the coated chicken on a wire rack set over a baking sheet.
- First Fry (Cooking Through): Pour enough neutral oil into a large pot to reach about 2-3 inches deep. Heat the oil over medium-high heat until it reaches 340-350°F (170-175°C). Carefully add the chicken pieces to the hot oil in batches, frying for 2-3 minutes per batch until lightly golden and cooked through. Remove the chicken with a slotted spoon and transfer it to a clean wire rack.
- Rest: Let all the fried chicken rest for at least 5-10 minutes.
- Second Fry (Achieving Ultimate Crispness): Increase the oil temperature to 375°F (190°C). Return the rested chicken to the hot oil in batches, frying for another 60-90 seconds until deeply golden brown and crispy.
- Serve Immediately: Remove the chicken from the oil, drain briefly on a wire rack or paper towels, and serve immediately with plenty of fresh lemon wedges.
- Prep Time: 30 mins
- Cook Time: 15 mins
- Category: Dinner
- Method: Frying
- Cuisine: Japanese
Nutrition
- Serving Size: 1 piece
- Calories: 300
- Sugar: 2 g
- Sodium: 600 mg
- Fat: 18 g
- Saturated Fat: 4 g
- Unsaturated Fat: 12 g
- Trans Fat: 0 g
- Carbohydrates: 20 g
- Fiber: 1 g
- Protein: 20 g
- Cholesterol: 70 mg
Keywords: Don't skip the double fry for authentic karaage crispness. Monitor oil temperature closely to avoid greasy chicken. Always pat chicken dry before marinating to ensure a crispy coating.