Blackberry Crum extractb Bars Recipe Easy And Perfect For Any Occasion
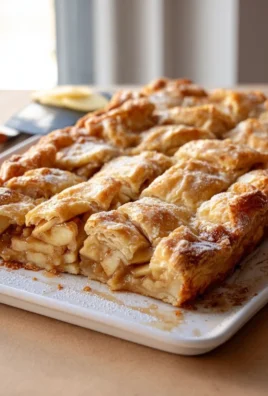
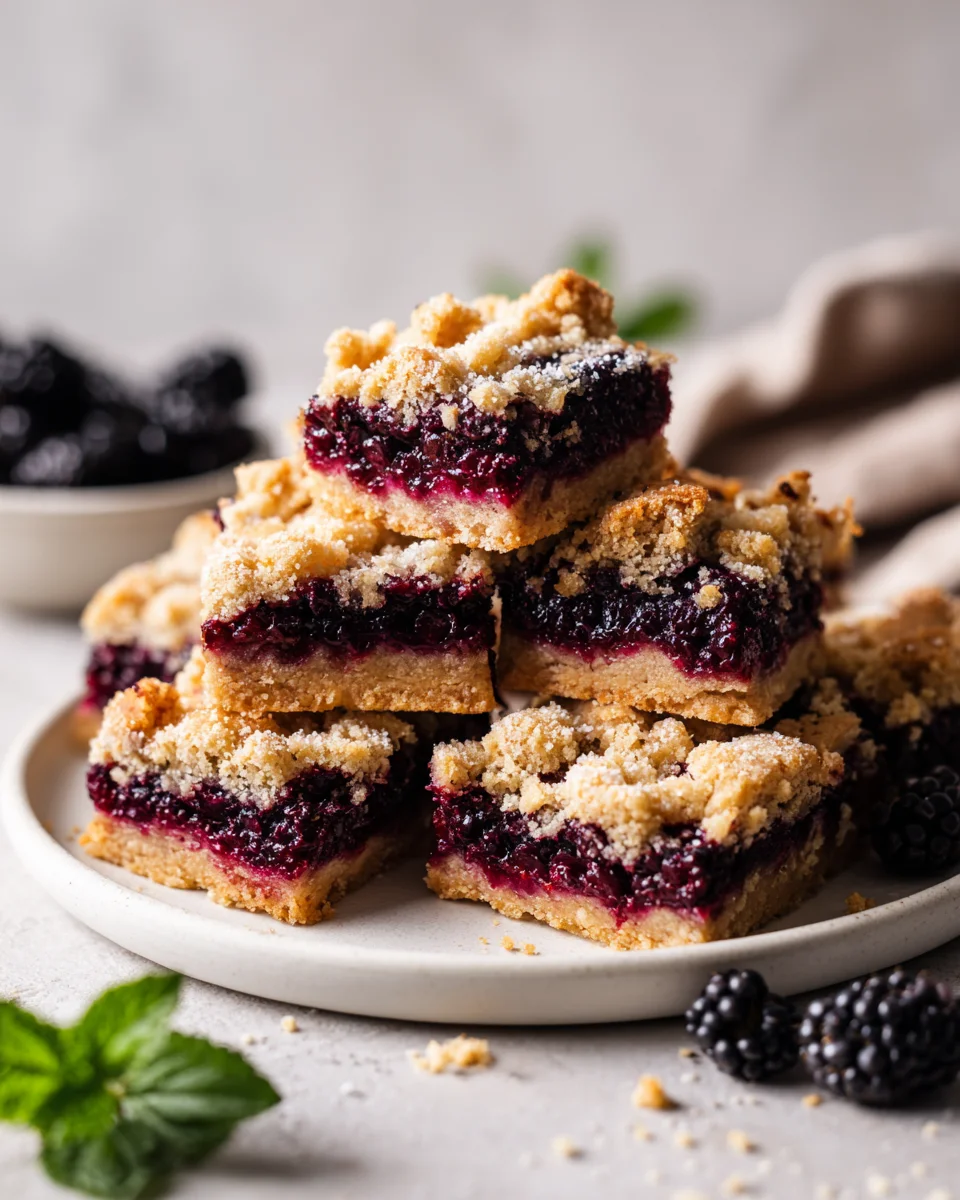
Oh my goodness, I am absolutely thrilled to share one of my all-time favorite dessert recipes with you today! Get ready to fall head over heels for the Blackberry Crum extractb Bars Recipe Easy And Perfect For Any Occasion. Trust me when I say these aren’t just any ordinary bars; they are a delightful symphony of textures and flavors that will have everyone asking for more. What makes them so special? Well, for starters, they perfectly balance the sweet and tart notes of juicy blackberries with a rich, buttery, crumbly crust and topping. It’s the kind of dessert that feels fancy and impressive, yet is surprisingly easy to whip up, making it truly perfect for any occasion – from a casual weeknight treat to a show-stopping potluck contribution.
You are absolutely going to love these bars because they tick all the boxes: they’re incredibly straightforward to make, require simple ingredients, and deliver an unforgettable taste experience. Imagine sinking your teeth into a tender, buttery base, followed by a burst of warm, slightly jammy blackberry filling, all crowned with a delicious, crunchy crumb topping. It’s pure bliss in every bite! These bars are wonderfully versatile; they make an amazing dessert after dinner, a delightful afternoon snack with a cup of coffee, or the star of any gathering. They’re quick enough for a spontaneous baking session but elegant enough for a special event. Seriously, once you try these easy-to-make, utterly delicious blackberry bars, you’ll find yourself reaching for this recipe again and again.

Ingredient Notes
Crafting the perfect Blackberry Crumb Bars starts with understanding your ingredients. I always say that good ingredients make for great results, and for these easy and delicious bars, it’s absolutely true! Here’s what I typically use, along with some handy substitutions I’ve discovered over the years.
- All-Purpose Flour: This forms the bulk of our crumbly base and topping. I find all-purpose flour gives the best texture – tender yet sturdy enough to hold together. If you’re looking to add a little extra fiber, you can swap out up to half of the all-purpose flour for whole wheat pastry flour. I wouldn’t recommend using regular whole wheat flour as it can make the bars a bit too dense.
- Rolled Oats (Old-Fashioned): These are key for that classic chewy, rustic crumb bar texture. Quick oats can work in a pinch, but they’ll result in a finer, less noticeable texture in your crumble. Instant oats are generally too fine and don’t provide the same chewiness.
- Granulated Sugar: For sweetness in both the crust and the filling. For the crumble, you could experiment with light brown sugar for a slightly deeper, molasses-like flavor, which pairs wonderfully with blackberries. Adjust the amount in the filling based on how sweet your blackberries are – super ripe berries might need less sugar.
- Cold Unsalted Butter: This is a non-negotiable for a truly crumbly, tender crust and topping. Cold butter, cut into small pieces, creates pockets of steam as it bakes, leading to that wonderful flaky texture. I always use unsalted so I can control the salt level myself. If you only have salted butter, just reduce the added salt in the recipe by about a quarter teaspoon. For a dairy-free option, a good quality plant-based butter alternative that’s firm when cold can work well.
- Baking Powder & Salt: The baking powder gives a little lift to our crumb, making it less dense, while the salt balances the sweetness and enhances all the flavors. Don’t skip the salt!
- Fresh or Frozen Blackberries: The star of the show! Fresh blackberries are fantastic when in season, offering vibrant flavor. If using frozen, there’s no need to thaw them first; you can add them directly to your filling mixture. They might release a little more liquid, but that’s what our cornstarch is for! You can also substitute other berries like raspberries, blueberries, or a mixed berry blend.
- Cornstarch: This is our thickening agent for the blackberry filling. It helps prevent the filling from becoming too runny, ensuring your bars hold their shape when sliced. Tapioca starch is a great gluten-free alternative if you need one, use the same amount.
- Fresh Lemon Juice: A squeeze of fresh lemon juice is crucial. It brightens the flavor of the blackberries, cutting through the sweetness and adding a lovely tang. It truly makes the fruit filling sing. Don’t worry about it making the bars sour; it just enhances the berry flavor.
- Vanilla Extract: A touch of pure vanilla extract in the filling or even in the crumble adds a warm, aromatic note that complements the berries beautifully.
Step-by-Step Instructions
Making these Blackberry Crumb Bars is truly a breeze, and I promise you’ll be delighted with the results. Just follow these steps, and you’ll have a tray of delightful treats ready for any occasion!
- Prepare Your Pan: First things first, preheat your oven to 375°F (190°C). Then, get your 9×13-inch baking pan ready. I like to grease it lightly and then line it with parchment paper, leaving an overhang on the sides. This makes lifting the bars out of the pan and cutting them so much easier!
- Start the Crumb Mixture: In a large mixing bowl, combine the dry ingredients for your crumb base and topping. This includes the all-purpose flour, rolled oats, granulated sugar, baking powder, and salt. Whisk them together thoroughly until well combined.
- Cut in the Butter: Now for the magic! Add your cold, cubed unsalted butter to the dry ingredients. Using a pastry blender, your fingertips, or a food processor (pulsing carefully!), cut the butter into the flour mixture until it resembles coarse crumbs with some pea-sized pieces of butter still visible. The key here is to work quickly so the butter stays cold. If using your hands, try not to overwork the dough; warmth from your hands can melt the butter too much.
- Form the Base Layer: Take about two-thirds of this crumb mixture and press it firmly and evenly into the bottom of your prepared baking pan. You can use the bottom of a glass or your hands to get a nice, compact layer. This will be the sturdy foundation for our bars.
- Par-Bake the Crust (Optional, but Recommended): For a crisper bottom crust that won’t get soggy, I sometimes like to pop this pressed base into the preheated oven for about 10-12 minutes, just until it’s lightly golden. This step isn’t strictly necessary, but it does make a difference in texture. If you skip this, no problem, just proceed to the next step.
- Prepare the Blackberry Filling: While your crust (if par-baking) is in the oven, or if you’re skipping that step, simply combine your fresh or frozen blackberries, granulated sugar, cornstarch, fresh lemon juice, and vanilla extract in a medium bowl. Gently toss everything together until the blackberries are coated and the cornstarch is dissolved.
- Assemble the Bars: Once your crust is ready (either par-baked and slightly cooled, or freshly pressed), spread the blackberry filling evenly over the top of the crust. Make sure the fruit is distributed from edge to edge.
- Add the Crumb Topping: Sprinkle the remaining one-third of the crumb mixture evenly over the blackberry filling. Don’t press it down too much; we want it to stay nice and crumbly on top.
- Bake to Golden Perfection: Place the pan back into the preheated oven. Bake for 35-45 minutes, or until the topping is beautifully golden brown, and the blackberry filling is bubbly around the edges. You’ll smell the wonderful aroma filling your kitchen!
- Cool Completely (This is Critical!): I know it’s tempting, but this is the most important step for clean, neat bars. Let the bars cool completely in the pan on a wire rack for at least 2-3 hours, or even longer. The filling needs time to set properly. If you cut them while warm, they’ll likely fall apart and be quite messy. Patience is a virtue here!
- Slice and Serve: Once completely cool, use the parchment paper overhangs to lift the entire slab of bars out of the pan. Place it on a cutting board and slice into squares or rectangles. Enjoy!
Tips & Suggestions
I’ve made these Blackberry Crumb Bars countless times, and along the way, I’ve picked up a few tricks that I love to share to help you make them absolutely perfect every single time. Here are my go-to tips and suggestions:
- Keep Your Butter Cold: I can’t stress this enough! Cold butter is the secret to a truly crumbly and tender crust. If your kitchen is warm, you can even chill your flour mixture for 10-15 minutes before cutting in the butter. If you notice your butter getting too soft while you’re working, pop the bowl into the fridge for a few minutes.
- Don’t Overwork the Crumb: Whether you’re using your hands or a pastry blender, stop mixing as soon as the butter is incorporated and resembles coarse crumbs. Overworking the dough develops gluten, which can lead to a tough crust instead of a tender one.
- Adjust Sweetness to Your Berries: Blackberries can vary quite a bit in sweetness depending on their ripeness. Taste a few of your berries before you mix the filling. If they’re particularly tart, you might want to add an extra tablespoon or two of sugar to the filling. If they’re super sweet, you can slightly reduce the sugar.
- The Power of Lemon Zest: For an extra burst of bright, citrusy flavor, I sometimes like to add about half a teaspoon of finely grated lemon zest to the blackberry filling along with the juice. It truly makes the fruit pop!
- Spice It Up: A pinch of cinnamon or a tiny grating of fresh nutmeg can be a wonderful addition to the crumb mixture. It adds a warm, cozy note that pairs beautifully with the blackberries.
- Consider Blind Baking: As mentioned in the instructions, par-baking the bottom crust for 10-12 minutes before adding the filling really helps prevent a soggy bottom, especially with juicy fruits like blackberries. It’s an extra step, but one I often take for the best texture.
- Patience with Cooling: I know it’s hard to wait when your kitchen smells amazing, but seriously, let these bars cool completely! If you try to cut them while warm, the filling will be too soft and oozy, and your bars won’t hold their shape. Trust me, it’s worth the wait for those clean, picture-perfect slices.
- Serving Suggestions: These bars are absolutely delicious on their own, but they’re also fantastic served slightly warm with a scoop of vanilla bean ice cream, a dollop of fresh whipped cream, or even a drizzle of homemade lemon glaze.
- Experiment with Other Fruits: While blackberries are wonderful, this crumb bar recipe is incredibly versatile. Feel free to swap them out for raspberries, blueberries, sliced peaches, or a mix of your favorite seasonal fruits. Just ensure you adjust the cornstarch if your chosen fruit is particularly watery.
Storage
Once you’ve baked a batch of these glorious Blackberry Crumb Bars, you’ll want to make sure they stay fresh and delicious for as long as possible. Here’s how I usually store them:
- At Room Temperature: If you plan on devouring them within a day or two, you can store your Blackberry Crumb Bars in an airtight container at room temperature. Just make sure they are completely cooled before putting them away. Any warmth trapped inside the container can create condensation, making the bars soggy. They’ll generally be good for up to 2 days this way.
- In the Refrigerator: For extended freshness, especially if your home is warm or humid, I recommend storing these bars in an airtight container in the refrigerator. This will keep them fresh for up to a week. The chilling might make the crust a little firmer, but they’ll still be wonderfully delicious. You can let them come to room temperature before serving, or even gently warm them in the microwave for a few seconds if you like them slightly gooey.
- Freezing for Longer Storage: These bars freeze beautifully, which is perfect if you want to make a big batch or save some for later!
- Ensure the bars are completely cooled before freezing.
- Slice them into individual portions.
- Wrap each bar tightly in plastic wrap, then place them in a freezer-safe airtight container or a heavy-duty freezer bag. This double layer helps prevent freezer burn.
- They will keep well in the freezer for up to 2-3 months.
When you’re ready to enjoy them, you can thaw individual bars at room temperature for an hour or two, or pop them in the microwave for a quick defrost and warm-up. They taste almost as good as fresh out of the oven!
Final Thoughts
I truly hope you’re inspired to try the Blackberry Crum extractb Bars Recipe Easy And Perfect For Any Occasion! I promise you, these delightful bars are more than just a treat; they’re an experience waiting to happen. With their perfect balance of juicy blackberries and that irresistible crumbly topping, they come together so easily, making them an ideal choice for any event – from a casual family dessert to a more formal gathering. Their incredible simplicity and universal appeal truly make the Blackberry Crum extractb Bars Recipe Easy And Perfect For Any Occasion a must-have in your baking collection. Go on, give them a try – I know you’ll adore every delicious bite!
Perfect Blackberry Crumble Bars: Easy & Delicious Recipe
- Total Time: 1 hour
- Yield: 12 servings 1x
Description
These Perfect Blackberry Crumble Bars are a delightful blend of sweet and tart blackberries nestled in a rich, buttery crust. They are easy to make and perfect for any occasion, from casual treats to elegant gatherings.
Ingredients
- 2 cups All-Purpose Flour
- 1 cup Rolled Oats (Old-Fashioned)
- 3/4 cup Granulated Sugar
- 1/2 cup Cold Unsalted Butter, cubed
- 1 tsp Baking Powder
- 1/2 tsp Salt
- 2 cups Fresh or Frozen Blackberries
- 2 tbsp Cornstarch
- 1 tbsp Fresh Lemon Juice
- 1 tsp Vanilla Extract
Instructions
- Preheat your oven to 375°F (190°C) and prepare a 9×13-inch baking pan by greasing it lightly and lining it with parchment paper.
- In a large mixing bowl, combine the all-purpose flour, rolled oats, granulated sugar, baking powder, and salt. Whisk them together thoroughly until well combined.
- Add the cold, cubed unsalted butter to the dry ingredients. Using a pastry blender, your fingertips, or a food processor, cut the butter into the flour mixture until it resembles coarse crumbs with some pea-sized pieces of butter still visible.
- Take about two-thirds of this crumb mixture and press it firmly and evenly into the bottom of your prepared baking pan.
- For a crisper bottom crust, par-bake the pressed base in the preheated oven for about 10-12 minutes until lightly golden.
- In a medium bowl, combine the fresh or frozen blackberries, granulated sugar, cornstarch, fresh lemon juice, and vanilla extract. Gently toss everything together until the blackberries are coated and the cornstarch is dissolved.
- Spread the blackberry filling evenly over the top of the crust.
- Sprinkle the remaining one-third of the crumb mixture evenly over the blackberry filling.
- Bake for 35-45 minutes, or until the topping is golden brown and the blackberry filling is bubbly around the edges.
- Allow the bars to cool completely in the pan on a wire rack for at least 2-3 hours before slicing.
- Prep Time: 15 mins
- Cook Time: 45 mins
- Category: Dessert
- Method: Baking
- Cuisine: American
Nutrition
- Serving Size: 1 bar
- Calories: 200
- Sugar: 10 g
- Sodium: 150 mg
- Fat: 9 g
- Saturated Fat: 5 g
- Unsaturated Fat: 3 g
- Trans Fat: 0 g
- Carbohydrates: 30 g
- Fiber: 2 g
- Protein: 3 g
- Cholesterol: 20 mg
Keywords: Keep your butter cold for a crumbly texture. Adjust sweetness based on the ripeness of your blackberries. You can also experiment with other fruits and add spices like cinnamon for extra flavor.