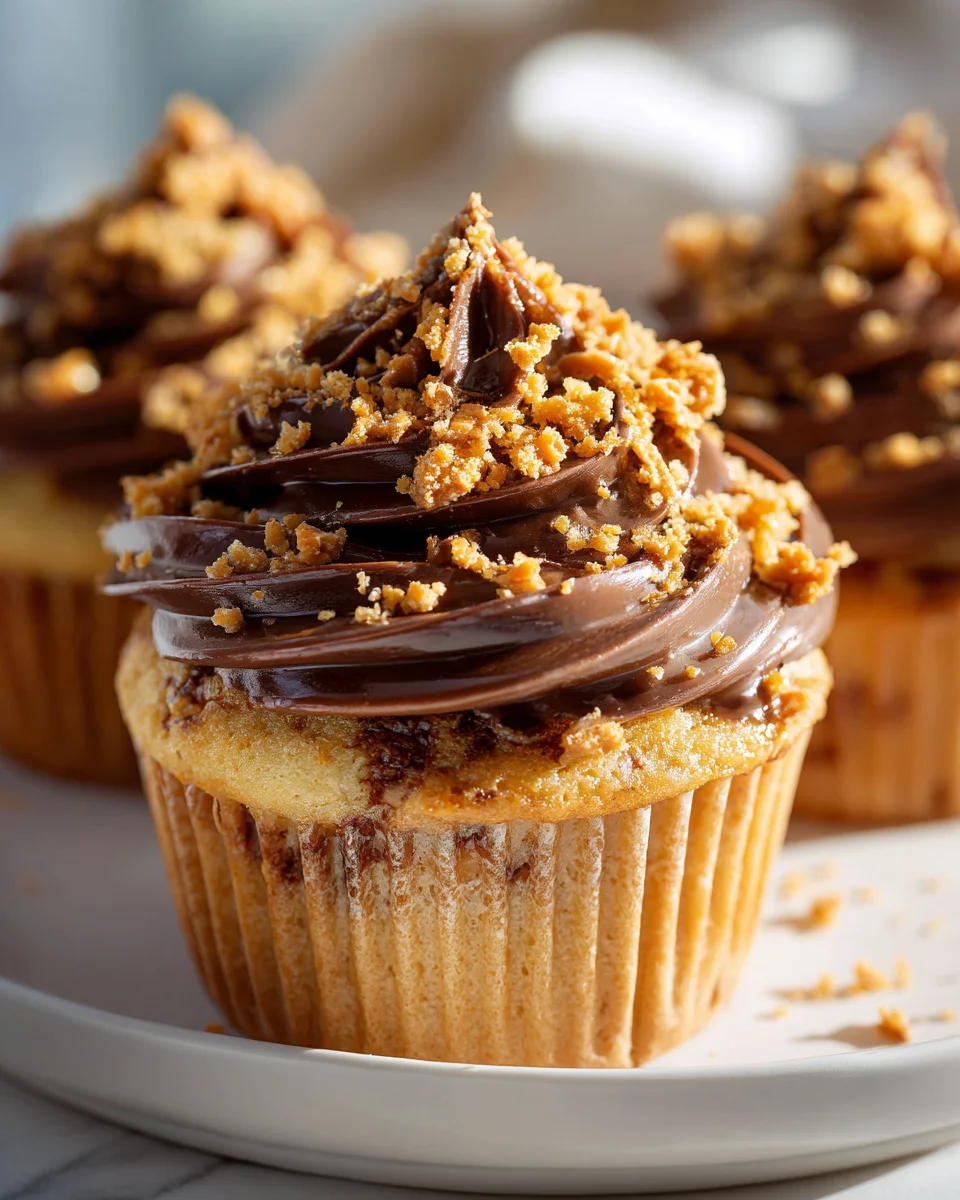
Butterfinger Cupcakes
Oh my goodness, get ready for a dessert experience that’s going to blow your taste buds away! If you’re anything like me, you have a soft spot for that iconic crunch and irresistible peanut butter and chocolate flavor of a Butterfinger candy bar. Well, imagine all that magic transformed into the most delightful, handheld treat: Butterfinger Cupcakes. This isn’t just any cupcake; it’s a celebration of texture and flavor that truly stands out, making it something incredibly special. You’ll love these because they bring a playful, nostalgic twist to a classic dessert, making them an instant hit for any gathering, from casual get-togethers to birthday parties. Each bite delivers a perfect harmony of moist, tender cupcake (I usually go for a rich chocolate or a classic vanilla base!), crowned with a dreamy, creamy frosting – often kissed with peanut butter flavor – and generously studded with crunchy, buttery bits of your favorite candy bar. It’s an indulgence that’s surprisingly easy to whip up, yet looks and tastes incredibly impressive. Prepare for happy faces and empty cupcake liners!

Ingredient Notes
Hello, fellow baking enthusiasts! Getting the right ingredients is key to irresistible Butterfinger Cupcakes. Here’s what I recommend:
The Cupcake Base
- Yellow Cake Mix: I prefer a classic yellow cake mix for its buttery, vanilla foundation that perfectly complements the Butterfinger flavor.
- Scratch Alternative: A good vanilla or yellow cake recipe for about 24 cupcakes works well, ensuring a moist and tender crumb.
- Wet Ingredients: Follow cake mix instructions for eggs, oil, and milk/water. Using milk instead of water often adds richness. Non-dairy milk is a good alternative.
The Butterfinger Magic
- Butterfinger Candy Bars: These are the star! You’ll need about 6-8 standard bars, crushed for both filling (optional) and topping. That signature crispety, crunchety, peanut-buttery texture is essential.
- Crushing: Unwrap the bars, place them in a zip-top bag, and gently crush them with a rolling pin. Aim for a mix of fine crumbs and small chunks for varied texture.
The Frosting
- Vanilla or Peanut Butter Buttercream: A creamy, decadent buttercream is essential. Vanilla allows the Butterfinger to shine, while a peanut butter buttercream perfectly complements the candy’s core flavor, taking it to another level.
- Store-Bought Option: A quality store-bought vanilla or chocolate frosting can be used in a pinch. Consider beating in some creamy peanut butter to elevate it.
- Homemade Buttercream: Typically requires unsalted butter, powdered sugar, vanilla extract, and a splash of milk or cream. Add creamy peanut butter for that specific flavor.
Optional Enhancements
- Peanut Butter: A small dollop of creamy peanut butter in the cupcake’s center adds an extra layer of flavor and moisture.
- Melted Chocolate/Peanut Butter Drizzle: For a decorative finish and an extra flavor boost, a drizzle looks fantastic.
Quality ingredients ensure the best Butterfinger experience!
Step-by-Step Instructions
Let’s make these fabulous Butterfinger Cupcakes. It’s simpler than you might think!
1. Prepare Your Cupcakes
- Preheat Oven & Line Pans: Preheat your oven to 350°F (175°C) or as specified on your cake mix or recipe. Line a 12-cup muffin tin with paper liners.
- Mix the Batter: Prepare your yellow cake batter according to the package directions or your chosen scratch recipe. Mix until just combined and smooth; avoid overmixing to prevent tough cupcakes.
- Fill & Bake: Divide the batter evenly among the prepared liners, filling each about two-thirds full. Bake for 18-22 minutes, or until a toothpick inserted into the center of a cupcake comes out clean.
- Cool Completely: Remove from the oven and let them cool in the muffin tin for a few minutes, then transfer to a wire rack to cool completely. This step is crucial; frosting warm cupcakes leads to a melty mess.
2. Prepare the Butterfinger and Optional Filling
- Crush Butterfinger Bars: While your cupcakes cool, unwrap your Butterfinger candy bars and crush them in a zip-top bag with a rolling pin. Aim for a mix of fine crumbs and small chunks. Set aside.
- Optional Cupcake Coring: Once completely cool, if you desire a filled cupcake, use a cupcake corer, a small knife, or the back of a large piping tip to carefully remove a small cone from the center of each cupcake. Save the removed cake piece.
- Fill Cupcakes (Optional): Fill the created cavity with a small spoonful of creamy peanut butter, extra crushed Butterfinger, or even a simple chocolate ganache. Then, cap the hole with the saved piece of cake.
3. Frost & Decorate
- Prepare Frosting: For homemade buttercream, beat softened unsalted butter, then gradually add powdered sugar, vanilla extract, and a splash of milk/cream until smooth. For peanut butter buttercream, beat in creamy peanut butter. If using store-bought frosting, give it a quick whip to lighten it.
- Frost Cupcakes: Once cupcakes are completely cool, spread or pipe frosting onto each cupcake using an offset spatula or a piping bag with your favorite tip.
- Add Butterfinger Topping: Immediately after frosting each cupcake, sprinkle a generous amount of your crushed Butterfinger candy bars over the top. The fresh frosting helps the crumbs adhere beautifully.
- Optional Drizzle: For an extra touch, drizzle with melted chocolate chips or creamy peanut butter (thinned with a tiny bit of oil) over the finished cupcakes.
Delicious Butterfinger Cupcakes, ready to enjoy!
Tips & Suggestions
I’ve learned a few tricks for these Butterfinger Cupcakes. Here are my top tips for outstanding results!
- Don’t Overmix Batter: Overmixing develops gluten, leading to tough, dense cupcakes. Mix just until ingredients are combined.
- Always Cool Completely: Essential for proper frosting adhesion and a beautiful finish. Never frost warm cupcakes.
- Chill Butterfingers First: Freezing unwrapped Butterfinger bars for 15-20 minutes makes them easier to crush into neat, crisp pieces.
- Vary Crumb Size: A mix of fine crumbs and small chunks provides the best textural contrast and that satisfying crunch.
- Peanut Butter Frosting: While vanilla is good, peanut butter buttercream truly amplifies the Butterfinger flavor for a divine blend.
- Enhanced Filling: For cored cupcakes, consider adding both a dollop of peanut butter and a sprinkle of crushed Butterfinger to the core for a delightful surprise.
- Pinch of Salt: A tiny bit of salt in your buttercream balances sweetness and enhances all the flavors, especially the peanut butter notes.
- Presentation: A neat swirl of frosting and a generous, even coating of crushed Butterfinger makes them visually stunning.
- Make Ahead: You can bake the cupcakes a day in advance, store them unfrosted in an airtight container at room temperature, and frost just before serving.
These tips ensure perfectly executed Butterfinger Cupcakes every time!
Storage
To keep your delightful Butterfinger Cupcakes fresh, here’s how I store them:
- Room Temperature (Frosted): Cupcakes frosted with a standard buttercream (made with butter, powdered sugar) can be stored in an airtight container at room temperature for 2-3 days. I usually place them in a single layer to protect the frosting and topping.
- Refrigeration (Longer Freshness / Specific Frostings): If you’ve used a cream cheese frosting, or a frosting made with whipped cream, these cupcakes absolutely need refrigeration. Store them in an airtight container in the fridge for up to 5 days. Standard buttercream cupcakes also last longer refrigerated, especially in warmer climates. Allow 20-30 minutes at room temperature before serving for the best flavor and texture.
- Unfrosted Cupcakes: Store baked, unfrosted cupcakes in an airtight container at room temperature for up to 2 days, or in the fridge for 4-5 days.
- Freezing Unfrosted: Yes, you can freeze them! Wrap each completely cooled, unfrosted cupcake individually in plastic wrap, then place them in a freezer-safe zip-top bag or airtight container. They’ll stay fresh in the freezer for 2-3 months. Thaw them overnight in the refrigerator or for a few hours at room temperature before frosting.
- Freezing Frosted (Carefully): While I prefer freezing unfrosted, you can freeze frosted ones. Place the frosted cupcakes on a baking sheet and flash freeze them for about an hour until the frosting is firm. Then, wrap each frozen cupcake individually in plastic wrap, and store them in an airtight freezer-safe container. Thaw in the refrigerator overnight. Note that the Butterfinger topping might soften slightly after freezing and thawing.
Proper storage ensures every Butterfinger Cupcake tastes amazing!
Final Thoughts
Well, there you have it! We’ve reached the sweet finish line with these absolutely delightful Butterfinger Cupcakes. I truly believe this isn’t just a recipe; it’s an invitation to pure joy in every single bite. The incredible combination of the moist, tender cake, the luscious frosting, and those glorious, crunchy Butterfinger bits creates a texture and flavor profile that is utterly irresistible. These Butterfinger Cupcakes are guaranteed to be a showstopper at any gathering, from a casual afternoon treat to a celebratory feast. Trust me, once you experience the magic of baking and tasting these, you’ll understand why I’m so enthusiastic. Get ready to impress everyone, and most importantly, treat yourself to something truly spectacular. You absolutely must try these – they’re simply divine!
Decadent Butterfinger Cupcakes: Your New Favorite Dessert!
- Total Time: 52 minutes
- Yield: 12 cupcakes 1x
Description
Get ready for a dessert experience that combines the iconic crunch and irresistible peanut butter and chocolate flavor of Butterfinger candy bars into delightful cupcakes. These Butterfinger Cupcakes are an indulgent treat that will impress at any gathering!
Ingredients
- 1 box yellow cake mix
- eggs (as per cake mix instructions)
- oil (as per cake mix instructions)
- milk or water (as per cake mix instructions, milk preferred)
- 6–8 Butterfinger candy bars, crushed
- unsalted butter (for homemade buttercream)
- powdered sugar (for homemade buttercream)
- vanilla extract (for homemade buttercream)
- milk or cream (for homemade buttercream)
- creamy peanut butter (optional for frosting and filling)
- store-bought vanilla or chocolate frosting (optional)
- melted chocolate chips (optional for drizzle)
- oil (for thinning peanut butter drizzle)
Instructions
- Preheat your oven to 350°F (175°C) or as specified on your cake mix or recipe. Line a 12-cup muffin tin with paper liners.
- Prepare your yellow cake batter according to the package directions or your chosen scratch recipe. Mix until just combined and smooth; avoid overmixing to prevent tough cupcakes.
- Divide the batter evenly among the prepared liners, filling each about two-thirds full. Bake for 18-22 minutes, or until a toothpick inserted into the center of a cupcake comes out clean.
- Remove from the oven and let them cool in the muffin tin for a few minutes, then transfer to a wire rack to cool completely.
- While your cupcakes cool, unwrap your Butterfinger candy bars and crush them in a zip-top bag with a rolling pin. Aim for a mix of fine crumbs and small chunks. Set aside.
- Once completely cool, if you desire a filled cupcake, use a cupcake corer, a small knife, or the back of a large piping tip to carefully remove a small cone from the center of each cupcake. Save the removed cake piece.
- Fill the created cavity with a small spoonful of creamy peanut butter, extra crushed Butterfinger, or even a simple chocolate ganache. Then, cap the hole with the saved piece of cake.
- For homemade buttercream, beat softened unsalted butter, then gradually add powdered sugar, vanilla extract, and a splash of milk/cream until smooth. For peanut butter buttercream, beat in creamy peanut butter. If using store-bought frosting, give it a quick whip to lighten it.
- Once cupcakes are completely cool, spread or pipe frosting onto each cupcake using an offset spatula or a piping bag with your favorite tip.
- Immediately after frosting each cupcake, sprinkle a generous amount of your crushed Butterfinger candy bars over the top.
- For an extra touch, drizzle with melted chocolate chips or creamy peanut butter (thinned with a tiny bit of oil) over the finished cupcakes.
- Prep Time: 30 mins
- Cook Time: 22 mins
- Category: Dessert
- Method: Baking
- Cuisine: American
Nutrition
- Serving Size: 1 cupcake
- Calories: 250
- Sugar: 20 g
- Sodium: 180 mg
- Fat: 12 g
- Saturated Fat: 5 g
- Unsaturated Fat: 7 g
- Trans Fat: 0 g
- Carbohydrates: 32 g
- Fiber: 1 g
- Protein: 3 g
- Cholesterol: 30 mg
Keywords: Don't overmix the batter to avoid tough cupcakes. Always cool cupcakes completely before frosting for better adhesion. Consider chilling Butterfinger bars before crushing for easier handling.