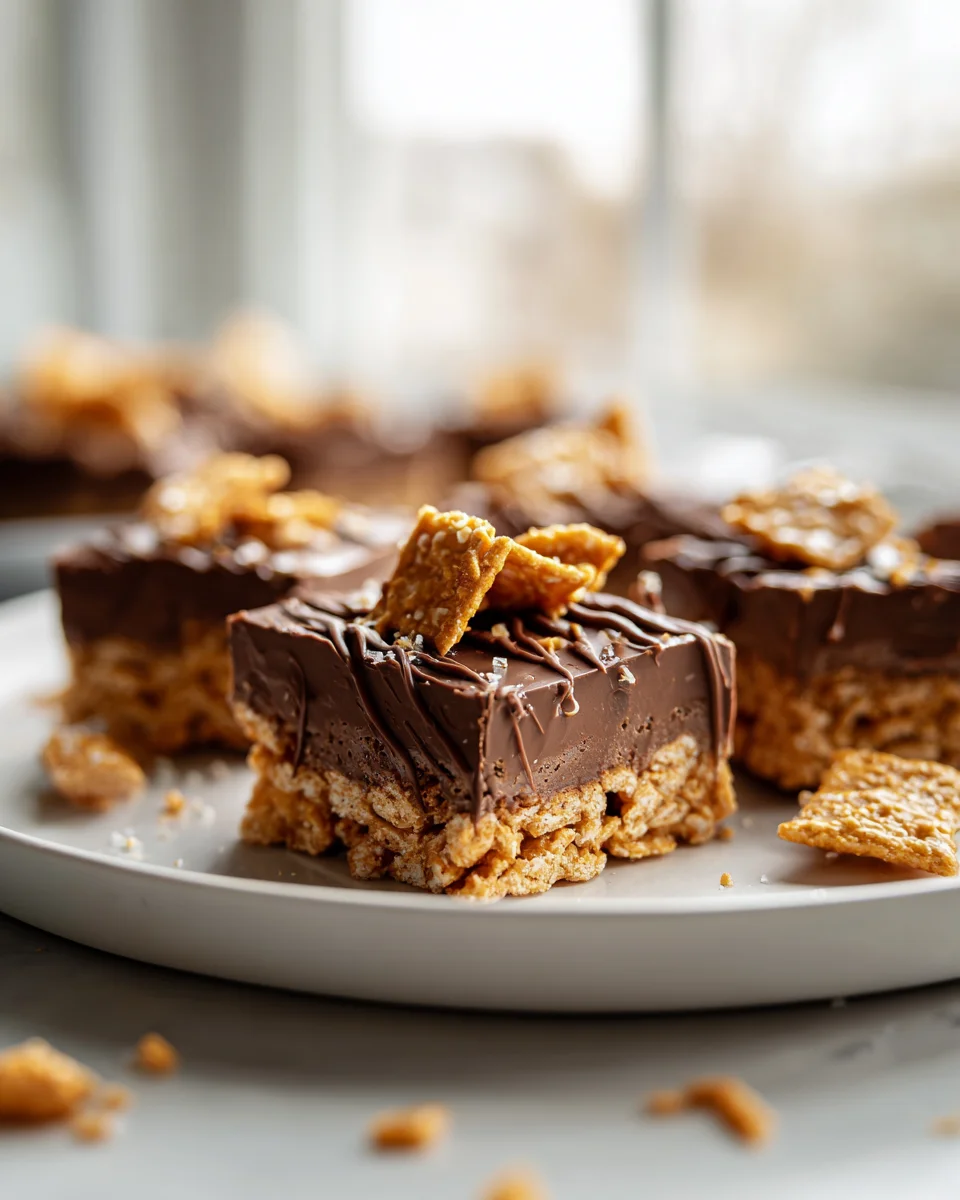
Omg Honey Chex Chocolate Peanut Butter Bars No Bake Gf
Oh my goodness, friends, prepare yourselves for a dessert experience that will have you saying “Omg!” the moment it hits your taste buds! I am absolutely thrilled to introduce you to my ultimate go-to treat: Omg Honey Chex Chocolate Peanut Butter Bars No Bake Gf. Seriously, the name says it all, and trust me, these bars live up to every single letter.
What makes these bars so incredibly special? Well, for starters, they’re a dream come true for anyone who loves that classic, irresistible pairing of chocolate and peanut butter. But we don’t just stop there! We elevate it with a delightfully crunchy base made from Honey Chex cereal. That’s right, those perfectly crisp, lightly sweetened squares bring a unique texture and subtle honey note that takes these bars beyond your average treat. And the best part? They’re No Bake! Forget turning on the oven; these beauties come together with minimal fuss, making them perfect for those scorching summer days, busy weeknights, or anytime you need a quick, impressive dessert.
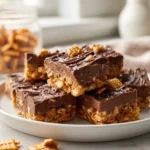
You, my dear reader, are going to absolutely adore these bars because they hit all the right notes. They’re incredibly simple to assemble, satisfyingly sweet, and wonderfully rich. Plus, they’re Gf – gluten-free – which means even more people can enjoy this divine combination without compromise. Just imagine: a thick, chewy, peanut buttery Honey Chex layer, topped with a smooth, glossy, melt-in-your-mouth chocolate ganache-like topping, all chilling to perfection in your fridge. Slice them up, and you’ve got a portable, pop-in-your-mouth slice of heaven that’s perfect for parties, lunchboxes, or just a little pick-me-up. Get ready to fall in love!

Ingredient Notes
Oh my goodness, get ready to dive into the most incredible no-bake bars you’ve ever tasted! These Omg Honey Chex Chocolate Peanut Butter Bars are not only ridiculously delicious but also completely gluten-free and so simple to make. Let’s talk about the stars of this show and some handy substitutions I’ve learned along the way.
Honey Chex Cereal
- The Star: This is the foundation of our crispy, chewy base. Honey Chex cereal provides that perfect hint of sweetness and satisfying crunch that sets these bars apart. Make sure you grab the gluten-free certified version, which is readily available.
- Substitution Note: While Honey Chex is my absolute favorite for this recipe, you could experiment with other gluten-free cereals like Rice Chex or Corn Chex. Just be aware that the flavor profile will shift slightly. The honey sweetness of Honey Chex really complements the peanut butter and chocolate, so if you use a plain cereal, you might want to add a little extra honey or a touch more sugar to the base mixture.
Peanut Butter
- The Core: Creamy, smooth peanut butter is essential for both the texture and the classic flavor of these bars. I always opt for a good quality, natural creamy peanut butter that’s easy to stir. Avoid the super dry, oil-separated kind, or make sure to stir it extremely well before measuring.
- Substitution Note: For those with peanut allergies or who prefer other nut/seed butters, almond butter or cashew butter can work wonderfully. Sunflower seed butter is another fantastic allergen-friendly option, though it might lend a slightly different color to the bars. Just ensure your chosen alternative is also gluten-free and has a similar creamy consistency. Keep in mind that different nut butters absorb liquid differently, so you might need a tiny adjustment in the base mixture if it feels too wet or too dry.
Butter
- The Binder: Unsalted butter forms the rich, smooth binding agent for our cereal base. It helps create that perfect chewy texture that holds everything together.
- Substitution Note: If you need a dairy-free option, a high-quality dairy-free butter substitute will work perfectly here. Just ensure it melts smoothly and has a neutral flavor.
Honey
- The Sweetener & Binder: Honey adds a lovely depth of sweetness and contributes significantly to the chewy texture of the base. It also helps bind the cereal together.
- Substitution Note: For a vegan alternative, maple syrup or agave nectar can be used in equal amounts. They will impart a slightly different flavor, but still result in a delicious bar.
Powdered Sugar (Confectioners’ Sugar)
- The Smooth Factor: Powdered sugar is key for creating a smooth, velvety peanut butter base without any grittiness. It dissolves beautifully into the melted mixture.
- Substitution Note: I highly recommend sticking to powdered sugar for the best texture. Granulated sugar will not dissolve as well and can result in a slightly grainy base.
Chocolate Chips
- The Glorious Topping: Semi-sweet chocolate chips are my go-to for the topping, offering that perfect balance of sweetness and rich chocolate flavor.
- Substitution Note: Feel free to use dark chocolate chips for a more intense chocolate experience, milk chocolate chips for a sweeter topping, or even white chocolate chips for a fun twist. If you need dairy-free or vegan, there are many excellent dairy-free chocolate chip options available now that melt beautifully.
Coconut Oil
- The Magic Touch: This is a secret weapon for making the chocolate topping super smooth, glossy, and firm when chilled. It helps the chocolate set nicely and gives it that satisfying snap when you bite into it.
- Substitution Note: You can substitute with a neutral-flavored shortening if you absolutely can’t use coconut oil, but coconut oil is usually preferred for its subtle flavor and excellent setting properties.
Step-by-Step Instructions
Alright, let’s get down to business! Making these Omg Honey Chex Chocolate Peanut Butter Bars is incredibly straightforward. You’ll be amazed at how quickly you can whip up this crowd-pleasing dessert. Just follow these simple steps, and you’ll be on your way to no-bake heaven!
- Prepare Your Pan: First things first, grab a 9×13 inch baking pan. Line it with parchment paper, allowing some overhang on the sides. This overhang acts as “handles” later, making it super easy to lift the entire slab of bars out of the pan for cutting. If you prefer thicker bars, an 8×8 or 9×9 inch pan also works, just adjust the chilling time accordingly.
- Measure Your Cereal: In a large bowl, measure out your Honey Chex cereal. I like to lightly crush some of the cereal (about a third of it) with my hands directly into the bowl. This creates a more cohesive base while still leaving plenty of whole pieces for crunch. Set this bowl aside.
- Melt the Base Ingredients: In a medium-sized saucepan, combine the butter, creamy peanut butter, honey, and powdered sugar. Place the saucepan over medium-low heat. Stir constantly until all the ingredients are fully melted and well combined into a smooth, thick mixture. Make sure it’s homogenous and shiny. Remove the saucepan from the heat immediately once everything is melted. You don’t want to boil this mixture.
- Combine Wet and Dry: Pour the warm peanut butter mixture over the Honey Chex cereal in the large bowl. Using a sturdy spatula or wooden spoon, gently fold and stir until the cereal is completely coated in the peanut butter mixture. Work quickly but carefully to ensure every piece gets covered.
- Press the Base: Transfer the coated cereal mixture into your prepared baking pan. Using the back of your spatula or a piece of parchment paper pressed down with your hands (or even a flat-bottomed glass), firmly and evenly press the mixture into the bottom of the pan. Make sure it’s packed down tightly from edge to edge; this is key for bars that hold together well.
- Chill the Base: Place the pan in the refrigerator for at least 30 minutes to an hour. This chilling time is important for the base to firm up before we add the chocolate topping.
- Prepare the Chocolate Topping: While the base is chilling, get your chocolate topping ready. In a microwave-safe bowl, combine the chocolate chips and coconut oil. Microwave on high in 30-second intervals, stirring well after each interval, until the chocolate is completely melted and smooth. Alternatively, you can melt them together in a double boiler over simmering water. Stir until glossy and fully combined.
- Add the Topping: Once the cereal base is firm from chilling, carefully pour the melted chocolate mixture evenly over the top. Use an offset spatula or the back of a spoon to spread the chocolate from edge to edge, creating a smooth, even layer.
- Final Chill: Return the pan to the refrigerator and chill for at least 2-3 hours, or until the chocolate topping is completely set and firm. For best results, I often let them chill overnight.
- Cut and Serve: Once completely firm, use the parchment paper overhang to lift the entire slab of bars out of the pan and onto a cutting board. Using a sharp knife that has been run under hot water and wiped dry (this helps with clean cuts), slice the slab into desired bar sizes. I usually go for 24 squares (4 rows by 6 columns).
Tips & Suggestions
Making these Omg Honey Chex Chocolate Peanut Butter Bars is already simple, but I’ve got a few extra tricks up my sleeve to ensure they turn out absolutely perfect every single time. These tips are born from countless batches and a deep love for these no-bake beauties!
- Don’t Over-Crush the Cereal: While I suggest lightly crushing some of the Honey Chex for a more cohesive base, avoid pulverizing it completely. We want those distinct cereal pieces and that satisfying crunch to shine through! The varied texture is part of the charm.
- Press the Base Firmly: This is a non-negotiable step for bars that hold their shape. Use serious pressure when pressing the cereal mixture into the pan. A clean, flat-bottomed glass or the bottom of a measuring cup works wonders for getting an even, compact layer. If the base isn’t pressed down well, your bars will be crumbly.
- Quality Ingredients Matter (Especially GF): Since these bars are gluten-free, always double-check the labels of all your ingredients. Some brands of peanut butter or chocolate chips may contain hidden gluten ingredients or cross-contamination warnings. Choosing certified gluten-free products gives you peace of mind.
- Don’t Rush the Chill Time: Patience is a virtue, especially with no-bake desserts! Rushing the chilling process for either the base or the chocolate topping will lead to gooey, messy bars. Give them ample time to firm up completely in the refrigerator. A fully set bar is a happy bar (and easier to cut!).
- Clean Cuts Every Time: For beautiful, professional-looking bars, here’s my favorite trick: before each cut, run your sharp knife under hot water, then wipe it completely dry. The warm blade will glide through the chocolate topping without cracking it and make a clean slice. Repeat this for every cut.
- A Touch of Sea Salt: For an elevated flavor experience, sprinkle a tiny pinch of flaky sea salt over the wet chocolate topping just before chilling. The salt perfectly balances the sweetness and enhances both the chocolate and peanut butter flavors. It’s a game-changer!
- Swirl it Up: Want to make your bars even prettier? After pouring the chocolate topping, warm about 2 tablespoons of extra peanut butter (just until slightly runny). Drizzle it over the chocolate, then use a skewer or a knife to gently swirl it into the chocolate for a lovely marbled effect.
- Vary Your Topping: While chocolate chips are classic, feel free to experiment! You could add a sprinkle of mini chocolate chips, chopped GF nuts (if no nut allergies), or even some sprinkles on top of the wet chocolate for a festive touch before chilling.
- Adjust Sweetness: If you prefer a less sweet dessert, you can slightly reduce the amount of honey or powdered sugar in the base by a tablespoon or two. Taste the base mixture before adding the cereal to adjust to your liking.
Storage
Once you’ve made these Omg Honey Chex Chocolate Peanut Butter Bars, you’ll want to make sure they stay fresh and delicious for as long as possible. Proper storage is key to maintaining their perfect texture and preventing them from becoming a melty mess.
- Refrigerator (Preferred Method): These bars are best stored in the refrigerator. The chocolate topping and the peanut butter base will soften at room temperature, especially in a warm environment. Place the cut bars in an airtight container, separating layers with parchment paper if stacking them. Stored this way, they will remain wonderfully firm and fresh for up to one week. I actually love them cold – the chocolate has a nice snap, and the base is perfectly chewy.
-
Freezer (Long-Term Storage): These bars freeze exceptionally well, which is great if you want to make a big batch or save some for later.
- To Freeze: Once the bars are fully set and cut, arrange them in a single layer on a baking sheet lined with parchment paper. Flash freeze them for about 30-60 minutes until solid. This prevents them from sticking together.
- After flash freezing, transfer the solid bars to an airtight freezer-safe container. You can stack them, separating layers with parchment paper to prevent sticking. They will keep well in the freezer for up to 2-3 months.
- To Thaw: When you’re ready to enjoy a frozen bar, simply take it out of the freezer and let it sit at room temperature for 10-15 minutes, or pop it directly into the fridge for about 30 minutes to an hour until it softens slightly to your desired consistency. They taste amazing when slightly chilled!
- Room Temperature (Not Recommended for Long-Term): While you can leave these bars out at room temperature for a couple of hours for serving, it’s not recommended for extended storage, especially in warmer climates. The butter and coconut oil in the recipe will soften, causing the bars to lose their firmness and potentially become quite messy. Always opt for refrigeration for the best quality and food safety.
Final Thoughts
There you have it! I truly hope you’re as excited as I am about these incredible no-bake treats. For me, the Omg Honey Chex Chocolate Peanut Butter Bars No Bake Gf are more than just a dessert; they’re a moment of pure, blissful indulgence that couldn’t be easier to achieve. The perfect blend of sweet honey-kissed crunch from the Chex, the rich depth of chocolate, and the comforting creaminess of peanut butter creates an explosion of flavor and texture that is utterly irresistible.
What makes the Omg Honey Chex Chocolate Peanut Butter Bars No Bake Gf an absolute must-try is not just their phenomenal taste, but also their sheer simplicity. No oven required, no complicated steps, and naturally gluten-free – they’re a dream come true for quick snacks, impressive potluck contributions, or simply satisfying that insistent sweet tooth. I promise, once you experience the ease and deliciousness of these bars, you’ll find yourself coming back to this recipe again and again. Go ahead, treat yourself and your loved ones to this delightful experience!
Easy No-Bake GF Honey Chex Chocolate Peanut Butter Bars
- Total Time: 15 minutes
- Yield: 24 servings 1x
Description
Indulge in these delicious no-bake bars that perfectly blend the flavors of chocolate and peanut butter with a crunchy Honey Chex base. They’re gluten-free, easy to make, and perfect for any occasion!
Ingredients
- 6 cups Honey Chex cereal
- 1 cup creamy peanut butter
- 1/2 cup unsalted butter
- 1/2 cup honey
- 1 cup powdered sugar (confectioners' sugar)
- 1 cup semi-sweet chocolate chips
- 2 tablespoons coconut oil
Instructions
- Prepare Your Pan: First things first, grab a 9×13 inch baking pan. Line it with parchment paper, allowing some overhang on the sides.
- Measure Your Cereal: In a large bowl, measure out your Honey Chex cereal. Lightly crush about a third of the cereal with your hands directly into the bowl.
- Melt the Base Ingredients: In a medium-sized saucepan, combine the butter, creamy peanut butter, honey, and powdered sugar. Place the saucepan over medium-low heat and stir constantly until all the ingredients are fully melted and well combined into a smooth, thick mixture.
- Combine Wet and Dry: Pour the warm peanut butter mixture over the Honey Chex cereal in the large bowl. Using a sturdy spatula or wooden spoon, gently fold and stir until the cereal is completely coated.
- Press the Base: Transfer the coated cereal mixture into your prepared baking pan. Firmly and evenly press the mixture into the bottom of the pan.
- Chill the Base: Place the pan in the refrigerator for at least 30 minutes to an hour.
- Prepare the Chocolate Topping: In a microwave-safe bowl, combine the chocolate chips and coconut oil. Microwave on high in 30-second intervals, stirring well after each interval until the chocolate is completely melted and smooth.
- Add the Topping: Once the cereal base is firm from chilling, carefully pour the melted chocolate mixture evenly over the top.
- Final Chill: Return the pan to the refrigerator and chill for at least 2-3 hours, or until the chocolate topping is completely set.
- Cut and Serve: Once completely firm, use the parchment paper overhang to lift the entire slab of bars out of the pan and onto a cutting board. Slice the slab into desired bar sizes.
- Prep Time: 15 mins
- Cook Time: 0 mins
- Category: Dessert
- Method: No Bake
- Cuisine: American
Nutrition
- Serving Size: 1 bar
- Calories: 200
- Sugar: 10 g
- Sodium: 50 mg
- Fat: 10 g
- Saturated Fat: 4 g
- Unsaturated Fat: 5 g
- Trans Fat: 0 g
- Carbohydrates: 25 g
- Fiber: 2 g
- Protein: 4 g
- Cholesterol: 10 mg
Keywords: Don't over-crush the cereal for a satisfying crunch. Ensure to press the base firmly for bars that hold their shape. Quality gluten-free ingredients are essential, and patience is key for chilling times.