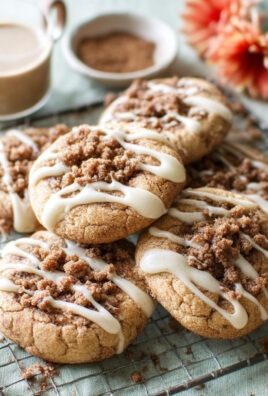
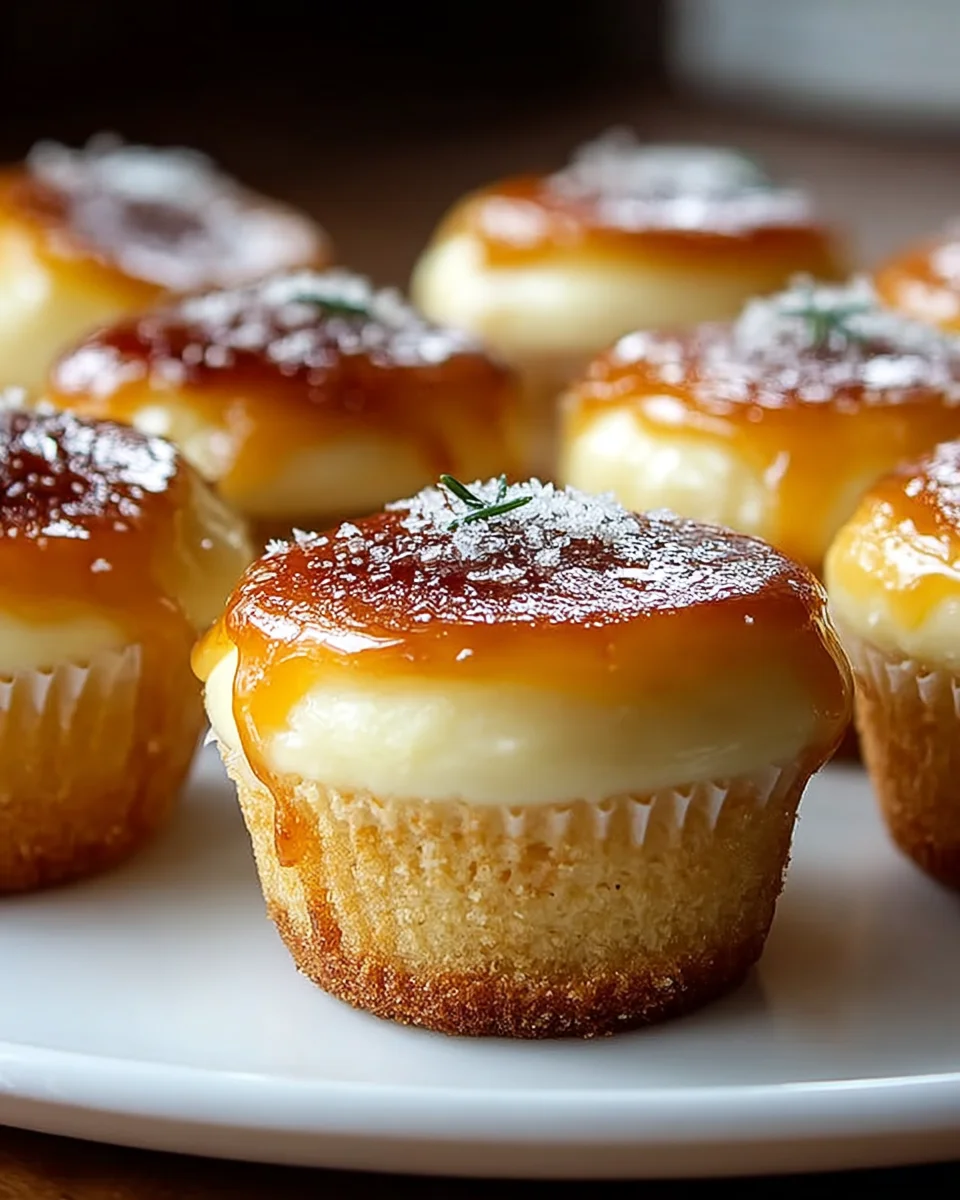
Vanilla Bean Creme Brulee Cheesecake Cupcakes The Ultimate Amazing Recipe unveils a dessert experience unlike any other. Imagine the delicate, rich vanilla custard of a classic French creme brulee, perfectly paired with the creamy, tangy indulgence of a New York-style cheesecake, all miniaturized into a delightful cupcake. This isn’t just a dessert; it’s a culinary masterpiece that combines sophisticated elegance with comforting familiarity. The concept brilliantly marries two beloved sweet treats into one stunning creation, offering the very best of both worlds in a single, irresistible bite. While creme brulee boasts a long, elegant history dating back to 17th-century France, and cheesecake has roots stretching to ancient Greece, the brilliant fusion presented in these cupcakes is a modern innovation designed to captivate your senses. People absolutely adore this dish not only for its incredible taste—the profound depth of real vanilla beans, the luscious cream cheese filling, and the satisfying crack of caramelized sugar on top—but also for its ingenious individual portioning. Each cupcake is a self-contained slice of heaven, making it perfect for entertaining or simply treating yourself. The contrasting textures, from the silky smooth cheesecake to the crisp sugar shell, create an unforgettable journey for your palate, solidifying its status as Vanilla Bean Creme Brulee Cheesecake Cupcakes The Ultimate Amazing Recipe.

Ingredients:
For the Vanilla Wafer Crust:
- 1 ¾ cups (about 150g) finely crushed vanilla wafers (I usually use Nilla Wafers; crush them really well, almost to a sand-like consistency for the best texture).
- ¼ cup (56g) unsalted butter, melted (Make sure it’s just melted, not browned, to maintain a pure vanilla flavor).
- 2 tablespoons granulated sugar (This adds a touch more sweetness and helps with caramelization).
- Pinch of salt (A tiny bit really enhances the flavor of the crust).
For the Vanilla Bean Cheesecake Filling:
- 24 ounces (about 3 blocks or 680g) full-fat cream cheese, softened to room temperature (This is CRUCIAL for a smooth, lump-free cheesecake. Seriously, let it sit out for at least 2 hours).
- 1 cup (200g) granulated sugar (For the perfect balance of sweetness).
- 2 large whole eggs, room temperature (Again, room temperature is key for emulsification and a creamy texture).
- 2 large egg yolks, room temperature (These add extra richness and a beautiful golden hue).
- ½ cup (120g) sour cream, room temperature (Full-fat is best here; it adds tang and moisture, preventing cracks).
- 1 tablespoon all-purpose flour (A small amount helps stabilize the cheesecake and prevent cracking).
- 1 ½ teaspoons pure vanilla extract (I love using a good quality extract for an intense vanilla aroma).
- 1 whole vanilla bean, split and scraped (This is where the magic happens! The tiny specks of vanilla bean truly elevate the flavor and appearance. If you can’t find a whole bean, you can use 1 teaspoon of vanilla bean paste as a substitute, but the whole bean is worth it!).
For the Creme Brulee Topping:
- ½ cup (100g) granulated sugar (For that irresistible crunchy sugar crust).
Equipment You’ll Need:
- Standard 12-cup muffin tin
- Cupcake liners (paper or silicone)
- Large mixing bowls
- Electric mixer (stand mixer with paddle attachment or a hand mixer)
- Rubber spatula
- Small saucepan
- Food processor or rolling pin for crushing wafers
- Small ice cream scoop or large spoon for filling
- Baking sheet (for the water bath)
- Kettle or pot for boiling water
- Kitchen torch (essential for the brulee topping!)
Phase 1: Preparing the Vanilla Wafer Crust
- Preheat and Prepare Your Muffin Tin: My first step is always to get the oven ready and the liners in place. Preheat your oven to 350°F (175°C). Line a standard 12-cup muffin tin with paper or silicone cupcake liners. I find that paper liners work perfectly well, but silicone ones can make for super easy removal.
- Crush the Vanilla Wafers: This part is quite satisfying! In a food processor, pulse the vanilla wafers until they are finely ground into crumbs. You’re looking for a texture similar to fine sand – no large chunks, please! If you don’t have a food processor, no worries! Place the wafers in a large zip-top bag, seal it, and crush them with a rolling pin. Just make sure to get them as fine as possible.
- Melt the Butter: In a small, microwave-safe bowl, melt your ¼ cup of unsalted butter. You can also do this on the stovetop in a small saucepan over low heat. Be careful not to let it brown; we just want it liquid.
- Combine Crust Ingredients: In a medium mixing bowl, combine the finely crushed vanilla wafer crumbs, 2 tablespoons of granulated sugar, and a tiny pinch of salt. Pour in the melted butter and mix everything together thoroughly with a fork or spatula until all the crumbs are moistened and resemble wet sand. Every crumb should be coated!
- Form the Crusts: Now it’s time to get the crusts into your cupcake liners. I like to use a small cookie scoop or a tablespoon measure for this. Place about 1 ½ tablespoons of the crumb mixture into the bottom of each prepared cupcake liner. Using the back of a spoon, or even your fingertips (if they’re clean and not sticky!), press the crumbs down firmly and evenly into the bottom of each liner. This creates a compact, sturdy crust that won’t crumble when you bite into your cheesecake. Don’t skip this firm pressing step!
- Pre-bake the Crusts: Pop the muffin tin with the pressed crusts into your preheated oven and bake for 5-7 minutes. This quick bake helps to set the crust, making it less likely to get soggy once the cheesecake filling is added. When they come out, let them cool slightly on a wire rack while you prepare the filling.
Phase 2: Crafting the Vanilla Bean Cheesecake Filling
- Prepare the Vanilla Bean: This is my favorite part for intensifying the vanilla flavor! Take your whole vanilla bean, lay it on a cutting board, and with a sharp paring knife, carefully slice it lengthwise down the middle, but don’t cut all the way through. Open it up like a book. Then, using the back of your knife, scrape out all those beautiful, tiny black specks – those are the vanilla seeds! Add them to your cream cheese mixture directly. You can save the scraped vanilla pod to make vanilla sugar or vanilla extract later, so don’t throw it away!
- Cream the Cream Cheese and Sugar: In a large mixing bowl, using an electric mixer fitted with the paddle attachment (or a hand mixer), beat the softened cream cheese on medium speed for about 1-2 minutes until it’s completely smooth and creamy, with no lumps at all. This is where room temperature cream cheese truly shines! Gradually add the 1 cup of granulated sugar and the scraped vanilla bean seeds. Continue beating on medium-low speed until the sugar is fully incorporated and the mixture is light and fluffy, about 2-3 minutes. Make sure to scrape down the sides of the bowl frequently with a rubber spatula to ensure everything is evenly mixed.
- Incorporate Eggs and Yolks: Now, add the 2 large whole eggs and the 2 large egg yolks, one at a time. After each addition, beat on low speed just until combined. It’s crucial not to overmix at this stage, as overmixing can incorporate too much air, which can lead to cracks in your baked cheesecake. Scrape down the bowl after each egg addition. The mixture should remain dense and creamy.
- Add Sour Cream, Flour, and Vanilla Extract: Next, add the sour cream, all-purpose flour, and pure vanilla extract to the cream cheese mixture. Beat on low speed until just combined and smooth. Again, be gentle with your mixing! The flour acts as a stabilizer, and the sour cream adds a lovely tang and helps with the silky texture. Give the bowl one final scrape to ensure every bit is perfectly blended. You should have a wonderfully smooth, slightly thick, and luxurious cheesecake batter.
Phase 3: Baking the Cheesecake Cupcakes
- Fill the Liners: Divide the vanilla bean cheesecake filling evenly among the 12 pre-baked crusts in the muffin tin. I like to use a large ice cream scoop for this, as it helps with even distribution. Fill each liner almost to the top, leaving just a little room for expansion. You should have enough batter for 12 perfectly sized cupcakes.
- Prepare the Water Bath (Bain-Marie): This step is key for preventing cracks and ensuring a super creamy texture in your cheesecakes. Place the muffin tin inside a larger baking pan with high sides (a roasting pan works well). Then, carefully pour hot, freshly boiled water into the larger baking pan, around the muffin tin, until the water comes about halfway up the sides of the cupcake liners. Be very careful not to get any water into the cheesecake batter itself!
- Bake to Perfection: Gently transfer the entire baking pan with the water bath and muffin tin into your preheated 350°F (175°C) oven. Bake for 22-28 minutes. The cheesecakes are done when the edges are set, but the centers still have a slight jiggle to them when you gently shake the pan. They will continue to set as they cool. Overbaking is the enemy of creamy cheesecake!
- Cool Gradually: Once baked, turn off the oven but leave the cheesecakes inside with the oven door propped open slightly (I use a wooden spoon). Let them sit in the cooling oven with the water bath for an additional 30 minutes. This slow cooling process is another vital step in preventing cracks and ensuring a smooth, even texture.
- Remove from Water Bath and Continue Cooling: After 30 minutes, carefully remove the muffin tin from the water bath and place it on a wire rack. Let the cheesecake cupcakes cool completely at room temperature for about 1 hour. You’ll notice they might sink slightly in the middle, which is perfectly normal and creates a nice little well for our brulee topping later!
Phase 4: Chilling and Preparing for Brulee
- Chill Thoroughly: Once completely cool to the touch, cover the muffin tin loosely with plastic wrap and transfer it to the refrigerator. Chill the cheesecake cupcakes for at least 4 hours, but preferably overnight. This chilling time is absolutely essential! It allows the cheesecakes to firm up properly, develop their full flavor, and become stable enough to handle the brulee topping without melting. Don’t rush this step!
- Unmold the Cupcakes: When you’re ready to serve and brulee, carefully remove the cheesecake cupcakes from the muffin tin. If using paper liners, you can peel them off right before serving or leave them on for easier handling.
Phase 5: The Grand Brulee Finish
- Prepare for Torching: Place the chilled cheesecake cupcakes on a heat-proof surface, such as a large baking sheet lined with parchment paper or a cutting board. This makes them easier to handle and ensures your countertop is safe from the torch flame.
- Sugar the Tops: Sprinkle about 1-2 teaspoons of granulated sugar evenly over the top of each chilled cheesecake cupcake. You want a thin, even layer that completely covers the surface. Don’t pile it too thick, or it will take longer to melt and might taste overly sweet.
- The Brulee Magic (Torch Time!): Now for the fun part! Ignite your kitchen torch according to the manufacturer’s instructions. Hold the torch a few inches above the sugar layer. Move the flame slowly and continuously in a circular motion over the sugar. You’ll see the sugar start to melt, bubble, and then caramelize into a beautiful amber crust. Keep the flame moving to prevent burning in one spot. Continue until all the sugar is melted and has transformed into a rich, golden-brown, hardened shell. This usually takes about 30-60 seconds per cupcake, depending on your torch.
- Let the Brulee Set: Allow the newly torched creme brulee topping to cool for just a few minutes, usually 2-5 minutes. As it cools, the caramelized sugar will harden into that signature brittle, glassy crust. You’ll hear a satisfying “tap” when you gently test it.
- Serve Immediately for Best Crunch: The “Vanilla Bean Creme Brulee Cheesecake Cupcakes The Ultimate Amazing Recipe” are truly best served immediately after torching. The crunchy topping is at its peak perfection when fresh. Each bite offers a delightful crack through the caramelized sugar, followed by the smooth, creamy, vanilla bean-flecked cheesecake. These are an absolute showstopper!
Tips for the Perfect “Vanilla Bean Creme Brulee Cheesecake Cupcakes The Ultimate Amazing Recipe”:
- Room Temperature Ingredients are Non-Negotiable: I cannot stress this enough for any cheesecake, but especially for these amazing cupcakes. If your cream cheese, eggs, and sour cream aren’t at room temperature, your batter will be lumpy, difficult to mix evenly, and can result in a less smooth, potentially cracked cheesecake. Plan ahead!
- Don’t Overmix: After the cream cheese and sugar are combined, mix only until ingredients are just incorporated. Overmixing introduces too much air into the batter, which expands during baking and then collapses, leading to cracks. Gentle, low-speed mixing is your friend.
- Quality Vanilla Matters: Since “Vanilla Bean Creme Brulee Cheesecake Cupcakes The Ultimate Amazing Recipe” truly highlights vanilla, invest in good quality vanilla extract and, if possible, a fresh vanilla bean. The difference in flavor is remarkable and well worth the extra effort or cost. Vanilla bean paste is a great alternative if you can’t find whole beans.
- The Water Bath is Your Secret Weapon: This bain-marie might seem like an extra step, but it provides a moist, even cooking environment, preventing the cheesecakes from drying out and cracking. It’s a game-changer for creamy, perfect cheesecakes.
- Cooling is a Process, Not a Rush: The gradual cooling steps (in the oven, then at room temperature, then chilled in the fridge) are vital. Rapid temperature changes are another common cause of cracks. Patience truly pays off with cheesecake.
- Chilling Time is Essential: Seriously, don’t skimp on the refrigeration time. A fully chilled cheesecake is firm, flavorful, and holds up beautifully when topped with the brulee. It allows the flavors to meld and the texture to set perfectly.
- Practice Your Torch Technique: If you’re new to a kitchen torch, practice on a small pile of sugar on a heat-proof plate first. The key is to keep the flame moving constantly and relatively close to the sugar to achieve an even, golden caramel without burning. Burnt sugar is bitter, so aim for that beautiful amber hue.
- Serve Promptly After Torching: For the ultimate experience, torch the “Vanilla Bean Creme Brulee Cheesecake Cupcakes The Ultimate Amazing Recipe” just before serving. The contrast between the warm, brittle sugar crust and the cold, creamy cheesecake is what makes this dessert so spectacular. If you torch them too far in advance, the sugar crust can start to soften due to moisture from the cheesecake.
- Storage: If you have any leftovers (unlikely!), store un-torched cupcakes in an airtight container in the refrigerator for up to 3-4 days. You can then torch them individually right before serving. Torched cupcakes can be stored in the fridge, but the crust won’t be as crisp.
- Making Ahead: You can prepare the cheesecake cupcakes (up to the chilling step in Phase 4) a day or two in advance. Store them well-covered in the refrigerator. Then, on the day of serving, simply brulee them as described in Phase 5. This makes them a fantastic dessert for entertaining!
Conclusion:
And there you have it, my dear fellow dessert enthusiasts! We’ve journeyed through the creation of what I truly believe is not just a dessert, but an experience. If you’ve been on the fence about tackling something seemingly intricate, let me assure you, this recipe is incredibly rewarding and surprisingly approachable. It’s the kind of treat that doesn’t just satisfy a sweet craving; it sparks joy, ignites conversation, and leaves a lasting impression. What makes this particular dessert an absolute game-changer, in my humble opinion, is the masterful fusion of two beloved classics: the creamy, dreamy decadence of cheesecake and the satisfying, caramelized crunch of crème brûlée. This isn’t just a simple dessert; it’s a symphony of textures and flavors that dance on your palate, creating a moment of pure bliss with every single bite.
The core appeal lies in that incredible contrast. Imagine sinking your teeth past that impossibly crisp, glassy sugar crust, hearing the delicate crackle, and then immediately encountering the smooth, velvety, and intensely aromatic vanilla bean cheesecake beneath. That distinct flavor profile, driven by genuine vanilla beans, is profound and sophisticated, far removed from artificial essences. It’s a richness that’s balanced beautifully, never cloying, allowing the intricate notes of the vanilla to truly shine. This delicate balance ensures that each cupcake feels luxurious, yet utterly comforting. It’s a dessert that speaks volumes about your culinary prowess, even if the steps themselves are straightforward and fun to execute. I promise you, the look of amazement on your guests’ faces when they crack open that sugary shell will be priceless, making every minute spent in the kitchen utterly worthwhile.
Now, let’s talk about making these beauties truly your own! While they are absolutely divine on their own, a few thoughtful serving suggestions can elevate them even further. I love serving these cupcakes slightly chilled, allowing the cheesecake to firm up just enough to provide a perfect counterpoint to the warm, freshly torched sugar. For an elegant touch, consider garnishing each cupcake with a single, fresh raspberry or a few delicate blueberries; their tartness provides a wonderful contrast to the sweetness. A whisper of unsweetened cocoa powder dusted through a small stencil can also add a sophisticated visual appeal, or perhaps a tiny sprig of fresh mint for a burst of color. As for pairings, a strong espresso or a rich cup of dark roast coffee makes a fantastic companion, cutting through the richness beautifully. Alternatively, for a truly indulgent evening, a small glass of a sweet, sparkling Moscato d’Asti or a dessert wine would complement the vanilla notes exquisitely.
Embrace Your Inner Pastry Chef with Variations!
Beyond serving, don’t hesitate to experiment with variations once you’ve mastered the base recipe. For a citrusy twist, you could incorporate a tablespoon of finely grated orange or lemon zest into the cheesecake batter; the bright notes would be absolutely delightful. Perhaps a swirl of homemade berry compote (raspberry or cherry work wonderfully) can be added to the center of the cheesecake before baking, creating a delightful surprise when bitten into. If you’re feeling adventurous, try swapping out a small portion of the granulated sugar for brown sugar in the brûlée topping for a deeper, more molasses-like caramel flavor. For chocolate lovers, a thin layer of melted dark chocolate could be spread over the cooled cheesecake before the sugar topping is applied, adding another layer of complexity. These cupcakes are also incredibly versatile for different occasions; imagine a mini version made in a regular muffin tin (with paper liners, of course) for a bite-sized treat at a party, or even scaling the recipe up to a full-sized cheesecake in a springform pan, adjusting baking times accordingly.
Your Culinary Journey Awaits!
So, what are you waiting for? This is more than just a recipe; it’s an invitation to create something truly extraordinary. Don’t let the name intimidate you; the process is straightforward, and the results are consistently spectacular. I wholeheartedly encourage you to dive into making these Vanilla Bean Creme Brulee Cheesecake Cupcakes The Ultimate Amazing Recipe. Gather your ingredients, prepare your kitchen, and get ready to impress yourself and everyone lucky enough to share in your creation. I promise you, the aroma of vanilla filling your home, the satisfying crack of the brûlée torch, and the first glorious bite will make you incredibly proud. And when you do make them, please, please, please share your experience! Snap some photos, tell me about your favorite variations, or just drop a comment about how much you loved them. Your feedback and creativity inspire me, and I absolutely adore seeing your culinary triumphs. Happy baking, and get ready to enjoy one of the most remarkable desserts you’ll ever make!
Vanilla Bean Creme Brulee Cheesecake Cupcakes The Ultimate Amazing Recipe
Experience a culinary masterpiece with these Vanilla Bean Creme Brulee Cheesecake Cupcakes The Ultimate Amazing Recipe, fusing the rich vanilla custard of creme brulee with the creamy tang of cheesecake into delightful individual portions. Each bite offers the best of both worlds, from the luxurious vanilla bean flavor to the satisfying crack of caramelized sugar.
Ingredients
Instructions
Important Information
Nutrition Facts (Per Serving)
It is important to consider this information as approximate and not to use it as definitive health advice.
Allergy Information
Please check ingredients for potential allergens and consult a health professional if in doubt.