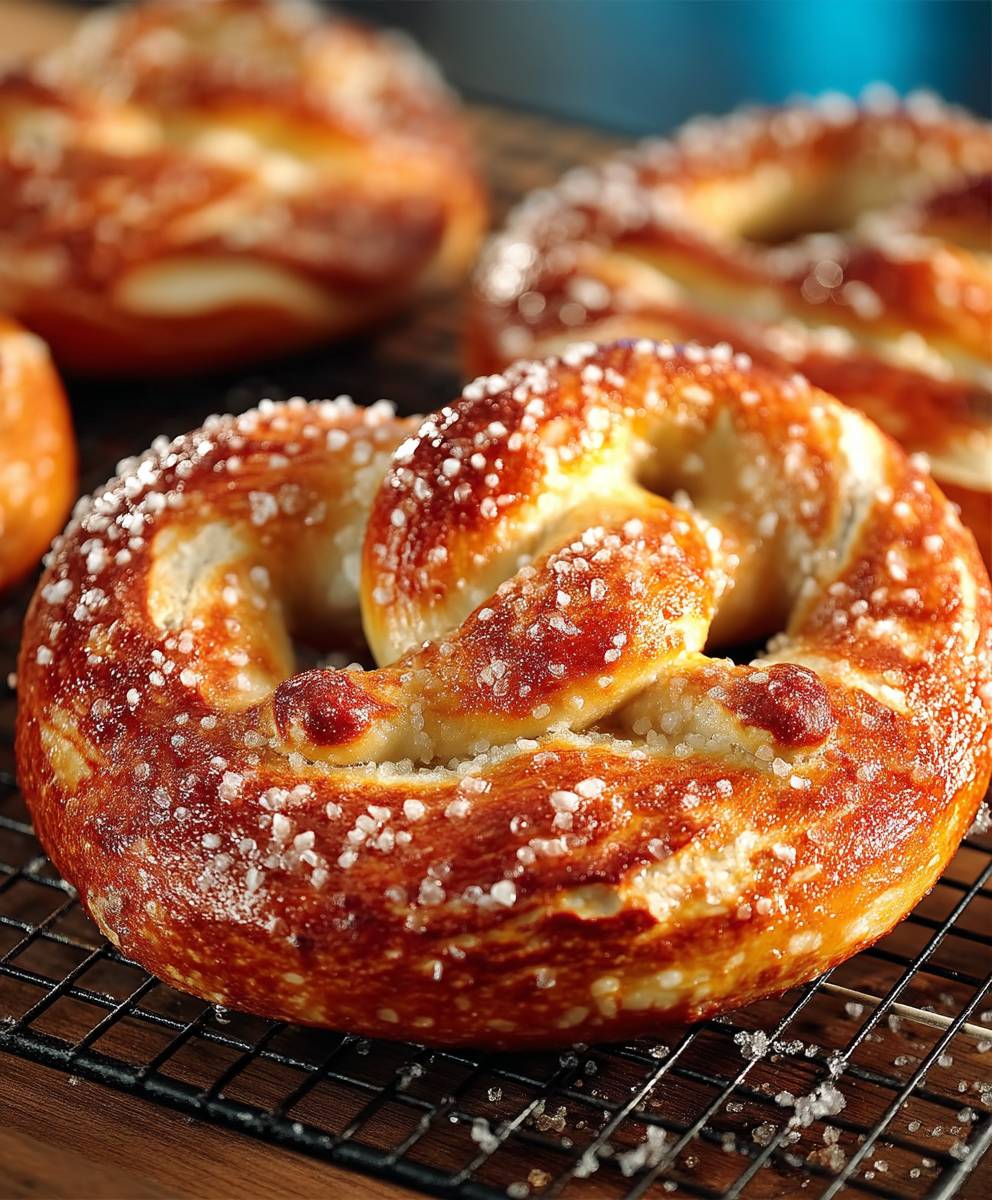
Auntie Anne’s Pretzels Copycat: Craving that warm, chewy, perfectly salted pretzel from the mall, but don’t want to leave the house? I get it! There’s something undeniably comforting about biting into a freshly baked pretzel, and today, I’m thrilled to share my secret to creating that iconic Auntie Anne’s experience right in your own kitchen.
Pretzels, in general, have a rich history, dating back centuries to European monasteries. Legend has it that they were invented by monks as a reward for children who learned their prayers. While Auntie Anne’s hasn’t been around quite that long, their version has certainly captured the hearts (and stomachs!) of millions.
What makes these pretzels so irresistible? It’s the perfect combination of a soft, slightly sweet interior, a chewy crust, and that satisfying salty crunch. Plus, the aroma alone is enough to make anyone’s mouth water! This Auntie Anne’s Pretzels Copycat recipe captures all of those elements, offering a homemade version that’s surprisingly easy to make and tastes just like the real deal. Get ready to impress your friends and family with these delightful treats – they’ll never believe you made them from scratch!

Ingredients:
- For the Dough:
- 1 ½ cups warm water (105-115°F)
- 1 tablespoon granulated sugar
- 2 ¼ teaspoons (1 packet) active dry yeast
- 4 cups all-purpose flour, plus more for dusting
- 2 tablespoons unsalted butter, melted
- 1 ½ teaspoons salt
- For the Boiling Solution:
- 10 cups water
- ⅔ cup baking soda
- For Brushing and Baking:
- 1 large egg, beaten with 1 tablespoon water (egg wash)
- Coarse pretzel salt, for sprinkling
- 2 tablespoons unsalted butter, melted (for brushing after baking, optional)
Preparing the Dough:
- First, let’s activate the yeast. In a large bowl (or the bowl of your stand mixer), combine the warm water and sugar. Sprinkle the yeast over the top and let it sit for 5-10 minutes, or until it gets foamy. This means the yeast is alive and ready to work its magic! If it doesn’t foam, your yeast might be old, and you’ll need to get a fresh packet.
- Next, add the flour, melted butter, and salt to the yeast mixture. If you’re using a stand mixer, use the dough hook attachment and mix on low speed until the dough comes together. If you’re kneading by hand, mix the ingredients with a wooden spoon until a shaggy dough forms, then turn it out onto a lightly floured surface and knead.
- Knead the dough for 5-7 minutes, either in the mixer or by hand, until it’s smooth and elastic. It should be slightly tacky but not sticky. If it’s too sticky, add a little more flour, a tablespoon at a time.
- Place the dough in a lightly oiled bowl, turning to coat. Cover the bowl with plastic wrap or a clean kitchen towel and let it rise in a warm place for 1 hour, or until doubled in size. This is crucial for that light and airy pretzel texture.
Shaping the Pretzels:
- Once the dough has doubled, gently punch it down to release the air. Turn it out onto a lightly floured surface.
- Divide the dough into 8 equal pieces. I like to use a kitchen scale to ensure they’re all the same size, but you can eyeball it too.
- Roll each piece of dough into a long rope, about 20-24 inches long. The thinner the rope, the thinner your pretzel will be.
- Now for the fun part – shaping the pretzels! Take one rope and form a U-shape. Cross the ends over each other twice, then press them down onto the bottom of the U to form the pretzel shape. Don’t worry if they’re not perfect; they’ll still taste amazing!
- Place the shaped pretzels on a baking sheet lined with parchment paper.
The Baking Soda Bath:
- This is the secret to that authentic pretzel flavor and chewy texture! In a large pot, bring the 10 cups of water to a rolling boil.
- Carefully add the baking soda to the boiling water. Be careful, as it will bubble up vigorously!
- Using a slotted spoon or spatula, gently lower each pretzel into the boiling water for 30 seconds. Don’t overcrowd the pot; do 1-2 pretzels at a time.
- Remove the pretzels from the water and place them back on the prepared baking sheet.
Baking the Pretzels:
- Preheat your oven to 425°F (220°C).
- Brush each pretzel with the egg wash. This will give them a beautiful golden-brown color.
- Sprinkle generously with coarse pretzel salt. Don’t be shy; the salt is essential!
- Bake for 12-15 minutes, or until the pretzels are a deep golden brown. Keep a close eye on them, as they can burn easily.
- Remove the pretzels from the oven and let them cool slightly on the baking sheet.
- If desired, brush the warm pretzels with melted butter for extra flavor and shine.
Serving and Storing:
- Serve your homemade Auntie Anne’s pretzels warm, and enjoy! They’re delicious on their own, or with your favorite dipping sauces like cheese sauce, mustard, or even sweet cream cheese dip.
- Store leftover pretzels in an airtight container at room temperature for up to 2 days. They’re best enjoyed fresh, but you can reheat them in the oven or microwave to freshen them up.
Tips and Tricks for Perfect Pretzels:
- Water Temperature: Make sure your water is warm enough to activate the yeast, but not too hot, or it will kill the yeast. Aim for 105-115°F.
- Kneading: Don’t skimp on the kneading! It’s essential for developing the gluten, which gives the pretzels their chewy texture.
- Rising Time: Let the dough rise in a warm place for the best results. A slightly warm oven (turned off) or a sunny spot in your kitchen works well.
- Baking Soda Bath: This is the key to that authentic pretzel flavor and texture. Don’t skip it!
- Salt: Use coarse pretzel salt for the best flavor and texture. Table salt will dissolve too easily.
- Don’t Overbake: Keep a close eye on the pretzels while they’re baking, as they can burn easily.
- Variations: Get creative with your pretzels! Try adding cinnamon sugar after baking for a sweet treat, or sprinkle with everything bagel seasoning for a savory twist.
Troubleshooting:
- Dough Not Rising: If your dough isn’t rising, it could be due to a few reasons: the yeast might be old, the water might not have been warm enough, or the room might be too cold. Try using fresh yeast, ensuring the water is the correct temperature, and placing the dough in a warmer spot.
- Pretzels Too Hard: If your pretzels are too hard, you might have overbaked them. Try reducing the baking time slightly. Also, make sure you’re not adding too much flour to the dough.
- Pretzels Not Chewy Enough: The baking soda bath is crucial for the chewy texture. Make sure you’re using enough baking soda and boiling the pretzels for the correct amount of time.
- Pretzels Burning: If your pretzels are burning, lower the oven temperature slightly and keep a closer eye on them. You can also tent them with foil during the last few minutes of baking.
Enjoy your homemade Auntie Anne’s pretzels! I hope this recipe helps you create delicious, chewy, and salty pretzels that everyone will love. Happy baking!
Conclusion:
So, there you have it! This Auntie Anne’s pretzels copycat recipe is more than just a way to satisfy a craving; it’s an experience. From the satisfying kneading of the dough to the delightful aroma that fills your kitchen as they bake, every step is a joy. And the final result? Soft, chewy, perfectly salted pretzels that rival the real deal, all made with your own two hands. What could be better?
I truly believe this recipe is a must-try for several reasons. First, the taste is spot on. After countless attempts and tweaks, I’ve managed to capture that signature Auntie Anne’s flavor that we all know and love. Second, it’s surprisingly easy to make. While it does require a bit of time, the steps are straightforward and the ingredients are readily available. You don’t need to be a professional baker to achieve pretzel perfection. Finally, it’s incredibly rewarding. There’s something special about creating something delicious from scratch, and these pretzels are no exception.
But the fun doesn’t stop there! These pretzels are incredibly versatile. Serve them warm with classic cheese dip for the ultimate snack experience. Or, get creative and try some variations. For a sweet treat, brush them with melted butter and sprinkle with cinnamon sugar. You could even dip them in chocolate for a decadent dessert. If you’re feeling adventurous, try adding different seasonings to the dough, like garlic powder, onion powder, or even a pinch of cayenne pepper for a spicy kick.
Looking for serving suggestions? These pretzels are perfect for game day gatherings, movie nights, or even just a cozy afternoon snack. They’re also a great addition to a party platter or a homemade gift basket. Imagine surprising your friends and family with a batch of freshly baked, warm pretzels – they’ll be so impressed!
Don’t be intimidated by the thought of making pretzels from scratch. This recipe is designed to be foolproof, and I’m confident that you’ll be able to create delicious, authentic-tasting pretzels in your own kitchen. The key is to follow the instructions carefully and don’t be afraid to experiment with different flavors and toppings.
Ready to embark on your pretzel-making adventure?
I urge you to give this Auntie Anne’s pretzels copycat recipe a try. I promise you won’t be disappointed. It’s a fun, rewarding, and delicious way to spend an afternoon, and the results are well worth the effort.
And once you’ve made them, I’d love to hear about your experience! Did you try any variations? What were your favorite toppings? Share your photos and stories in the comments below. I’m always eager to see your creations and learn from your experiences. Let’s build a community of pretzel-loving bakers!
So, grab your ingredients, preheat your oven, and get ready to make some magic. Happy baking! I can’t wait to hear all about your pretzel-making success. Remember, the best pretzels are the ones you make yourself, with love and a little bit of patience. Enjoy!
Auntie Anne's Pretzels Copycat: The Ultimate Recipe Guide
Delicious, chewy, and salty homemade soft pretzels, just like Auntie Anne's! This recipe includes a baking soda bath for that authentic pretzel flavor and texture.
Ingredients
Instructions
Recipe Notes
- Water Temperature: Use 105-115°F water to activate the yeast.
- Kneading: Kneading is essential for a chewy texture.
- Rising Time: Let the dough rise in a warm place.
- Baking Soda Bath: Don’t skip the baking soda bath for authentic flavor and texture.
- Salt: Use coarse pretzel salt.
- Don’t Overbake: Watch the pretzels closely to prevent burning.
- Variations: Add cinnamon sugar or everything bagel seasoning.
- Troubleshooting:
- Dough Not Rising: Use fresh yeast, ensure correct water temperature, and place dough in a warmer spot.
- Pretzels Too Hard: Reduce baking time and avoid adding too much flour.
- Pretzels Not Chewy Enough: Ensure enough baking soda and correct boiling time.
- Pretzels Burning: Lower oven temperature or tent with foil.