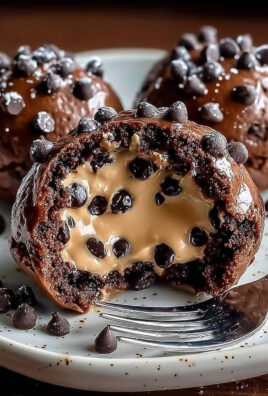
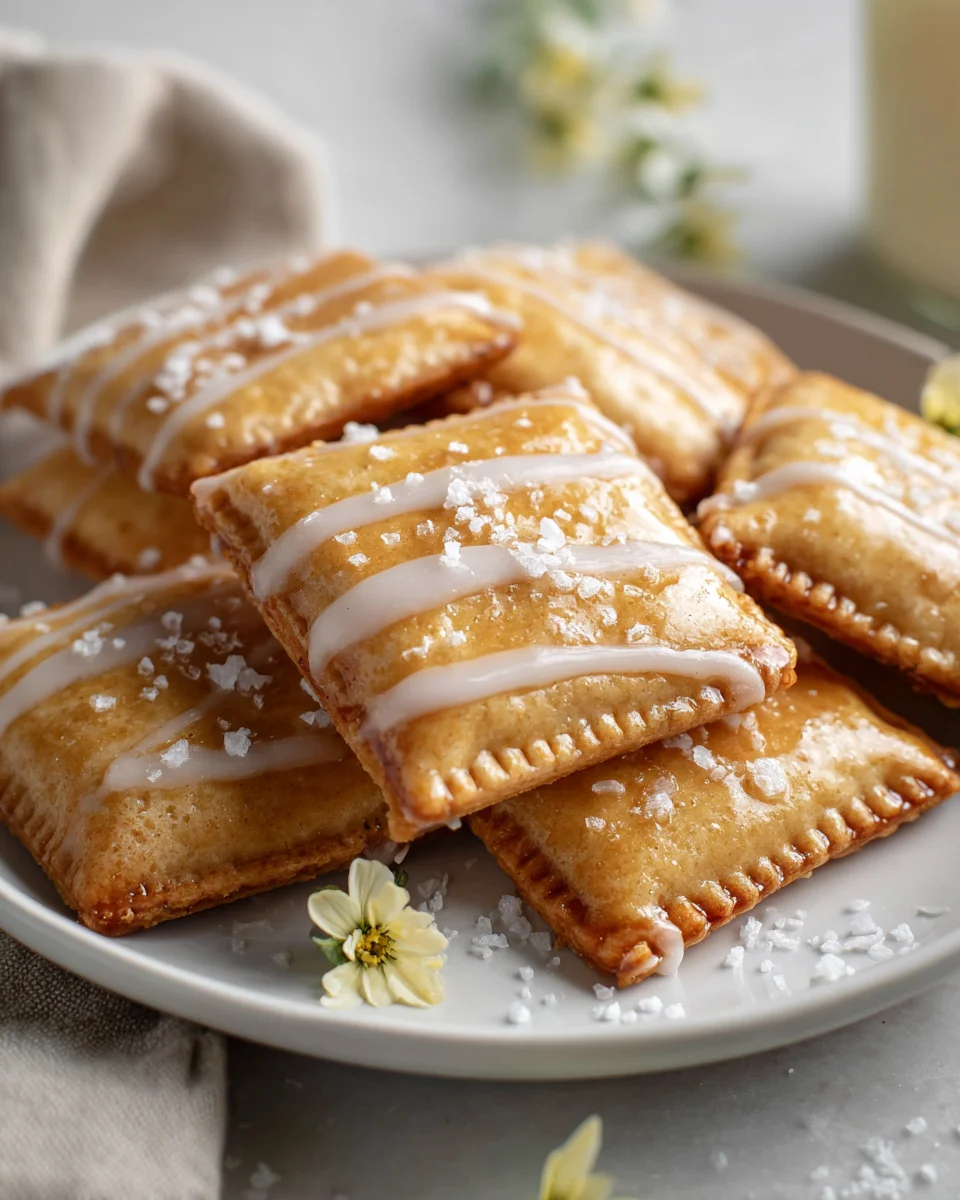
Brown Sugar Pop Tart Cookies: A Delicious Twist On A Classic Treat
Oh my goodness, friends, do I have a treat for you today! Get ready to dive into the most incredible dessert mash-up you never knew you needed. I’ve always had a soft spot for those classic breakfast pastries, but let’s be honest, sometimes you just want that nostalgic flavor in a different, even more delightful package. That’s exactly why I created these Brown Sugar Pop Tart Cookies: A Delicious Twist On A Classic Treat. They take everything you adore about a warm, gooey brown sugar Pop Tart and transform it into a perfectly portable, ridiculously addictive cookie!
What makes these so special? Imagine a buttery, tender shortbread-style cookie that perfectly encapsulates a sweet, molten brown sugar and cinnamon filling. Then, to really seal the deal, we top them off with that signature sweet glaze – just like the real deal! You’ll absolutely love how these cookies bring a sense of comforting nostalgia with every bite, but with an elevated, homemade touch. They’re perfect for satisfying that sweet tooth, impressing guests, or simply treating yourself to something truly unique and utterly delicious. It’s the best of both worlds: a chewy, delightful cookie cradling that beloved brown sugar goodness we all grew up with. Trust me, once you try these, there’s no going back!

Ingredient Notes
Creating these Brown Sugar Pop Tart Cookies truly is a delightful experience, and it all starts with understanding the stars of our show – the ingredients! I’ve carefully selected components that deliver that classic buttery, flaky texture of a cookie combined with the sweet, spiced punch of a brown sugar Pop Tart filling. Here’s what you’ll need and some thoughts on substitutions.
For the Cookie Dough
- All-Purpose Flour: This forms the structure of our cookies. I recommend using a good quality unbleached all-purpose flour. If you’re looking for a gluten-free option, a 1:1 gluten-free baking blend that contains xanthan gum works wonderfully here. Just make sure it’s suitable for baking.
- Unsalted Butter: Cold and cubed, this is critical for a tender, almost pastry-like cookie. It contributes richness and helps achieve that delightful flakiness. If you need a dairy-free alternative, a good quality plant-based butter (like Miyoko’s Kitchen or Earth Balance sticks) can be substituted in equal measure. Ensure it’s cold!
- Granulated Sugar & Light Brown Sugar: The combination gives us sweetness and helps with chewiness and flavor. The brown sugar adds a subtle molasses note that complements the filling. I wouldn’t recommend swapping these out completely, but if you’re out of one, using all of the other will work, though the final texture might be slightly different. For a lower glycemic option, coconut sugar can replace brown sugar, but the flavor will be less traditional.
- Egg Yolk: Just the yolk adds richness and helps bind the dough without making it too cakey. If you need an egg-free alternative, a flax egg (1 tablespoon ground flaxseed meal mixed with 3 tablespoons water, let sit for 5 minutes) can sometimes work in cookie doughs, but the texture might be slightly different.
- Vanilla Extract: A splash of pure vanilla extract enhances all the sweet flavors. Almond extract or even a touch of maple extract could offer a fun twist.
- Baking Powder & Salt: These are our leavening agent and flavor enhancer. Don’t skip the salt – it balances the sweetness beautifully.
For the Brown Sugar Cinnamon Filling
- Light Brown Sugar: This is the heart of our filling! Its deep, caramel-like flavor is essential. Dark brown sugar can be used for a more robust molasses taste.
- Ground Cinnamon: The perfect warm spice to pair with brown sugar. Feel free to adjust the amount to your preference. A pinch of nutmeg or cardamom could also be a nice addition.
- All-Purpose Flour or Cornstarch: Just a tiny bit helps thicken the filling slightly, preventing it from being too runny and leaking out during baking.
- Unsalted Butter: Melted butter helps bring the filling together into a paste. Again, a plant-based butter can be used for a dairy-free option.
- Milk or Water: A tablespoon or two helps achieve the right consistency for the filling. Any milk (dairy or non-dairy like almond or oat milk) works.
For the Simple Glaze
- Powdered Sugar (Confectioners’ Sugar): This forms the base of our smooth, quick-setting glaze.
- Milk or Water: To thin the glaze to a drizzly consistency. Dairy milk or any non-dairy milk works here.
- Vanilla Extract: Just a touch to enhance the sweetness of the glaze.
Step-by-Step Instructions
Ready to bake? I promise, these cookies are as fun to make as they are to eat! Just follow these steps, and you’ll have a batch of incredible Brown Sugar Pop Tart Cookies in no time.
1. Prepare the Cookie Dough
- Cream Butter & Sugars: In a large mixing bowl, using an electric mixer, cream together the cold, cubed unsalted butter, granulated sugar, and light brown sugar on medium speed until light and fluffy. This usually takes me about 3-4 minutes. Scrape down the sides of the bowl as needed.
- Add Egg Yolk & Vanilla: Beat in the egg yolk and vanilla extract until just combined. Don’t overmix at this stage.
- Combine Dry Ingredients: In a separate medium bowl, whisk together the all-purpose flour, baking powder, and salt.
- Combine Wet & Dry: Gradually add the dry ingredients to the wet ingredients, mixing on low speed until just combined and a shaggy dough forms. Be careful not to overmix, as this can lead to tough cookies.
- Chill the Dough: Divide the dough in half, flatten each half into a disc, wrap tightly in plastic wrap, and refrigerate for at least 1 hour. Chilling is crucial for easy handling and preventing spread.
2. Make the Brown Sugar Cinnamon Filling
- While the dough is chilling, prepare your filling. In a small bowl, combine the light brown sugar, ground cinnamon, and the teaspoon of flour or cornstarch.
- Pour in the melted unsalted butter and 1 tablespoon of milk or water. Mix well with a spoon until a thick, spreadable paste forms. If it’s too thick, add another teaspoon of milk/water until it reaches the right consistency. It shouldn’t be runny.
3. Assemble the Cookies
- Preheat Oven & Prep Pans: Preheat your oven to 350°F (175°C). Line two baking sheets with parchment paper or silicone baking mats.
- Roll Out Dough: On a lightly floured surface, or even better, between two sheets of parchment paper, roll out one disc of chilled dough to about 1/8 to 1/4 inch thickness. I find rolling between parchment paper makes it much easier to handle.
- Cut Rectangles: Using a sharp knife or a rectangular cookie cutter (about 3×2 inches), cut out an even number of rectangles. Carefully transfer half of these rectangles to your prepared baking sheets. Reroll scraps gently as needed.
- Add Filling: Spoon about 1-1.5 teaspoons of the brown sugar filling onto the center of each rectangle on the baking sheet, leaving about a 1/4-inch border around the edges.
- Top & Crimp: Carefully place the remaining dough rectangles on top of the filled rectangles. Using a fork, gently press and crimp the edges all around to seal the filling inside. This gives them that classic Pop Tart look and helps prevent leakage.
- Vent: Using a toothpick or the tip of a knife, poke a few holes in the top of each cookie to allow steam to escape during baking.
4. Bake the Cookies
- Bake for 10-14 minutes, or until the edges are lightly golden brown and the tops are just set. Keep an eye on them, as oven temperatures can vary.
- Remove from the oven and let the cookies cool on the baking sheets for 5 minutes before carefully transferring them to a wire rack to cool completely. Cooling completely is crucial before glazing!
5. Glaze & Decorate
- Make the Glaze: In a small bowl, whisk together the powdered sugar, 1 tablespoon of milk or water, and vanilla extract until smooth. Add more milk/water a tiny bit at a time if you need a thinner consistency for drizzling.
- Glaze the Cookies: Once the cookies are completely cool, drizzle or spread the glaze over the tops. You can make them as messy or neat as you like!
- Set: Let the glaze set for about 15-20 minutes before serving, or longer if you’ve applied a thicker layer. Enjoy your delicious twist on a classic!
Tips & Suggestions
I’ve made these Brown Sugar Pop Tart Cookies countless times, and I’ve picked up a few tricks along the way that I’d love to share with you. These tips will help ensure your cookies turn out perfectly every time, delivering that delightful homemade goodness.
- Don’t Skimp on Chilling: I know it’s tempting to rush, but properly chilling the cookie dough is absolutely essential. Cold dough is much easier to roll out and cut, and it prevents the cookies from spreading too much in the oven, helping them maintain their shape and that lovely buttery flakiness. If your kitchen is warm, you might even pop your rolled-out dough rectangles back into the fridge for 10 minutes before assembling.
- Uniform Thickness for Rolling: When rolling out your dough, aim for an even 1/8 to 1/4 inch thickness. This ensures that all your cookies bake evenly. I find rolling between two sheets of parchment paper to be a game-changer – it prevents sticking and makes transferring the dough much easier.
- Perfecting the Filling Consistency: Your brown sugar filling should be like a thick, spreadable paste, not runny. If it’s too dry, add a tiny bit more milk or water (a teaspoon at a time). If it’s too wet, you can mix in a pinch more powdered sugar or flour. A good consistency ensures it stays put during baking and doesn’t leak out.
- Seal Those Edges Well: When you’re crimping the edges with a fork, make sure you create a good, tight seal all around. This is your main defense against the delicious brown sugar filling escaping during baking. A firm but gentle press is all it takes.
- Don’t Overbake: For that perfect cookie texture, watch your cookies carefully. They should be just lightly golden at the edges, and the tops should look set. Overbaking can lead to dry, hard cookies, and we want them tender and slightly chewy!
- Cool Completely Before Glazing: Patience is key here! Glazing warm cookies will cause the glaze to melt and become messy. Let them cool fully on a wire rack to ensure your glaze sets beautifully and looks picture-perfect.
- Get Creative with Sprinkles: While a plain glaze is classic, I often like to add some fun sprinkles on top of the wet glaze. Rainbow nonpareils or even some cinnamon sugar sprinkles can add an extra pop of color and texture, making them even more appealing, especially for kids (and adults who are kids at heart!).
- Consider a Chocolate Drizzle: For an extra decadent treat, try drizzling melted chocolate over the set glaze. A little dark or milk chocolate can be a fantastic addition to the brown sugar and cinnamon flavors.
- Make Ahead Dough: You can prepare the cookie dough a day or two in advance and store it wrapped in the refrigerator. This makes assembly on baking day quick and easy!
Storage
Once you’ve gone to the effort of baking these delightful Brown Sugar Pop Tart Cookies, you’ll want to make sure they stay fresh and delicious for as long as possible. Here are my go-to tips for storing them, whether you’ve got leftovers or you’re planning ahead.
At Room Temperature
- Airtight Container is Key: For best freshness, store your baked and glazed Brown Sugar Pop Tart Cookies in an airtight container at room temperature. I usually use a cookie jar or a plastic container with a tight-fitting lid.
- Shelf Life: Stored this way, they will stay wonderfully fresh for about 3-5 days. After a few days, they might start to lose a bit of their tender texture, but they’ll still be delicious!
- Layering: If you’re stacking them, I recommend placing a small piece of parchment paper between layers, especially if the glaze is still slightly soft or you want to prevent them from sticking together.
Freezing (Baked Cookies)
- Before Glazing (Recommended): If you plan to freeze a batch, I highly recommend freezing the cookies before glazing them. Bake the cookies, let them cool completely, then place them in a single layer on a baking sheet and freeze until solid (about 1-2 hours).
- Transfer to Bag: Once frozen solid, transfer the unglazed cookies to a freezer-safe zip-top bag or airtight container. This prevents them from sticking together and from freezer burn. They can be stored for up to 2-3 months.
- Thawing & Glazing: When you’re ready to enjoy them, simply remove the desired number of cookies from the freezer and let them thaw at room temperature for an hour or two. Then, prepare and apply your glaze as usual. This way, the glaze is always fresh!
- Freezing Glazed Cookies: While possible, freezing glazed cookies isn’t ideal as the glaze can sometimes become a little sticky or watery upon thawing. If you must freeze them glazed, ensure the glaze is completely set, then wrap each cookie individually in plastic wrap before placing them in a freezer-safe container. Thaw at room temperature.
Freezing (Unbaked Dough)
- As Discs: You can freeze the prepared cookie dough discs, tightly wrapped in plastic wrap, for up to 1 month. When ready to use, thaw in the refrigerator overnight, then proceed with rolling and assembling as per the instructions.
- As Assembled Unbaked Cookies: For ultimate convenience, you can even assemble the unbaked cookies (with filling, crimped edges, and poked holes), then place them on a parchment-lined baking sheet and freeze until solid. Once solid, transfer to a freezer-safe bag. When ready to bake, you can bake them directly from frozen, adding a few extra minutes to the baking time (monitor closely).
Final Thoughts
I truly hope you’re as excited as I am about whipping up a batch of these extraordinary Brown Sugar Pop Tart Cookies: A Delicious Twist On A Classic Treat! What makes this recipe an absolute must-try is its magical ability to bottle up all the nostalgic joy of a classic treat and present it in an entirely new, incredibly irresistible form. It’s more than just a cookie; it’s a journey back to childhood, reimagined with the warmth and love of homemade baking.
From the moment you taste the perfectly tender crust, to the sweet, gooey brown sugar filling, and that delightful icing drizzle, you’ll understand why this twist is so special. It’s a testament to how simple ingredients can create something truly spectacular and heartwarming. I promise you, these cookies are not just a delicious dessert; they’re an experience that will bring smiles to everyone who tries them. So, gather your ingredients and get ready to create some delicious memories with this wonderfully unique treat!
Brown Sugar Pop Tart Cookies: Classic Treat, New Twist!
- Total Time: 1 hour 29 minutes
- Yield: 24 cookies
Description
Dive into the most incredible dessert mash-up with these Brown Sugar Pop Tart Cookies! Enjoy the nostalgic flavor of a warm, gooey brown sugar Pop Tart transformed into a delightful cookie.
Ingredients
- All-Purpose Flour
- Unsalted Butter, cold and cubed
- Granulated Sugar
- Light Brown Sugar
- Egg Yolk
- Vanilla Extract
- Baking Powder
- Salt
- Light Brown Sugar (for filling)
- Ground Cinnamon
- All-Purpose Flour or Cornstarch (for filling)
- Unsalted Butter, melted (for filling)
- Milk or Water (for filling)
- Powdered Sugar (Confectioners' Sugar)
- Milk or Water (for glaze)
- Vanilla Extract (for glaze)
Instructions
- 1. Prepare the Cookie Dough: Cream together the cold, cubed unsalted butter, granulated sugar, and light brown sugar on medium speed until light and fluffy. Beat in the egg yolk and vanilla extract until just combined. In a separate bowl, whisk together the all-purpose flour, baking powder, and salt. Gradually add the dry ingredients to the wet ingredients, mixing on low speed until just combined and a shaggy dough forms. Divide the dough in half, flatten each half into a disc, wrap tightly in plastic wrap, and refrigerate for at least 1 hour.
- 2. Make the Brown Sugar Cinnamon Filling: In a small bowl, combine the light brown sugar, ground cinnamon, and the teaspoon of flour or cornstarch. Pour in the melted unsalted butter and 1 tablespoon of milk or water. Mix well until a thick, spreadable paste forms.
- 3. Assemble the Cookies: Preheat your oven to 350°F (175°C). Line two baking sheets with parchment paper. Roll out one disc of chilled dough to about 1/8 to 1/4 inch thickness. Cut out rectangles and transfer half to the baking sheets. Spoon about 1-1.5 teaspoons of the brown sugar filling onto the center of each rectangle, leaving a 1/4-inch border. Place the remaining dough rectangles on top and crimp the edges to seal. Poke a few holes in the top of each cookie.
- 4. Bake the Cookies: Bake for 10-14 minutes, or until the edges are lightly golden brown. Let the cookies cool on the baking sheets for 5 minutes before transferring to a wire rack to cool completely.
- 5. Glaze & Decorate: In a small bowl, whisk together the powdered sugar, 1 tablespoon of milk or water, and vanilla extract until smooth. Once the cookies are completely cool, drizzle or spread the glaze over the tops and let it set for about 15-20 minutes before serving.
- Prep Time: 1 hour 15 mins
- Cook Time: 14 mins
- Category: Dessert
- Method: Baking
- Cuisine: American
Nutrition
- Serving Size: 1 cookie
- Calories: 150
- Sugar: 10 g
- Sodium: 50 mg
- Fat: 6 g
- Saturated Fat: 4 g
- Unsaturated Fat: 2 g
- Trans Fat: 0 g
- Carbohydrates: 22 g
- Fiber: 0 g
- Protein: 1 g
- Cholesterol: 20 mg
Keywords: Chilling the dough is essential for easy handling and preventing spread. Ensure the filling is a thick, spreadable paste to avoid leakage during baking.