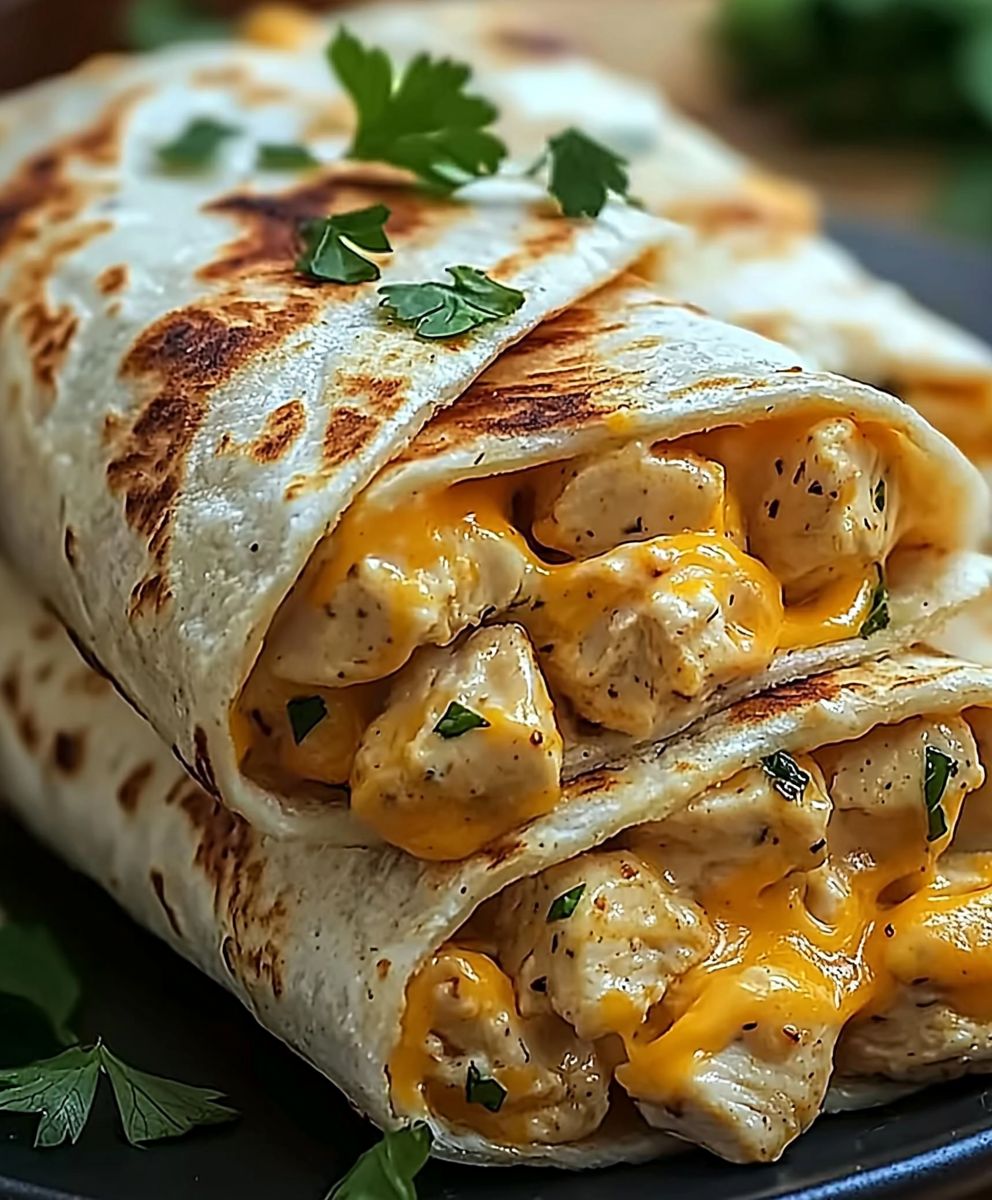
Cheesy Chicken Wrap: Prepare to embark on a culinary adventure that will redefine your lunch game! Imagine sinking your teeth into a warm, toasted tortilla, bursting with tender, juicy chicken and rivers of melted, gooey cheese. This isn’t just a wrap; it’s an experience.
While the exact origins of the chicken wrap are somewhat shrouded in mystery, its popularity exploded in the late 20th century as a convenient and customizable alternative to traditional sandwiches. It perfectly embodies the modern desire for quick, delicious, and portable meals. Think of it as a blank canvas for your culinary creativity!
What makes the cheesy chicken wrap so irresistible? It’s the perfect marriage of textures and flavors. The soft tortilla gives way to the savory chicken and the rich, comforting cheese. It’s incredibly versatile, too! You can customize it with your favorite sauces, vegetables, and spices to create a wrap that perfectly suits your taste. Plus, it’s incredibly easy to make, making it ideal for busy weeknights or a satisfying lunch on the go. I find myself craving this simple yet satisfying meal at least once a week. So, let’s get started and create the ultimate cheesy chicken wrap together!

Ingredients:
- For the Chicken:
- 2 boneless, skinless chicken breasts (about 6-8 ounces each)
- 1 tablespoon olive oil
- 1 teaspoon paprika
- 1/2 teaspoon garlic powder
- 1/2 teaspoon onion powder
- 1/4 teaspoon dried oregano
- 1/4 teaspoon dried thyme
- Salt and freshly ground black pepper to taste
- For the Cheese Sauce:
- 2 tablespoons butter
- 2 tablespoons all-purpose flour
- 2 cups milk (whole milk recommended for richness)
- 1 cup shredded cheddar cheese
- 1/2 cup shredded Monterey Jack cheese
- 1/4 teaspoon garlic powder
- 1/4 teaspoon onion powder
- Pinch of cayenne pepper (optional, for a little kick)
- Salt and freshly ground black pepper to taste
- For the Wraps:
- 4 large flour tortillas (10-12 inch diameter)
- 1/2 cup shredded lettuce
- 1/4 cup diced tomatoes
- 1/4 cup diced red onion (optional)
- 1/4 cup sour cream or Greek yogurt (optional)
- Hot sauce (optional, for serving)
Preparing the Chicken:
- Pound the Chicken: Place each chicken breast between two sheets of plastic wrap. Use a meat mallet or rolling pin to pound the chicken to an even thickness of about 1/2 inch. This helps the chicken cook evenly and quickly.
- Season the Chicken: In a small bowl, combine the paprika, garlic powder, onion powder, oregano, thyme, salt, and pepper. Rub this spice mixture all over both sides of the flattened chicken breasts, ensuring they are evenly coated.
- Cook the Chicken: Heat the olive oil in a large skillet over medium-high heat. Once the oil is shimmering, carefully place the seasoned chicken breasts in the skillet. Cook for about 5-7 minutes per side, or until the chicken is cooked through and reaches an internal temperature of 165°F (74°C). Use a meat thermometer to ensure accuracy.
- Rest and Slice the Chicken: Remove the cooked chicken from the skillet and place it on a cutting board. Let it rest for a few minutes before slicing it into thin strips. This allows the juices to redistribute, resulting in more tender and flavorful chicken.
Making the Cheese Sauce:
- Melt the Butter: In a medium saucepan, melt the butter over medium heat.
- Make a Roux: Whisk in the flour and cook for 1-2 minutes, stirring constantly, until the mixture forms a smooth paste. This is called a roux, and it helps to thicken the cheese sauce. Be careful not to burn the roux, as this will affect the flavor of the sauce.
- Add the Milk: Gradually whisk in the milk, a little at a time, ensuring that there are no lumps. Continue whisking until the mixture is smooth and creamy.
- Simmer the Sauce: Bring the sauce to a simmer over medium heat, stirring constantly. Reduce the heat to low and continue to simmer for 5-7 minutes, or until the sauce has thickened slightly.
- Add the Cheese and Seasonings: Remove the saucepan from the heat and stir in the cheddar cheese and Monterey Jack cheese until they are completely melted and the sauce is smooth and creamy. Stir in the garlic powder, onion powder, cayenne pepper (if using), salt, and pepper. Taste and adjust the seasonings as needed.
Assembling the Wraps:
- Warm the Tortillas: Warm the tortillas in a dry skillet over medium heat for a few seconds per side, or until they are pliable. You can also warm them in the microwave for a few seconds. This will make them easier to roll without tearing.
- Layer the Ingredients: Lay a warm tortilla flat on a clean surface. Spread a generous amount of cheese sauce in the center of the tortilla, leaving about an inch of space around the edges.
- Add the Chicken and Toppings: Top the cheese sauce with a portion of the sliced chicken, shredded lettuce, diced tomatoes, and diced red onion (if using).
- Fold the Wrap: Fold in the sides of the tortilla towards the center, then tightly roll the tortilla from the bottom up, like a burrito.
- Serve Immediately: Serve the cheesy chicken wraps immediately. You can cut them in half for easier handling.
Optional: Grilling the Wraps
For an extra layer of flavor and a slightly crispy texture, you can grill the assembled wraps.
- Prepare the Grill: Preheat a grill pan or outdoor grill to medium heat.
- Grill the Wraps: Lightly brush the outside of each wrap with olive oil or cooking spray. Place the wraps on the preheated grill and cook for 2-3 minutes per side, or until they are golden brown and slightly crispy.
- Serve: Remove the grilled wraps from the grill and let them cool slightly before cutting them in half and serving.
Tips and Variations:
- Cheese Variations: Feel free to experiment with different types of cheese in the cheese sauce. Pepper jack cheese will add a spicy kick, while Gruyere or Swiss cheese will add a nutty flavor.
- Vegetable Additions: Add other vegetables to the wraps, such as bell peppers, mushrooms, or spinach. Sauté the vegetables before adding them to the wraps.
- Spice It Up: Add a pinch of cayenne pepper to the cheese sauce or a dash of hot sauce to the wraps for a spicier flavor.
- Make it Healthier: Use whole wheat tortillas and low-fat cheese to make the wraps healthier. You can also use Greek yogurt instead of sour cream.
- Meal Prep: You can prepare the chicken and cheese sauce ahead of time and store them in the refrigerator. When you’re ready to assemble the wraps, simply warm the tortillas and layer the ingredients.
- Leftovers: Leftover cheesy chicken wraps can be stored in the refrigerator for up to 3 days. Reheat them in the microwave or oven before serving.
- Chicken Alternatives: You can substitute the chicken breasts with shredded rotisserie chicken or leftover cooked chicken.
- Sauce Consistency: If the cheese sauce becomes too thick, add a little more milk to thin it out. If it’s too thin, simmer it for a few more minutes to thicken it.
- Tortilla Size: The size of the tortillas will affect how many wraps you can make. If you’re using smaller tortillas, you may need to adjust the amount of filling accordingly.
- Serving Suggestions: Serve the cheesy chicken wraps with a side of salsa, guacamole, or sour cream. They also pair well with a simple salad or some tortilla chips.
Troubleshooting:
- Tortillas Tearing: If the tortillas are tearing when you try to roll them, they may be too cold or dry. Warm them slightly before using them.
- Cheese Sauce Lumpy: If the cheese sauce is lumpy, it may be because the milk was added too quickly or the roux was not properly cooked. Use an immersion blender to smooth out the sauce.
- Chicken Dry: If the chicken is dry, it may be because it was overcooked. Be sure to use a meat thermometer to ensure that it reaches an internal temperature of 165°F (74°C), but don’t overcook it.
- Wraps Soggy: To prevent the wraps from becoming soggy, don’t add too much cheese sauce or other wet ingredients. Also, serve them immediately after assembling them.
Nutritional Information (Approximate, per wrap):
- Calories: 500-600
- Protein: 30-40g
- Fat: 25-35g
- Carbohydrates: 40-50g
Note: Nutritional information may vary depending on the specific ingredients used and portion sizes.
Conclusion:
This Cheesy Chicken Wrap isn’t just another lunch option; it’s a flavor explosion waiting to happen, and trust me, you absolutely need to try it! The combination of juicy, seasoned chicken, melted cheese, and your favorite fresh toppings all nestled in a warm, pliable tortilla is simply irresistible. It’s quick, it’s easy, and it’s infinitely customizable, making it the perfect solution for busy weeknights, packed lunches, or even a satisfying weekend snack.
But why is this particular wrap a must-try? It’s all about the balance. We’ve carefully crafted this recipe to ensure that every bite is bursting with flavor, from the savory chicken to the creamy cheese and the crisp vegetables. It’s not just a wrap; it’s an experience. And the best part? It’s so simple to make that even the most novice cook can whip it up in minutes.
Now, let’s talk about serving suggestions and variations because the possibilities are truly endless! For a spicier kick, try adding a dash of your favorite hot sauce or a sprinkle of red pepper flakes to the chicken mixture. If you’re looking for a lighter option, swap out the regular tortillas for whole wheat or low-carb versions. You could even use lettuce wraps for a completely carb-free alternative!
Want to elevate your wrap game even further? Consider adding some grilled vegetables like bell peppers, onions, or zucchini for extra flavor and nutrients. A dollop of guacamole or sour cream can also add a creamy, tangy element that complements the other ingredients perfectly. And don’t forget the herbs! Fresh cilantro, parsley, or even a sprinkle of dried oregano can really enhance the overall taste.
For a truly decadent experience, try grilling your Cheesy Chicken Wrap after assembling it. This will melt the cheese even more and give the tortilla a crispy, golden-brown exterior. Serve it with a side of salsa, guacamole, or your favorite dipping sauce for the ultimate flavor combination.
If you’re serving these wraps for a party or gathering, you can easily prepare the chicken mixture ahead of time and let your guests assemble their own wraps. This is a fun and interactive way to get everyone involved, and it allows them to customize their wraps to their liking.
I’m confident that once you try this recipe, it will become a staple in your household. It’s the perfect combination of convenience, flavor, and versatility, and it’s sure to satisfy even the pickiest eaters.
So, what are you waiting for? Grab your ingredients, fire up your stove, and get ready to create the most delicious Cheesy Chicken Wrap you’ve ever tasted! I’m so excited for you to try it, and I can’t wait to hear what you think.
Once you’ve made your masterpiece, please, please, please share your experience! Leave a comment below and let me know what variations you tried, what toppings you added, and how much you loved it. Did you add a special sauce? Did you use a different type of cheese? I’m always looking for new ideas and inspiration, and I love hearing from my readers. Your feedback is invaluable, and it helps me to create even better recipes in the future. So, don’t be shy – share your Cheesy Chicken Wrap success story with the world! Happy wrapping!
Cheesy Chicken Wrap: The Ultimate Recipe & Easy Guide
Delicious and easy cheesy chicken wraps filled with tender seasoned chicken, a creamy homemade cheese sauce, lettuce, and tomatoes. Perfect for a quick lunch or dinner!
Ingredients
- 2 boneless, skinless chicken breasts (about 6-8 ounces each)
- 1 tablespoon olive oil
- 1 teaspoon paprika
- 1/2 teaspoon garlic powder
- 1/2 teaspoon onion powder
- 1/4 teaspoon dried oregano
- 1/4 teaspoon dried thyme
- Salt and freshly ground black pepper to taste
- 2 tablespoons butter
- 2 tablespoons all-purpose flour
- 2 cups milk (whole milk recommended for richness)
- 1 cup shredded cheddar cheese
- 1/2 cup shredded Monterey Jack cheese
- 1/4 teaspoon garlic powder
- 1/4 teaspoon onion powder
- Pinch of cayenne pepper (optional, for a little kick)
- Salt and freshly ground black pepper to taste
- 4 large flour tortillas (10-12 inch diameter)
- 1/2 cup shredded lettuce
- 1/4 cup diced tomatoes
- 1/4 cup diced red onion (optional)
- 1/4 cup sour cream or Greek yogurt (optional)
- Hot sauce (optional, for serving)
Instructions
- Prepare the Chicken: Place each chicken breast between two sheets of plastic wrap. Use a meat mallet or rolling pin to pound the chicken to an even thickness of about 1/2 inch.
- In a small bowl, combine the paprika, garlic powder, onion powder, oregano, thyme, salt, and pepper. Rub this spice mixture all over both sides of the flattened chicken breasts.
- Heat the olive oil in a large skillet over medium-high heat. Once the oil is shimmering, carefully place the seasoned chicken breasts in the skillet. Cook for about 5-7 minutes per side, or until the chicken is cooked through and reaches an internal temperature of 165°F (74°C).
- Remove the cooked chicken from the skillet and place it on a cutting board. Let it rest for a few minutes before slicing it into thin strips.
- Make the Cheese Sauce: In a medium saucepan, melt the butter over medium heat.
- Whisk in the flour and cook for 1-2 minutes, stirring constantly, until the mixture forms a smooth paste (roux).
- Gradually whisk in the milk, a little at a time, ensuring that there are no lumps. Continue whisking until the mixture is smooth and creamy.
- Bring the sauce to a simmer over medium heat, stirring constantly. Reduce the heat to low and continue to simmer for 5-7 minutes, or until the sauce has thickened slightly.
- Remove the saucepan from the heat and stir in the cheddar cheese and Monterey Jack cheese until they are completely melted and the sauce is smooth and creamy. Stir in the garlic powder, onion powder, cayenne pepper (if using), salt, and pepper. Taste and adjust the seasonings as needed.
- Assemble the Wraps: Warm the tortillas in a dry skillet over medium heat for a few seconds per side, or until they are pliable.
- Lay a warm tortilla flat on a clean surface. Spread a generous amount of cheese sauce in the center of the tortilla, leaving about an inch of space around the edges.
- Top the cheese sauce with a portion of the sliced chicken, shredded lettuce, diced tomatoes, and diced red onion (if using).
- Fold in the sides of the tortilla towards the center, then tightly roll the tortilla from the bottom up, like a burrito.
- Serve the cheesy chicken wraps immediately. You can cut them in half for easier handling.
- Optional: Grilling the Wraps: Preheat a grill pan or outdoor grill to medium heat. Lightly brush the outside of each wrap with olive oil or cooking spray. Place the wraps on the preheated grill and cook for 2-3 minutes per side, or until they are golden brown and slightly crispy. Remove the grilled wraps from the grill and let them cool slightly before cutting them in half and serving.
Notes
- Cheese Variations: Experiment with different cheeses like pepper jack, Gruyere, or Swiss.
- Vegetable Additions: Add sautéed bell peppers, mushrooms, or spinach.
- Spice It Up: Add cayenne pepper to the cheese sauce or hot sauce to the wraps.
- Make it Healthier: Use whole wheat tortillas, low-fat cheese, and Greek yogurt.
- Meal Prep: Prepare the chicken and cheese sauce ahead of time.
- Leftovers: Store in the refrigerator for up to 3 days and reheat.
- Chicken Alternatives: Use shredded rotisserie chicken.
- Sauce Consistency: Add milk to thin or simmer to thicken.
- Tortilla Size: Adjust filling based on tortilla size.
- Serving Suggestions: Serve with salsa, guacamole, or a salad.
- Troubleshooting:
- If tortillas are tearing, warm them slightly.
- If cheese sauce is lumpy, use an immersion blender.
- If chicken is dry, use a meat thermometer and don’t overcook.
- To prevent soggy wraps, don’t overfill and serve immediately.