Garbage Bread is a culinary marvel whose intriguing name playfully hides its truly delicious and comforting nature. Don’t let the unconventional moniker fool you; this beloved dish is a testament to the magic that happens when simple ingredients come together to create something extraordinary. I am absolutely thrilled to share the secrets behind this incredible recipe with you.
The Allure of Garbage Bread: A Potluck Legend
While specific historical records for Garbage Bread might be as varied as its fillings, its spirit undoubtedly stems from resourceful home cooking and the joy of creating a crowd-pleasing meal with readily available ingredients. It has become a cherished staple at family gatherings, potlucks, and casual weeknight dinners, adored for its incredible versatility and ease of preparation. People simply can’t get enough of its golden-brown, flaky crust wrapped around a warm, savory, and often cheesy filling. It’s the ultimate comfort food that consistently delivers on taste, texture, and convenience, making it a guaranteed hit every single time. Prepare to discover your new favorite savory baked delight!

Ingredients:
- Two (2) cans (8 oz each) refrigerated crescent roll dough: I often find that using two cans gives us a really hearty, substantial Garbage Bread, perfect for sharing or ensuring delicious leftovers. You want the classic crescent roll sheets, not the pre-perforated triangles, as this makes for easier assembly and a sturdier wrap. If you can only find the triangles, don’t fret; you’ll just need to carefully pinch all the seams together to form a solid sheet.
- Half (1/2) pound sliced deli ham: I prefer a good quality, thinly sliced ham for this, like black forest or honey ham. You can cube it, shred it, or just layer it as slices; the choice is yours, but I find layering the slices works best for even distribution.
- Half (1/2) pound sliced deli turkey: Again, thinly sliced breast meat works wonderfully. A smoked turkey can add a lovely depth of flavor to our Garbage Bread.
- One (1) cup shredded mozzarella cheese: This cheese melts beautifully and gives us that satisfying, gooey pull.
- One (1) cup shredded sharp cheddar cheese: For a little extra tang and a bolder flavor profile that complements the deli meats. Feel free to use a blend of your favorite cheeses here – provolone or Monterey Jack would also be fantastic additions to your Garbage Bread.
- One (1) small bell pepper (any color), finely diced: I love the crunch and subtle sweetness a bit of bell pepper adds. Red or yellow peppers are often my go-to for their vibrant color and mild flavor.
- Half (1/2) small onion, finely diced: A little onion provides a savory aromatic base. If you’re not an onion fan, you can certainly omit this, but I think it really enhances the overall flavor of the Garbage Bread.
- Two (2) tablespoons unsalted butter, melted: This will be for brushing the top of our Garbage Bread, ensuring a gorgeous golden-brown crust and extra richness.
- Half (1/2) teaspoon garlic powder: A staple in my kitchen, it adds a warm, savory note.
- Half (1/2) teaspoon onion powder: Enhances the savory profile even further.
- Half (1/2) teaspoon dried Italian seasoning: A blend of herbs like oregano, basil, thyme, and rosemary that truly brings out the classic “pizza-like” essence in our Garbage Bread.
- One (1) large egg, lightly beaten (for egg wash, optional but recommended): This gives our Garbage Bread an incredibly professional-looking, glossy, deep golden finish. It also helps any seasonings you sprinkle on top adhere better.
- Optional additions for a personalized Garbage Bread:
- Two (2) ounces sliced pepperoni or salami: For a spicy kick and more robust flavor.
- One (1) jalapeño, seeded and minced: If you enjoy a bit of heat!
- Two (2) tablespoons finely chopped fresh parsley: For a fresh, herbaceous garnish after baking.
- Two (2) tablespoons mayonnaise or Dijon mustard: For spreading a thin layer on the dough before adding fillings, adding extra moisture and flavor.
Gathering My Tools and Preparing the Workspace:
Before I even think about unwrapping that dough, I like to have all my ducks in a row. This makes the entire process of creating my amazing Garbage Bread so much smoother and more enjoyable. Trust me, there’s nothing worse than realizing you need a specific tool or ingredient when your hands are already covered in dough!
- Preheat the Oven: First things first, I set my oven to 375°F (190°C). Getting the oven to the correct temperature beforehand is crucial for even baking and a perfectly golden crust on our Garbage Bread.
- Prepare My Baking Surface: I grab a large baking sheet, the bigger the better, and line it with parchment paper. This is a non-negotiable step for me. Parchment paper not only prevents sticking (which would be a real tragedy for our beautiful Garbage Bread) but also makes cleanup an absolute breeze. If you don’t have parchment, a silicone baking mat works wonderfully too. If neither are available, you can lightly grease your baking sheet, but be warned, it might stick a little more.
- Melt the Butter: I’ll take my two tablespoons of unsalted butter and melt it gently, either in a small saucepan over low heat or in a microwave-safe bowl in 15-second intervals. I set it aside to cool slightly, as we’ll be brushing this liquid gold over the top of our Garbage Bread just before it goes into the oven.
- Prepare the Egg Wash (if using): In a small bowl, I crack my large egg and lightly beat it with a fork. Just a few seconds of whisking until the yolk and white are combined is all it takes. This egg wash is my secret weapon for that bakery-quality shine.
- Gather My Seasonings: I like to have my garlic powder, onion powder, and Italian seasoning ready to go in little pinch bowls. This way, I can easily sprinkle them over the Garbage Bread without fumbling around mid-assembly.
Crafting the Heart of My Garbage Bread: The Filling Preparation:
This is where the magic really starts to happen for our Garbage Bread. The filling is what makes this dish so incredibly versatile and delicious, truly living up to its “Garbage Bread” name because you can practically put anything in it! I’m going for a classic savory combination today.
- Shred the Cheeses: If you’re not using pre-shredded cheese (and honestly, freshly shredded often melts better), now is the time to grate your mozzarella and cheddar. I always aim for about two cups total, split evenly between the two types.
- Dice the Vegetables: I take my small bell pepper and half an onion, give them a good wash, and then finely dice them. The key here is “finely diced.” We want these veggies to cook through nicely within the baking time of the crescent dough, and large chunks might stay a bit too crisp. Plus, smaller pieces ensure an even distribution of flavor in every bite of our Garbage Bread.
- Prepare the Deli Meats: For the deli ham and turkey, I usually keep them as slices. I find that layering the slices neatly across the dough helps create a more uniform structure once the Garbage Bread is rolled up. However, if you prefer a more “chopped salad” texture, feel free to roughly chop your deli meats. If I’m adding pepperoni or salami, I’ll slice those into smaller pieces or use pre-sliced rounds.
- Combine Optional Add-ins: If I’m feeling adventurous and adding a minced jalapeño or some extra chopped olives, I’ll chop those now too. Sometimes I even toss all the chopped veggies and meats together in a bowl with a pinch of the Italian seasoning to give them a little pre-flavoring, but it’s not strictly necessary.
- Consider the Spread (Optional): If you’re going for that extra layer of flavor and moisture, now’s the time to get your mayonnaise or Dijon mustard ready. We’ll spread it directly onto the dough, but having it measured out and accessible is a good idea.
Assembling My Masterpiece: The Garbage Bread Roll-Up:
This is the fun part where everything comes together! I find it’s like building a delicious, savory pastry burrito. Precision helps, but don’t worry too much about perfection; it’s Garbage Bread, after all, and it’s always delicious.
- Unroll the Dough Sheets: Carefully unroll one can of crescent roll dough onto your prepared baking sheet. You want to make sure the seams are pressed together firmly to form a single, rectangular sheet. Sometimes, the dough comes as pre-cut triangles, and in that case, I lay them out with the wide ends slightly overlapping, then gently press and pinch all the seams together until I have a relatively solid rectangle. I try to make it as seamless as possible to prevent any filling from escaping during baking. I repeat this with the second can of dough, laying it directly next to and slightly overlapping the first sheet on the long side. Then, I pinch the seam where the two dough sheets meet, creating one large, roughly 16×10-inch rectangle. This large surface area is essential for a substantial Garbage Bread. I use my fingers to gently stretch and square off the edges if needed.
- Apply the Base Layer (Optional but Recommended): If I’m using mayonnaise or Dijon mustard, I spread a very thin, even layer over the entire surface of the dough, leaving about a 1-inch border clear around the edges. This adds an extra punch of flavor and helps keep the filling moist. For a classic Garbage Bread, you can skip this, but I highly recommend it for an extra layer of deliciousness.
- First Layer of Cheese: I start by evenly sprinkling about half of my shredded mozzarella and half of my shredded cheddar over the dough. Again, I leave that 1-inch border around the edges bare. The cheese acts as a glue, helping to hold the other ingredients in place and melt into a beautiful, gooey layer within our Garbage Bread.
- Layer the Meats: Next, I arrange the slices of deli ham over the cheese, trying to cover the entire cheese layer evenly. Then, I do the same with the deli turkey slices. If I’m adding pepperoni or salami, I’ll scatter those on top of the ham and turkey. This is where the generosity of the “Garbage Bread” really shines through!
- Add the Vegetables: Now it’s time for our finely diced bell peppers and onions. I sprinkle these evenly over the meats. If I’m using jalapeños or olives, those go on now too. I try not to overstuff, keeping the layer relatively thin so it cooks evenly.
- Second Layer of Cheese: I finish the filling with the remaining half of my mozzarella and cheddar cheese. This top layer of cheese will melt and help seal everything in, creating an incredibly satisfying cross-section in our finished Garbage Bread.
- Rolling Up the Garbage Bread: This is arguably the most crucial step. Starting from one of the long sides of the rectangle, I carefully and slowly begin to roll the dough up, away from me, into a tight log. It’s important to roll it tightly to ensure the filling is secure and doesn’t create large air pockets. As I roll, I tuck in any filling that tries to escape. I continue rolling until I have a nice, firm log.
- Sealing the Seams: Once rolled, I gently place the seam side down on the parchment-lined baking sheet. Then, I firmly pinch the ends of the log together and tuck them underneath, sealing the Garbage Bread completely. This prevents any cheese or other delicious fillings from oozing out during baking. I also double-check the long seam at the bottom, pressing it gently against the baking sheet to ensure it’s closed.
The Baking Journey: Achieving Golden Perfection:
We’re almost there! The anticipation builds as our beautiful Garbage Bread makes its way into the oven. This stage is all about achieving that perfect golden crust and ensuring the filling is hot and gooey.
- Egg Wash and Season: With my Garbage Bread log neatly sealed and resting on the baking sheet, I grab my lightly beaten egg and use a pastry brush to gently coat the entire top and sides of the dough. This egg wash is truly transformative, giving our Garbage Bread a beautiful sheen and rich color. Immediately after brushing, I sprinkle my garlic powder, onion powder, and Italian seasoning evenly over the top. The egg wash helps these delicious spices adhere perfectly. If you didn’t use an egg wash, you can brush with the melted butter and then sprinkle the seasonings, but the color won’t be as deep.
- Bake Until Golden: Carefully transfer the baking sheet with your Garbage Bread to the preheated 375°F (190°C) oven. I let it bake for approximately 25-30 minutes. The exact time can vary slightly depending on your oven, so I recommend keeping an eye on it after the 20-minute mark. What I’m looking for is a beautifully puffed-up, deep golden-brown crust. The aroma filling your kitchen will be absolutely irresistible! If you notice one side browning faster than the other, you can carefully rotate the baking sheet halfway through the baking time.
- Check for Doneness: I want to ensure the dough is fully cooked through and the cheese inside is bubbly and melted. If the top is browning too quickly but you suspect the inside isn’t quite done, you can loosely tent the Garbage Bread with aluminum foil for the last 5-10 minutes of baking.
- Rest Before Slicing: Once the Garbage Bread is gorgeously golden and baked to perfection, I carefully remove the baking sheet from the oven. This is the hardest part: resisting the urge to cut into it immediately! I let the Garbage Bread rest on the baking sheet for at least 5-10 minutes before slicing. This crucial resting period allows the cheese to set slightly, preventing it from oozing out excessively when you cut into it, and also makes for cleaner slices. Plus, it’s still piping hot right out of the oven, so a little cooling time helps prevent burnt tongues!
Serving Suggestions and Storage:
The moment of truth! Your homemade Garbage Bread is ready to be enjoyed. This versatile dish is perfect for so many occasions.
- Slice and Serve: After its brief rest, I use a sharp serrated knife to cut the Garbage Bread into thick slices, typically about 1 to 1.5 inches wide. The serrated knife helps cut through the crispy crust and gooey interior without squishing the entire log. I often arrange the slices on a platter to make them easy for everyone to grab.
- Dipping Sauces: My family loves to dip their Garbage Bread. Some of our favorite dipping sauces include:
- Warm Marinara Sauce: A classic choice that complements the Italian seasoning and cheesy filling perfectly.
- Ranch Dressing: A creamy, cool contrast to the warm, savory Garbage Bread.
- Garlic Butter: For an extra layer of indulgence, you can quickly melt a bit more butter with some garlic powder and a pinch of parsley for dipping.
- Honey Mustard: If you enjoy a sweet and tangy flavor profile.
- Pairing Ideas: Garbage Bread is fantastic on its own as a hearty snack or light meal, but it also pairs wonderfully with other dishes:
- Simple Green Salad: A fresh, crisp salad with a light vinaigrette is a perfect counterpoint to the rich Garbage Bread.
- Tomato Soup: A classic comforting combination, especially on a chilly day.
- Pickles or Olives: A side of briny pickles or olives can cut through the richness and add a delightful tang.
- Storing Leftovers: If by some miracle you have any Garbage Bread left, it stores surprisingly well!
- Refrigeration: I let any leftover slices cool completely to room temperature. Then, I store them in an airtight container or wrap them tightly in plastic wrap or aluminum foil. They will keep beautifully in the refrigerator for up to 3-4 days.
- Reheating: For the best results, I reheat individual slices in a toaster oven or in a regular oven at 350°F (175°C) for about 10-15 minutes, or until warmed through and the crust has crisped up again. The microwave works in a pinch, but it can sometimes make the crust a bit soft.
- Freezing (Optional): You can also freeze baked and cooled slices of Garbage Bread. Wrap each slice individually in plastic wrap, then place them in a freezer-safe bag or container. They can be frozen for up to 1 month. To reheat from frozen, bake in a preheated oven at 375°F (190°C) for about 20-25 minutes, or until hot and crispy.
And there you have it! My absolute favorite way to make a delicious, crowd-pleasing batch of Garbage Bread. It’s truly a flexible recipe, so feel free to experiment with your own favorite fillings and make it your own signature dish. Happy baking!
Conclusion:
The Garbage Bread recipe isn’t just another dish; it’s a culinary adventure that promises to delight your taste buds and simplify your kitchen routine. I truly believe this recipe is a must-try for everyone, from novice cooks looking for a simple win to seasoned chefs seeking a versatile base for creativity. Its unparalleled versatility, incredible flavor, and the sheer joy it brings to any table make it a standout. It’s the kind of dish that adapts effortlessly to whatever you have on hand, making it a fantastic solution for those “what’s for dinner?” dilemmas or when you’re looking for a crowd-pleasing appetizer that requires minimal fuss. Imagine warm, golden-brown crust, giving way to a rich, gooey, and savory filling – a perfect symphony of textures and tastes that truly elevates humble ingredients into something extraordinary. This is more than just a recipe; it’s an experience, a delightful surprise that consistently earns rave reviews and happy sighs.
Why This Recipe is a True Kitchen Game-Changer
What truly sets this recipe apart is its ability to transform simple pantry staples into a masterpiece with minimal effort. It’s comforting, satisfying, and deeply flavorful, hitting all the right notes for a dish that feels both familiar and excitingly new. The process itself is incredibly forgiving, allowing for experimentation and personal touches without fear of failure. This means you can confidently tackle it even on your busiest days, knowing that a delicious and impressive meal is just a short bake away. It’s also incredibly economical, utilizing ingredients you likely already have, which makes it not only a joy to eat but also kind to your wallet. For busy families, entertaining friends, or simply treating yourself to something special, this recipe delivers on all fronts. It’s the kind of dish that makes you feel like a culinary wizard, effortlessly creating something truly wonderful.
Unleashing the Versatility: Serving Suggestions & Flavor Explorations
For serving, the possibilities are truly endless, making this dish incredibly adaptable to any meal of the day. For a hearty breakfast or brunch, I love serving generous slices of it alongside scrambled eggs, crispy bacon, and a fresh fruit salad. The savory notes of the bread perfectly complement traditional breakfast fare, adding a unique twist to your morning spread. At lunchtime, a warm slice paired with a crisp, green salad dressed with a light vinaigrette makes for a satisfying and easy meal. It’s substantial enough to keep you full without feeling overly heavy, making it an ideal choice for a quick yet nourishing midday option. And for dinner, it can effortlessly transition from a fantastic side dish to a light main course. Consider serving it with a simple marinara sauce for dipping, transforming it into a glorified Stromboli experience that’s sure to be a hit with everyone. Cut into smaller, bite-sized pieces, it becomes an instant appetizer sensation at parties, easily devoured by guests while they mingle. It truly shines as a centerpiece for casual gatherings.
But where this recipe truly excels is in its endless potential for customization. This is where you can truly make it your own! Don’t be afraid to experiment with different cheeses – provolone, smoked gouda, or even a sharp cheddar can add a wonderful depth of flavor, while a spicy pepper jack can give it an exciting kick. When it comes to meats, consider diced ham, crumbled cooked sausage, or even leftover shredded chicken for completely different flavor profiles. For a delicious vegetarian option, sautéed mushrooms, bell peppers, or fresh spinach can be folded into the mix, adding delightful textures and nutrients. I’ve even tried a version with caramelized onions and roasted garlic, which brought an incredible sweetness and savory depth to the bread. A sprinkle of red pepper flakes for a bit of heat, or a generous dash of Italian seasoning to enhance the herbaceous notes, are simple additions that make a big difference. The beauty of this recipe lies in its forgiving nature; it actively encourages creativity and improvisation, inviting you to clear out your fridge and create something truly unique and delicious.
Your Culinary Adventure Awaits!
So, please, don’t let the name fool you. This isn’t just any ordinary bread; it’s a culinary gem waiting to be discovered by you. I wholeheartedly encourage you to roll up your sleeves, gather your favorite ingredients, and give this incredible recipe a try in your own kitchen. You’ll be amazed at how simple it is to put together and how utterly delicious the result is. There’s a profound satisfaction that comes from creating something so wonderfully tasty from scratch, and I promise you, this recipe delivers that feeling in spades. It’s an experience that’s not just about the final dish, but also about the joy of the process and the pride of serving something homemade and truly special.
Once you’ve experienced the joy of baking and tasting your very own batch of this wonderful Garbage Bread, I would absolutely love to hear about it! What unique fillings did you choose? Did you find a new favorite cheese combination? Did you serve it for breakfast, lunch, or dinner? Your insights, personal twists, and success stories are incredibly valuable and inspiring to me and our community of food lovers. Share your culinary adventure with us by dropping a comment below or even posting a picture of your masterpiece! Let’s celebrate the delicious simplicity and endless possibilities that this recipe offers together. I’m genuinely excited to see all the wonderful variations you’ll come up with. Happy baking, and happy eating!
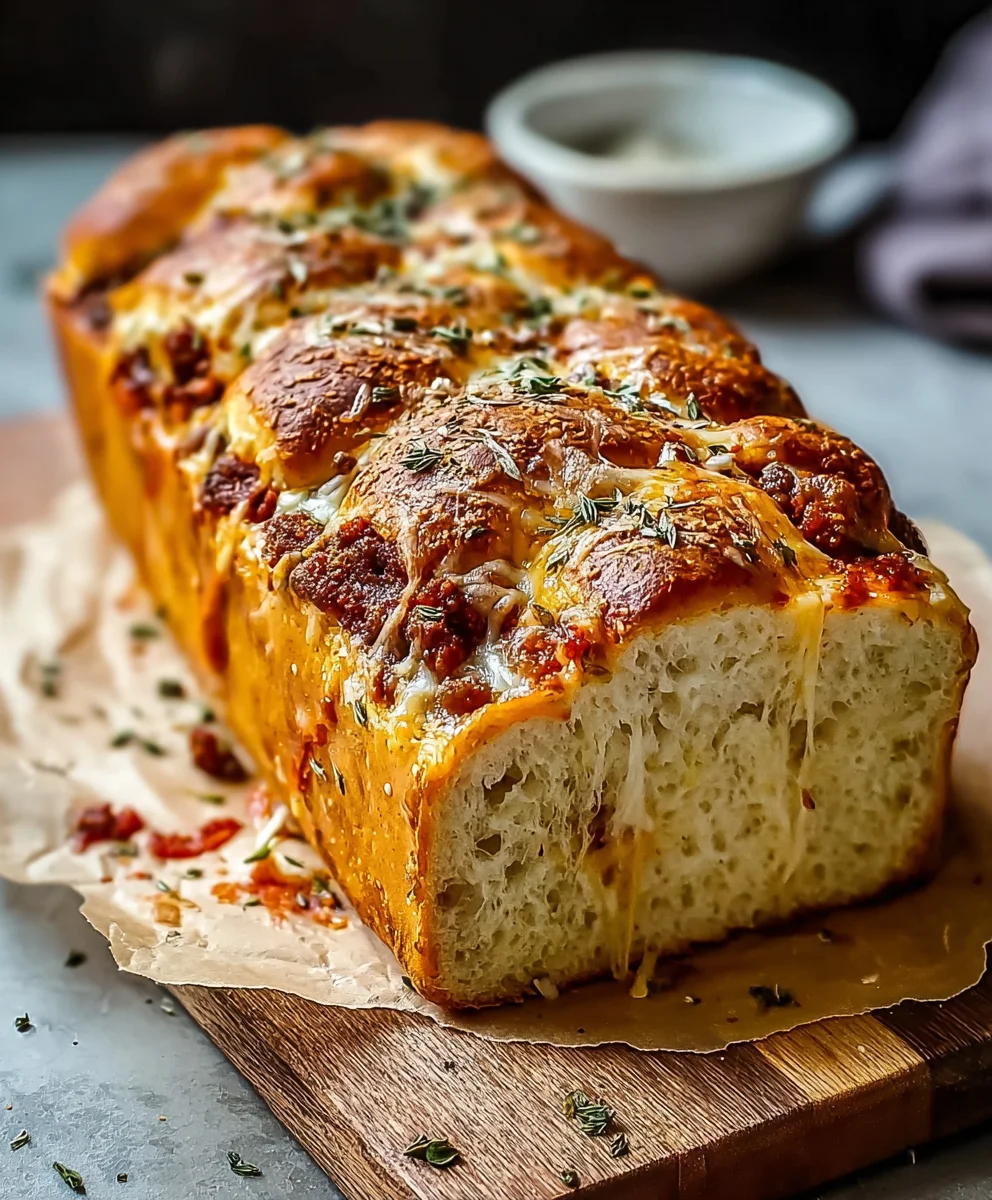
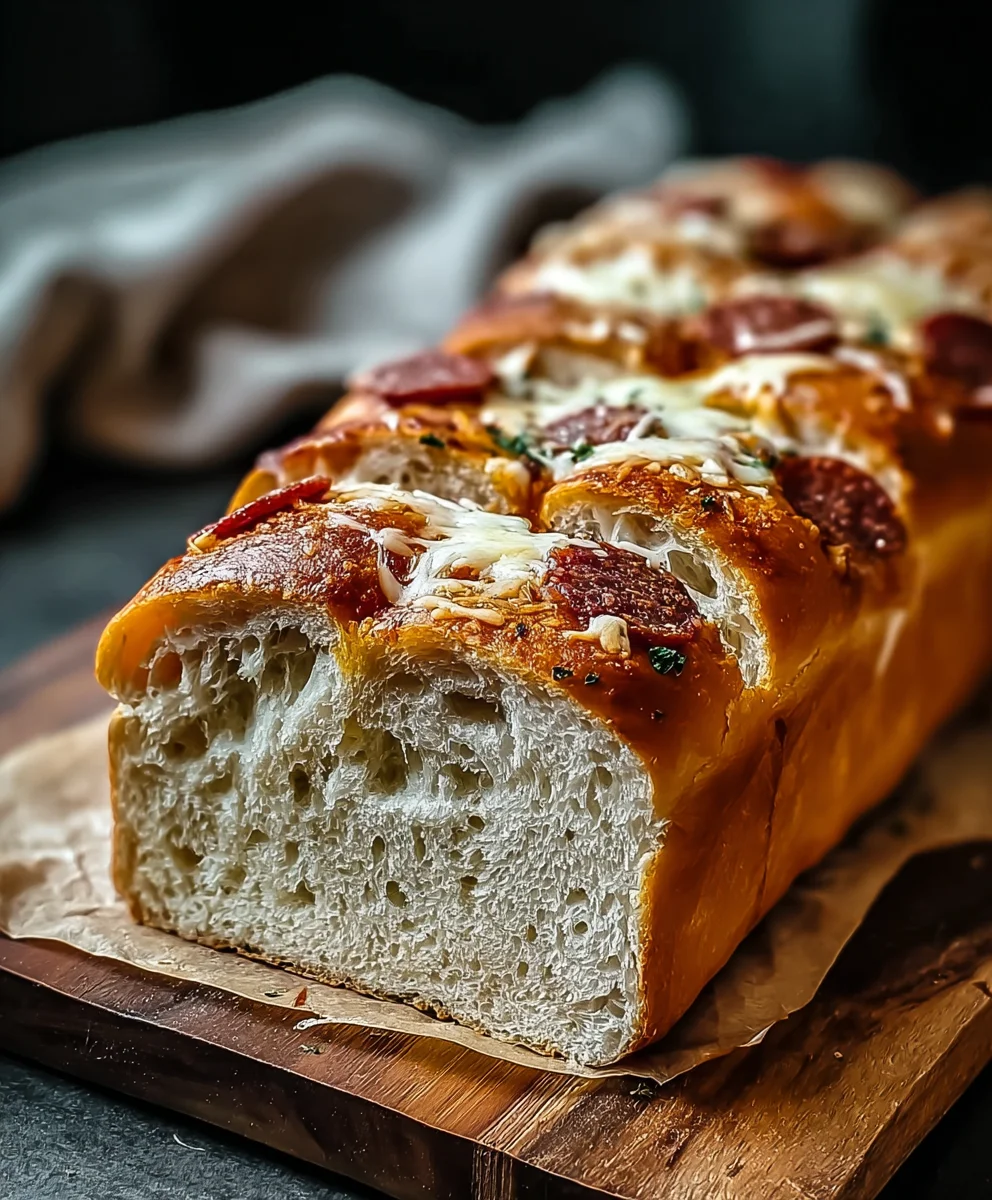
Cheesy Garbage Bread: Amazing Beef & Cheese Pull-Apart Loaf
Don’t let the unconventional moniker fool you; this beloved dish is a testament to the magic that happens when simple ingredients come together to create something extraordinary. This versatile and delicious pull-apart loaf, perfect for potlucks or weeknight dinners, features a golden crust wrapped around savory beef pepperoni, beef sausage, cheese, and vegetables.
Ingredients
-
1 can refrigerated pizza dough
-
1 cup shredded mozzarella cheese
-
1/2 cup shredded cheddar cheese
-
1/2 cup beef pepperoni slices
-
1/2 cup cooked beef sausage crumbles
-
1/4 cup diced green bell pepper
-
1/4 cup diced onion
-
1/4 cup sliced black olives
-
1/4 cup marinara sauce
-
1 tablespoon olive oil
-
1 teaspoon Italian seasoning
Instructions
-
Step 1
Preheat oven to 375°F (190°C). Line a large baking sheet with parchment paper. -
Step 2
Unroll the refrigerated pizza dough onto the prepared baking sheet, gently stretching it to form an approximate 14×10-inch rectangle. -
Step 3
Spread marinara sauce evenly over the dough, leaving a 1-inch border. Sprinkle with half of the shredded mozzarella and cheddar cheeses. Evenly layer the beef pepperoni, cooked beef sausage crumbles, diced green bell pepper, diced onion, and sliced black olives. Top with the remaining mozzarella and cheddar cheeses. -
Step 4
Starting from one of the long sides, carefully and tightly roll the dough into a log. Pinch the seam and firmly tuck and pinch the ends to seal completely. Place the log seam-side down on the baking sheet. -
Step 5
Brush the top and sides of the dough log with olive oil. Sprinkle evenly with Italian seasoning. Transfer to the preheated oven and bake for 20-25 minutes, or until the crust is golden brown and puffed. If the top browns too quickly, loosely tent with aluminum foil for the last few minutes. -
Step 6
Carefully remove the baking sheet from the oven. Let the Cheesy Garbage Bread rest on the baking sheet for 5-10 minutes before slicing into thick pieces with a serrated knife. Serve warm.
Important Information
Nutrition Facts (Per Serving)
It is important to consider this information as approximate and not to use it as definitive health advice.
Allergy Information
Please check ingredients for potential allergens and consult a health professional if in doubt.