Cheesy Garlic Chicken Wraps Recipe is truly a culinary hero for anyone seeking a swift, satisfying, and utterly delicious meal. I’ve always believed that some of the best dishes emerge from the simple desire for comfort and robust flavor, and these wraps are a perfect embodiment of that principle. While this particular combination may not boast centuries of ancient tradition, it has rapidly cemented its place as a modern classic, a testament to its widespread appeal and pure deliciousness.
Why We Can’t Get Enough of These Wraps
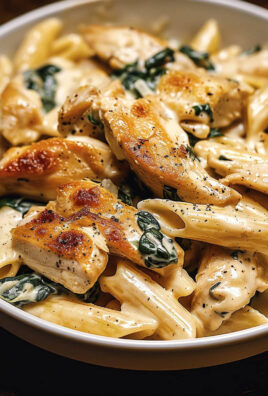
What makes this dish so universally adored? It’s the irresistible alchemy of tender, succulent chicken, lovingly coated in a rich, aromatic garlic sauce, and then generously enveloped in melted cheese, all snuggled within a warm, soft tortilla. The delightful contrast of the creamy, savory filling with the pillowy wrap creates an experience that is both comforting and incredibly moreish. Whether you’re searching for a quick weeknight dinner solution, an impressive yet easy lunch, or a crowd-pleasing appetizer, this Cheesy Garlic Chicken Wraps Recipe delivers every single time, offering convenience without ever compromising on taste.

Ingredients:
Creating the perfect Cheesy Garlic Chicken Wraps Recipe starts with having all your wonderful components ready to go. I’ve broken down each ingredient, offering a bit more detail on what I find works best for this incredibly satisfying dish.
- For the Garlic Herb Chicken:
- 2 large (or 3 medium) boneless, skinless chicken breasts: About 1.5 to 2 pounds total. I prefer breasts for their leanness, but thighs would also be incredibly tender and flavourful. We’ll be slicing or shredding them later, so consistency isn’t as critical as the flavor absorption.
- 2 tablespoons olive oil: A good quality extra virgin olive oil helps carry the flavors into the chicken and keeps it moist during cooking.
- 4-5 cloves garlic, minced: Yes, this recipe calls for a generous amount of garlic! We want that pungent, aromatic punch. Freshly minced is always best here.
- 1 teaspoon dried oregano: Earthy and classic, it pairs beautifully with chicken and garlic.
- 1 teaspoon dried basil: Sweet and peppery, another staple herb for this profile.
- 1/2 teaspoon paprika: For a touch of warmth and lovely color. Smoked paprika would add a deeper dimension if you enjoy that flavour.
- 1/2 teaspoon salt: Adjust to your taste, but this is a good starting point for seasoning.
- 1/4 teaspoon black pepper: Freshly ground makes a difference!
- 1 tablespoon fresh lemon juice (optional, but recommended): A little acidity brightens all the flavours and tenderizes the chicken slightly.
- For the Creamy Cheesy Sauce:
- 2 tablespoons unsalted butter: The base for our rich, creamy sauce.
- 3 cloves garlic, minced: More garlic! We’re building layers of garlic flavour, and this step ensures it shines in the sauce itself.
- 2 tablespoons all-purpose flour: Our thickener for a smooth, velvety sauce.
- 1.5 cups milk: Whole milk gives the best creaminess, but 2% will work too. Make sure it’s at room temperature or slightly warmed to prevent lumps when adding to the roux.
- 1.5 cups shredded cheese blend: I love a mix of sharp cheddar and mozzarella for both flavour and meltability. A Monterey Jack or Colby Jack blend would also be fantastic.
- 2 ounces cream cheese, softened (optional, but highly recommended): This adds an incredible extra layer of creaminess and tang to the sauce, making it extra luscious.
- Salt and black pepper to taste: Essential for seasoning the sauce perfectly.
- 1 tablespoon chopped fresh parsley or chives (for garnish/flavour, optional): Adds a pop of fresh colour and herbaceousness.
- For Assembling the Wraps:
- 6-8 large flour tortillas: About 10-12 inches in diameter. We need large ones to hold all our wonderful filling without tearing.
- 1 small red onion, thinly sliced or finely diced: Adds a crisp, sharp bite that contrasts beautifully with the rich filling.
- 1 red bell pepper, thinly sliced or julienned: For crunch, sweetness, and vibrant colour.
- 2 cups fresh spinach or shredded lettuce: For freshness, a slight bitterness, and a healthy green touch.
- Additional condiments (optional): A dollop of sour cream, extra garlic aioli, or a dash of hot sauce for those who like a little kick with their Cheesy Garlic Chicken Wraps Recipe.
- Cooking Oil: A neutral oil like canola, vegetable, or grapeseed for cooking the chicken, if not using olive oil from the marinade.
Preparing the Irresistible Garlic Herb Chicken
This phase is all about infusing our chicken with incredible flavour and ensuring it’s perfectly cooked and tender for our Cheesy Garlic Chicken Wraps Recipe. Take your time with the marination; it truly makes a world of difference!
- Pound the Chicken for Even Cooking: First things first, place your chicken breasts between two pieces of plastic wrap or in a large zip-top bag. Using a meat mallet or a heavy rolling pin, gently pound the chicken until it’s about 3/4-inch thick all over. This step is crucial because it ensures the chicken cooks evenly and tenderizes it slightly, preventing dry spots. Trust me, this small effort pays off big time in the final texture! Evenly thick chicken also means more surface area for our delicious marinade to cling to.
- Marinate for Maximum Flavour: In a medium bowl, combine the 2 tablespoons of olive oil, 4-5 cloves of minced garlic, dried oregano, dried basil, paprika, salt, black pepper, and the optional lemon juice. Whisk everything together until it’s well combined, forming a fragrant paste. Add your pounded chicken breasts to this bowl, ensuring each piece is thoroughly coated with the garlic herb mixture. You can use your hands to really work the marinade into every crevice. Cover the bowl with plastic wrap or transfer the chicken to a sealed bag, and refrigerate for at least 30 minutes. For an even more intense flavour experience, I highly recommend marinating for 2-4 hours, or even overnight if you have the foresight. The longer it marinates, the more flavourful and tender your chicken will be. This step is foundational for the rich taste of our Cheesy Garlic Chicken Wraps Recipe.
- Cook the Chicken to Perfection: Heat a large skillet or frying pan over medium-high heat. Once hot, add a tablespoon of cooking oil (if not using the olive oil from the marinade) and let it shimmer. Carefully place the marinated chicken breasts in the hot pan, making sure not to overcrowd it. If necessary, cook in batches. Sear the chicken for 5-7 minutes per side, or until it’s beautifully golden brown and cooked through. The internal temperature should reach 165°F (74°C). The exact time will depend on the thickness of your chicken. Avoid moving the chicken too much initially, allowing that lovely crust to form. Once cooked, transfer the chicken to a clean cutting board and let it rest for at least 5-10 minutes. Resting the chicken is super important! It allows the juices to redistribute, keeping the chicken moist and tender.
- Shred or Slice the Cooked Chicken: After resting, you have a couple of options. You can shred the chicken using two forks, pulling it apart into bite-sized strands, which I personally love for wraps as it integrates well with the sauce. Alternatively, you can slice it against the grain into thin strips. Both methods work wonderfully for these wraps. Set the prepared chicken aside while we move on to our next delicious component.
Crafting the Creamy Cheesy Garlic Sauce
This creamy, dreamy sauce is what truly elevates our dish from simple chicken wraps to incredible Cheesy Garlic Chicken Wraps Recipe. It brings everything together with its rich texture and potent garlic flavour.
- Start the Roux with More Garlic: In the same skillet (or a clean one if you prefer) used for cooking the chicken, melt the 2 tablespoons of unsalted butter over medium heat. Once the butter is melted and bubbly, add the 3 cloves of minced garlic. Sauté for about 1 minute, stirring constantly, until the garlic is fragrant but not browned. We want to infuse the butter with that wonderful garlic aroma without burning it.
- Whisk in the Flour: Sprinkle the 2 tablespoons of all-purpose flour over the melted butter and garlic. Whisk continuously for another 1-2 minutes, creating a smooth paste known as a roux. This step cooks out the raw flour taste, which is essential for a delicious sauce. The roux will start to turn a light golden color and smell slightly nutty.
- Gradually Add Milk for Smoothness: Slowly, and I mean slowly, pour in the 1.5 cups of milk, whisking constantly as you add it. It’s crucial to add the milk gradually to prevent lumps from forming. Start with a small splash, whisk until smooth, then add a bit more, continuing to whisk vigorously. The mixture will thicken as it comes to a gentle simmer. Continue cooking and whisking for 3-5 minutes, until the sauce has thickened to your desired consistency – it should be thick enough to coat the back of a spoon.
- Melt in the Cheesy Goodness: Reduce the heat to low. Add the 1.5 cups of shredded cheese blend to the sauce, stirring until it’s completely melted and smooth. This is where the magic happens and our sauce becomes truly cheesy! If using, now is the time to add the 2 ounces of softened cream cheese. Stir it in until it’s fully incorporated and the sauce is lusciously smooth and extra creamy. Season the sauce with salt and black pepper to taste. Remember that the cheese adds some saltiness, so taste before adding too much.
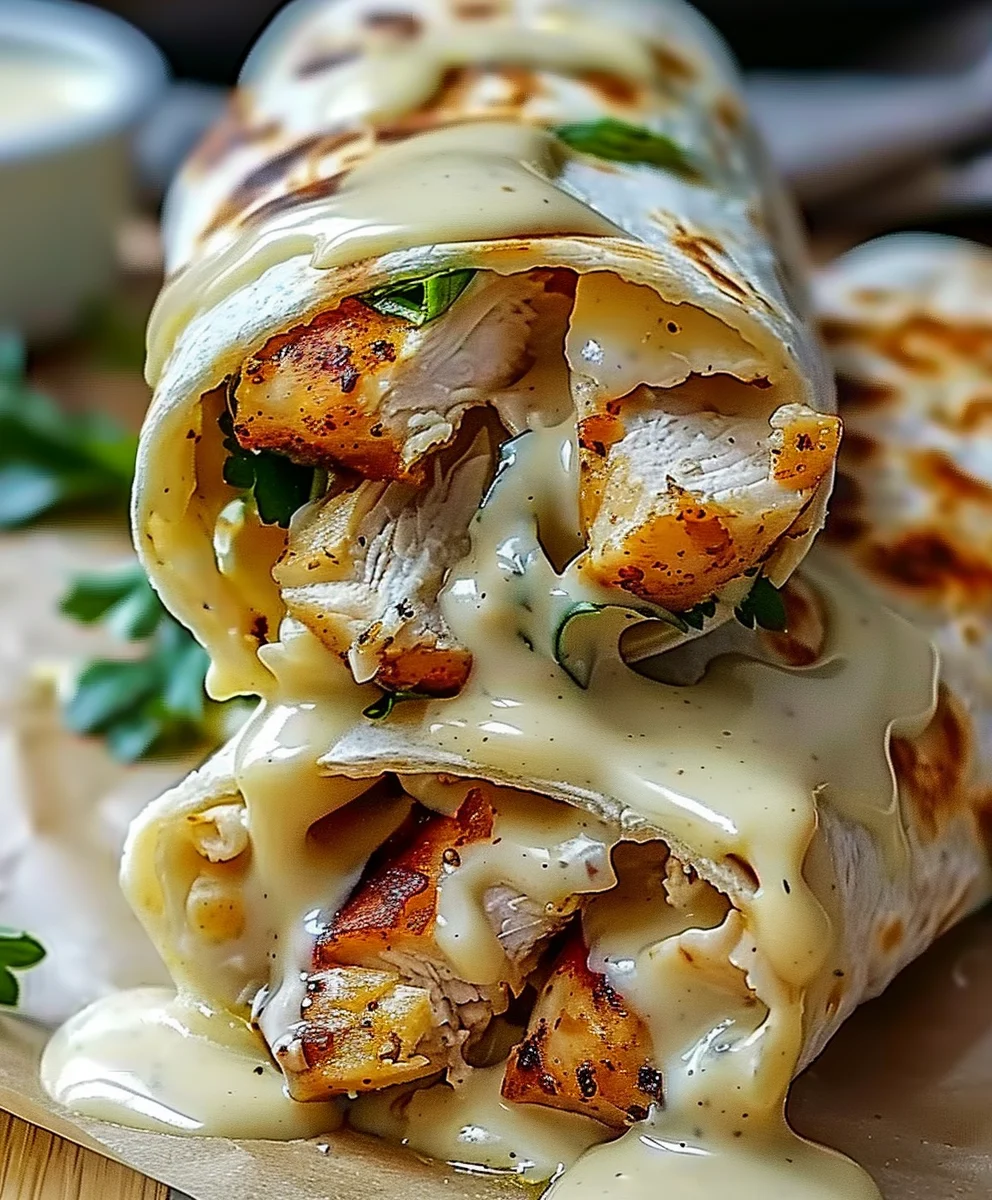
- Combine Chicken with the Cheesy Sauce: Gently fold the shredded or sliced garlic herb chicken into the creamy cheesy sauce. Stir until all the chicken is thoroughly coated. Keep the chicken mixture warm over very low heat while you prepare the other wrap components. This gooey, garlicky, cheesy chicken filling is the heart of our Cheesy Garlic Chicken Wraps Recipe! The aroma alone will have everyone eager for dinner.
Prepping Your Fresh Veggies and Tortillas
While our chicken and sauce are happily mingling, let’s get our fresh components ready. Freshness and a variety of textures are key to a truly satisfying wrap!
- Prepare Your Crisp Vegetables: Take your 1 small red onion and either slice it very thinly into half-moons or finely dice it, depending on your preference. For the 1 red bell pepper, thinly slice or julienne it into strips. Wash and thoroughly dry your 2 cups of fresh spinach or shred your lettuce. Having these prepped and ready on a platter makes the assembly process smooth and quick. The vibrant colours and crunch of these fresh additions provide a wonderful contrast to the rich, warm chicken filling.
- Warm the Tortillas for Flexibility: This step might seem minor, but it’s a game-changer! Cold tortillas are prone to cracking when folded. Briefly warm your large flour tortillas one at a time. You can do this in a microwave for 10-15 seconds each, in a dry skillet over medium heat for 30 seconds per side until pliable, or stack them wrapped in foil and warm them in a low oven (300°F/150°C) for 5-10 minutes. Warm tortillas are much more flexible and less likely to tear, making your wrap assembly much easier and more enjoyable.
Assembling Your Ultimate Cheesy Garlic Chicken Wraps
Now for the grand finale – putting everything together! This is where our Cheesy Garlic Chicken Wraps Recipe truly comes to life. A good folding technique ensures every bite is perfect.
- Lay Out Your Workspace: Find a clean, flat surface to assemble your wraps. Lay one warm tortilla flat in front of you.
- Spread a Base (Optional but Recommended): If you’re using any additional condiments like sour cream or extra garlic aioli, spread a thin layer down the center of the tortilla. This adds another layer of flavour and moisture, acting as a delicious adhesive for our filling.
- Fill Generously with Cheesy Chicken: Spoon a generous amount of the warm, creamy cheesy garlic chicken mixture down the center of the tortilla, leaving about an inch or two free on the top and bottom edges, and a couple of inches on each side. Don’t be shy with the filling, but don’t overfill to the point where it’s impossible to close! About 1/2 to 3/4 cup is usually perfect.
- Layer on the Freshness: Arrange a handful of the fresh spinach or shredded lettuce over the chicken mixture. Follow with some of the thinly sliced red onion and red bell pepper strips. The combination of warm, savory chicken and cool, crisp veggies is truly delightful in these Cheesy Garlic Chicken Wraps Recipe.
- Master the Folding Technique: This is key to a tidy, mess-free wrap!
- First, fold the left and right sides of the tortilla inward, over the filling, by about 1.5 to 2 inches. This creates a neat enclosure for the sides.
- Next, grab the bottom edge of the tortilla (the one closest to you) and fold it up tightly over the filling. Tuck it in firmly.
- Finally, continue to roll the wrap upward, away from you, keeping it as tight as possible. Use gentle but firm pressure to ensure the filling is snugly packed inside. You should end up with a beautifully rolled, sealed wrap.
Repeat this process for all remaining tortillas and filling.
- Optional: Toast for Extra Crunch and Melted Cheese: For an extra layer of deliciousness and a wonderfully crispy exterior, lightly toast your assembled wraps. Heat a dry skillet over medium heat. Place the rolled wraps seam-side down in the skillet and cook for 2-3 minutes per side, or until golden brown and the cheese inside is wonderfully gooey. This step isn’t strictly necessary, but it truly takes the Cheesy Garlic Chicken Wraps Recipe to the next level, adding a satisfying texture and ensuring all the cheese is perfectly melted.
Serving Suggestions and Customization for Your Cheesy Garlic Chicken Wraps
Your magnificent Cheesy Garlic Chicken Wraps Recipe is complete! Here’s how to serve them and some ideas for making them uniquely yours, ensuring they remain a family favourite.
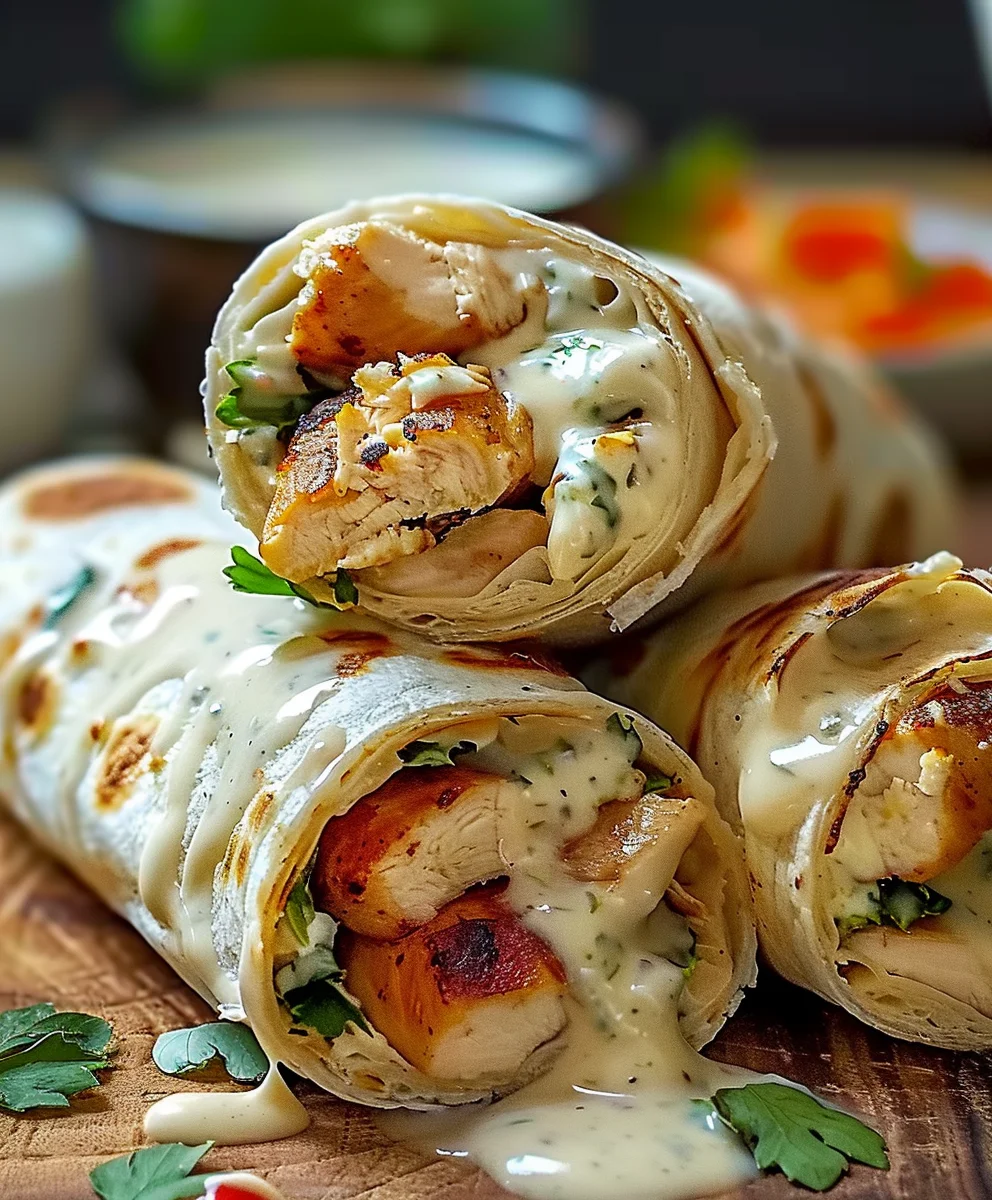
- Serve Immediately: For the best experience, cut each toasted wrap in half diagonally to expose the beautiful layers of filling. Serve them while they are still warm and the cheese is gloriously melty. They are fantastic as a standalone meal, packed with all the essential food groups.
- Perfect Pairing Side Dishes:
- Crisp Green Salad: A simple side salad with a light vinaigrette offers a refreshing contrast to the richness of the wraps.
- Crispy Fries or Sweet Potato Fries: For a more indulgent meal, a side of hot, crispy fries is always a winner.
- Tomato Soup: A warm bowl of classic tomato soup makes for a comforting and satisfying combination, especially on a cooler day.
- Fresh Fruit Salad: A bowl of vibrant, seasonal fruit adds a sweet and healthy component to your meal.
- Unleash Your Creativity with Variations: This Cheesy Garlic Chicken Wraps Recipe is incredibly versatile!
- Cheese Swaps: Experiment with different cheese blends! Pepper Jack for a subtle kick, provolone for extra stretch, or even a smoked gouda for a deeper flavour profile.
- Add a Spicy Kick: If you love heat, finely dice some jalapeños or a serrano pepper and add them to the cheesy chicken mixture. A dash of your favourite hot sauce in the creamy sauce or drizzled into the wrap would also be fantastic.
- More Veggies, More Fun: Feel free to add other vegetables to your wraps. Corn kernels, black beans, thinly sliced avocado, or even sautéed mushrooms would all be delicious additions. For extra color and crunch, consider adding shredded carrots or cabbage.
- Herb Enhancements: Beyond parsley and chives, fresh cilantro or dill can add different aromatic dimensions to the filling.
- Different Protein: While chicken is king here, you could adapt this recipe using pan-seared shrimp, thinly sliced steak, or even a plant-based protein alternative for a vegetarian version.
- Make it a Bowl: If you’re avoiding wraps or prefer a deconstructed meal, serve the cheesy garlic chicken mixture over a bed of rice, quinoa, or salad greens. Top with all your favourite fresh veggies and a dollop of sour cream or guacamole. This is a great gluten-free option too!
- Homemade Tortillas: For the truly ambitious, making your own flour tortillas can elevate the experience even further, offering unparalleled freshness and flavour.
- Storage Tips: If you have any leftover cheesy chicken filling, store it in an airtight container in the refrigerator for up to 3-4 days. It reheats well in a microwave or on the stovetop over low heat. It’s best to assemble wraps fresh, as the tortillas can become soggy if stored with the filling for too long. However, you can prep all your components in advance, making assembly a breeze for quick weeknight meals. The cooked garlic herb chicken can even be frozen for up to 2 months and thawed for future wrap nights!
I hope you enjoy making and devouring this truly wonderful Cheesy Garlic Chicken Wraps Recipe as much as I do. It’s a versatile, flavour-packed meal that’s perfect for families, entertaining, or simply treating yourself to something incredibly delicious!
So, there you have it! We’ve journeyed through the steps of creating what I genuinely believe will become a new staple in your kitchen. This isn’t just another meal; it’s an experience. The incredible fusion of savory, tender chicken, gooey melted cheese, and the aromatic punch of garlic, all nestled within a soft wrap, makes the Cheesy Garlic Chicken Wraps Recipe an absolute winner. It’s incredibly satisfying, bursting with flavor, and surprisingly simple to put together. Forget bland, forget boring – these wraps are here to elevate your lunch, dinner, or even snack game to a whole new level of deliciousness. I promise you, once you take that first bite, you’ll understand why I’m so enthusiastic about this recipe.
What truly sets this recipe apart, in my humble opinion, is its perfect balance of comfort food indulgence and practical preparation. In a world where time often feels like a luxury, having a go-to recipe that delivers such immense flavor without demanding hours in the kitchen is invaluable. Whether you’re whipping up a quick weeknight dinner for the family, looking for an impressive yet easy dish for a casual get-together with friends, or simply craving something incredibly tasty for yourself, these wraps fit the bill perfectly. They’re hearty enough to feel like a complete meal, yet light enough not to leave you feeling overly heavy. The textural contrast between the slightly crisp exterior of the warmed wrap and the tender, juicy filling inside is pure culinary bliss. It’s a dish that genuinely pleases almost everyone, making it an ideal choice for a diverse range of palates and occasions. I find myself coming back to this recipe again and again, not just because it’s easy, but because it consistently delivers on flavor and satisfaction.
Now, while these wraps are undeniably fantastic on their own, offering a complete and satisfying meal, don’t hesitate to think about what you might serve alongside them to round out the experience. For a lighter touch, a crisp, vibrant side salad with a tangy vinaigrette would be a wonderful companion, cutting through the richness of the cheese and garlic. Think mixed greens, cherry tomatoes, cucumbers, and maybe a sprinkle of red onion. If you’re leaning into a more comforting vibe, a warm bowl of creamy tomato soup or a clear chicken broth could be a delightful pairing, perfect for dipping. Even something as simple as a side of crunchy coleslaw or a fresh fruit salad can offer a refreshing contrast. And for those who love a little extra dip, a side of ranch dressing, a spicy sriracha mayo, or even a cool dollop of sour cream can add another layer of flavor and moisture, though I find them perfectly moist as they are. It’s all about personal preference and how you want to build your meal.
One of the joys of cooking is making a recipe your own, and this one is wonderfully adaptable. Feel free to experiment with different types of cheese – cheddar, Monterey Jack, or even a smoky provolone could offer delightful twists. If chicken isn’t your preference, cooked shredded turkey or even a plant-based chicken substitute could work beautifully. Want to sneak in some extra veggies? Finely diced bell peppers, sautéed spinach, or even some thinly sliced mushrooms would integrate seamlessly into the filling, adding both nutrition and texture. For a bit of heat, a pinch of red pepper flakes or a dash of hot sauce in the chicken mixture would awaken the taste buds. You could also try different types of wraps – whole wheat for a healthier option, or even larger tortillas to make burritos instead of wraps. Don’t be afraid to adjust the garlic level to your liking; some of us are true garlic fiends, while others prefer a more subtle hint. The beauty is in the customization, allowing you to tailor this delicious base to your exact cravings and dietary needs.
So, what are you waiting for? I sincerely hope I’ve convinced you to give this fantastic recipe a try. Trust me, your taste buds will thank you. Dive into your kitchen, gather those ingredients, and prepare to be amazed by the simplicity and incredible flavor packed into every bite. Once you’ve created your own batch of these delightful wraps, I would absolutely love to hear about your experience! Did you stick to the recipe, or did you put your own spin on it? What were your favorite variations or serving suggestions? Please, share your culinary adventures with us – your insights and creative ideas inspire me and countless other home cooks. Happy cooking!
Cheesy Garlic Chicken Wraps Recipe: Quick & Delicious!
Cheesy Garlic Chicken Wraps are a culinary hero for anyone seeking a swift, satisfying, and utterly delicious meal. This dish is universally adored for its irresistible alchemy of tender, succulent chicken, lovingly coated in a rich, aromatic garlic sauce, generously enveloped in melted cheese, all snuggled within a warm, soft tortilla. It’s perfect for a quick weeknight dinner, easy lunch, or crowd-pleasing appetizer, offering convenience without ever compromising on taste.
Ingredients
-
2 cups cooked chicken, shredded
-
1 cup shredded mozzarella cheese
-
1/2 cup cream cheese, softened
-
1/4 cup mayonnaise
-
2 cloves garlic, minced
-
1 teaspoon Italian seasoning
-
1/2 teaspoon salt
-
1/4 teaspoon black pepper
-
4 large flour tortillas
-
1 cup fresh spinach leaves
-
1/2 cup diced tomatoes
-
1/4 cup sliced green onions
Instructions
-
Step 1
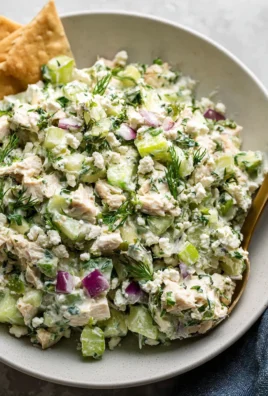
In a large bowl, combine the shredded cooked chicken, shredded mozzarella cheese, softened cream cheese, mayonnaise, minced garlic, Italian seasoning, salt, and black pepper. Mix thoroughly until all ingredients are evenly incorporated and creamy. -
Step 2
Briefly warm each flour tortilla (10-15 seconds in the microwave or 30 seconds per side in a dry skillet) until pliable. This prevents tearing during assembly. -
Step 3
Lay a warm tortilla flat. Spoon a generous amount of the cheesy garlic chicken mixture down the center. Top the chicken mixture with fresh spinach leaves, diced tomatoes, and sliced green onions. -
Step 4
Fold the left and right sides of the tortilla inward (about 1.5-2 inches). Then, fold the bottom edge of the tortilla up tightly over the filling. Continue to roll the wrap upward, away from you, keeping it as tight as possible to create a securely packed wrap. -
Step 5
For a crispy exterior and extra gooey cheese, heat a dry skillet over medium heat. Place the assembled wraps seam-side down in the skillet and cook for 2-3 minutes per side, or until golden brown. This step enhances texture and flavor. -
Step 6
Cut each toasted wrap in half diagonally and serve while warm, so the cheese is gloriously melty. Enjoy your delicious cheesy garlic chicken wraps!
Important Information
Nutrition Facts (Per Serving)
It is important to consider this information as approximate and not to use it as definitive health advice.
Allergy Information
Please check ingredients for potential allergens and consult a health professional if in doubt.