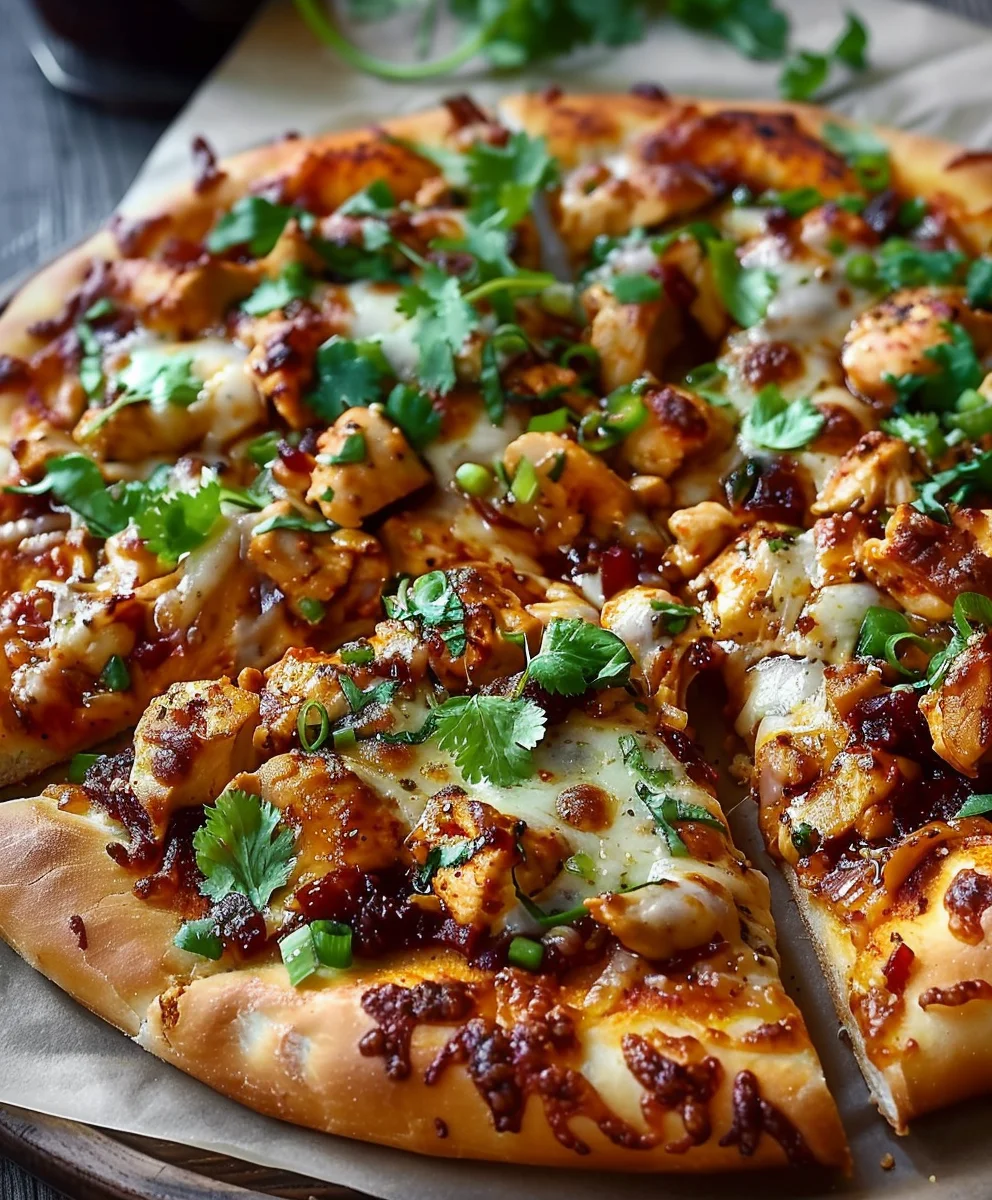
Chili Garlic Chicken Pizza The Ultimate Flavor Explosion” – have you ever craved a dish that perfectly marries comfort food with an adventurous kick? I certainly have, and this recipe delivers precisely that. Pizza, a timeless culinary classic, has always been a canvas for innovation, evolving from its humble Neapolitan origins to become a global phenomenon. While many adore the traditional Margherita or Pepperoni, I believe there’s a special joy in exploring vibrant, new flavor profiles that surprise and delight the palate. This particular creation elevates the familiar pizza experience to an extraordinary level, drawing inspiration from bold Asian-inspired flavors and combining them with the universally beloved Italian staple.
What makes this dish truly special? It’s the irresistible combination of tender, succulent chicken coated in a fiery, aromatic chili garlic sauce, generously spread over a crispy crust and topped with gooey, melted cheese. Every bite offers a symphony of tastes and textures – the savory chicken, the pungent garlic, the exhilarating heat of the chili, all balanced by the rich cheese and perfect crust. It’s more than just a meal; it’s a culinary adventure that promises to awaken your taste buds. Get ready to experience what I affectionately call “Chili Garlic Chicken Pizza The Ultimate Flavor Explosion” – a dish that’s incredibly satisfying, remarkably easy to prepare, and guaranteed to become a new family favorite.

Ingredients:
- For the Pizza Dough (Makes two 12-14 inch pizzas – or use 2 store-bought crusts):
- 1 ½ cups warm water (105-115°F or 40-46°C)
- 2 teaspoons active dry yeast
- 1 teaspoon granulated sugar
- 3 ½ – 4 cups all-purpose flour, plus more for dusting
- 2 tablespoons olive oil, plus extra for greasing
- 1 ½ teaspoons fine sea salt
- For the Chili Garlic Chicken Marinade:
- 1 ½ pounds boneless, skinless chicken thighs (or breasts, sliced thin)
- 2 tablespoons olive oil
- 3 tablespoons soy sauce (low sodium preferred)
- 2 tablespoons rice vinegar
- 4 cloves garlic, minced very finely
- 1 tablespoon fresh ginger, grated
- 1 teaspoon red chili flakes (adjust to your heat preference)
- 1 tablespoon brown sugar or honey
- ½ teaspoon freshly ground black pepper
- For the Ultimate Chili Garlic Sauce (Pizza Base):
- 1 tablespoon olive oil
- 8 cloves garlic, minced (yes, that much! It’s chili garlic pizza!)
- 2 teaspoons red chili flakes (again, adjust for heat)
- 2 tablespoons tomato paste
- 1 (15 ounce) can passata or crushed tomatoes
- ½ cup chicken or vegetable broth
- 1 tablespoon Sriracha or Gochujang (optional, for extra depth and kick)
- 1 tablespoon brown sugar or honey
- 1 tablespoon rice vinegar
- 1 tablespoon soy sauce (low sodium preferred)
- Salt and freshly ground black pepper, to taste
- 1 tablespoon fresh lime juice
- For the Pizza Assembly and Toppings:
- 2 prepared pizza dough balls (from recipe above, or store-bought)
- 2 cups low-moisture mozzarella cheese, freshly shredded (don’t use pre-shredded if possible, it melts better!)
- ½ cup provolone cheese, freshly shredded (optional, for extra flavor)
- ½ medium red onion, thinly sliced
- ¼ cup fresh cilantro, chopped (for garnish)
- Optional: 1-2 jalapeños, thinly sliced (for extra heat)
- Optional: A drizzle of honey or chili oil, for serving
Preparing the Irresistible Chili Garlic Chicken
This chicken is truly the star of our “Chili Garlic Chicken Pizza The Ultimate Flavor Explosion.” Its deep, savory, and spicy notes are what make this pizza so incredibly addictive. Don’t rush this part!
- Prepping the Chicken: Let’s get our chicken ready for its flavorful bath! If you’re using boneless, skinless chicken thighs, I usually prefer to leave them whole or cut them into slightly larger, rustic 1-inch pieces. Thighs stay incredibly juicy and tender through the cooking process, which is ideal for a pizza topping. If you opt for chicken breasts, I highly recommend butterflying them first to make thinner cutlets, then dicing them into similar 1-inch pieces. Thinner pieces will absorb the marinade more effectively and cook much faster and more evenly.
- Crafting the Marinade: In a medium-sized bowl, let’s combine all the magical ingredients for our marinade. Whisk together the olive oil, soy sauce, rice vinegar, a generous amount of freshly minced garlic (garlic is key in this recipe!), freshly grated ginger, red chili flakes (feel free to adjust this based on your preferred spice level – a little goes a long way, but we’re going for flavor here!), and a touch of brown sugar or honey. The sugar isn’t just for sweetness; it helps to balance the savory and acidic notes while also promoting beautiful caramelization when the chicken cooks. Mix everything until it’s perfectly emulsified and all the flavors are singing together.
- Marinating for Maximum Flavor: Add your prepared chicken pieces to the glorious marinade, ensuring every single piece is thoroughly coated. Think of each piece basking in this flavor-packed mixture. Once coated, cover the bowl tightly with plastic wrap or transfer the chicken to a zip-top bag. Now, the waiting game: refrigerate for at least 30 minutes. However, for an unparalleled depth of flavor and truly tender chicken that will make your taste buds sing, I strongly urge you to marinate it for 2-4 hours, or even better, overnight! This extended marination time is the secret weapon for succulent, flavor-packed chicken.
- Cooking the Chicken: When you’re ready to cook, heat a tablespoon of olive oil in a large skillet or cast-iron pan over medium-high heat. You want the pan to be nice and hot to get a good sear. Add the marinated chicken to the hot pan in a single layer, making sure not to overcrowd it. If your pan is too full, the chicken will steam instead of sear, and we want that beautiful golden-brown crust! You might need to cook the chicken in two or even three batches. Sear each side for 3-5 minutes, until the chicken is cooked through, boasts a gorgeous golden-brown color, and has those lovely caramelized edges. The exact cooking time will depend on the thickness of your chicken pieces. Once cooked, remove the chicken from the pan and let it rest on a clean cutting board for a few minutes. If you left the chicken pieces larger, this is the time to dice them into bite-sized pieces suitable for pizza topping.
Mastering the Ultimate Chili Garlic Pizza Sauce
This isn’t just any pizza sauce; it’s the chili garlic backbone of our “Ultimate Flavor Explosion.” It’s rich, spicy, tangy, and deeply aromatic. Prepare to fall in love!
- Aromatic Foundation: Grab a medium saucepan and heat your olive oil over medium heat. Now, prepare yourself for an aroma explosion! Add an even more generous amount of freshly minced garlic (yes, we’re doubling down on the garlic here, and it’s glorious!) along with the red chili flakes. Sauté this dynamic duo for 1-2 minutes, stirring constantly. You want the garlic to become incredibly fragrant and turn a beautiful light golden color. Be vigilant, though, because burnt garlic can quickly become bitter, and we definitely don’t want that! This initial step is absolutely crucial for building the foundational depth of flavor for our sauce.
- Building the Sauce Body: Stir in the tomato paste. Cook it for another 2-3 minutes, using the back of your spoon to press it against the bottom of the pan. This step, often overlooked, is vital: cooking the tomato paste caramelizes its sugars, which significantly deepens its flavor and eliminates any raw, metallic taste. Next, pour in the passata or crushed tomatoes along with the chicken or vegetable broth. Give it a good stir to combine everything smoothly.
- Layering the Flavors: Now for the magic that makes this sauce truly ultimate! Incorporate the Sriracha or Gochujang (if you’re using it – it adds a fantastic layer of complex heat and fermented goodness!), the brown sugar or honey (to balance the acidity of the tomatoes and the heat), the rice vinegar (for a bright, tangy counterpoint), and the soy sauce (for that irresistible umami depth). Season with salt and freshly ground black pepper to taste. Always remember the golden rule: you can always add more seasoning, but you can’t take it away, so start cautiously and adjust as you go.
- Simmering to Perfection: Bring the sauce to a gentle simmer, then immediately reduce the heat to low. Let it simmer, uncovered, for at least 15-20 minutes, stirring occasionally to prevent sticking. This simmering time is where all the individual flavors get to know each other and meld into a harmonious, incredibly delicious whole. It also allows the sauce to thicken slightly to that perfect spreadable consistency for pizza. If it becomes too thick for your liking, don’t hesitate to add a splash more broth or even a little water until it reaches your desired texture.
- Finishing Touches: Once the sauce has achieved its desired consistency and flavor profile, remove it from the heat. The final flourish: stir in the fresh lime juice. This adds a wonderful, bright zing that cuts through the richness and lifts all the other flavors, giving our chili garlic sauce an unforgettable, vibrant finish. Give it one last taste and adjust any seasonings if needed. Set this glorious sauce aside to cool slightly while you prepare the rest of your pizza components.
Preparing the Perfect Pizza Dough (If Making from Scratch)
A great pizza starts with a great crust. While store-bought is fine, making your own elevates this “Chili Garlic Chicken Pizza The Ultimate Flavor Explosion” to a whole new level of homemade goodness!
- Activating the Yeast: In a large mixing bowl, combine the warm water (it needs to be between 105-115°F or 40-46°C – too hot will kill your yeast, too cold won’t activate it) and the granulated sugar. Sprinkle the active dry yeast evenly over the surface. Let this mixture sit undisturbed for 5-10 minutes. What you’re looking for is a foamy, bubbly layer to form on top – this is your yeast telling you it’s alive and ready to perform! If you don’t see any foam, your yeast might be old or the water temperature was off, and it’s best to start again with fresh yeast.
- Mixing the Dough: Add about half of your all-purpose flour, the 2 tablespoons of olive oil, and the fine sea salt to the activated yeast mixture. Stir everything with a sturdy wooden spoon until just combined. Now, gradually add the remaining flour, a little at a time, continuing to mix until a shaggy, somewhat sticky dough forms. Don’t dump all the flour in at once, as you might not need it all, or you might need a tiny bit more depending on humidity and how your flour absorbs liquid.
- Kneading for Structure: Turn the dough out onto a lightly floured surface. Begin to knead the dough. This is where you develop the gluten, which gives your pizza crust its characteristic chewiness and elasticity. Knead for a good 7-10 minutes by hand, pushing the dough away from you with the heels of your hands, folding it over, and turning it. The dough will transform from shaggy to smooth, elastic, and much less sticky. If you have a stand mixer with a dough hook, this process is considerably easier and takes about 5-7 minutes on medium-low speed. Proper kneading is paramount for that perfect pizza texture!
- First Rise (Bulk Fermentation): Lightly grease a clean, large bowl with a little olive oil. Place your beautifully kneaded dough into the bowl, turning it once to coat the top lightly with oil. This prevents it from drying out. Cover the bowl tightly with plastic wrap or a clean, damp kitchen towel. Find a warm, draft-free spot in your kitchen (like a slightly warm oven that’s turned off, or near a sunny window) and let the dough rise for 1 to 1.5 hours, or until it has visibly doubled in size. The exact rising time can vary quite a bit depending on the ambient temperature of your kitchen.
- Dividing and Second Rise: Once the dough has doubled, gently “punch down” the risen dough to deflate it and release all the accumulated gases. Turn the dough out onto a lightly floured surface and divide it into two equal balls – these will be for your two medium-sized pizzas. Shape each half into a smooth ball. Place them on a lightly floured surface, cover them again with a clean kitchen towel, and let them rest for another 15-20 minutes. This crucial resting period relaxes the gluten in the dough, making it much, much easier to shape without it springing back.
Assembling and Baking Your Chili Garlic Chicken Pizza
This is where all our hard work comes together to create the “Chili Garlic Chicken Pizza The Ultimate Flavor Explosion” masterpiece!
- Preheating the Oven and Pizza Stone/Steel: This step is non-negotiable for achieving that coveted crispy, perfectly cooked crust! Place your pizza stone or steel (or, if you don’t have one, simply an inverted sturdy baking sheet) into your oven. Preheat your oven to its absolute highest temperature, which is typically 475-500°F (245-260°C). Let it preheat for a solid 30-60 minutes. A super-hot baking surface is absolutely essential for a quick bake and a beautifully crisp crust, mimicking a professional pizza oven.
- Preparing Your Workspace: While the oven is preheating, lightly dust your pizza peel (if you have one) or a piece of parchment paper on a flat baking sheet with either semolina flour or regular all-purpose flour. This creates a non-stick surface and helps the dough slide easily into the hot oven.
- Shaping the Dough: Take one of your rested dough balls. On your lightly floured surface, gently press it out from the center towards the edges using your fingertips. Avoid using a rolling pin at first, as pressing maintains more of the air bubbles created during proofing, which contributes to a lighter crust. Work quickly but gently. If the dough starts to resist and spring back, simply cover it with a towel and let it rest for another 5-10 minutes; this allows the gluten to relax further. Aim for about a 12-14 inch circular shape, leaving a slightly thicker edge for that satisfying crust.
- Saucing the Base: Once your dough is shaped, carefully transfer it to your prepared pizza peel or parchment paper. Now, spread a generous, yet not overwhelming, layer of your incredible homemade chili garlic sauce over the dough. Make sure to leave about a half-inch border around the edge for the crust. It’s important not to overload the sauce, as too much moisture can lead to a soggy crust.
- Layering the Cheeses: Next up, sprinkle a good amount of your freshly shredded low-moisture mozzarella cheese evenly over the sauce. If you’re using it, add some shredded provolone cheese on top for an extra layer of savory flavor and that wonderful stretchy melt. The cheese acts as a delicious barrier, further protecting the crust from becoming overly moist from the sauce.
- Adding the Toppings: Evenly distribute your perfectly cooked, diced chili garlic chicken over the cheese layer. Then, scatter the thinly sliced red onions and any optional jalapeños. I find the sharp, slightly sweet bite of red onion to be an excellent contrast to the rich chicken and spicy sauce, adding another layer of texture and flavor.
- Transferring to the Oven: This is the moment of truth! Carefully but confidently slide the assembled pizza onto the preheated pizza stone or steel in the scorching hot oven. If you’re using parchment paper, you can simply slide the entire paper and pizza onto the hot surface, which makes transfer much easier.
- Baking to Golden Perfection: Close the oven door quickly to retain heat. Bake your pizza for 10-15 minutes. You’ll know it’s ready when the crust is beautifully golden brown, the cheese is bubbling vigorously, melted to perfection, and possibly even showing some delightful slightly charred spots. Keep a close eye on it, as every oven behaves a little differently. If you notice your crust browning too quickly, you can try moving the pizza to a lower rack in the oven or slightly reducing the temperature for the last few minutes.
- The Grand Finale: Once baked to perfection, carefully remove the pizza from the oven using your pizza peel or by pulling the parchment paper. Transfer it to a cutting board.
- Resting and Garnish: It’s tempting to dive right in, but please, resist for just a moment! Let the pizza rest for 2-3 minutes before slicing. This brief rest allows the cheese to set slightly, which prevents all those wonderful toppings from sliding off when you cut into it. Finally, garnish generously with fresh chopped cilantro. For an ultimate flourish, a light drizzle of honey or a fragrant chili oil over the top before serving adds an extra dimension of sweet heat and incredible visual appeal.
Serving and Enjoying Your Ultimate Flavor Explosion
Now for the best part – digging into your masterpiece, the “Chili Garlic Chicken Pizza The Ultimate Flavor Explosion”!
- Slicing and Serving: Grab your sharpest pizza cutter and slice your magnificent pizza into your desired portions. I typically aim for 8 generous slices, but if you’re feeling particularly hungry or sharing among fewer people, 6 massive slices are always an option! Serve immediately while it’s hot and the cheese is still wonderfully gooey.
- Pairing Suggestions: This pizza is a powerhouse of flavors – bold, spicy, savory, and tangy. It pairs wonderfully with something that can cut through its richness and heat. A crisp, simple green salad with a light vinaigrette is a fantastic choice, offering a refreshing contrast. For beverages, a cold lager, a crisp pale ale, or even a sparkling limeade or ginger beer would be a perfect accompaniment to complement and cool down the spicy notes.
- Leftovers (If Any!): If, by some miracle, you happen to have any slices of this incredible pizza left over, fear not! Store them in an airtight container in the refrigerator for up to 3 days. For the best reheating results that revive that desirable crispy crust, I highly recommend reheating individual slices in a preheated oven or an air fryer. A microwave will warm it through in a pinch, but you’ll miss out on the crispy crust.
- Customization Ideas to Keep the Flavor Explosion Going: Don’t be afraid to make this recipe your own and explore new flavor combinations! Consider adding other vegetable toppings like thinly sliced bell peppers for sweetness and crunch, sautéed mushrooms for an earthy depth, or even some fresh pineapple chunks if you’re a fan of that controversial yet delicious sweet-and-spicy contrast. A sprinkle of toasted sesame seeds over the top just before serving can add a lovely nutty flavor and delightful texture. For those who crave even more heat, a final drizzle of extra chili oil or a few finely diced fresh bird’s eye chilies scattered over the finished pizza would elevate the spice level to thrilling new heights. You could also experiment with different cheese blends; perhaps some smoked gouda for a deeper, more complex cheesy profile, or a touch of feta for a salty tang.
Conclusion:
So, there you have it – my ultimate guide to creating a truly unforgettable pizza experience right in your own kitchen. I genuinely believe that this particular recipe isn’t just another meal; it’s a culinary journey that promises a riot of flavors with every single bite. The masterful blend of fiery chili, aromatic garlic, and succulent chicken, all nestled on a perfectly baked crust with bubbling cheese, creates something truly extraordinary. This isn’t just a pizza; it’s an event, a declaration of deliciousness. Get ready for Chili Garlic Chicken Pizza The Ultimate Flavor Explosion – it’s a promise, not just a name. It’s the kind of dish that makes you close your eyes and savor the moment, a symphony of savory, spicy, and umami notes dancing on your palate.
What truly sets this pizza apart is the meticulous balance we strike. We’re not just adding heat; we’re infusing layers of warmth and depth. The garlic isn’t merely a background note; it’s a fragrant cornerstone, complementing the chicken’s richness without overpowering it. And that chili? It’s not about relentless inferno, but a vibrant, lingering warmth that makes each mouthful utterly addictive. You’ll find yourself reaching for another slice almost instinctively, drawn in by the irresistible aroma and the promise of that thrilling flavor combination. It’s a testament to how simple ingredients, when treated with respect and combined thoughtfully, can yield a dish of profound complexity and comfort. This pizza transcends the ordinary, transforming a common dish into something truly remarkable that you’ll be proud to serve and eager to devour.
Now that you’re armed with the knowledge to craft this masterpiece, let’s talk about how to best enjoy it. While this pizza is a star in its own right, a crisp, fresh green salad with a light vinaigrette makes for a perfect counterpoint, cutting through the richness and offering a refreshing balance. For drinks, a cold lager, a crisp white wine like a Sauvignon Blanc, or even a sparkling apple cider would complement the spicy notes beautifully. Imagine gathering friends for a game night, or a cozy family dinner on a chilly evening – this pizza instantly elevates the occasion. It’s also fantastic for a casual weekend lunch, or even as an impressive centerpiece for a potluck where you want to truly wow your fellow foodies. Its vibrant flavors make it a fantastic choice for any celebratory moment, turning an ordinary meal into something special and memorable for everyone at the table.
The beauty of a great recipe lies in its adaptability, and this Chili Garlic Chicken Pizza is no exception. Feeling adventurous?
Spice Level Adjustments:
If you prefer a milder experience, simply reduce the amount of fresh chilies or chili flakes in the marinade and sauce. For those who crave extra heat, don’t hesitate to add a pinch more, or even a dash of your favorite fiery hot sauce to the chicken marinade or drizzled over the pizza before serving. You can also experiment with different types of chilies to find your perfect balance of flavor and heat.
Protein Alternatives:
Not a fan of chicken? This recipe is incredibly versatile! Try it with grilled shrimp for a delightful seafood twist, or even a plant-based ‘chicken’ substitute for a fantastic vegetarian option. Ground pork or beef seasoned with the same chili garlic blend would also be incredibly delicious, offering a richer, more robust flavor profile. Even thinly sliced marinated tofu can work wonders here, absorbing all those incredible flavors.
Vegetable Additions:
Feel free to load up on your favorite veggies! Sautéed bell peppers, thinly sliced red onions, mushrooms, or even some spinach wilted into the sauce would add extra texture, nutrients, and visual appeal. Broccolini, jalapeños, or even roasted corn kernels could also be fantastic additions, bringing their own unique flavors to the mix.
Cheese Combinations:
While mozzarella is classic and melts beautifully, consider adding a sprinkle of smoked gouda for a deeper, more complex flavor, or some provolone for an extra gooey pull. A touch of freshly grated Parmesan or Pecorino Romano sprinkled over the top after baking also adds a lovely salty, umami finish that truly elevates the cheese experience. Don’t be afraid to mix and match to find your ideal cheesy blend.
Crust Options:
Experiment with different crusts – a thin and crispy crust will highlight the toppings, allowing their flavors to shine, while a thicker, chewy crust provides more substance and a satisfying bite. You could even try a gluten-free base if you have dietary restrictions, ensuring everyone can enjoy this incredible creation. For a fun twist, consider making mini pizzas on pita bread or flatbreads for individual servings.
I am so incredibly excited for you to try this recipe. It’s more than just following steps; it’s about bringing joy and incredible flavor into your home. So, roll up your sleeves, gather your ingredients, and prepare for a truly memorable meal that will impress everyone fortunate enough to get a slice. Once you’ve taken that first glorious bite, I would absolutely love to hear about your experience! Did you make any exciting variations? What was your favorite part? Please share your photos and comments below. Your culinary adventures inspire me, and I can’t wait to see your amazing creations. Until next time, happy cooking, and may your kitchen be filled with the most delightful aromas and the happiest of eaters!

Chili Garlic Chicken Pizza: An Ultimate Flavor Explosion!
Experience an extraordinary culinary adventure with this Chili Garlic Chicken Pizza, where tender chicken coated in a fiery, aromatic chili garlic sauce meets crispy crust and gooey melted cheese. A satisfying, easy-to-prepare dish combining bold Asian-inspired flavors with a beloved Italian classic.
Ingredients
-
3 cups all-purpose flour
-
1 tsp sugar
-
1 tsp salt
-
1 packet (2 1/4 tsp) active dry yeast
-
1 1/4 cups warm water (105-115°F)
-
2 tbsp olive oil (for dough)
-
1.5 lbs boneless, skinless chicken breasts, 1-inch cubed
-
2 tbsp olive oil (for marinade)
-
4 cloves garlic, minced (for marinade)
-
2-3 red chilies, finely chopped (or 1/2 tsp red pepper flakes, optional)
-
1/4 cup soy sauce
-
2 tbsp honey
-
1 tbsp rice vinegar
-
1 tsp sesame oil
-
1 tbsp olive oil (for pizza sauce)
-
8 cloves garlic, minced (for pizza sauce)
-
2 tsp red chili flakes (for pizza sauce)
-
2 tbsp tomato paste
-
1 (15 oz) can passata or crushed tomatoes
-
1/2 cup chicken or vegetable broth
-
1 tbsp Sriracha or Gochujang (optional)
-
1 tbsp brown sugar or honey (for pizza sauce)
-
1 tbsp rice vinegar (for pizza sauce)
-
1 tbsp soy sauce (for pizza sauce)
-
Salt and pepper, to taste (for pizza sauce)
-
1 tbsp fresh lime juice
-
2 prepared pizza dough balls (from recipe or store-bought)
-
2 cups low-moisture mozzarella cheese, shredded
-
1/2 cup provolone cheese, shredded (optional)
-
1/2 medium red onion, thinly sliced
-
1/4 cup fresh cilantro, chopped (for garnish)
-
Optional: 1-2 jalapeños, thinly sliced
-
Optional: Honey or chili oil, for serving
Instructions
-
Step 1
In a large bowl, combine warm water, sugar, and yeast; let foam for 5-10 min. Mix in 1.5 cups flour, 2 tbsp olive oil, and salt. Gradually add remaining flour until a shaggy dough forms. Knead on a floured surface for 7-10 min until smooth. Place in an oiled bowl, cover, and let rise in a warm place for 1-1.5 hours until doubled. Punch down, divide into two balls, cover, and rest for 15-20 min. -
Step 2
In a bowl, whisk together 2 tbsp olive oil, 4 cloves minced garlic, chopped red chilies (or red pepper flakes), soy sauce, honey, rice vinegar, and sesame oil. Add chicken cubes, ensuring they are well coated. Marinate for at least 30 min, preferably 2-4 hours or overnight in the refrigerator. -
Step 3
Heat 1 tbsp olive oil in a skillet over medium-high heat. Add marinated chicken in a single layer (cook in batches if needed). Sear for 3-5 min per side until golden brown and cooked through. Remove, rest, then dice into bite-sized pieces if not already. -
Step 4
In a medium saucepan, heat 1 tbsp olive oil over medium heat. Sauté 8 cloves minced garlic and 2 tsp red chili flakes for 1-2 min until fragrant. Stir in tomato paste and cook 2-3 min. Add passata/crushed tomatoes and broth. Incorporate Sriracha/Gochujang (if using), brown sugar/honey, rice vinegar, and soy sauce. Season with salt and pepper. Simmer, uncovered, for 15-20 min, stirring occasionally, until slightly thickened. Stir in fresh lime juice; set aside. -
Step 5
Preheat oven to 475-500°F (245-260°C) with a pizza stone/steel or inverted baking sheet for 30-60 min. Dust a pizza peel or parchment paper with semolina/flour. Shape one dough ball into a 12-14 inch circle, leaving a crust border. Transfer to peel/parchment. Spread chili garlic sauce over dough, leaving a border. Top with mozzarella, provolone (if using), cooked chicken, sliced red onion, and optional jalapeños. Slide pizza onto the hot baking surface. Bake 10-15 min, until crust is golden brown and cheese is bubbly and lightly charred. -
Step 6
Carefully remove pizza from oven and transfer to a cutting board. Let rest for 2-3 min before slicing. Garnish generously with fresh chopped cilantro. Drizzle with honey or chili oil if desired. Serve immediately with a crisp green salad or cold beverage. Reheat leftovers in an oven or air fryer for best results.
Important Information
Nutrition Facts (Per Serving)
It is important to consider this information as approximate and not to use it as definitive health advice.
Allergy Information
Please check ingredients for potential allergens and consult a health professional if in doubt.