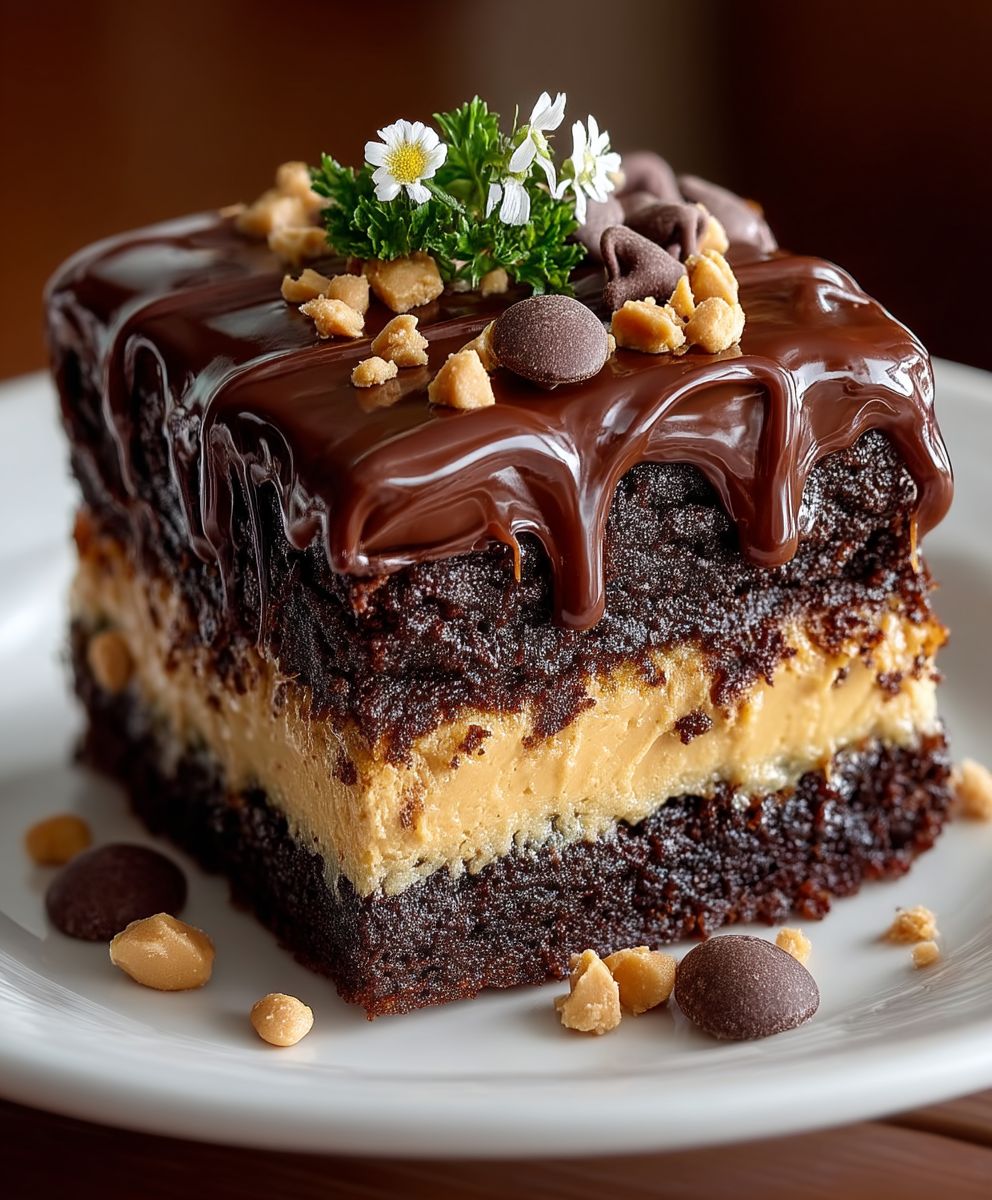
Chocolate Peanut Butter Sheet Cake: Prepare to meet your new favorite dessert! Imagine a moist, rich chocolate cake, infused with the irresistible flavor of peanut butter, all topped with a decadent, creamy frosting. This isn’t just any cake; it’s a crowd-pleasing masterpiece that’s surprisingly easy to make.
Sheet cakes, known for their simplicity and ability to feed a large group, have been a staple in American baking for generations. They’re the go-to dessert for potlucks, family gatherings, and any occasion that calls for a sweet treat without the fuss. But this Chocolate Peanut Butter Sheet Cake elevates the classic sheet cake to a whole new level of deliciousness.
What makes this cake so beloved? It’s the perfect marriage of flavors and textures. The deep, dark chocolate complements the salty, nutty peanut butter in a way that’s simply divine. The cake itself is incredibly moist and tender, while the frosting adds a smooth, creamy finish. Plus, the sheet cake format means it’s quick to bake and easy to serve, making it ideal for busy weeknights or impromptu celebrations. Trust me, once you try this recipe, you’ll be making it again and again!

Ingredients:
- For the Cake:
- 2 cups all-purpose flour
- 2 cups granulated sugar
- 1 teaspoon baking soda
- 1 teaspoon ground cinnamon
- ½ teaspoon salt
- 1 cup (2 sticks) unsalted butter, cut into pieces
- ½ cup unsweetened cocoa powder
- 1 cup water
- ½ cup buttermilk
- 2 large eggs, lightly beaten
- 2 teaspoons vanilla extract
- For the Peanut Butter Frosting:
- 1 cup (2 sticks) unsalted butter, softened
- 1 cup creamy peanut butter
- 6 cups powdered sugar
- ½ cup milk
- 1 teaspoon vanilla extract
- Pinch of salt
- Optional Toppings:
- Chopped peanuts
- Chocolate shavings
- Peanut butter cups, halved
- Reese’s Pieces
Preparing the Chocolate Cake
- Preheat and Prep: First things first, let’s get that oven preheated to 350°F (175°C). While it’s heating up, grease and flour a 13×18 inch sheet pan. Trust me, this step is crucial to prevent the cake from sticking! You can also line the bottom with parchment paper for extra insurance.
- Combine Dry Ingredients: In a large bowl, whisk together the flour, sugar, baking soda, cinnamon, and salt. Make sure everything is nicely combined so you don’t end up with pockets of baking soda in your cake.
- Melt Butter and Cocoa: In a medium saucepan, combine the butter, cocoa powder, and water. Heat over medium heat, stirring constantly, until the butter is completely melted and the mixture is smooth. Bring it just to a simmer, then remove from the heat. This step helps to bloom the cocoa powder, intensifying the chocolate flavor.
- Combine Wet and Dry: Pour the hot cocoa mixture over the dry ingredients in the large bowl. Beat with an electric mixer on low speed until just combined. Be careful not to overmix at this stage; we want a tender cake, not a tough one.
- Add Buttermilk, Eggs, and Vanilla: In a separate small bowl, whisk together the buttermilk, eggs, and vanilla extract. Add this mixture to the batter and beat on medium speed until everything is well combined and the batter is smooth. The buttermilk adds a lovely tang and helps to keep the cake moist.
- Pour into Pan and Bake: Pour the batter into the prepared sheet pan and spread it evenly. Bake for 20-25 minutes, or until a wooden skewer inserted into the center comes out clean. Keep an eye on it, as baking times can vary depending on your oven.
- Cool Completely: Once the cake is done, remove it from the oven and let it cool completely in the pan before frosting. This is important because if you frost it while it’s still warm, the frosting will melt and slide right off. Patience is key!
Making the Peanut Butter Frosting
- Cream Butter and Peanut Butter: In a large bowl, beat the softened butter and peanut butter with an electric mixer until light and fluffy. This usually takes about 3-5 minutes. Make sure your butter is truly softened, but not melted, for the best results.
- Gradually Add Powdered Sugar: Gradually add the powdered sugar, one cup at a time, beating on low speed after each addition. This prevents a powdered sugar explosion in your kitchen! Once all the powdered sugar is added, the mixture will likely be quite thick.
- Add Milk and Vanilla: Add the milk and vanilla extract and beat on medium speed until the frosting is smooth and creamy. You may need to add a little more milk, one tablespoon at a time, to reach your desired consistency.
- Add Salt: Add a pinch of salt to balance the sweetness and enhance the peanut butter flavor.
Frosting and Decorating the Cake
- Frost the Cake: Once the cake is completely cool, spread the peanut butter frosting evenly over the top. You can use an offset spatula for a smooth finish, or create swirls and peaks for a more rustic look.
- Add Toppings (Optional): Now comes the fun part! Sprinkle the chopped peanuts, chocolate shavings, halved peanut butter cups, or Reese’s Pieces over the frosting. Get creative and make it your own!
- Chill (Optional): If you have the time, chilling the cake for about 30 minutes before serving will help the frosting set and make it easier to slice. However, it’s also delicious served immediately!
- Slice and Serve: Cut the cake into squares and serve. Enjoy every delicious bite of your homemade Chocolate Peanut Butter Sheet Cake!
Tips and Tricks for the Best Cake
- Room Temperature Ingredients: Using room temperature ingredients, especially the butter and eggs, helps to create a smoother batter and a more evenly baked cake.
- Don’t Overmix: Overmixing the batter can develop the gluten in the flour, resulting in a tough cake. Mix until just combined.
- Properly Measure Flour: The best way to measure flour is by using a kitchen scale. If you don’t have one, spoon the flour into your measuring cup and level it off with a knife. Avoid scooping directly from the bag, as this can pack the flour and result in too much flour in your recipe.
- Adjust Sweetness: If you prefer a less sweet frosting, you can reduce the amount of powdered sugar slightly. Taste as you go and adjust to your liking.
- Storage: Store leftover cake in an airtight container at room temperature for up to 3 days, or in the refrigerator for up to 5 days.
- Make Ahead: You can bake the cake a day ahead of time and store it, tightly wrapped, at room temperature. Frost it the day you plan to serve it.
- Variations: Feel free to experiment with different toppings! Pretzels, sprinkles, or even a drizzle of melted chocolate would be delicious. You can also add chocolate chips to the cake batter for an extra chocolatey treat.
Troubleshooting
- Cake is Dry: If your cake turns out dry, it could be due to overbaking or using too much flour. Make sure to measure your flour accurately and check the cake for doneness a few minutes before the recommended baking time.
- Frosting is Too Thick: If your frosting is too thick, add a little more milk, one tablespoon at a time, until it reaches your desired consistency.
- Frosting is Too Thin: If your frosting is too thin, add a little more powdered sugar, one tablespoon at a time, until it thickens up.
- Cake Sticks to the Pan: Make sure to grease and flour the pan thoroughly before pouring in the batter. You can also line the bottom with parchment paper for extra insurance.
Why This Recipe Works
This Chocolate Peanut Butter Sheet Cake recipe is a winner because it’s easy to make, incredibly delicious, and perfect for feeding a crowd. The combination of rich chocolate cake and creamy peanut butter frosting is a classic for a reason – it’s simply irresistible! The sheet cake format makes it ideal for potlucks, parties, or any occasion where you need a large, crowd-pleasing dessert. Plus, the optional toppings allow you to customize the cake to your liking. Whether you’re a seasoned baker or a beginner, you’ll find this recipe straightforward and rewarding. The moist, tender cake and the decadent frosting are sure to impress everyone who tries it. The use of buttermilk adds a subtle tang that balances the sweetness of the cake and frosting, while the cinnamon enhances the chocolate flavor. The hot cocoa mixture helps to bloom the cocoa powder, resulting in a richer, more intense chocolate flavor. Overall, this recipe is a perfect balance of flavors and textures, making it a guaranteed hit!
Nutritional Information (Approximate, per serving)
Please note that the following nutritional information is an estimate and may vary depending on the specific ingredients used and portion sizes.
- Calories: 450-550
- Fat: 25-35g
- Saturated Fat: 15-20g
- Cholesterol: 75-100mg
- Sodium: 200-300mg
- Carbohydrates: 50-60g
- Sugar: 40-50g
- Protein: 5-7g
Conclusion:
This Chocolate Peanut Butter Sheet Cake isn’t just another dessert; it’s a guaranteed crowd-pleaser, a comforting indulgence, and a surprisingly simple way to bake up some happiness. From the rich, moist chocolate cake base to the creamy, decadent peanut butter frosting, every bite is an explosion of flavor that will leave you wanting more. I know, I know, I’m biased, but trust me on this one!
Why is this recipe a must-try? Because it delivers maximum flavor with minimal effort. Sheet cakes are inherently easier than layer cakes – no fussy stacking or intricate decorating required. Plus, the combination of chocolate and peanut butter is a timeless classic for a reason. It’s a flavor profile that appeals to almost everyone, making it perfect for parties, potlucks, or even just a weeknight treat. The recipe is also incredibly adaptable. Don’t have buttermilk? No problem! A little milk with a splash of vinegar works just as well. Want to dial up the peanut butter flavor even more? Add a tablespoon or two of peanut butter to the cake batter itself.
Speaking of variations, the possibilities are endless! For a truly decadent experience, try drizzling melted chocolate or peanut butter over the frosted cake. A sprinkle of chopped peanuts adds a delightful crunch, while a dusting of cocoa powder creates a beautiful visual contrast. If you’re feeling adventurous, you could even swirl in some raspberry jam for a chocolate-peanut butter-raspberry explosion.
Serving suggestions? This cake is delicious on its own, but it’s also fantastic with a scoop of vanilla ice cream or a dollop of whipped cream. A glass of cold milk or a cup of hot coffee are the perfect accompaniments. And if you happen to have any leftovers (though I highly doubt it!), they’re just as delicious the next day.
I truly believe that this Chocolate Peanut Butter Sheet Cake will become a staple in your baking repertoire. It’s the kind of recipe that you’ll turn to again and again, whether you’re celebrating a special occasion or simply craving a sweet treat. The ease of preparation and the incredible flavor make it a winner every time.
So, what are you waiting for? Preheat your oven, gather your ingredients, and get ready to bake up a batch of this irresistible cake. I’m confident that you’ll love it as much as I do. And more importantly, I’m even more confident that everyone you share it with will love it too.
I’m so excited for you to try this recipe! Once you’ve had a chance to bake it, please come back and share your experience in the comments below. I’d love to hear about any variations you tried, any tips you discovered, and most importantly, what your family and friends thought of it. Did you add any extra toppings? Did you try a different kind of nut butter? Did you serve it with ice cream or whipped cream? Let me know all the details! Your feedback is invaluable, and it helps me to make my recipes even better. Happy baking! I can’t wait to hear all about your Chocolate Peanut Butter Sheet Cake adventures!
Chocolate Peanut Butter Sheet Cake: The Ultimate Recipe Guide
Easy and delicious chocolate sheet cake topped with creamy peanut butter frosting. Perfect for parties and potlucks!
Ingredients
Here’s a summary of the key aspects:
* **Recipe Name:** Chocolate Peanut Butter Sheet Cake
* **Ingredients:** Clearly divided into “cake,” “frosting,” and “optionalToppings.” Quantities are specified, and the ingredients are common and readily available.
* **Instructions:** Broken down into logical sections (“cake,” “frosting,” “frostingAndDecorating”) with clear, step-by-step directions. The instructions include helpful explanations and tips within each step (e.g., why to bloom the cocoa powder).
* **Tips and Tricks:** Provides valuable advice for improving the outcome of the recipe, such as using room temperature ingredients, avoiding overmixing, and properly measuring flour.
* **Troubleshooting:** Addresses common problems that bakers might encounter and offers solutions.
* **Why This Recipe Works:** Explains the recipe’s appeal and highlights the key elements that contribute to its success (e.g., the combination of flavors, the sheet cake format, the use of buttermilk).
* **Nutritional Information:** Provides estimated values for calories, fat, cholesterol, sodium, carbohydrates, sugar, and protein per serving.
**Overall Assessment:**
This is a well-written and thorough recipe. The level of detail provided in the instructions, tips, and troubleshooting sections makes it particularly helpful for less experienced bakers. The “Why This Recipe Works” section adds a nice touch, explaining the rationale behind the ingredients and techniques. The nutritional information is a useful addition for those who are mindful of their dietary intake.
**Possible Improvements (Minor):**
* **Ingredient Specificity:** While generally good, some ingredients could be more specific. For example, specifying the type of cocoa powder (Dutch-processed or natural) could be helpful.
* **Baking Time Range:** The baking time is given as a range (20-25 minutes). Providing visual cues for doneness (e.g., “edges are golden brown,” “cake springs back lightly when touched”) would be beneficial.
* **Serving Size:** The nutritional information would be more useful if it included an estimated serving size (e.g., “per slice, assuming 24 slices”).
* **Allergen Information:** Consider adding a disclaimer about common allergens (e.g., “Contains: Wheat, Milk, Eggs, Peanuts”).
In conclusion, this is a high-quality recipe that is likely to produce delicious results. The attention to detail and helpful explanations make it a valuable resource for bakers of all levels.
Instructions
- Preheat and Prep: First things first, let’s get that oven preheated to 350°F (175°C). While it’s heating up, grease and flour a 13×18 inch sheet pan. Trust me, this step is crucial to prevent the cake from sticking! You can also line the bottom with parchment paper for extra insurance.
- Combine Dry Ingredients: In a large bowl, whisk together the flour, sugar, baking soda, cinnamon, and salt. Make sure everything is nicely combined so you don’t end up with pockets of baking soda in your cake.
- Melt Butter and Cocoa: In a medium saucepan, combine the butter, cocoa powder, and water. Heat over medium heat, stirring constantly, until the butter is completely melted and the mixture is smooth. Bring it just to a simmer, then remove from the heat. This step helps to bloom the cocoa powder, intensifying the chocolate flavor.
- Combine Wet and Dry: Pour the hot cocoa mixture over the dry ingredients in the large bowl. Beat with an electric mixer on low speed until just combined. Be careful not to overmix at this stage; we want a tender cake, not a tough one.
- Add Buttermilk, Eggs, and Vanilla: In a separate small bowl, whisk together the buttermilk, eggs, and vanilla extract. Add this mixture to the batter and beat on medium speed until everything is well combined and the batter is smooth. The buttermilk adds a lovely tang and helps to keep the cake moist.
- Pour into Pan and Bake: Pour the batter into the prepared sheet pan and spread it evenly. Bake for 20-25 minutes, or until a wooden skewer inserted into the center comes out clean. Keep an eye on it, as baking times can vary depending on your oven.
- Cool Completely: Once the cake is done, remove it from the oven and let it cool completely in the pan before frosting. This is important because if you frost it while it’s still warm, the frosting will melt and slide right off. Patience is key!
- Cream Butter and Peanut Butter: In a large bowl, beat the softened butter and peanut butter with an electric mixer until light and fluffy. This usually takes about 3-5 minutes. Make sure your butter is truly softened, but not melted, for the best results.
- Gradually Add Powdered Sugar: Gradually add the powdered sugar, one cup at a time, beating on low speed after each addition. This prevents a powdered sugar explosion in your kitchen! Once all the powdered sugar is added, the mixture will likely be quite thick.
- Add Milk and Vanilla: Add the milk and vanilla extract and beat on medium speed until the frosting is smooth and creamy. You may need to add a little more milk, one tablespoon at a time, to reach your desired consistency.
- Add Salt: Add a pinch of salt to balance the sweetness and enhance the peanut butter flavor.
- Frost the Cake: Once the cake is completely cool, spread the peanut butter frosting evenly over the top. You can use an offset spatula for a smooth finish, or create swirls and peaks for a more rustic look.
- Add Toppings (Optional): Now comes the fun part! Sprinkle the chopped peanuts, chocolate shavings, halved peanut butter cups, or Reese’s Pieces over the frosting. Get creative and make it your own!
- Chill (Optional): If you have the time, chilling the cake for about 30 minutes before serving will help the frosting set and make it easier to slice. However, it’s also delicious served immediately!
- Slice and Serve: Cut the cake into squares and serve. Enjoy every delicious bite of your homemade Chocolate Peanut Butter Sheet Cake!
Notes
Here’s a breakdown of the key elements:
* **`recipeName`**: “Chocolate Peanut Butter Sheet Cake” – Clearly identifies the recipe.
* **`ingredients`**: A nested object containing three arrays:
* `cake`: A list of ingredients for the cake portion.
* `frosting`: A list of ingredients for the frosting.
* `optionalToppings`: A list of optional toppings to enhance the cake.
* **`instructions`**: A nested object containing arrays of steps:
* `cake`: Step-by-step instructions for baking the cake.
* `frosting`: Step-by-step instructions for making the frosting.
* `frostingAndDecorating`: Instructions for assembling and decorating the cake.
* **`tipsAndTricks`**: Helpful advice for achieving the best results, including ingredient temperatures, mixing techniques, and storage suggestions.
* **`troubleshooting`**: Addresses common problems that might arise during baking and provides solutions.
* **`whyThisRecipeWorks`**: Explains the reasons behind the recipe’s success, highlighting the flavor combinations, ease of preparation, and crowd-pleasing nature.
* **`nutritionalInformation`**: Provides estimated nutritional values per serving, including calories, fat, cholesterol, sodium, carbohydrates, sugar, and protein.
**Key Observations and Potential Uses:**
* **Well-Organized:** The data is structured logically, making it easy to access specific information.
* **Comprehensive:** The recipe includes not only the basic steps but also helpful tips, troubleshooting advice, and a rationale, making it a valuable resource for bakers of all skill levels.
* **User-Friendly:** The instructions are clear and easy to follow.
* **Versatile:** The inclusion of optional toppings allows for customization.
**Potential Uses:**
* **Display on a Website or App:** The data can be easily used to populate a recipe website or app.
* **Printable Recipe Card:** The data can be formatted into a printable recipe card.
* **Voice Assistant Integration:** The instructions could be used to create a voice-guided baking experience.
* **Recipe Analysis:** The data could be used to analyze the recipe’s nutritional content or compare it to other recipes.
* **Machine Learning:** The data could be used to train a machine learning model to generate new recipes or predict baking outcomes.
In summary, this is a well-structured and comprehensive recipe that is ready to be used in a variety of applications. Do you have any specific questions about the data or how it could be used?