Chicken Tender Subs
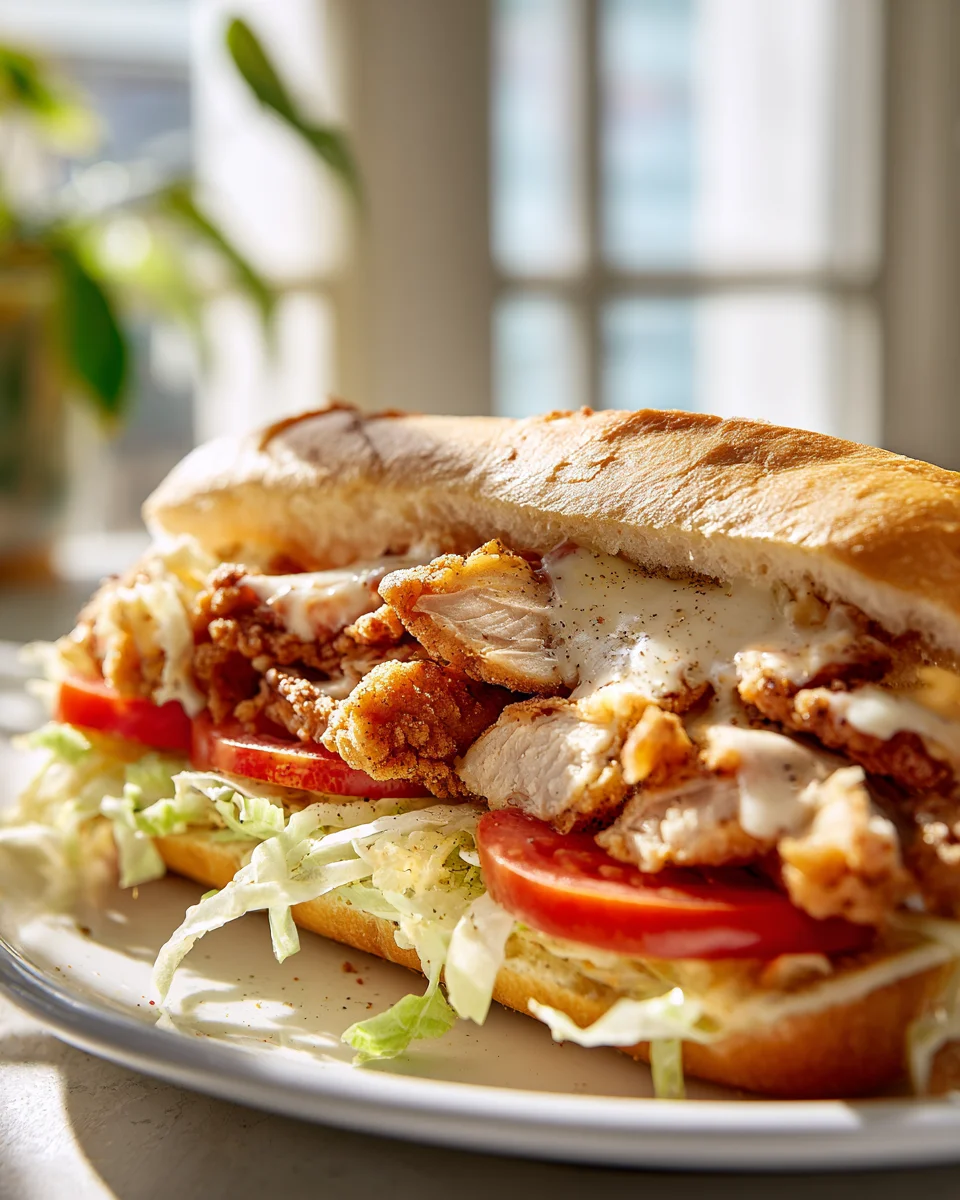
Hey everyone! I’m so excited to share one of my absolute favorite comfort food creations with you today: the incredible Chicken Tender Sub. This isn’t just any sandwich; it’s a glorious, handheld feast that takes crispy, juicy chicken tenders and elevates them into something truly spectacular.
What makes these subs so special, you ask? Well, it’s the perfect harmony of textures and flavors. Imagine perfectly seasoned, golden-fried chicken tenders – whether you whip them up from scratch or grab some high-quality frozen ones for a super speedy meal – tucked into a toasted, pillowy sub roll. Then, we load it up with all your favorite fixings: think melty cheese, crisp lettuce, juicy tomatoes, maybe some tangy pickles, and a generous drizzle of your chosen sauce (I’m a big fan of a creamy ranch or a zesty honey mustard here!).
You’re going to absolutely adore this recipe because it’s the ultimate satisfying meal that feels indulgent but is surprisingly simple to put together. It’s fantastic for a quick weeknight dinner, a fun game day treat, or whenever you’re craving something hearty and delicious that beats any drive-thru version hands down. Get ready to experience a sandwich so good, it might just become your new go-to!

Ingredient Notes
When I set out to make my ultimate Chicken Tender Subs, I focus on a few key ingredients that really make the dish sing. It’s all about creating that perfect balance of crispy, juicy chicken, fresh toppings, and a fantastic sauce, all nestled in a soft, yet sturdy sub roll.
The Chicken Tenders
- Chicken: For the star of the show, I always reach for good quality chicken tenders. You can buy them fresh, already cut into tenderloin strips, or you can purchase boneless, skinless chicken breasts and slice them into 1-inch thick, tender-sized strips yourself. This gives you control over the size and ensures they cook evenly.
- Breading: This is crucial for that satisfying crunch. I often make my own breading mixture using seasoned flour, an egg wash, and panko breadcrumbs for extra crispiness. For convenience, good quality frozen, pre-breaded chicken tenders work wonderfully too. Just make sure they’re the kind that get truly crispy when cooked. If you’re looking for a gluten-free option, there are excellent gluten-free breadcrumbs available, or you can even use crushed cornflakes for a unique crunch.
The Sub Roll
- Rolls: This isn’t just any sandwich – it’s a sub! I look for soft yet resilient sub rolls, often labeled as hoagie rolls, hero rolls, or even French bread baguettes cut into sub lengths. Brioche sub rolls offer a richer flavor, while a whole wheat option can add a touch of nuttiness and fiber. The key is a roll that can hold up to the fillings without falling apart, but isn’t so tough it hurts your mouth.
Sauces and Spreads
- Mayo/Aioli: A good base spread is essential. I love a classic mayonnaise, sometimes jazzed up with a squeeze of lemon and a pinch of garlic powder for a quick aioli. You could also try a spicy mayo by adding a dash of your favorite hot sauce.
- Special Sauces: This is where you can truly personalize your sub! Options like honey mustard, ranch dressing, buffalo sauce, or even a tangy BBQ sauce can elevate the flavors. I sometimes mix a little sriracha into ranch for a creamy, spicy kick.
Toppings and Cheese
- Lettuce & Tomato: Crisp shredded lettuce (iceberg or romaine work best for texture) and thinly sliced ripe tomatoes are non-negotiable for freshness and crunch.
- Onions & Pickles: Thinly sliced red onion adds a sharp bite, and dill pickle chips provide that essential tangy counterpoint.
- Cheese: For a melty, cheesy goodness, I typically use provolone or cheddar slices. Swiss, Monterey Jack, or even a spicy pepper jack can also be fantastic choices, depending on the flavor profile you’re aiming for. The key is a cheese that melts well.
Substitutions I Enjoy
- Different Chicken Cuts: If tenders aren’t available, chicken breast or even boneless, skinless chicken thighs can be sliced into strips and breaded.
- Roll Alternatives: If you’re avoiding gluten, there are many excellent gluten-free sub rolls available now. For a lower-carb option, you could serve the chicken and toppings in a large lettuce wrap.
- Sauce Swaps: Don’t be afraid to experiment! A creamy pesto, a balsamic glaze, or even a non-alcoholic beer cheese sauce could be incredible.
- Veggies: Add some sautéed bell peppers and onions, or perhaps some fresh avocado slices for extra creaminess.
Step-by-Step Instructions
Alright, let’s build these incredible Chicken Tender Subs! The process is straightforward, but timing is everything to ensure everything is fresh and warm.
Step 1: Prepare and Cook Your Chicken Tenders
- If using homemade breaded tenders:
- Set up your breading station: one shallow dish with seasoned flour (salt, pepper, garlic powder, paprika), one with whisked eggs, and one with panko breadcrumbs.
- Dredge each chicken tender first in the flour, shaking off excess, then dip in the egg wash, and finally coat thoroughly in the panko breadcrumbs, pressing gently to adhere.
- To cook:
- Frying: Heat about 1 inch of oil (vegetable, canola, or peanut) in a large skillet to 350°F (175°C). Fry tenders in batches for 3-5 minutes per side, or until golden brown and cooked through (internal temperature reaches 165°F/74°C). Drain on a wire rack over paper towels.
- Baking: Preheat oven to 400°F (200°C). Place tenders on a baking sheet lined with parchment paper. Bake for 15-20 minutes, flipping halfway, until golden and cooked through.
- Air Frying: Preheat air fryer to 375°F (190°C). Spray tenders lightly with cooking spray. Air fry for 10-15 minutes, flipping halfway, until crispy and cooked through.
- If using frozen pre-breaded tenders: Follow the package instructions for baking, frying, or air frying until they are golden and crispy.
Step 2: Prep Your Sub Rolls and Toppings
- Prepare the rolls: While the chicken cooks, slice your sub rolls lengthwise, being careful not to cut all the way through, creating a hinge. You can lightly toast them in a toaster oven or under the broiler for 1-2 minutes until slightly golden, or simply leave them soft. If you like, spread a thin layer of butter or garlic butter on the inside before toasting.
- Slice your toppings: Thinly slice your lettuce, tomatoes, red onion, and have your pickles and cheese ready.
Step 3: Assemble Your Chicken Tender Subs
- Spread the base: On the bottom half of each sub roll, spread your chosen base sauce (mayo, aioli, or a mix).
- Add cheese: Lay 1-2 slices of cheese directly onto the bottom roll.
- Layer the chicken: Place 2-4 cooked chicken tenders onto the cheese, depending on the size of your roll and tenders.
- Melt the cheese (optional but recommended!): If you want truly gooey cheese, you can now briefly place the open sub (with cheese and chicken) under a broiler for 1-2 minutes until the cheese is melted and bubbly. Watch it carefully to prevent burning!
- Add more sauce and toppings: Drizzle your special sauce (buffalo, honey mustard, etc.) over the warm chicken. Then pile on the fresh toppings: shredded lettuce, sliced tomatoes, red onion, and dill pickles.
- Close and serve: Carefully close the sub, pressing down gently. You can cut the sub in half if it’s very large, or serve it whole.
Tips & Suggestions
Crafting the perfect Chicken Tender Sub is an art, and I’ve picked up a few tricks over the years to make them truly exceptional. Here are my top tips and some fun variations you might want to try!
For the Crispiest Chicken
- Don’t overcrowd the pan: Whether frying or air frying, cook your chicken tenders in batches to ensure they get crispy. Overcrowding lowers the oil temperature or traps steam, leading to soggy chicken.
- High heat is key: Make sure your oil is at the right temperature for frying, or your oven/air fryer is fully preheated. This helps create that immediate crisp crust.
- Drain well: After frying, always place your tenders on a wire rack set over paper towels to drain excess oil. This prevents them from getting greasy and soft on the bottom.
Elevating Your Sub Roll
- Toasting with purpose: A light toast gives the roll a bit more structure and warmth. I love spreading a thin layer of garlic butter or herb butter on the inside before toasting for an extra layer of flavor. It also creates a barrier against soggy sauces!
- The hinge cut: Cutting the roll about three-quarters of the way through instead of completely separating it makes assembly much easier and keeps all your delicious fillings contained.
Sauce Sensations
- Mix it up: Don’t stick to just one sauce! A base of mayo with a drizzle of buffalo sauce and a sprinkle of blue cheese crumbles (if you’re a fan) makes for an amazing “Buffalo Chicken Tender Sub.”
- Homemade dressings: While store-bought is convenient, whipping up a quick honey mustard or a creamy ranch from scratch can make a huge difference in flavor.
- Spicy kick: Add a pinch of cayenne pepper to your breading or a dash of hot sauce to your mayo for a gentle heat.
Cheese Perfection
- Melt, don’t just warm: For that ultimate melty cheese pull, place your open sub (with chicken and cheese) under the broiler for a minute or two. Keep a close eye on it so it doesn’t burn!
Creative Topping Additions
- Sautéed veggies: Caramelized onions and bell peppers add a sweet and savory depth.
- Fresh herbs: A sprinkle of fresh parsley or cilantro can brighten the flavors.
- Avocado: Sliced or mashed avocado adds a creamy, healthy fat that’s incredibly delicious.
- Pickled jalapeños: For those who love a bit more heat and tang!
Making it a Meal
These subs are hearty enough on their own, but if you want to make it a full spread, I suggest serving them alongside some crispy french fries, a light coleslaw, or even just a simple side salad.
Storage
When it comes to storing Chicken Tender Subs, the golden rule is: assemble just before serving. However, I understand that sometimes you need to prep ahead or save leftovers. Here’s how I handle it:
Storing Assembled Subs
- Not ideal for long: A fully assembled Chicken Tender Sub is best eaten fresh. The moisture from the sauces, tomatoes, and lettuce can quickly make the sub roll soggy, and the chicken tenders can lose their crispness.
- Short-term: If you must store an assembled sub for a few hours, wrap it tightly in plastic wrap or foil and refrigerate. It will still be edible, but don’t expect the same perfect texture. Eat within 1-2 hours for the best experience.
Storing Components Separately (Recommended!)
For the best quality and to minimize sogginess, I always recommend storing the cooked chicken tenders and other ingredients separately until you’re ready to build your sub.
- Cooked Chicken Tenders:
- Refrigeration: Allow the cooked tenders to cool completely. Store them in an airtight container in the refrigerator for up to 3-4 days.
- Freezing: Cooked chicken tenders can also be frozen. Once cooled, arrange them in a single layer on a baking sheet and freeze until solid (this prevents them from sticking together). Then transfer them to a freezer-safe bag or container. They can be stored for up to 2-3 months.
- Reheating: For best results, reheat tenders in an oven or air fryer at 375°F (190°C) for 8-12 minutes, or until heated through and crispy again. Microwaving is an option for speed but will make them less crispy.
- Prepped Toppings:
- Lettuce, Tomatoes, Onions: Store these separately in airtight containers in the refrigerator. Lettuce can be kept crisp by placing a paper towel in the container. Use within 2-3 days.
- Cheese: Keep cheese slices in their original packaging or an airtight container in the refrigerator for up to a week.
- Sauces: Store any leftover sauces or spreads in airtight containers in the refrigerator according to their individual shelf life.
Reviving a Stored Sub (If you must!)
If you have an assembled sub that’s been in the fridge for a short period:
- Remove any soggy lettuce or tomatoes (they’re better fresh anyway).
- You can try briefly toasting the sub (without the fresh veggies) in a toaster oven or under the broiler to warm the chicken and crisp the bread, but be careful not to dry it out or burn the cheese.
- Add fresh toppings and a fresh drizzle of sauce before serving.
By storing components separately, you can enjoy a fresh-tasting Chicken Tender Sub any time with minimal effort!
Final Thoughts
And there you have it, folks! My absolute favorite way to transform simple ingredients into something truly special. These Chicken Tender Subs aren’t just another meal; they’re a revelation. I promise you, once you take that first bite into the crispy, juicy chicken, perfectly nestled in a soft bun with all your favorite toppings, you’ll understand why I rave about them.
What makes these Chicken Tender Subs a must-try? It’s the incredible balance of textures and flavors – the crunch of the tenders, the creaminess of the sauce, the freshness of the veggies, all held together by that satisfying bread. They’re customizable, comforting, and incredibly delicious. Perfect for a quick weeknight dinner, a fun game day treat, or simply when you’re craving something hearty and satisfying.
So go ahead, give these Chicken Tender Subs a try. I’m confident they’ll become a beloved staple in your kitchen, just like they are in mine. Happy cooking, and enjoy every single bite!

Delicious Chicken Tender Subs: The Best Quick & Easy Recipe!
- Total Time: 45 minutes
- Yield: 4 servings 1x
Description
Experience the ultimate comfort food with these Chicken Tender Subs, featuring crispy, juicy chicken tenders nestled in soft sub rolls. Loaded with fresh toppings and your favorite sauces, this recipe is perfect for a quick weeknight dinner or game day treat!
Ingredients
- Chicken tenders (fresh or frozen)
- Seasoned flour (salt, pepper, garlic powder, paprika)
- Eggs (for egg wash)
- Panko breadcrumbs
- Vegetable oil (for frying) or cooking spray (for air frying)
- Sub rolls (hoagie rolls, hero rolls, or French bread baguettes)
- Mayonnaise
- Lemon (for aioli)
- Garlic powder (for aioli)
- Hot sauce (for spicy mayo)
- Honey mustard
- Ranch dressing
- Buffalo sauce
- BBQ sauce
- Crisp shredded lettuce (iceberg or romaine)
- Ripe tomatoes (thinly sliced)
- Red onion (thinly sliced)
- Dill pickle chips
- Provolone cheese slices
- Cheddar cheese slices
- Swiss cheese slices
- Monterey Jack cheese slices
- Pepper jack cheese slices
Instructions
- Prepare and Cook Your Chicken Tenders: If using homemade breaded tenders, set up your breading station with seasoned flour, whisked eggs, and panko breadcrumbs. Dredge each chicken tender in flour, dip in egg wash, and coat in panko breadcrumbs. To cook, heat oil in a skillet to 350°F (175°C) and fry tenders for 3-5 minutes per side until golden brown, or bake at 400°F (200°C) for 15-20 minutes, flipping halfway, until cooked through. If using frozen pre-breaded tenders, follow package instructions.
- Prep Your Sub Rolls and Toppings: While the chicken cooks, slice your sub rolls lengthwise, creating a hinge. Toast them lightly if desired. Slice your lettuce, tomatoes, red onion, and prepare pickles and cheese.
- Assemble Your Chicken Tender Subs: Spread your chosen base sauce on the bottom half of each sub roll. Add 1-2 slices of cheese, then layer 2-4 cooked chicken tenders on top. Optionally, melt the cheese under a broiler for 1-2 minutes. Drizzle your special sauce over the chicken, then add fresh toppings: shredded lettuce, sliced tomatoes, red onion, and dill pickles. Close the sub and serve.
- Prep Time: 15 mins
- Cook Time: 30 mins
- Category: Dinner
- Method: Frying, Baking, Air Frying
- Cuisine: American
Nutrition
- Serving Size: 1 sub
- Calories: 600
- Sugar: 5 g
- Sodium: 900 mg
- Fat: 30 g
- Saturated Fat: 8 g
- Unsaturated Fat: 15 g
- Trans Fat: 0 g
- Carbohydrates: 50 g
- Fiber: 3 g
- Protein: 30 g
- Cholesterol: 80 mg
Keywords: For the crispiest chicken, avoid overcrowding the pan and ensure your oil is at the right temperature. You can personalize your sub with different sauces and toppings, such as sautéed veggies or fresh herbs.