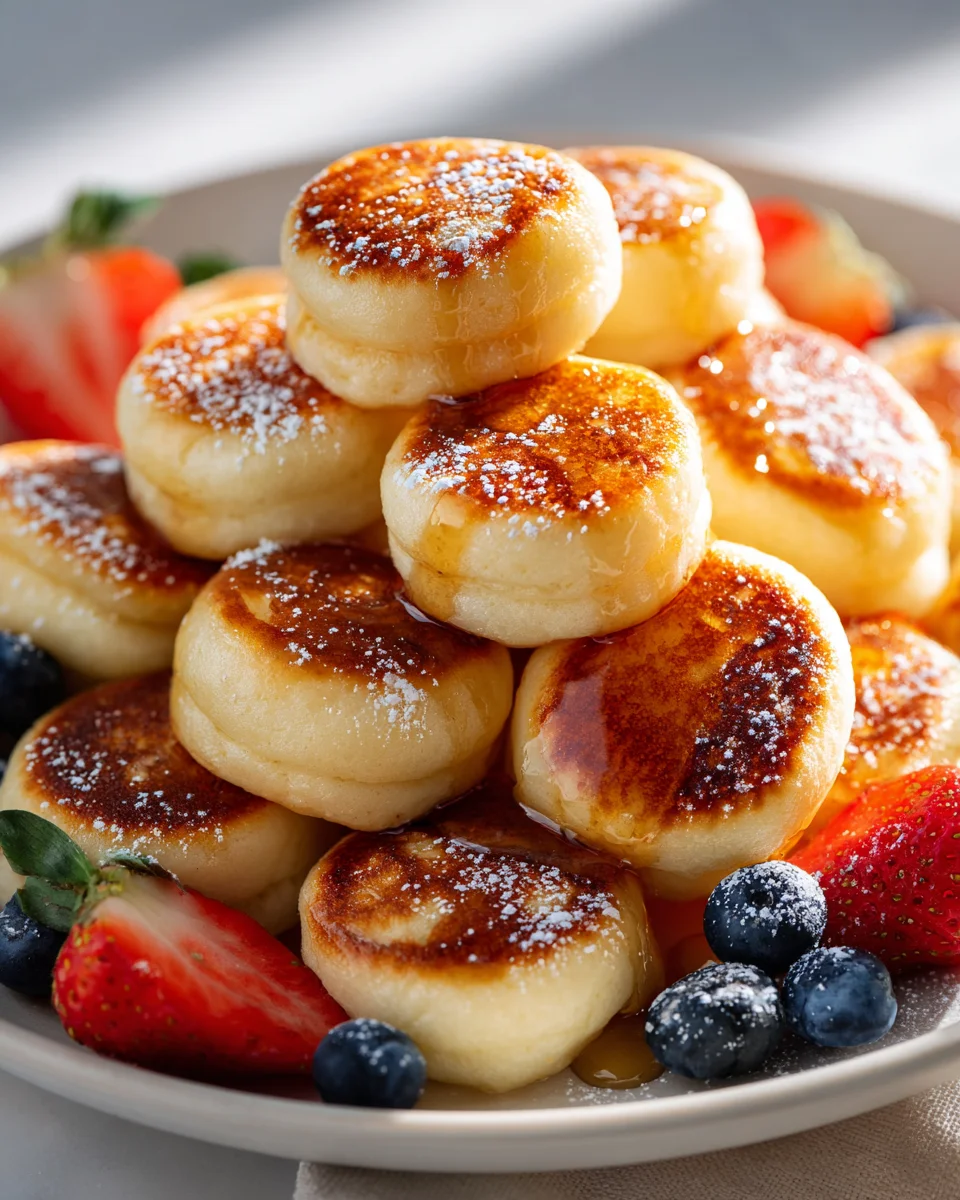
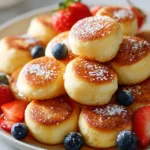
Mini Old Fashioned Pancake Bites
Oh, prepare yourselves for the most delightful breakfast experience! Today, I’m absolutely thrilled to share the recipe for Mini Old Fashioned Pancake Bites. These aren’t just any pancakes; they’re a tiny, adorable, and incredibly delicious twist on a classic comfort food that I know you’re going to adore. What makes them so special, you ask? Well, imagine all the warm, fluffy goodness of your favorite old-fashioned pancakes, but shrunken down into perfect, pop-able little bites! No more wrestling with a big griddle for a stack of full-sized cakes; these charming little morsels are incredibly easy to make and even easier to eat.
You’ll fall in love with them because they’re fantastic for so many occasions – from a relaxed weekend brunch with the family to a fun, interactive breakfast for guests. They’re super kid-friendly (who doesn’t love mini food?), and honestly, they just make breakfast feel a little more magical. Each bite-sized pancake is golden brown on the outside, wonderfully tender and airy on the inside, and ready to be drizzled with maple syrup, sprinkled with powdered sugar, or paired with your favorite fresh berries. Get ready to transform your breakfast routine with these irresistible little gems!

Ingredient Notes
There’s something incredibly comforting about a batch of Mini Old Fashioned Pancake Bites, and achieving that classic, homey taste starts with the right ingredients. For me, the beauty of “old fashioned” recipes lies in their simplicity and the way quality ingredients truly shine. Here’s a breakdown of what I use and some helpful substitutions to keep in mind.
Flour Power
- All-Purpose Flour: This is my go-to for these bites. It provides the perfect balance of structure and tenderness that’s characteristic of old-fashioned pancakes.
- Substitution Tip: If you’re looking for a gluten-free option, a good quality 1:1 gluten-free baking blend works wonderfully. Just ensure it contains xanthan gum for the best texture. For a slightly lighter, fluffier bite, you could even try using some cake flour, but all-purpose is classic for a reason!
The Dairy Difference
- Buttermilk: This is a game-changer for old-fashioned pancakes. The acidity in buttermilk reacts with the baking soda to create incredibly light and fluffy bites, and it imparts a subtle tang that I absolutely adore. If you don’t have buttermilk on hand, don’t worry!
- Substitution Tip: You can easily make a DIY buttermilk substitute. Just add 1 tablespoon of white vinegar or lemon juice to a liquid measuring cup, then fill the rest with regular milk (dairy or non-dairy, like almond or soy milk) to equal 1 cup. Let it sit for 5-10 minutes until it slightly curdles. This “non-alcohol alternative” creates the necessary acidity for the reaction. For a richer flavor, whole milk is always my preference, but 2% works fine too.
Eggs and Sweeteners
- Large Eggs: Eggs bind everything together and contribute to the rich, tender texture of these bites.
- Substitution Tip: For a vegan option, you can use flax eggs (1 tablespoon ground flaxseed mixed with 3 tablespoons water per egg, let sit for 5 minutes to thicken).
- Granulated Sugar: Just a touch of sugar enhances the overall flavor without making them overly sweet.
- Substitution Tip: Maple syrup or honey can be used, but you might need to slightly reduce the liquid elsewhere in the recipe to maintain the right batter consistency.
Leavening Agents and Flavor
- Baking Powder and Baking Soda: These two work in tandem, especially with buttermilk, to give our mini bites their beautiful lift and airy texture. Don’t skip them!
- Melted Butter: Butter is essential for that rich, classic pancake flavor. I always use unsalted butter so I can control the salt content myself.
- Substitution Tip: Vegetable oil or coconut oil can be used, but you’ll lose some of that distinctive buttery taste that really sings in an “old fashioned” recipe.
- Vanilla Extract: A good splash of vanilla is non-negotiable for me. It adds warmth and depth of flavor that makes these bites truly special.
- Salt: Just a pinch balances the sweetness and enhances all the other flavors.
By using these simple, quality ingredients, you’re well on your way to creating Mini Old Fashioned Pancake Bites that taste like they came straight from grandma’s kitchen!
Step-by-Step Instructions
Making these Mini Old Fashioned Pancake Bites is a truly delightful experience, and the “mini” aspect actually makes them quicker to cook and perfect for little hands (and big ones!). Here’s how I bring them to life:
1. Get Your Dry Ingredients Ready
- In a large mixing bowl, I whisk together my all-purpose flour, granulated sugar, baking powder, baking soda, and salt. It’s important to whisk them thoroughly to ensure all the leavening agents are evenly distributed. This prevents any pockets of unmixed powder and ensures a consistent rise in every mini bite.
2. Prepare the Wet Mix
- In a separate medium bowl, I gently whisk the buttermilk, eggs, and melted butter. I make sure the melted butter isn’t too hot, otherwise, it might scramble the eggs when combined. If I’m using vanilla extract, I’ll add it in here too – it really brings out that “old fashioned” flavor.
3. Combine and Conquer (Don’t Overmix!)
- Now, I pour the wet ingredients into the dry ingredients. With a rubber spatula or wooden spoon, I mix just until the ingredients are combined. It’s absolutely crucial not to overmix the batter. Lumps are your friend here! Overmixing develops the gluten in the flour, resulting in tough, chewy pancakes instead of light, fluffy bites. A few streaks of flour are perfectly fine. Let the batter rest for 5-10 minutes while you heat your griddle; this allows the gluten to relax and the leavening agents to start working their magic.
4. Preheat Your Griddle
- I heat a non-stick griddle or a large non-stick frying pan over medium-low heat. The “medium-low” is important for mini bites because they cook quickly. I lightly grease it with a pat of butter or a little cooking spray. To test if it’s ready, I flick a few drops of water onto the surface – if they sizzle and evaporate immediately, it’s good to go!
5. Portioning for “Mini” Perfection
- This is where the “mini” comes into play! I use a small cookie scoop (about 1-tablespoon capacity) or a clean squeeze bottle (like a ketchup bottle) to portion out my batter. I drop small dollops onto the preheated griddle, leaving a little space between each one for easy flipping. Aim for about 1.5 to 2 inches in diameter for each bite.
6. Cook Until Golden
- I cook the mini pancake bites for about 1-2 minutes per side. You’ll know they’re ready to flip when tiny bubbles appear on the surface and the edges look set. Because they’re so small, they cook very quickly, so keep a close eye on them! Once flipped, I cook for another 1-2 minutes until they are golden brown and cooked through.
7. Serve Warm
- As each batch finishes, I transfer the Mini Old Fashioned Pancake Bites to a plate and often keep them warm in a low oven (around 200°F / 95°C) while I finish cooking the rest. This ensures everyone gets to enjoy warm, fresh bites. Pile them high and get ready for a delicious breakfast!
Tips & Suggestions
Creating the perfect batch of Mini Old Fashioned Pancake Bites is all about a few key tricks and embracing the joy of a simple, classic breakfast. Here are some of my favorite tips and suggestions to elevate your mini pancake game:
Batter Consistency is King
- Not Too Thick, Not Too Thin: For these mini bites, you want a batter that’s easily scoopable but not so thick it won’t spread a little on the griddle, nor so thin it runs everywhere. If your batter seems a bit too thick after resting, you can add a tiny splash more buttermilk (or milk) until it reaches a pourable but still substantial consistency. If it’s too thin, a tablespoon or two of extra flour can help, but try to avoid this by measuring accurately.
- The Rest: As I mentioned in the instructions, letting the batter rest for 5-10 minutes is a small step that makes a big difference. It allows the flour to fully hydrate and the gluten to relax, leading to more tender and airy bites.
Mastering the Griddle Temperature
- Medium-Low Heat is Your Friend: This is arguably the most important tip for mini pancakes. Because they’re so small, they cook quickly. If your griddle is too hot, they’ll burn on the outside before the inside is cooked through. A consistent medium-low heat ensures a golden-brown exterior and a fully cooked, fluffy interior. Don’t rush it!
- Test Pancake: Always make one “test” mini pancake first. This allows you to check your griddle temperature and adjust it before committing the rest of your batter.
Perfect Portioning for Uniformity
- Scoop or Squeeze: For perfectly uniform mini bites, I highly recommend using a small cookie scoop (about 1 tablespoon) or a squeeze bottle. A squeeze bottle gives you fantastic control over the size and shape, making for a very neat presentation. It’s also great for involving kids!
- Spacing: Don’t overcrowd your griddle. Give each mini bite enough space to expand slightly and for easy flipping.
Serving Suggestions – The “Old Fashioned” Way
- Classic Maple Syrup: For me, nothing beats a generous drizzle of real maple syrup. It’s the quintessential “old fashioned” topping.
- Fresh Berries: A sprinkle of fresh blueberries, sliced strawberries, or raspberries adds a pop of color and natural sweetness.
- Powdered Sugar: A dusting of powdered sugar makes them look incredibly inviting and adds a delicate sweetness.
- Whipped Cream: A dollop of homemade whipped cream, perhaps lightly sweetened with maple syrup, is a luxurious touch.
- Savory Side: To round out the breakfast, I love serving these mini bites alongside some crispy beef bacon or a couple of fried eggs. The combination of sweet and savory is absolutely delicious and very much in the spirit of a classic diner breakfast.
Flavor Variations to Try
- Warm Spices: A pinch of cinnamon, nutmeg, or a dash of cardamom in the batter really enhances that “old fashioned” feel.
- Zest Appeal: A little lemon or orange zest adds a bright, fresh note without overpowering the classic pancake flavor.
- Mini Chocolate Chips: If you’re catering to a sweet tooth, miniature chocolate chips are a fantastic addition. Stir them directly into the batter!
These mini bites are designed to be simple and satisfying, and with these tips, you’ll be making batches of perfection in no time!
Storage
One of the best things about these Mini Old Fashioned Pancake Bites is how well they store, making them perfect for meal prepping and quick breakfasts on busy mornings. I often make a double batch just so I have some ready to go!
Cooling is Key
- Before storing, it’s absolutely essential to let your Mini Old Fashioned Pancake Bites cool completely to room temperature. Storing them while they are still warm will create condensation, which can lead to soggy pancakes and encourage mold growth. I usually spread them out on a wire rack in a single layer to ensure they cool down quickly and evenly.
Refrigeration
- How to Store: Once cooled, I place the pancake bites in an airtight container or a resealable plastic bag. To prevent them from sticking together, especially if you have a larger batch, I sometimes layer them with small pieces of parchment paper between the layers.
- Shelf Life: Stored properly in the refrigerator, they will stay fresh for up to 3-4 days.
Freezing for Longer Term
- The Best Method: Freezing is my preferred method for longer storage, and these mini bites are perfect for it! First, arrange the cooled pancake bites in a single layer on a baking sheet. Pop the baking sheet into the freezer for about 30 minutes to an hour, until the pancakes are solid. This “flash freezing” prevents them from clumping together when you transfer them to a container.
- How to Store: Once flash-frozen, transfer the solid mini pancake bites to a freezer-safe airtight container or a heavy-duty resealable freezer bag. Again, you can use parchment paper between layers if you wish, though after flash freezing, it’s less critical.
- Shelf Life: They will keep beautifully in the freezer for up to 2-3 months. Beyond that, they might start to lose a bit of their quality, but they’ll likely still be safe to eat.
Reheating Your Mini Bites
Reheating these little gems is super quick and easy, making them ideal for a grab-and-go breakfast:
- Microwave: This is the fastest method. Place a few mini pancake bites on a microwave-safe plate. Microwave on high for 15-30 seconds, or until heated through. Times will vary based on your microwave and the number of bites.
- Toaster Oven/Oven: For a slightly crispier edge, preheat your toaster oven or conventional oven to 350°F (175°C). Spread the frozen or refrigerated bites in a single layer on a baking sheet and bake for about 5-10 minutes, or until warmed through. This method is great for larger batches.
- Griddle/Frying Pan: Heat a non-stick pan over medium-low heat. Add the pancake bites and warm them for 1-2 minutes per side, until heated through. This method can restore some of their fresh-off-the-griddle crispness.
Having a stash of these Mini Old Fashioned Pancake Bites in the fridge or freezer is a wonderful way to ensure a delicious and easy breakfast is always within reach!
Final Thoughts
There you have it! I truly hope you’ve enjoyed bringing these delightful Mini Old Fashioned Pancake Bites to life in your kitchen. They’re more than just a breakfast item; they’re a little bite of comfort and joy that’s incredibly easy to share.
What makes these Mini Old Fashioned Pancake Bites a truly essential recipe to add to your repertoire? It’s their irresistible charm in miniature form, perfectly capturing that classic, comforting pancake taste without the fuss of flipping large rounds. They’re incredibly easy to prepare, making them perfect for busy mornings, a leisurely brunch, or even a fun, sweet snack. Their small size makes them wonderfully kid-friendly and ideal for dipping into your favorite syrup, fruit compote, or even a dollop of whipped cream.
I promise, once you experience the ease of serving and the pure delight of popping these little golden treasures, you’ll find yourself reaching for this recipe again and again. So go ahead, whip up a batch of these wonderful Mini Old Fashioned Pancake Bites and treat yourself, your family, or your guests to a deliciously old-fashioned experience in a modern, convenient package. Happy cooking!
Delicious Mini Old Fashioned Pancake Bites Recipe
- Total Time: 25 minutes
- Yield: 4 servings 1x
Description
These Mini Old Fashioned Pancake Bites are a delightful twist on a classic breakfast favorite, perfect for any occasion. With their golden brown exterior and fluffy interior, they are sure to become a family favorite!
Ingredients
- 1 cup All-Purpose Flour
- 2 tablespoons Granulated Sugar
- 1 teaspoon Baking Powder
- 1/2 teaspoon Baking Soda
- 1/4 teaspoon Salt
- 1 cup Buttermilk
- 2 Large Eggs
- 2 tablespoons Melted Butter
- 1 teaspoon Vanilla Extract
Instructions
- In a large mixing bowl, whisk together the all-purpose flour, granulated sugar, baking powder, baking soda, and salt until thoroughly combined.
- In a separate medium bowl, gently whisk the buttermilk, eggs, and melted butter together. If using, add the vanilla extract.
- Pour the wet ingredients into the dry ingredients and mix just until combined. Do not overmix; lumps are okay. Let the batter rest for 5-10 minutes.
- Preheat a non-stick griddle or frying pan over medium-low heat and lightly grease it with butter or cooking spray.
- Using a small cookie scoop or squeeze bottle, drop small dollops of batter onto the griddle, leaving space between each.
- Cook the mini pancake bites for about 1-2 minutes per side, flipping when tiny bubbles appear on the surface and the edges look set.
- Transfer the cooked pancake bites to a plate and keep warm in a low oven while finishing the rest. Serve warm.
- Prep Time: 15 mins
- Cook Time: 10 mins
- Category: Breakfast
- Method: Griddling
- Cuisine: American
Nutrition
- Serving Size: 2 bites
- Calories: 150
- Sugar: 3 g
- Sodium: 200 mg
- Fat: 5 g
- Saturated Fat: 3 g
- Unsaturated Fat: 2 g
- Trans Fat: 0 g
- Carbohydrates: 22 g
- Fiber: 1 g
- Protein: 4 g
- Cholesterol: 50 mg
Keywords: For a gluten-free option, use a 1:1 gluten-free baking blend. You can substitute buttermilk with a DIY mix of milk and vinegar or lemon juice. For a vegan option, replace eggs with flax eggs.