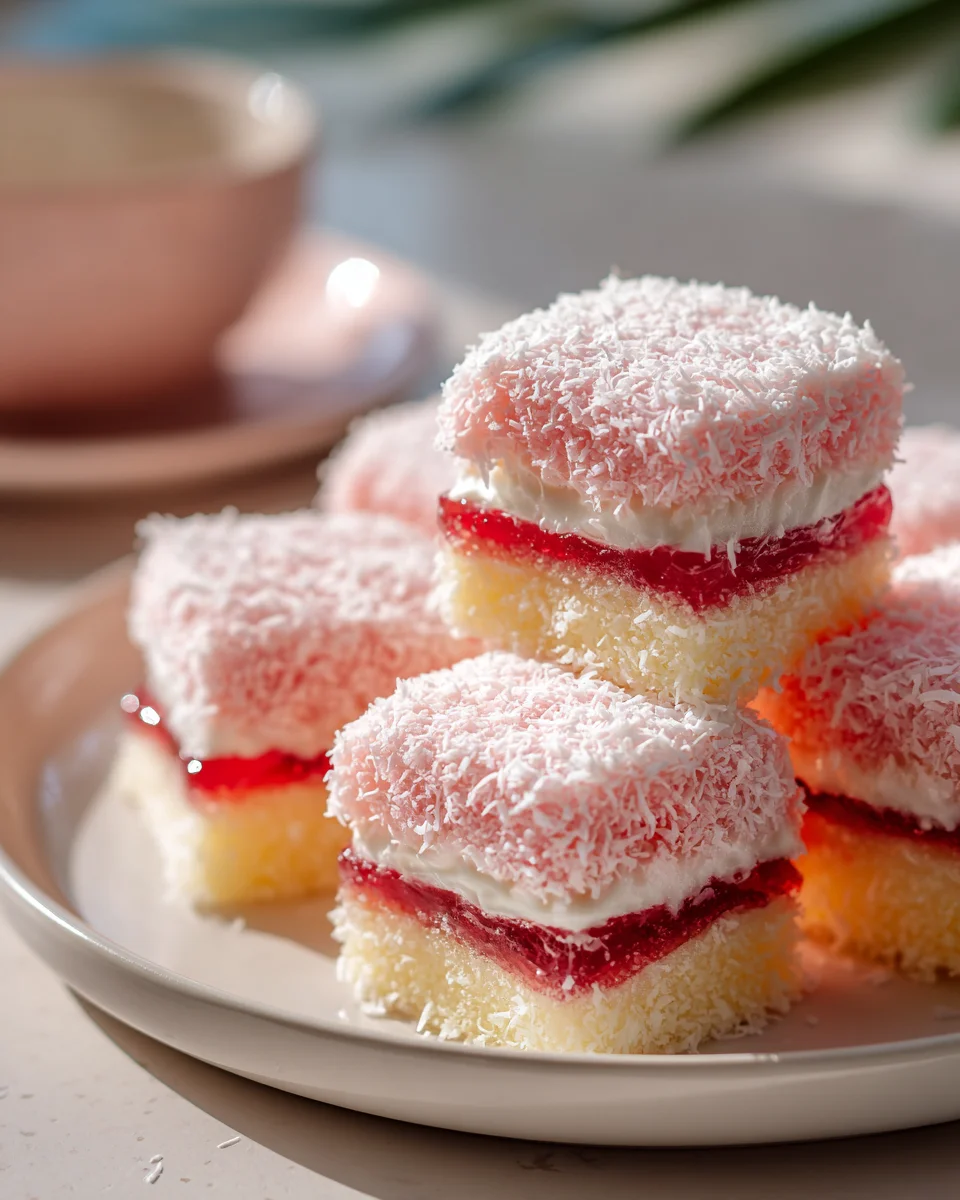
Old Fashioned Pink Jelly Cakes
Welcome to the delightful world of Old Fashioned Pink Jelly Cakes, a nostalgic treat that has a special place in my heart! These charming little cakes are not just a feast for the eyes with their lovely pink hue, but they also bring a wave of sweet memories that transport me back to simpler times. I remember my grandmother making these whimsical confections for family gatherings, and I can still hear the laughter and joy that filled the kitchen as we eagerly waited to taste her creations.
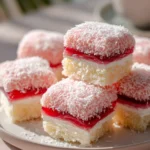
What makes Old Fashioned Pink Jelly Cakes so special is their delightful combination of fluffy sponge cake layered with a luscious jelly filling. The soft, airy texture of the cake perfectly complements the sweet and tangy jelly, creating a harmony of flavors that’s simply irresistible. Whether you’re hosting a tea party, celebrating a birthday, or just craving a nostalgic dessert, these cakes are sure to impress your guests and bring smiles all around. So, let’s don our aprons and dive into this delicious journey of baking, where every bite is a reminder of the love and warmth of home!

Ingredient Notes
When making Old Fashioned Pink Jelly Cakes, it’s essential to gather the right ingredients for that classic flavor and texture. Here’s a breakdown of the key ingredients and some substitutions you might consider.
- Flour: All-purpose flour is the base of the cake. For a gluten-free version, you can substitute with a gluten-free flour blend.
- Sugar: Granulated sugar gives the cake sweetness. You can use coconut sugar for a healthier alternative, but it will slightly alter the flavor.
- Baking powder: This helps the cake rise. Ensure it’s fresh for the best results. Baking soda can be used in a pinch but adjust the amount accordingly.
- Butter: Unsalted butter adds richness. If you need a dairy-free option, use coconut oil or a plant-based butter substitute.
- Eggs: They provide moisture and binding. You can use flaxseed meal mixed with water (1 tablespoon flaxseed meal + 2.5 tablespoons water = 1 egg) as a vegan substitute.
- Milk: Whole milk is traditional, but almond milk or oat milk works well for a non-dairy option.
- Jelly: Raspberry or strawberry jelly is typical for that beautiful pink hue. If you’re looking for a lower-sugar alternative, consider using fruit preserves or a homemade jelly.
Step-by-Step Instructions
Now that we have our ingredients sorted, let’s dive into making these delightful Old Fashioned Pink Jelly Cakes!
- Preheat the Oven: Preheat your oven to 350°F (175°C). Greasing and lining your cake pans with parchment paper will help the cakes come out easily.
- Mix Dry Ingredients: In a large bowl, whisk together 2 cups of all-purpose flour, 1 ½ teaspoons of baking powder, and a pinch of salt. Set this mixture aside.
- Cream Butter and Sugar: In another bowl, cream together 1 cup of unsalted butter and 1 ½ cups of granulated sugar until light and fluffy. This should take about 3-5 minutes.
- Add Eggs: Add in 3 large eggs, one at a time, mixing well after each addition. Make sure to scrape down the sides of the bowl as needed.
- Incorporate Dry Ingredients: Gradually add the dry mixture to the butter mixture, alternating with 1 cup of whole milk. Start and end with the flour mixture, mixing until just combined.
- Fill Pans: Divide the batter evenly between the prepared cake pans. Smooth the tops with a spatula.
- Bake: Bake in the preheated oven for 25-30 minutes, or until a toothpick inserted in the center comes out clean. Allow the cakes to cool in the pans for 10 minutes before transferring them to a wire rack to cool completely.
- Prepare the Jelly: Once the cakes are cool, spread a generous layer of raspberry or strawberry jelly between the layers of cake. If desired, you can also spread jelly on the sides and top of the cake for a beautiful finish.
- Decorate: Optionally, you can dust the top with powdered sugar or decorate with fresh berries for an added touch.
Tips & Suggestions
Here are some handy tips to ensure your Old Fashioned Pink Jelly Cakes turn out perfectly:
- Room Temperature Ingredients: Make sure your butter, eggs, and milk are at room temperature. This helps in achieving a smoother batter and a more even bake.
- Don’t Overmix: When combining the wet and dry ingredients, mix until just combined. Overmixing can lead to dense cakes.
- Check for Doneness: Ovens can vary, so start checking the cakes a few minutes before the suggested time. Remember, every minute counts!
- Layering: For a more decadent cake, consider adding whipped cream or a layer of frosting between the jelly layers.
- Flavor Variations: Experiment with different flavors of jelly or add a splash of vanilla extract to the batter for an extra layer of flavor.
Storage
To keep your Old Fashioned Pink Jelly Cakes fresh and delicious, follow these storage tips:
- Room Temperature: If you plan to eat the cake within a couple of days, you can store it in an airtight container at room temperature.
- Refrigeration: For longer storage, keep the cake in the fridge. It can last up to a week this way. Make sure it’s covered to prevent it from drying out.
- Freezing: You can freeze the cakes if you want to save them for later. Wrap them tightly in plastic wrap and then in aluminum foil. They can be frozen for up to three months. Thaw in the fridge overnight before serving.
Enjoy making these delightful Old Fashioned Pink Jelly Cakes, and I hope they bring a smile to your face and warmth to your gatherings!
Final Thoughts
If you’re looking for a delightful treat that brings a touch of nostalgia to your baking, then the Old Fashioned Pink Jelly Cakes are an absolute must-try! With their soft, fluffy layers and the sweet, fruity essence of jelly, these cakes are perfect for any occasion, whether it’s a cozy family gathering or a sunny afternoon tea with friends. The beautiful pink hue adds a charming visual appeal that will impress your guests and bring smiles to their faces. Plus, they are simple to make and can be enjoyed by everyone, even those who prefer non-alcohol alternatives. So roll up your sleeves, gather your ingredients, and let the Old Fashioned Pink Jelly Cakes transport you to a simpler time filled with warmth and sweetness!
Delicious Old Fashioned Pink Jelly Cakes Recipe to Try Today!
- Total Time: 45 minutes
- Yield: 8 servings 1x
Description
Indulge in the nostalgic flavors of Old Fashioned Pink Jelly Cakes, featuring fluffy sponge cake layered with sweet jelly. Perfect for any occasion, these charming treats will bring smiles to your gatherings!
Ingredients
- 2 cups all-purpose flour
- 1 ½ teaspoons baking powder
- pinch of salt
- 1 cup unsalted butter
- 1 ½ cups granulated sugar
- 3 large eggs
- 1 cup whole milk
- raspberry or strawberry jelly
Instructions
- Preheat your oven to 350°F (175°C). Grease and line your cake pans with parchment paper.
- In a large bowl, whisk together 2 cups of all-purpose flour, 1 ½ teaspoons of baking powder, and a pinch of salt. Set this mixture aside.
- In another bowl, cream together 1 cup of unsalted butter and 1 ½ cups of granulated sugar until light and fluffy, about 3-5 minutes.
- Add in 3 large eggs, one at a time, mixing well after each addition. Scrape down the sides of the bowl as needed.
- Gradually add the dry mixture to the butter mixture, alternating with 1 cup of whole milk. Start and end with the flour mixture, mixing until just combined.
- Divide the batter evenly between the prepared cake pans. Smooth the tops with a spatula.
- Bake in the preheated oven for 25-30 minutes, or until a toothpick inserted in the center comes out clean. Allow the cakes to cool in the pans for 10 minutes before transferring them to a wire rack to cool completely.
- Once the cakes are cool, spread a generous layer of raspberry or strawberry jelly between the layers of cake. Optionally, spread jelly on the sides and top of the cake.
- Optionally, dust the top with powdered sugar or decorate with fresh berries.
- Prep Time: 15 mins
- Cook Time: 30 mins
- Category: Dessert
- Method: Baking
- Cuisine: American
Nutrition
- Serving Size: 1 cake slice
- Calories: 300
- Sugar: 20 g
- Sodium: 150 mg
- Fat: 15 g
- Saturated Fat: 9 g
- Unsaturated Fat: 6 g
- Trans Fat: 0 g
- Carbohydrates: 40 g
- Fiber: 1 g
- Protein: 3 g
- Cholesterol: 70 mg
Keywords: Ensure your butter, eggs, and milk are at room temperature for a smoother batter. Don't overmix the wet and dry ingredients to avoid dense cakes.