One sunny afternoon, I found myself in the kitchen with my niece, Ella, who was buzzing with excitement about the upcoming Easter celebration. We decided to whip up something special together, and that’s when we stumbled upon the idea of White Chocolate Bunny Cakesicles. As we melted the white chocolate and dipped the fluffy cake pops, the sweet aroma filled the room, instantly transporting me back to my own childhood, when my mom would surprise us with delightful treats during the holidays.
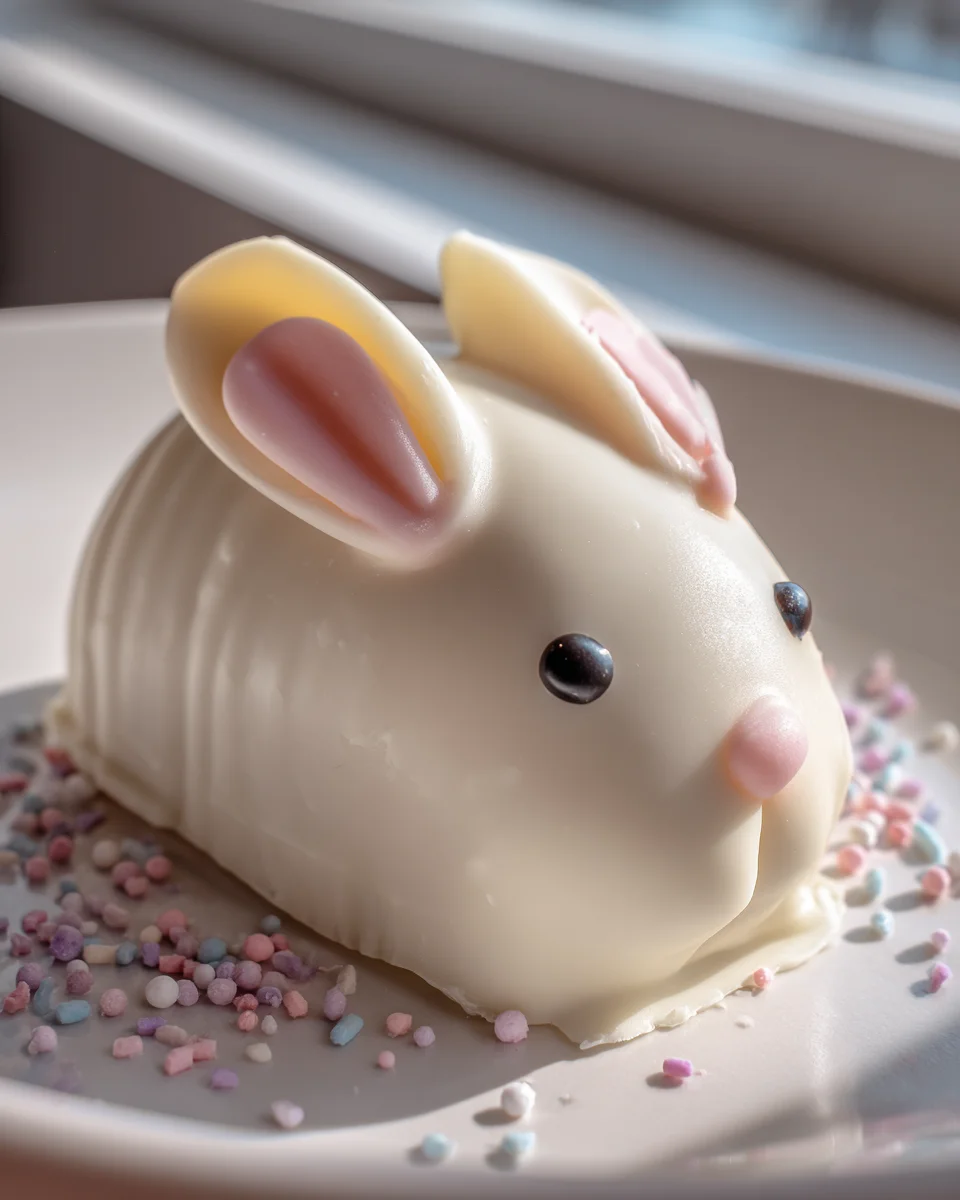
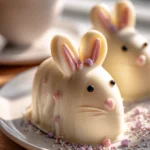
These cakesicles are not just adorable; they’re a delightful fusion of moist cake and creamy white chocolate, encased in a crunchy coating that’s simply irresistible. The moment you take a bite, the luscious sweetness of the white chocolate dances on your palate, perfectly complementing the tender cake interior. And let’s not forget the whimsical bunny shape that adds a touch of fun to any dessert table—perfect for both kids and adults alike!
What makes my version of White Chocolate Bunny Cakesicles stand out is the unique flavor combination I incorporate. I infuse the cake with hints of vanilla and a dash of almond extract, elevating the taste to new heights. Plus, I love to decorate them with colorful sprinkles or edible glitter, making them a feast for the eyes as well as the taste buds.
So, if you’re ready to create some sweet memories in your kitchen, let me show you exactly how to make these delightful White Chocolate Bunny Cakesicles.

Why You’ll Love This Recipe
- Each cakesicle boasts a rich, moist texture that perfectly complements the creamy white chocolate coating.
- Ready in under an hour, this recipe is perfect for quick and delightful treats, making it ideal for last-minute celebrations.
- With a budget-friendly ingredient list, you can whip up these adorable cakesicles without breaking the bank.
- They are endlessly customizable, allowing you to personalize decorations for any occasion, from Easter to birthdays.
- These cakesicles are a hit with both kids and adults, making them a fun treat for parties or family gatherings.
Ingredients
- 1 ½ cups all-purpose flour
- 1 teaspoon baking powder
- ½ teaspoon baking soda
- ½ teaspoon salt
- ½ cup unsalted butter, softened (1 stick)
- 1 cup granulated sugar
- 2 large eggs
- 1 teaspoon vanilla extract
- ½ cup buttermilk
- ½ cup white chocolate chips (for the batter)
- 12 oz white chocolate chips or melting wafers
- 1 tablespoon coconut oil (optional, for a smoother melt)
- Assorted sprinkles (optional)
- Edible eyes (optional)
- Mini chocolate chips (for the nose, optional)
- Pink candy melts or colored icing (for the ears, optional)
- Bunny-shaped cakesicle molds
When it comes to making White Chocolate Bunny Cakesicles, each ingredient plays a crucial role. The all-purpose flour provides the structure needed for the cakes, while the baking powder and baking soda work together to ensure a light and fluffy texture. If you run out of baking powder, you can substitute it with baking soda, but remember to adjust the quantities accordingly.
Unsalted butter not only adds richness but also helps in retaining moisture, creating a tender crumb. If you’re looking for a lighter alternative, you can use coconut oil instead. The buttermilk is essential for adding tanginess and ensuring the cakes remain moist; if you don’t have buttermilk on hand, a mixture of milk and vinegar can work as an effective substitute. Lastly, the white chocolate chips provide that luxurious sweetness and flavor, which is further enhanced by the white chocolate coating.
Step-by-Step Instructions
- Preheat your oven to 350°F (175°C) and grease your bunny-shaped cakesicle molds. The molds should be completely dry, ensuring a smooth release after baking.
- In a medium bowl, whisk together 1 ½ cups of all-purpose flour, 1 teaspoon of baking powder, ½ teaspoon of baking soda, and ½ teaspoon of salt. Mix until well combined, and set aside.
- In a large mixing bowl, cream together ½ cup of softened unsalted butter and 1 cup of granulated sugar using an electric mixer on medium speed for about 3-4 minutes until the mixture is light and fluffy.
- Add 2 large eggs, one at a time, mixing well after each addition. Then, mix in 1 teaspoon of vanilla extract until fully incorporated.
- Gradually add the dry ingredients to the wet mixture, alternating with ½ cup of buttermilk. Start and end with the dry ingredients, mixing until just combined. Be careful not to overmix; a few lumps are okay!
- Fold in ½ cup of white chocolate chips gently until evenly distributed in the batter.
- Spoon the batter into the prepared bunny molds, filling each cavity about two-thirds full. This will allow space for the cakes to rise without overflowing.
- Bake in the preheated oven for 12-15 minutes, or until the edges are lightly golden and a toothpick inserted into the center comes out clean. Keep an eye on them to avoid overbaking, which can dry out the cakes.
- Once baked, remove the molds from the oven and let them cool in the molds for about 5 minutes. Then, gently remove the cakes from the molds and transfer them to a wire rack to cool completely.
- While the cakes cool, melt 12 oz of white chocolate chips or melting wafers in a microwave-safe bowl in 30-second intervals, stirring after each interval until smooth. If desired, add 1 tablespoon of coconut oil to achieve a creamier consistency.
- Once the cakes are cool, dip each one into the melted white chocolate, ensuring they are completely coated. Allow any excess chocolate to drip off before placing them on a parchment-lined baking sheet.
- While the coating is still wet, decorate your cakesicles with assorted sprinkles, edible eyes, mini chocolate chips for noses, or pink candy melts for ears. Get creative!
- Let the decorated cakesicles set at room temperature or place them in the fridge for about 30 minutes until the chocolate coating is firm.
Pro Tips for the Best White Chocolate Bunny Cakesicles
- Ensure the butter is at room temperature for easy creaming with sugar; cold butter can lead to a dense texture.
- A common mistake is overmixing the batter. Mix until just combined to keep the cakes light and fluffy.
- If you’re using molds, be sure to grease them well to prevent sticking. Silicone molds work best for easy release.
- For a smoother white chocolate coating, using coconut oil is a game-changer; it helps prevent the chocolate from hardening too quickly.
- Experiment with different sprinkles and decorations to make each cakesicle unique; this not only enhances their appearance but can also add various flavors and textures.
Variations & Serving Ideas
- Chocolate Bunny Cakesicles: Substitute half of the all-purpose flour with cocoa powder for a chocolate flavor.
- Carrot Cake Bunny Cakesicles: Add 1 cup of grated carrots and spices like cinnamon and nutmeg to the batter for a festive twist.
- Gluten-Free Version: Use a gluten-free flour blend in place of all-purpose flour for a suitable alternative.
- Seasonal Colors: Use colored candy melts to match your occasion, whether it’s pastels for spring or vibrant colors for summer.
For serving ideas, consider pairing your White Chocolate Bunny Cakesicles with a fresh fruit salad for a refreshing contrast. A scoop of vanilla ice cream complements the creamy texture, making for a delightful dessert experience. Additionally, a cup of hot cocoa or a refreshing lemonade can enhance the sweet flavors of the cakesicles, making your dessert table truly inviting.
Storage, Make-Ahead & Reheating
Store your White Chocolate Bunny Cakesicles in an airtight container in the refrigerator for up to 5 days. They can also be frozen for up to 2 months; just make sure to wrap each cakesicle individually in plastic wrap before placing them in a freezer-safe bag. To reheat, let them thaw in the refrigerator overnight and enjoy them at room temperature. Interestingly, these cakesicles tend to taste even better the next day, as the flavors meld beautifully!
Frequently Asked Questions
Can I make White Chocolate Bunny Cakesicles ahead of time?
Yes — in fact, they taste even better the next day! You can prepare the cakes up to 2 days in advance and store them in the fridge, then dip and decorate them just before serving for a fresh look.
What if I don’t have bunny molds?
If bunny molds are unavailable, you can use any cake pop mold or even cut the cakes into bunny shapes after baking. Just ensure they are thoroughly cooled to avoid crumbling.
Can I use dark chocolate instead of white chocolate?
Absolutely! While the recipe is designed for white chocolate, dark chocolate can add a rich flavor contrast. Just be aware that it will alter the overall sweetness of the cakesicles.
How can I make these cakesicles more festive?
To add a festive touch, consider using seasonal sprinkles, colored icing for decoration, or even themed edible decorations to match holidays or events!
What should I do if my white chocolate coating is too thick?
If your white chocolate coating is too thick, try adding a bit more coconut oil or shortening to the melted chocolate and stir until you reach a smoother consistency. This will help it coat the cakesicles evenly.
Final Thoughts
White Chocolate Bunny Cakesicles are not just a treat; they are a delightful celebration of flavors and creativity that brings joy to any occasion. The creamy white chocolate enveloping the moist cake pops creates a satisfying contrast that’s hard to resist.
This is the kind of recipe I come back to again and again, especially when I want to surprise loved ones with something sweet and whimsical. Each bite evokes a sense of nostalgia and joy, making it perfect for holidays or simply as a delightful afternoon snack.
I encourage you to give these cakesicles a try! Experiment with flavors or decorations to make them your own. Don’t forget to share your results or any unique twists you come up with; I’d love to see your creations!
Delicious White Chocolate Bunny Cakesicles Recipe for Easter Fun
- Total Time: 30 minutes
- Yield: 12 cakesicles 1x
Description
These White Chocolate Bunny Cakesicles are a delightful fusion of moist cake and creamy white chocolate, perfect for Easter celebrations. Adorable and customizable, they bring joy to both kids and adults alike!
Ingredients
- 1 ½ cups all-purpose flour
- 1 teaspoon baking powder
- ½ teaspoon baking soda
- ½ teaspoon salt
- ½ cup unsalted butter, softened (1 stick)
- 1 cup granulated sugar
- 2 large eggs
- 1 teaspoon vanilla extract
- ½ cup buttermilk
- ½ cup white chocolate chips (for the batter)
- 12 oz white chocolate chips or melting wafers
- 1 tablespoon coconut oil (optional, for a smoother melt)
- Assorted sprinkles (optional)
- Edible eyes (optional)
- Mini chocolate chips (for the nose, optional)
- Pink candy melts or colored icing (for the ears, optional)
- Bunny-shaped cakesicle molds
Instructions
- Preheat your oven to 350°F (175°C) and grease your bunny-shaped cakesicle molds. The molds should be completely dry, ensuring a smooth release after baking.
- In a medium bowl, whisk together 1 ½ cups of all-purpose flour, 1 teaspoon of baking powder, ½ teaspoon of baking soda, and ½ teaspoon of salt. Mix until well combined, and set aside.
- In a large mixing bowl, cream together ½ cup of softened unsalted butter and 1 cup of granulated sugar using an electric mixer on medium speed for about 3-4 minutes until the mixture is light and fluffy.
- Add 2 large eggs, one at a time, mixing well after each addition. Then, mix in 1 teaspoon of vanilla extract until fully incorporated.
- Gradually add the dry ingredients to the wet mixture, alternating with ½ cup of buttermilk. Start and end with the dry ingredients, mixing until just combined. Be careful not to overmix; a few lumps are okay!
- Fold in ½ cup of white chocolate chips gently until evenly distributed in the batter.
- Spoon the batter into the prepared bunny molds, filling each cavity about two-thirds full. This will allow space for the cakes to rise without overflowing.
- Bake in the preheated oven for 12-15 minutes, or until the edges are lightly golden and a toothpick inserted into the center comes out clean. Keep an eye on them to avoid overbaking, which can dry out the cakes.
- Once baked, remove the molds from the oven and let them cool in the molds for about 5 minutes. Then, gently remove the cakes from the molds and transfer them to a wire rack to cool completely.
- While the cakes cool, melt 12 oz of white chocolate chips or melting wafers in a microwave-safe bowl in 30-second intervals, stirring after each interval until smooth. If desired, add 1 tablespoon of coconut oil to achieve a creamier consistency.
- Once the cakes are cool, dip each one into the melted white chocolate, ensuring they are completely coated. Allow any excess chocolate to drip off before placing them on a parchment-lined baking sheet.
- While the coating is still wet, decorate your cakesicles with assorted sprinkles, edible eyes, mini chocolate chips for noses, or pink candy melts for ears. Get creative!
- Let the decorated cakesicles set at room temperature or place them in the fridge for about 30 minutes until the chocolate coating is firm.
- Prep Time: 15 mins
- Cook Time: 15 mins
- Category: Dessert
- Method: Baking
- Cuisine: American
Nutrition
- Serving Size: 1 cakesicle
- Calories: 200
- Sugar: 15 g
- Sodium: 150 mg
- Fat: 10 g
- Saturated Fat: 6 g
- Unsaturated Fat: 3 g
- Trans Fat: 0 g
- Carbohydrates: 25 g
- Fiber: 1 g
- Protein: 2 g
- Cholesterol: 40 mg
Keywords: Ensure the butter is at room temperature for easy creaming with sugar; cold butter can lead to a dense texture. A common mistake is overmixing the batter. Mix until just combined to keep the cakes light and fluffy.