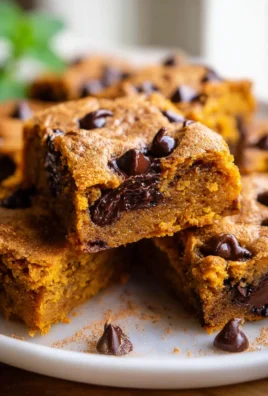
Easy Caramel Cookie Bars
Oh my goodness, do I have a treat for you today! If you’re anything like me, you adore the magical combination of a buttery, chewy cookie and rich, gooey caramel. And if you also appreciate a dessert that looks impressive but is secretly super simple to make, then you are absolutely going to fall head over heels for these Easy Caramel Cookie Bars.
What makes these bars truly special is right there in the name: they’re incredibly easy to whip up, meaning less time in the kitchen and more time enjoying that first glorious bite. Forget fiddly individual cookies or complex baking projects; these bars come together with a simple press-in crust, a generous layer of luscious caramel, and a delightful crumbly topping that bakes into pure bliss.
You’ll love them because they’re the ultimate crowd-pleaser – perfect for potlucks, parties, or just a cozy night in with a mug of coffee. Every bite offers that perfect symphony of a soft, golden cookie base, a stretchy, buttery caramel center, and a satisfying chewiness that will have everyone asking for the recipe. Trust me, these aren’t just any cookie bars; they’re a little slice of caramel heaven that’s destined to become a staple in your baking repertoire!

Ingredient Notes
Crafting these Easy Caramel Cookie Bars is an absolute joy, and it all starts with understanding the stars of the show in your ingredient list. I’ve designed this recipe to be straightforward, leaning on readily available items, but I also love giving you options for making it your own!
- Unsalted Butter: This is the foundation of our rich, chewy cookie base. I always recommend unsalted butter so you can control the salt content yourself. Make sure it’s softened to room temperature for the best creaming results. If you only have salted butter, you can use it, but I’d suggest reducing any added salt in the cookie dough by about a quarter teaspoon to avoid an overly salty outcome. Margarine can be used as a substitute in a pinch, but be aware that it might slightly alter the texture and flavor, resulting in a less rich dough.
- Granulated Sugar & Brown Sugar: The combination of these two sugars is key for both flavor and texture. Granulated sugar provides crispness and sweetness, while brown sugar adds moisture, chewiness, and that lovely molasses undertone that complements caramel so well. Light brown sugar is my preference here, but dark brown sugar will give a deeper, more pronounced caramel-like flavor to your cookie base. I don’t recommend significantly altering the sugar quantities, as it affects both the structure and moisture of the bars.
- Large Egg: Our binding agent! An egg helps bring all the ingredients together, adding structure and richness to the cookie dough. Ensure it’s also at room temperature so it incorporates smoothly into your butter and sugar mixture, preventing curdling.
- Vanilla Extract: A dash of good quality vanilla is non-negotiable for me. It enhances all the other flavors in the cookie base and works beautifully with the caramel. Pure vanilla extract is always best, but imitation vanilla will work if that’s what you have.
- All-Purpose Flour: The primary structural component of our cookie base. I always use unbleached all-purpose flour. Make sure to measure it correctly – spooning the flour into your measuring cup and leveling it off, rather than scooping directly from the bag, is my go-to method to avoid a dense, dry cookie. For a gluten-free alternative, a 1:1 gluten-free baking blend that contains xanthan gum can often be swapped in directly, but keep an eye on the dough consistency as some blends absorb liquid differently.
- Baking Soda: This leavening agent helps our cookie base rise slightly and contributes to its tender texture. Make sure your baking soda is fresh for optimal results!
- Salt: Just a pinch of salt balances the sweetness and brings out the depth of the other flavors. Don’t skip it! If using salted butter, remember my advice about reducing the added salt.
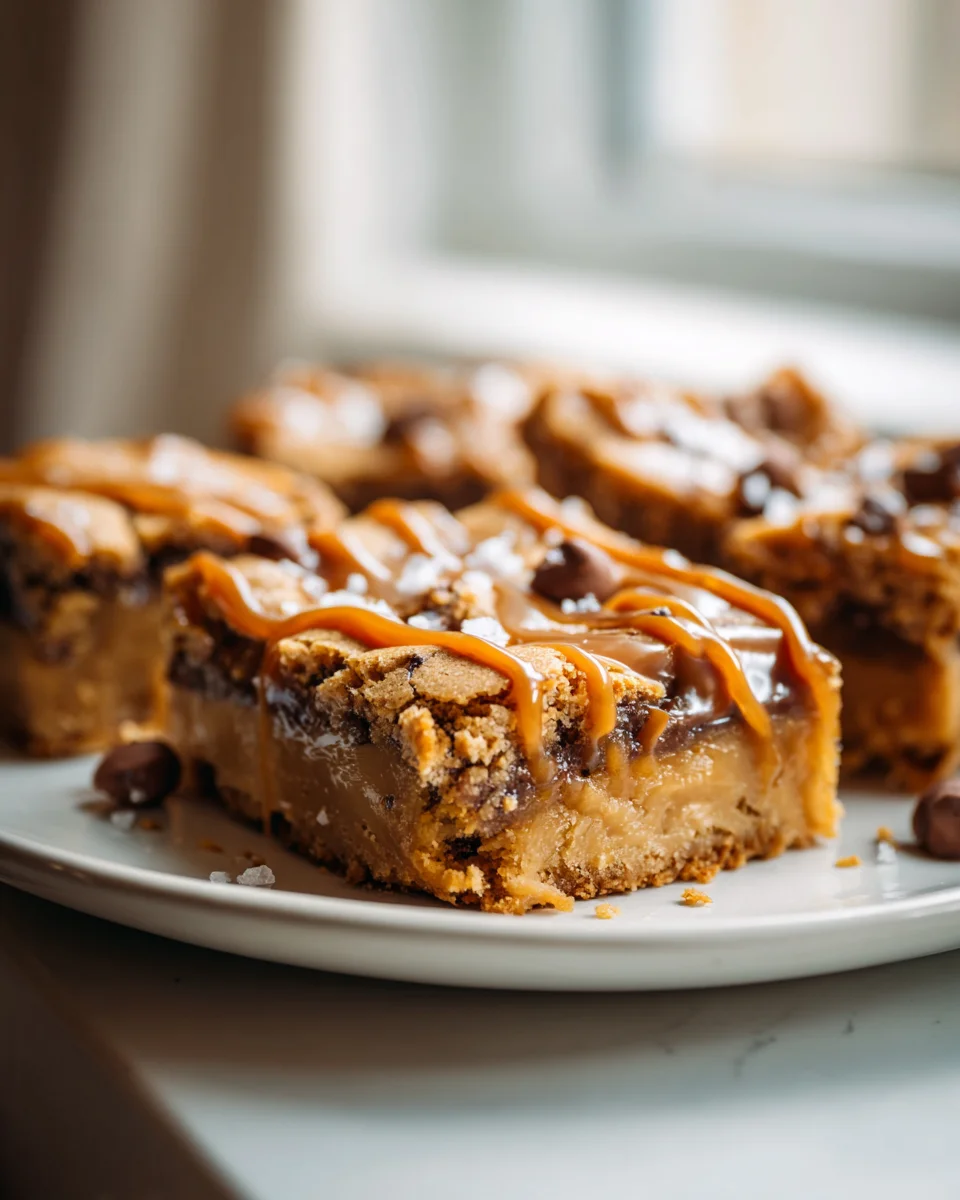
- Store-Bought Caramels: This is where the “easy” truly shines in these cookie bars! Individually wrapped soft caramels (like Kraft Caramels) are perfect for this recipe. You’ll need about a 14-ounce bag. The beauty of using these is the consistent texture and flavor, plus it saves you a ton of time. If you’re feeling ambitious, you could make homemade caramel or dulce de leche, but you’ll need to ensure its consistency is thick enough to set properly when cooled – a softer caramel might make your bars too gooey to cut cleanly.
- Heavy Cream (or Milk): This is crucial for melting down those caramels into a smooth, pourable sauce. Heavy cream will give you a richer, thicker caramel layer, which I prefer. Whole milk can be used as a substitute, but your caramel layer might be slightly thinner. I wouldn’t recommend using skim milk as it often doesn’t provide enough fat to create the desired consistency for the caramel.
- Optional: Chocolate Chips or Sea Salt: I love adding a handful of chocolate chips to my cookie base for an extra layer of flavor and texture. Semi-sweet or milk chocolate chips are fantastic. A sprinkle of flaky sea salt over the warm caramel layer after baking is also a game-changer – it really elevates the caramel flavor and adds a gourmet touch.
Step-by-Step Instructions
Let’s get baking! Follow these simple steps to create your irresistibly delicious Easy Caramel Cookie Bars. I’ve broken it down so you can nail it every time.
- Prepare Your Pan: First things first, preheat your oven to 350°F (175°C). Then, grab a 9×13 inch baking pan. This is a crucial step for easy removal and cleanup: line the pan with parchment paper, leaving an overhang on the sides. This “sling” will be your best friend later when you need to lift the cooled bars out. A little spray with non-stick cooking spray on the parchment paper and the exposed sides of the pan can also help, just to be extra safe.
- Cream Butter and Sugars: In a large mixing bowl, using an electric mixer (or a stand mixer with the paddle attachment), beat the softened unsalted butter with both the granulated sugar and brown sugar until the mixture is light, fluffy, and pale in color. This usually takes about 2-3 minutes. This creaming process incorporates air, which contributes to the tender texture of your cookie base.
- Add Wet Ingredients: Beat in the large egg and vanilla extract until they are just combined. Don’t overmix here; you just want to see everything come together smoothly. Scraping down the sides of the bowl with a rubber spatula ensures everything is incorporated.
- Combine Dry Ingredients: In a separate medium bowl, whisk together the all-purpose flour, baking soda, and salt. Whisking them together first ensures that the leavening agent and salt are evenly distributed throughout the dough, so you don’t end up with pockets of unmixed ingredients.
- Add Dry to Wet: Gradually add the dry ingredients to the wet ingredients, mixing on low speed until just combined. Be careful not to overmix the dough once the flour is added, as this can develop the gluten too much, leading to tough bars. If you’re adding chocolate chips or other mix-ins, gently fold them in now.
- Form the Base Layer: Take about two-thirds of the cookie dough and press it evenly into the bottom of your prepared 9×13 inch pan. I find lightly floured hands or the back of a spoon work best for this. Make sure it’s an even layer from edge to edge so it bakes uniformly.
- Pre-Bake the Base: Place the pan in your preheated oven and bake for 12-15 minutes, or until the edges are lightly golden and the center is just set. We’re not fully baking it yet, just giving it a head start to ensure it can support the caramel layer.
- Prepare the Caramel Layer: While the base is pre-baking, unwrap all your store-bought caramels and place them in a microwave-safe bowl with the heavy cream (or milk). Microwave on high power in 30-second intervals, stirring well after each, until the caramels are completely melted and smooth. This usually takes about 1.5 to 2.5 minutes, depending on your microwave. Alternatively, you can melt them in a saucepan over low heat, stirring constantly, until smooth.
- Assemble the Layers: Once the cookie base is pre-baked, remove the pan from the oven. Carefully pour the melted caramel mixture evenly over the warm cookie base, spreading it gently with a spatula if needed.
- Add the Topping: Crumble the remaining one-third of the cookie dough over the caramel layer. Don’t worry about perfectly even coverage here; the crumbled pieces will spread and meld during baking, creating a delightful rustic topping.
- Final Bake: Return the pan to the oven and bake for an additional 20-25 minutes, or until the cookie topping is golden brown and the caramel underneath is bubbly around the edges. If you’re adding flaky sea salt, sprinkle it over the bars immediately after removing them from the oven while the caramel is still warm and soft.
- Cool Completely: This is arguably the most critical step for beautiful, clean-cut bars! Allow the bars to cool completely in the pan on a wire rack for at least 2-3 hours, or even longer. For truly pristine squares, I sometimes even pop them in the refrigerator for an hour once they’ve cooled down a bit. The caramel needs to firm up completely before you attempt to cut them.
- Slice and Serve: Once fully cooled, use the parchment paper overhang to lift the entire slab of bars out of the pan. Place it on a cutting board and cut into squares or rectangles using a sharp, non-serrated knife. If your knife gets sticky, wipe it clean between cuts. Enjoy!
Tips & Suggestions
These Easy Caramel Cookie Bars are already pretty foolproof, but I’ve got a few tricks up my sleeve to make them absolutely perfect every single time. Pay attention to these little details, and you’ll be a caramel cookie bar maestro!
- Don’t Overbake the Cookie Base: The initial bake for the bottom cookie layer is just a partial bake. We want it to be set but still slightly soft. Overbaking at this stage will result in a dry, crumbly base that doesn’t meld as nicely with the caramel. Remember, it will go back into the oven for a second bake!
- The Art of Cooling is Key: I cannot stress this enough – patience is a virtue when it comes to these bars! The caramel layer needs ample time to cool and firm up completely. If you try to cut them while they’re still warm, you’ll end up with a delicious but messy, gooey disaster. Trust me, it’s worth the wait for clean, perfect squares. For extra clean cuts, you can even chill the completely cooled bars in the refrigerator for 30-60 minutes before slicing.
- Perfectly Melted Caramel: When melting your caramels, low and slow is the way to go, especially if using a stovetop. If microwaving, stir diligently between each 30-second burst. Overheating caramel can cause it to seize or burn, leading to a gritty or bitter texture. The heavy cream (or milk) helps immensely in keeping it smooth and pourable.
- Embrace the Sea Salt: If you’re a fan of salted caramel, a generous sprinkle of flaky sea salt (like Maldon) over the warm caramel layer right after the final bake is an absolute must. It really brightens the sweetness and adds a sophisticated pop of flavor. Don’t use regular table salt; the coarse texture of flaky sea salt is what you’re after.
- Vary Your Cookie Base: While I love a classic chocolate chip cookie base, feel free to get creative!
- Nutty Bars: Add 1/2 cup of chopped pecans or walnuts to your cookie dough for a wonderful crunch and depth of flavor.
- Different Chips: Swap out semi-sweet chocolate chips for milk chocolate, dark chocolate, white chocolate, or even toffee bits!
- Spice It Up: A pinch of cinnamon or nutmeg in the cookie dough can add a cozy, warming note that pairs beautifully with the caramel.
- Clean Cuts Every Time: For neat squares, use a large, sharp chef’s knife. If the caramel starts to stick, wipe the blade clean with a damp paper towel between each cut. Sometimes running the knife under hot water, drying it, and then cutting also helps achieve cleaner lines.
- Don’t Forget the Parchment Paper Sling: That parchment paper overhang isn’t just for easy cleanup. It’s your secret weapon for lifting the entire batch of cooled bars out of the pan in one piece. This makes cutting so much easier than trying to slice them directly in the pan.
Storage
You’ve put in the effort to bake these glorious Easy Caramel Cookie Bars, and now you want to make sure they stay fresh and delicious for as long as possible! Here’s my best advice for storing them, whether you plan to devour them quickly or save some for later.
- At Room Temperature: This is my preferred method for short-term storage. Once the bars are completely cooled and cut, place them in an airtight container. A single layer is ideal, but if you need to stack them, place a piece of parchment paper or wax paper between the layers to prevent them from sticking together. Stored this way, your Easy Caramel Cookie Bars will stay fresh and wonderfully chewy for up to 3-4 days. I find the texture is best at room temperature, as the caramel remains perfectly soft and gooey.
- In the Refrigerator: If your kitchen is particularly warm, or if you prefer a firmer bar, you can store these in the refrigerator. Again, place them in an airtight container, using parchment or wax paper between layers if stacking. They will keep well in the fridge for up to a week. Be aware that the caramel layer will become quite firm when chilled. If you prefer a softer caramel, simply let them sit at room temperature for about 15-30 minutes before serving to allow the caramel to soften slightly.
- Freezing for Longer Storage: These cookie bars freeze beautifully, which is fantastic news if you want to make a big batch or save some for a rainy day!
- Individual Wrapping: Once the bars are completely cooled and cut, wrap each individual bar tightly in plastic wrap. This prevents freezer burn and makes it easy to grab just one or two at a time.
- Airtight Container/Bag: Place the individually wrapped bars into a larger freezer-safe airtight container or a heavy-duty freezer bag. Squeeze out as much air as possible if using a bag.
- Duration: They can be stored in the freezer for up to 2-3 months.
- Thawing: When you’re ready to enjoy, simply remove the desired number of bars from the freezer. You can let them thaw at room temperature for about an hour, or overnight in the refrigerator. I sometimes even pop a frozen bar into the microwave for 10-15 seconds (without the plastic wrap, of course!) for a quick, warm, gooey treat.
Final Thoughts
And there you have it! I truly believe my recipe for Easy Caramel Cookie Bars is a genuine game-changer and an absolute must-try. It’s not just about making a dessert; it’s about creating pure joy with minimal fuss. These bars perfectly capture that irresistible blend of chewy cookie goodness and decadent, gooey caramel, all wrapped up in a package that lives up to its “easy” name. Whether you’re looking for a crowd-pleasing treat for a gathering, a comforting snack for your family, or just a little something special to brighten your day, these Easy Caramel Cookie Bars deliver every single time. Get ready to fall in love with their incredible flavor and delightful simplicity!
Easy Caramel Cookie Bars: Best Chewy & Gooey Dessert!
- Total Time: 1 hour
- Yield: 16 servings 1x
Description
Indulge in the delightful combination of buttery, chewy cookies and rich, gooey caramel with these Easy Caramel Cookie Bars. Perfect for any occasion, these bars are simple to make and sure to impress your guests!
Ingredients
- 1 cup Unsalted Butter, softened
- 1/2 cup Granulated Sugar
- 1 cup Brown Sugar
- 1 Large Egg
- 1 teaspoon Vanilla Extract
- 2 1/4 cups All-Purpose Flour
- 1 teaspoon Baking Soda
- 1/2 teaspoon Salt
- 14 ounces Store-Bought Caramels
- 1/2 cup Heavy Cream (or Milk)
- Optional: 1/2 cup Chocolate Chips or Sea Salt
Instructions
- Preheat your oven to 350°F (175°C) and line a 9×13 inch baking pan with parchment paper, leaving an overhang on the sides.
- In a large mixing bowl, beat the softened unsalted butter with both the granulated sugar and brown sugar until light and fluffy, about 2-3 minutes.
- Beat in the large egg and vanilla extract until just combined, being careful not to overmix.
- In a separate bowl, whisk together the all-purpose flour, baking soda, and salt.
- Gradually add the dry ingredients to the wet ingredients, mixing on low speed until just combined. If adding chocolate chips, fold them in now.
- Press about two-thirds of the cookie dough evenly into the bottom of the prepared pan.
- Pre-bake the base for 12-15 minutes, until the edges are lightly golden and the center is just set.
- While the base is pre-baking, unwrap the caramels and place them in a microwave-safe bowl with the heavy cream. Microwave in 30-second intervals, stirring until melted and smooth.
- Once the cookie base is pre-baked, pour the melted caramel mixture evenly over it.
- Crumble the remaining one-third of the cookie dough over the caramel layer.
- Return the pan to the oven and bake for an additional 20-25 minutes, until the topping is golden brown and the caramel is bubbly around the edges.
- Allow the bars to cool completely in the pan on a wire rack for at least 2-3 hours before slicing.
- Prep Time: 20 mins
- Cook Time: 40 mins
- Category: Dessert
- Method: Baking
- Cuisine: American
Nutrition
- Serving Size: 1 bar
- Calories: 250
- Sugar: 20 g
- Sodium: 150 mg
- Fat: 12 g
- Saturated Fat: 7 g
- Unsaturated Fat: 4 g
- Trans Fat: 0 g
- Carbohydrates: 34 g
- Fiber: 1 g
- Protein: 2 g
- Cholesterol: 30 mg
Keywords: For best results, do not overbake the cookie base and allow ample cooling time for clean cuts. A sprinkle of flaky sea salt enhances the caramel flavor beautifully.