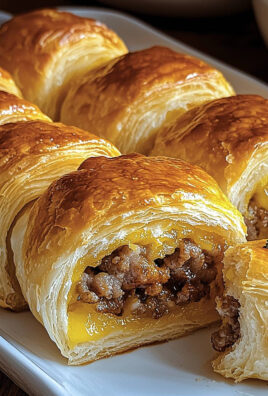
Protein Pop Tarts Recipe – does that sound like an impossible dream? For years, I, like many of you, cherished the nostalgic delight of a classic toaster pastry. The sweet, fruity filling encased in a golden, flaky crust brought instant comfort and a simple joy to breakfast. However, as our understanding of nutrition evolves, many of us seek options that not only satisfy our cravings but also fuel our bodies effectively.
That’s precisely where this incredible creation comes in. This isn’t just about recreating a childhood favorite; it’s about elevating it, transforming it into a powerhouse of nutrition without sacrificing an ounce of flavor or that coveted texture. Imagine a warm, soft pastry, bursting with a delightful filling, and knowing each bite contributes positively to your daily protein intake. It’s the perfect blend of indulgence and smart eating, making it ideal for a quick breakfast, a satisfying snack, or even a healthier dessert alternative. This innovative Protein Pop Tarts Recipe offers a guilt-free way to enjoy a beloved treat, proving that healthy eating can be just as delicious and convenient as its traditional counterpart. Get ready to redefine your breakfast routine!

Ingredients:
- For the Protein Pastry Dough:
- 1 ½ cups (180g) all-purpose flour (or a 1:1 gluten-free baking blend for a GF option)
- ½ cup (60g) vanilla or unflavored whey protein powder (I find whey blends best for texture here, but you can experiment with others)
- ¼ cup (50g) erythritol or granular sweetener of choice (adjust to your sweetness preference)
- ½ teaspoon baking powder
- ¼ teaspoon salt
- 6 tablespoons (85g) unsalted butter, very cold and cut into small cubes (or a plant-based butter alternative for dairy-free)
- ¼ cup (60ml) ice-cold water, plus 1-2 tablespoons more if needed
- 1 teaspoon vanilla extract
- For the Fruit & Protein Filling:
- 1 cup (240g) mixed berries (fresh or frozen, I love a blend of raspberries and blueberries)
- 2 tablespoons (30g) vanilla or berry-flavored protein powder (casein works well for thickness here, but whey is fine too)
- 1 tablespoon chia seeds (these really help to thicken the filling naturally)
- 1-2 tablespoons (15-30ml) water or almond milk, as needed for consistency
- 1 tablespoon (15ml) maple syrup or honey (optional, for extra sweetness)
- ½ teaspoon lemon juice (to brighten the flavors)
- For the Protein Glaze:
- ½ cup (60g) powdered erythritol or sugar-free powdered sweetener
- 2 tablespoons (30g) vanilla or unflavored protein powder (whey or casein works)
- 2-3 tablespoons (30-45ml) almond milk or water
- ¼ teaspoon vanilla extract
- A tiny pinch of salt (enhances sweetness)
- Optional: Food coloring for fun, or sprinkles for a festive touch!
Phase 1: Preparing the Protein Pastry Dough
- Combine Dry Ingredients: In a large mixing bowl, I like to start by whisking together my all-purpose flour, protein powder, erythritol (or chosen granular sweetener), baking powder, and salt. Make sure everything is really well combined. This step is crucial for even distribution of flavors and leavening. I always give it a good minute or two with a balloon whisk to ensure there are no clumps of protein powder.
- Cut in the Cold Butter: Now, it’s time for the butter. I add my very cold, cubed unsalted butter to the dry ingredients. Using a pastry blender, two knives, or even your fingertips (working quickly so the butter doesn’t get too warm), cut the butter into the flour mixture until it resembles coarse crumbs with some pea-sized pieces remaining. The key here is to keep the butter as cold as possible; this is what creates that wonderful flaky texture we’re aiming for in our Protein Pop Tarts Recipe. If the butter melts too much, your pastry will be tough.
- Introduce Wet Ingredients: In a separate small bowl or measuring cup, I combine the ice-cold water and vanilla extract. Slowly, I add this liquid mixture to the flour and butter mixture, starting with ¼ cup. Using a fork, stir until the dough just begins to come together. I find it’s better to add liquid gradually. If the dough still seems too dry and crumbly, I’ll add an additional tablespoon of ice water at a time, mixing gently after each addition, until the dough forms a cohesive ball. Be careful not to overmix; overworking the dough develops gluten, leading to a tough pastry.
- Form and Chill the Dough: Once the dough comes together, I gently gather it into a disk shape. I flatten it slightly, wrap it tightly in plastic wrap, and then place it in the refrigerator for at least 30 minutes, or even up to an hour. Chilling the dough is an absolutely vital step for several reasons: it allows the gluten to relax, which makes the dough easier to roll out, and it re-chills the butter, which is essential for that flaky texture. This patience now will pay off in the final delightful bite of your protein pop tart.
- Prepare Your Workspace: While the dough is chilling, I like to prepare my workspace. I grab some parchment paper, a rolling pin, and a sharp knife or pizza cutter. Having everything ready before the dough comes out of the fridge ensures I can work efficiently while the dough is still cold.
Phase 2: Crafting the Filling
- Combine Ingredients: In a small saucepan, I combine my mixed berries, two tablespoons of water (or almond milk), and the optional maple syrup or honey. I place the saucepan over medium heat, bringing the mixture to a gentle simmer. I cook this for about 5-7 minutes, stirring occasionally, until the berries have softened and started to break down, releasing their juices. The aroma filling my kitchen at this point is always a wonderful preview of what’s to come!
- Thicken and Flavor: Once the berries are jammy, I remove the saucepan from the heat. I then stir in the protein powder, chia seeds, and lemon juice. I mix everything really well until the protein powder is fully incorporated and there are no lumps. The chia seeds will slowly begin to absorb moisture and thicken the mixture as it cools.
- Adjust Consistency: I allow the filling to cool for about 10-15 minutes. As it cools, it will continue to thicken significantly thanks to the chia seeds. If it seems too thick, I might add another tablespoon of water or almond milk to reach a spreadable, jam-like consistency. If it’s too thin, you can let it sit a little longer or add a tiny bit more chia seeds, though be careful not to make it overly gel-like. The ideal consistency is thick enough to hold its shape but still easy to spread. This protein-packed filling is truly the heart of our Protein Pop Tarts Recipe.
- Taste and Adjust: This is my favorite part – a little taste test! I check for sweetness and acidity. If I want it sweeter, I’ll add a tiny bit more sweetener. If it needs a little more zing, another squeeze of lemon juice does the trick.
Phase 3: Assembling and Baking Your Pop Tarts
- Preheat Oven and Prepare Baking Sheet: While the filling cools and the dough chills, I preheat my oven to 375°F (190°C). I also line a large baking sheet with parchment paper. This prevents sticking and makes cleanup a breeze.
- Roll Out the Dough: I retrieve the chilled dough from the refrigerator. On a lightly floured surface (or between two sheets of parchment paper, which I often prefer to avoid adding too much extra flour), I roll out the dough into a large rectangle, roughly 1/8 to 1/4 inch thick. I aim for a rectangle approximately 12×16 inches, but the exact dimensions aren’t as important as uniform thickness. Thin dough will be crispy, thicker dough will be chewier.
- Cut into Rectangles: Using a sharp knife or pizza cutter, I carefully trim the edges to create a neat rectangle. Then, I cut the large rectangle into 8 smaller, even rectangles – each about 3×4 inches. This will give me 4 complete protein pop tarts. Don’t worry if your cuts aren’t perfectly straight; rustic charm is always in style!
- Portion the Filling: On four of the dough rectangles, I spoon about 1-2 tablespoons of the cooled berry-protein filling onto the center of each, leaving a clear border of about ½ inch around the edges. Be careful not to overfill, as this can cause the filling to leak out during baking. I always make sure to keep that border clear for sealing.
- Create the Top Layer: I gently place the remaining four dough rectangles on top of the filled ones, carefully aligning the edges. This forms the top crust of my protein pop tarts.
- Seal the Edges: Now for the crucial sealing step! Using my fingertips, I gently press down around the edges of each pop tart to seal the two dough layers together. Then, with the tines of a fork, I firmly crimp all around the edges of each pop tart. This not only creates that classic pop tart look but also helps to securely seal the filling inside, preventing any delicious goo from escaping during baking. A good seal is essential for a tidy finish.
- Vent the Pop Tarts: Before baking, I use a fork or a skewer to poke a few small holes in the top of each pop tart. These vents are important as they allow steam to escape during baking, preventing the pop tarts from puffing up excessively and cracking. It’s a small step that makes a big difference in presentation and texture.
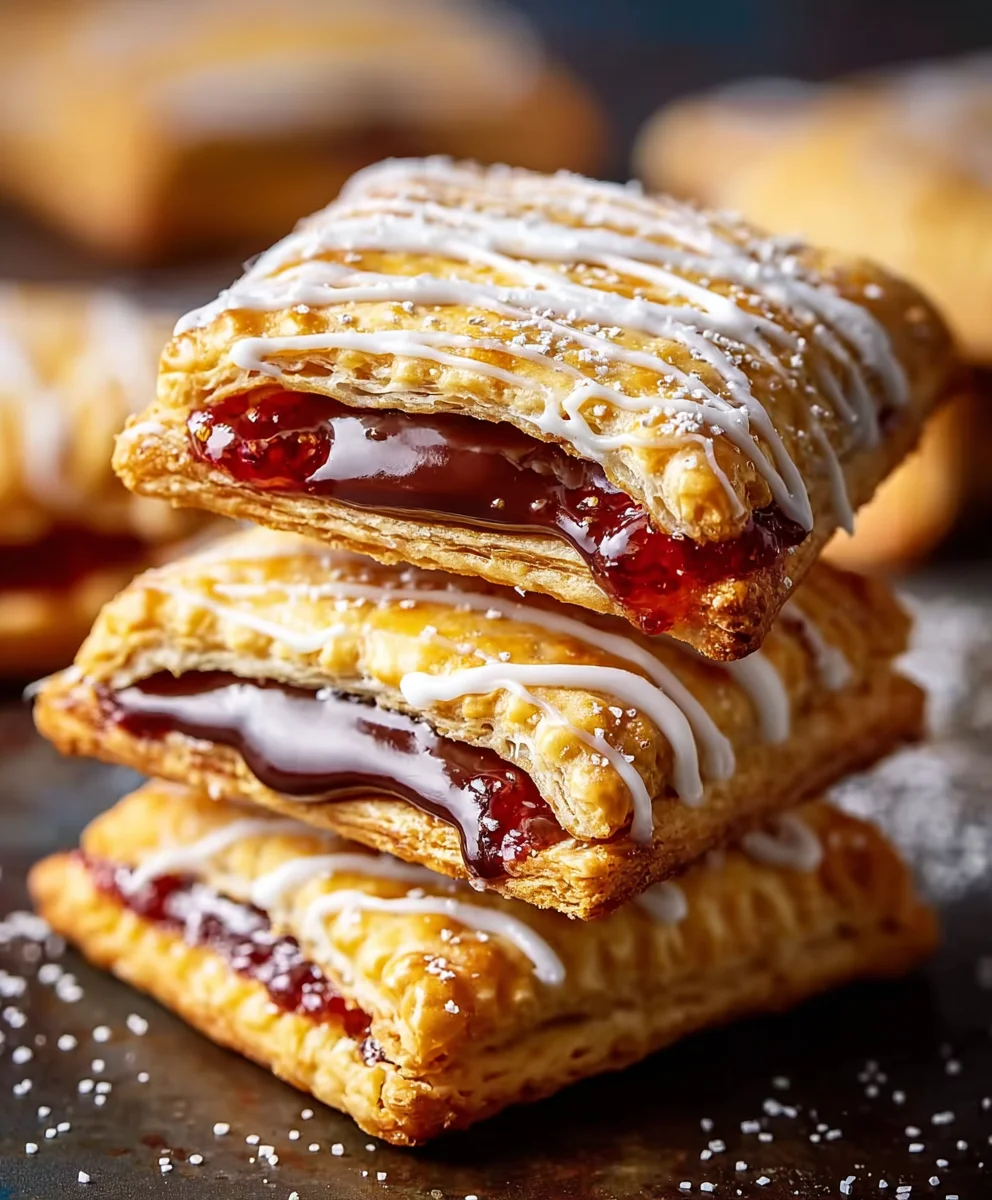
- Bake to Golden Perfection: I carefully transfer the assembled protein pop tarts to the prepared baking sheet. I place them in the preheated oven and bake for 15-20 minutes, or until the edges are golden brown and the pastry looks cooked through. Keep a close eye on them towards the end, as oven temperatures can vary. I’m looking for a beautiful, inviting golden hue.
- Cool Completely: Once baked, I remove the protein pop tarts from the oven and transfer them to a wire rack to cool completely. This cooling period is important because it allows the pastry to firm up and the filling to set further. Attempting to glaze them while warm will result in a runny, messy glaze. I usually let them cool for at least 30 minutes.
Phase 4: Whipping Up the Protein Glaze
- Combine Dry Glaze Ingredients: In a small bowl, I combine the powdered erythritol (or powdered sweetener of choice) and the protein powder. I always use powdered sweetener here because granulated will give a gritty texture. Whisking these dry ingredients together first helps prevent lumps when liquid is added.
- Add Wet Ingredients: Gradually, I add the almond milk (or water) and vanilla extract to the dry ingredients, stirring continuously with a small whisk or spoon. I start with 2 tablespoons of liquid and add more, a tiny bit at a time, until I reach a smooth, pourable consistency. I also add that tiny pinch of salt to balance the sweetness.
- Adjust Consistency: The glaze should be thick enough to coat the back of a spoon but still flow slowly. If it’s too thick, I add a few more drops of milk. If it’s too thin, a tiny bit more powdered sweetener or protein powder will help. This is where personal preference comes in; some like a thicker, opaque glaze, while others prefer a thinner, shinier finish. I always aim for a consistency that will spread easily but set firmly.
- Optional Enhancements: If I’m feeling fancy, this is the stage where I might add a drop of food coloring to my glaze for a vibrant hue, or a tiny amount of lemon zest for an extra burst of flavor. This simple protein glaze takes our Protein Pop Tarts Recipe to the next level!
Phase 5: Glazing and Enjoying Your Masterpiece
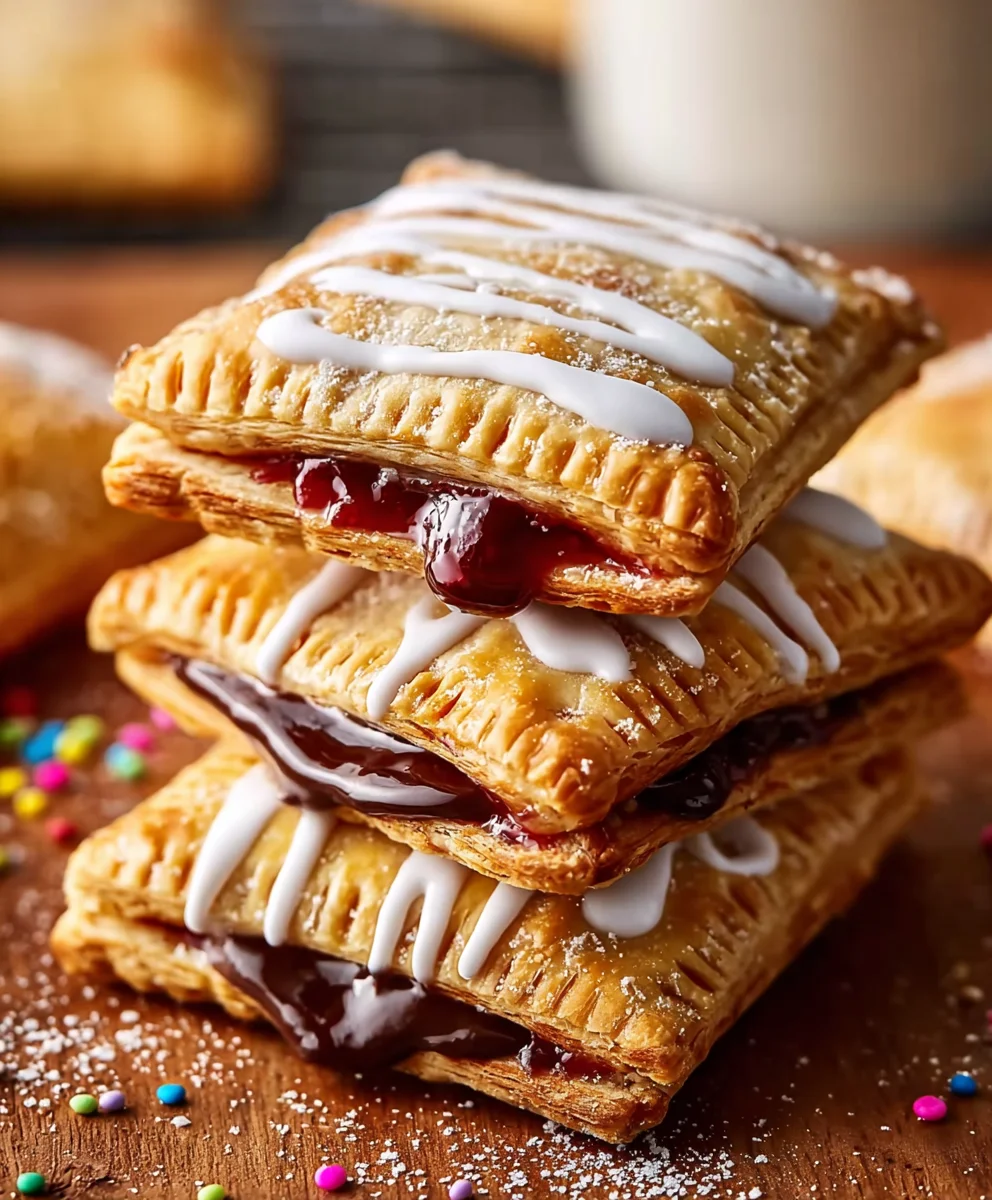
- Glaze the Cooled Pop Tarts: Once the pop tarts are completely cool, I drizzle or spread the protein glaze evenly over the top of each one. This step is best done when the pop tarts are fully cooled; otherwise, the glaze will simply melt and run off. I make sure to cover the surface well, letting a little drip down the sides for that authentic look.
- Add Optional Toppings: If I’m using sprinkles, I scatter them over the wet glaze immediately after applying it, so they adhere properly before the glaze sets. This makes them look incredibly inviting and adds a fun crunch.
- Allow Glaze to Set: I let the glazed protein pop tarts sit on the wire rack for at least 15-20 minutes, or until the glaze has fully set and hardened. This ensures a clean finish and prevents sticky fingers when handling. Patience truly is a virtue in baking, even at this final stage!
- Serve and Enjoy: Finally, my delicious homemade Protein Pop Tarts are ready to be devoured! I love serving them with a cup of coffee or as a quick, satisfying breakfast or snack. The combination of the flaky, protein-rich pastry, the sweet and tangy berry filling, and the smooth protein glaze is simply irresistible. This is truly one of my favorite healthy treats, perfect for satisfying that sweet craving without derailing my goals.
- Storage: If by some miracle you have any left, these protein pop tarts can be stored in an airtight container at room temperature for up to 3 days, or in the refrigerator for up to a week. They are also freezer-friendly without the glaze; simply thaw and then apply fresh glaze when ready to enjoy. They are equally delightful cold or gently warmed for a few seconds in the microwave.
Conclusion:
My culinary journey with this particular creation has been incredibly rewarding, and now that you’ve got all the tools and techniques, I am absolutely thrilled for you to embark on your own adventure. After countless experiments and adjustments, I genuinely believe that this isn’t just another recipe; it’s a game-changer for anyone looking to enjoy a classic comfort food without the usual guilt. What we’ve crafted here is more than just a sweet treat; it’s a testament to how wholesome ingredients can be transformed into something truly extraordinary and deeply satisfying. This isn’t merely about cutting calories or boosting protein; it’s about elevating your breakfast or snack experience, making it more nutritious, more delicious, and frankly, more exciting. Imagine biting into a warm, flaky crust, revealing a perfectly sweet, gooey filling, all while knowing you’re fueling your body with quality ingredients. That’s the magic we’ve captured.
This Protein Pop Tarts Recipe is a must-try because it elegantly bridges the gap between nostalgic indulgence and modern dietary needs. We’re talking about an offering that is not only packed with muscle-building protein but also remarkably versatile, allowing you to tailor it precisely to your taste buds. No longer do you have to choose between satisfying your cravings and sticking to your health goals. This recipe empowers you to do both, delivering a delightful experience that feels indulgent yet remains entirely within the bounds of a balanced lifestyle. The sense of accomplishment you’ll feel after baking a batch of these homemade wonders, knowing exactly what’s in them, is incredibly gratifying. It’s a perfect solution for busy mornings, a post-workout refuel, or a delightful evening snack. Trust me when I say, once you taste these, store-bought alternatives will simply not compare to the freshness, quality, and customizable deliciousness of your own creation.
Elevate Your Pop Tart Experience: Serving Suggestions & Variations
The beauty of homemade treats lies in their adaptability, and these protein pop tarts are no exception. While they are absolutely divine straight out of the oven, or even at room temperature, I have a few suggestions to truly make them your own. For a simple yet elegant finish, consider a light glaze made from a scoop of vanilla protein powder mixed with just a touch of almond milk – enough to create a pourable consistency. Drizzle this over your cooled pop tarts for an extra layer of sweetness and, of course, more protein! You could also get playful with toppings: a sprinkle of finely chopped nuts like almonds or pistachios adds a wonderful crunch, or a few sugar-free chocolate chips melted on top can turn them into a decadent dessert. For those who enjoy a little spice, a tiny pinch of cinnamon in the filling can add a warm, inviting note.
Don’t be afraid to experiment with the fillings themselves. While classic fruit jams are wonderful, imagine the possibilities with a swirl of sugar-free lemon curd, a rich chocolate hazelnut protein spread, or even a spiced apple compote. For a truly unique twist, try a creamy peanut butter filling, perhaps mixed with a little mashed banana for natural sweetness and moisture. The key is to ensure your filling isn’t too runny, so it stays neatly encased within the crust. If you’re keen on making these ahead for meal prep, they store beautifully in an airtight container at room temperature for a couple of days, or in the refrigerator for up to a week. For an optimal experience, a quick zap in the microwave for 10-15 seconds or a few minutes in a toaster oven will bring back that comforting warmth and slightly crisp crust. They’re also fantastic served alongside your morning coffee or a refreshing glass of milk, making for a truly complete and satisfying start to your day.
Your Turn: Bake, Savor, and Share!
Now, it’s over to you! I genuinely cannot wait for you to experience the joy of baking and, more importantly, tasting this incredible creation. I’m confident that once you whip up a batch of these protein-packed delights, they’ll become a cherished part of your healthy eating repertoire. Don’t hesitate to dive in; the steps are clear, and the outcome is incredibly rewarding. Feel free to put your own spin on them – maybe a different protein powder flavor, a unique filling combination, or even some creative decorations. Your kitchen is your canvas!
After you’ve baked your first batch, please, please, please come back and tell me all about it! Your feedback and experiences are incredibly valuable. Did you try a unique filling? Did you serve them in a special way? What did your family and friends think? Share your successes, your learning moments, and your brilliant variations in the comments section below. I absolutely love seeing your culinary adventures come to life. Snap a photo and share it on your social media, tagging me (if you know how) or using a relevant hashtag so I can celebrate your delicious achievements with you. Let’s build a community around making healthy eating not just sustainable, but truly enjoyable and exciting. I believe in you, and I know you’re going to absolutely nail this Protein Pop Tarts Recipe. Happy baking!
Easy Protein Pop Tarts Recipe: Guilt-Free Breakfast Delight
Enjoy a guilt-free breakfast or snack with this innovative Protein Pop Tarts Recipe. Features a warm, soft pastry with a delightful fruit filling, offering a smart blend of indulgence and daily protein intake.
Ingredients
-
1 1/2 cups whole wheat flour
-
1/2 cup vanilla protein powder
-
1 tablespoon sugar
-
2 teaspoons baking powder
-
1/4 cup applesauce
-
1/4 cup neutral-flavored oil
-
1 teaspoon vanilla extract
-
1/2 cup strawberry jam
-
1 cup confectioners sugar (sugar-free or regular)
-
1 cup vanilla protein powder (optional)
-
2 tablespoons milk or water (as needed)
-
1/2 teaspoon vanilla
Instructions
-
Step 1
In a large bowl, combine 1 1/2 cups whole wheat flour, 1/2 cup vanilla protein powder, 1 tablespoon sugar, and 2 teaspoons baking powder. In a separate bowl, whisk 1/4 cup applesauce, 1/4 cup neutral-flavored oil, and 1 teaspoon vanilla extract. Add the wet ingredients to the dry mixture and mix until a cohesive dough forms. Do not overmix. Gently gather the dough into a disk, wrap tightly in plastic wrap, and chill in the refrigerator for at least 30 minutes. Prepare your workspace for rolling. -
Step 2
Have 1/2 cup strawberry jam ready for the filling. -
Step 3
Preheat oven to 375°F (190°C) and line a large baking sheet with parchment paper. On a lightly floured surface, roll out the chilled dough into a large rectangle, approximately 12×16 inches and 1/8 to 1/4 inch thick. Trim the edges to create a neat rectangle, then cut it into 8 smaller, even rectangles (about 3×4 inches each). Spoon 1-2 tablespoons of strawberry jam onto the center of four dough rectangles, leaving about a 1/2-inch clear border around the edges. Place the remaining four dough rectangles on top of the filled ones, aligning the edges. Using your fingertips, press down around the edges to seal the two dough layers, then firmly crimp all around the edges with a fork. Poke a few small holes in the top of each pop tart with a fork to allow steam to escape during baking. Carefully transfer the assembled protein pop tarts to the prepared baking sheet and bake for 15-20 minutes, or until the edges are golden brown. Remove from oven and transfer to a wire rack to cool completely. -
Step 4
In a small bowl, combine 1 cup confectioners sugar (sugar-free or regular), 1 cup vanilla protein powder (if using), and 1/2 teaspoon vanilla. Gradually add 2 tablespoons of milk or water, stirring continuously with a small whisk or spoon, until a smooth, pourable consistency is reached. Adjust liquid as needed for your desired thickness. -
Step 5
Once the pop tarts are completely cool, drizzle or spread the prepared protein glaze evenly over the top of each one. Allow the glazed protein pop tarts to sit on the wire rack for at least 15-20 minutes, or until the glaze has fully set and hardened. Serve and enjoy! Store any leftover protein pop tarts in an airtight container at room temperature for up to 3 days, or in the refrigerator for up to a week.
Important Information
Nutrition Facts (Per Serving)
It is important to consider this information as approximate and not to use it as definitive health advice.
Allergy Information
Please check ingredients for potential allergens and consult a health professional if in doubt.