English Muffins: How To Get The Perfect Nooks & Crannies
Oh, English muffins! Just thinking about them brings a smile to my face. Forget everything you thought you knew about those bland, store-bought discs because, my friends, we’re about to embark on a journey to pure breakfast bliss. I’m talking about the real deal, the kind that transforms a simple meal into an experience.
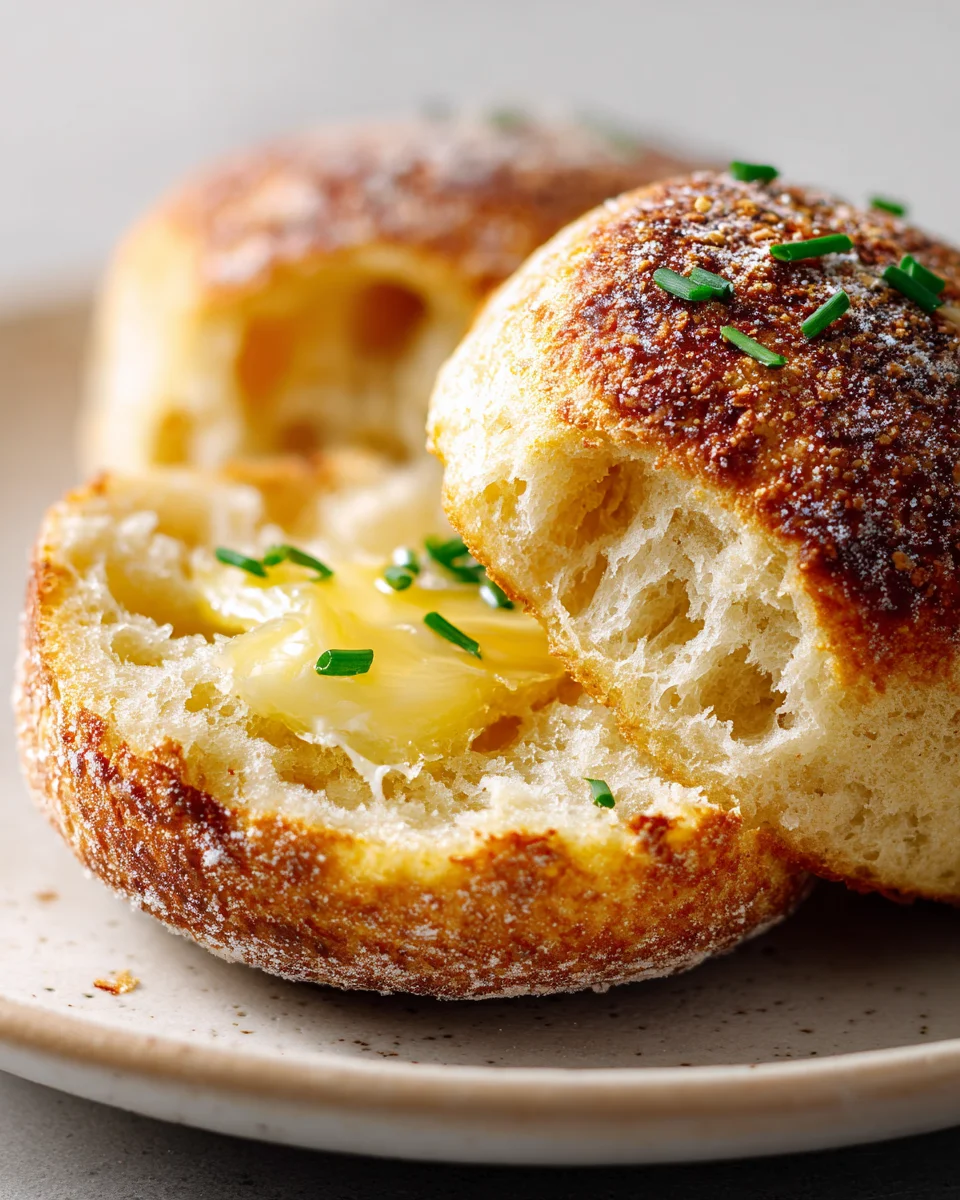
This isn’t just another recipe; it’s the recipe for achieving English muffin perfection. What makes it so special, you ask? Well, it’s all about those legendary nooks and crannies! We’ve cracked the code to ensure every single muffin you pull off the griddle is riddled with those glorious pockets – ready to capture every last drop of melted butter, a dollop of homemade jam, or a runny egg yolk. It’s a texture sensation that, frankly, you just can’t get anywhere else.
You’re going to absolutely love making these. There’s such a satisfying feeling in taking a simple yeast dough and transforming it into something so utterly delicious and distinctive. The process itself is surprisingly straightforward, involving a delightful dough that gets griddle-cooked to golden perfection, creating that unique slightly chewy exterior and incredibly soft, airy interior. Imagine waking up to the smell of freshly baked muffins, knowing you made them yourself – it’s a game-changer for weekend brunches or a special weekday treat. Get ready to ditch the toaster pastries and embrace the true joy of a homemade English muffin!

Ingredient Notes
Hello, fellow breakfast lovers! Achieving those iconic, open nooks and crannies in your English muffins isn’t just magic; it’s a careful balance of ingredients working together. Let’s dive into what makes them so special.
- Strong Bread Flour: This is truly the superstar for those perfect nooks and crannies. Bread flour has a higher protein content than all-purpose flour, meaning it develops more gluten. This strong gluten network is absolutely crucial because it acts like a flexible net, trapping the carbon dioxide gas produced by the yeast during fermentation. This trapping action is precisely what creates those desirable, airy pockets. While you can use all-purpose flour, your muffins will likely be denser with fewer, smaller nooks. Stick with bread flour for the best results!
- Active Dry or Instant Yeast: The leavening agent responsible for all that wonderful gas production. Fresh, active yeast is vital! It’s the engine that inflates your dough, stretching that gluten network and carving out the internal structure. If your yeast isn’t lively, you won’t get the lift needed for impressive nooks.
- Whole Milk: I love using whole milk here for its richness and the tenderness it imparts to the crumb. The fat in the milk contributes to a softer, more luxurious texture, which is a lovely contrast to the chewiness provided by the strong gluten. Make sure it’s warm enough to activate the yeast without being too hot. For substitutions, you can use water or non-dairy alternatives like almond or oat milk, but you might notice a slight difference in richness and tenderness.
- Granulated Sugar: Not just for sweetness! A small amount of sugar acts as food for the yeast, helping it to get a good start and produce plenty of gas. It also aids in browning on the griddle, giving your muffins a beautiful golden crust. Don’t overdo it, though, as too much sugar can inhibit gluten development.
- Salt: Essential for flavor, balancing the sweetness, and actually helping to control yeast activity. Without salt, your dough would rise too quickly and taste bland. It also strengthens the gluten structure, indirectly contributing to better nooks.
- Unsalted Butter: Adding softened butter towards the end of kneading enriches the dough, adds flavor, and makes the muffins more tender. The fat also helps lubricate the gluten strands, allowing them to stretch more easily without tearing, which is beneficial for forming those open structures.
- Cornmeal or Fine Semolina: While not part of the dough itself, these are critical for dusting your work surface and the baking sheet where your muffins proof. They prevent sticking and give English muffins their characteristic slightly gritty exterior. They don’t directly influence the internal nooks, but they’re essential for the overall authentic experience.
You might notice I haven’t mentioned any beef or non-alcohol substitutions. That’s because traditional English muffins are quite a simple bread recipe, relying on these basic ingredients to create their unique texture and flavor. No need for fancy additions when the fundamentals are this good!
Step-by-Step Instructions
This is where we really focus on how to coax those incredible nooks and crannies into existence. Follow these steps carefully, and you’ll be rewarded!
- Activate the Yeast: If using active dry yeast, warm your milk (or water) to about 105-115°F (40-46°C). It should feel warm but not hot to the touch. Pour it into a large mixing bowl or the bowl of your stand mixer, sprinkle in the granulated sugar and yeast, and let it sit for 5-10 minutes. It should become foamy and bubbly, indicating your yeast is alive and ready to make those nooks! If using instant yeast, you can usually add it directly with the dry ingredients, but activating it first gives peace of mind.
- Mix the Dough: To the yeast mixture, add the bread flour and salt. Mix with a spoon or the dough hook of your stand mixer on low speed until a shaggy, cohesive dough forms. It will be quite sticky – don’t be tempted to add too much extra flour at this stage, as a higher hydration dough is key to larger nooks and crannies.
- Kneading – The Nook & Cranny Secret: This is arguably the most crucial step for developing that open, airy texture.
- Stand Mixer: Increase the speed to medium-low and knead for about 8-10 minutes. The dough will start very sticky, pulling away from the sides of the bowl only reluctantly. As the gluten develops, it will become smoother, more elastic, and less sticky, though it will still be a soft dough.
- By Hand: Turn the dough out onto a lightly floured surface. Knead vigorously for 12-15 minutes, stretching and folding. The dough will be challenging at first due to its stickiness. Use a bench scraper to help incorporate sticky bits.
- The Windowpane Test: You’re aiming for a strong gluten network. To test, pinch off a small piece of dough and gently stretch it. If you can stretch it thin enough to see light through it without tearing (like a windowpane), your gluten is well-developed. This strong, elastic gluten is what allows the dough to capture and hold all those gas bubbles, creating your beloved nooks!
- Incorporate Butter: Once your dough passes the windowpane test, add the softened unsalted butter. Continue kneading until the butter is fully incorporated and the dough is smooth and elastic again, about 2-3 more minutes.
- First Rise (Bulk Fermentation): Lightly grease a large bowl. Place the dough in the bowl, turning once to coat. Cover the bowl tightly with plastic wrap or a clean kitchen towel. Let it rise in a warm, draft-free place for 1 to 1.5 hours, or until doubled in size. This initial rise establishes the foundation for the internal structure, allowing yeast to produce initial gas bubbles.
- Shape the Muffins – Gently is Key: Lightly dust your work surface generously with cornmeal or semolina. Turn the risen dough out onto the prepared surface. Handle the dough very gently – we want to preserve as much of the air created during the first rise as possible! Pat or gently roll the dough to about ½ to ¾ inch thickness. Using a 3-inch round cutter, press straight down firmly to cut out your muffins. Do not twist the cutter, as this can seal the edges and inhibit the rise and development of nooks.
- Second Rise (Proofing): Transfer the shaped muffins to a baking sheet generously dusted with cornmeal or semolina, leaving some space between each. Cover loosely with plastic wrap or a clean kitchen towel. Let them rise again in a warm, draft-free place for 30-45 minutes, or until visibly puffy and slightly expanded. This final rise inflates the dough further, making those potential nooks even more prominent.
- Cook on the Griddle: Heat a non-stick griddle or heavy-bottomed skillet over medium-low heat. It’s crucial to use low heat here to allow the muffins to cook through slowly without burning the exterior, giving the internal structure time to set and for the last bit of yeast activity to create more air pockets. Place a few muffins on the griddle, ensuring they have room. Cook for 5-7 minutes per side, until deeply golden brown and cooked through. An internal temperature of 200-210°F (93-99°C) indicates they are done. They should feel light and springy.
- Cool: Transfer the cooked English muffins to a wire rack to cool completely. This is important for the internal structure to firm up properly.
Tips & Suggestions
To truly master the art of English muffins with glorious nooks and crannies, keep these pointers in mind:
- Don’t Be Afraid of Sticky Dough: English muffin dough is intentionally high in hydration, making it quite sticky. Resist the urge to add too much extra flour during kneading or shaping. This higher water content contributes significantly to a more open crumb and those coveted large nooks. Use a bench scraper and a lightly floured surface for handling.
- Kneading is Your Friend: Seriously, good gluten development is the secret weapon. Whether by hand or mixer, ensure your dough passes the windowpane test. A strong, elastic gluten network is non-negotiable for trapping gas and creating those internal air pockets.
- Low and Slow Griddle Cooking: I can’t stress this enough! Cooking on medium-low heat is paramount. Too high heat will burn the outside before the inside cooks through, resulting in a raw, dense center and poor nooks. The gentle, consistent heat allows the steam and yeast activity to continue working inside, expanding those nooks without over-browning the exterior.
- No Twisting! When using your round cutter, press straight down and lift. Twisting can seal the edges of the dough, which restricts its ability to rise freely and develop the desired airy structure.
- Fork Split, Don’t Slice: This is the classic trick for a reason! English muffins are meant to be fork-split, not sliced with a knife. Slicing compresses the delicate internal structure, effectively squashing those beautiful nooks and crannies you worked so hard to create. Gently poke around the side with a fork, then pull apart to reveal their full glory.
- Proofing Environment: A warm, draft-free place for both rises is ideal. Consistency in temperature helps the yeast work steadily, ensuring even gas production.
Storage
Once you’ve achieved those perfect nooks and crannies, you’ll want to keep your English muffins fresh to enjoy them fully!
- Room Temperature: English muffins are best enjoyed fresh, but they will keep well at room temperature for 2-3 days. Store them in an airtight container or a large zip-top bag to prevent them from drying out.
- Refrigeration: I generally don’t recommend refrigerating English muffins. The cold air in the fridge can cause them to become stale more quickly and alter their texture, making them a bit tougher. Stick to room temperature or the freezer.
- Freezing (The Best Option for Longer Storage): This is my preferred method for keeping a batch fresh for weeks.
- Once your English muffins have completely cooled, individually wrap each muffin tightly in plastic wrap. This prevents freezer burn.
- Place the individually wrapped muffins into a freezer-safe zip-top bag or an airtight container.
- They will keep beautifully in the freezer for up to 3 months.
- To enjoy, you can either thaw them at room temperature for an hour or two, or my favorite method: simply fork-split them while frozen and pop them straight into the toaster on a lower setting. They’ll toast up beautifully, often even better than fresh!
- Reheating: Always, always fork-split your English muffins before reheating. Whether from fresh or thawed, a good toast in the toaster or under the broiler will bring out their best texture and enhance those wonderful nooks for soaking up butter and jam.
Final Thoughts
There’s truly nothing quite like the satisfaction of baking something from scratch, especially when the results are this spectacular. I hope you’ve enjoyed following along on this journey to create something truly special. This isn’t just any recipe; English Muffins: How To Get The Perfect Nooks & Crannies is designed to guide you step-by-step to achieving that elusive, iconic texture that makes English muffins so wonderfully unique. The moment you split one open and see those glorious, airy chambers, ready to soak up butter and jam, you’ll know exactly why this recipe is a must-try. I promise you, the rich flavor and the ultimate nooks and crannies achieved with this method will make every breakfast feel like a luxurious treat. Give it a go, and prepare to be amazed by your own baking prowess!
English Muffins Recipe: Perfect Nooks & Crannies!
- Total Time: 45 minutes
- Yield: 12 muffins
Description
Discover the secret to making English muffins with the perfect nooks and crannies that capture butter and jam beautifully. This recipe will elevate your breakfast experience with homemade muffins that are soft, airy, and utterly delicious.
Ingredients
- Strong Bread Flour
- Active Dry or Instant Yeast
- Whole Milk
- Granulated Sugar
- Salt
- Unsalted Butter
- Cornmeal or Fine Semolina
Instructions
- Activate the Yeast: If using active dry yeast, warm your milk (or water) to about 105-115°F (40-46°C). Pour it into a large mixing bowl or the bowl of your stand mixer, sprinkle in the granulated sugar and yeast, and let it sit for 5-10 minutes until foamy.
- Mix the Dough: Add the bread flour and salt to the yeast mixture. Mix until a shaggy, cohesive dough forms, which will be quite sticky.
- Kneading – The Nook & Cranny Secret: Knead the dough using a stand mixer on medium-low speed for about 8-10 minutes or by hand for 12-15 minutes until it becomes smoother and more elastic. Perform the windowpane test to check gluten development.
- Incorporate Butter: Once the dough passes the windowpane test, add the softened unsalted butter and knead until fully incorporated.
- First Rise (Bulk Fermentation): Lightly grease a large bowl, place the dough inside, cover it, and let it rise in a warm place for 1 to 1.5 hours until doubled in size.
- Shape the Muffins – Gently is Key: Dust your work surface with cornmeal or semolina, turn the risen dough out, and gently pat or roll it to about ½ to ¾ inch thickness. Cut out muffins using a 3-inch round cutter without twisting.
- Second Rise (Proofing): Transfer the shaped muffins to a baking sheet dusted with cornmeal or semolina, cover loosely, and let them rise for 30-45 minutes until puffy.
- Cook on the Griddle: Heat a non-stick griddle over medium-low heat. Cook the muffins for 5-7 minutes per side until golden brown and cooked through, reaching an internal temperature of 200-210°F (93-99°C).
- Cool: Transfer the cooked muffins to a wire rack to cool completely.
- Prep Time: 15 mins
- Cook Time: 30 mins
- Category: Breakfast
- Method: Griddle Cooking
- Cuisine: British
Nutrition
- Serving Size: 1 muffin
- Calories: 150
- Sugar: 1 g
- Sodium: 200 mg
- Fat: 3 g
- Saturated Fat: 1 g
- Unsaturated Fat: 2 g
- Trans Fat: 0 g
- Carbohydrates: 28 g
- Fiber: 1 g
- Protein: 5 g
- Cholesterol: 10 mg
Keywords: Don't be afraid of sticky dough; it's key for achieving large nooks. Kneading is essential for gluten development, and remember to cook on low heat to ensure proper cooking without burning.