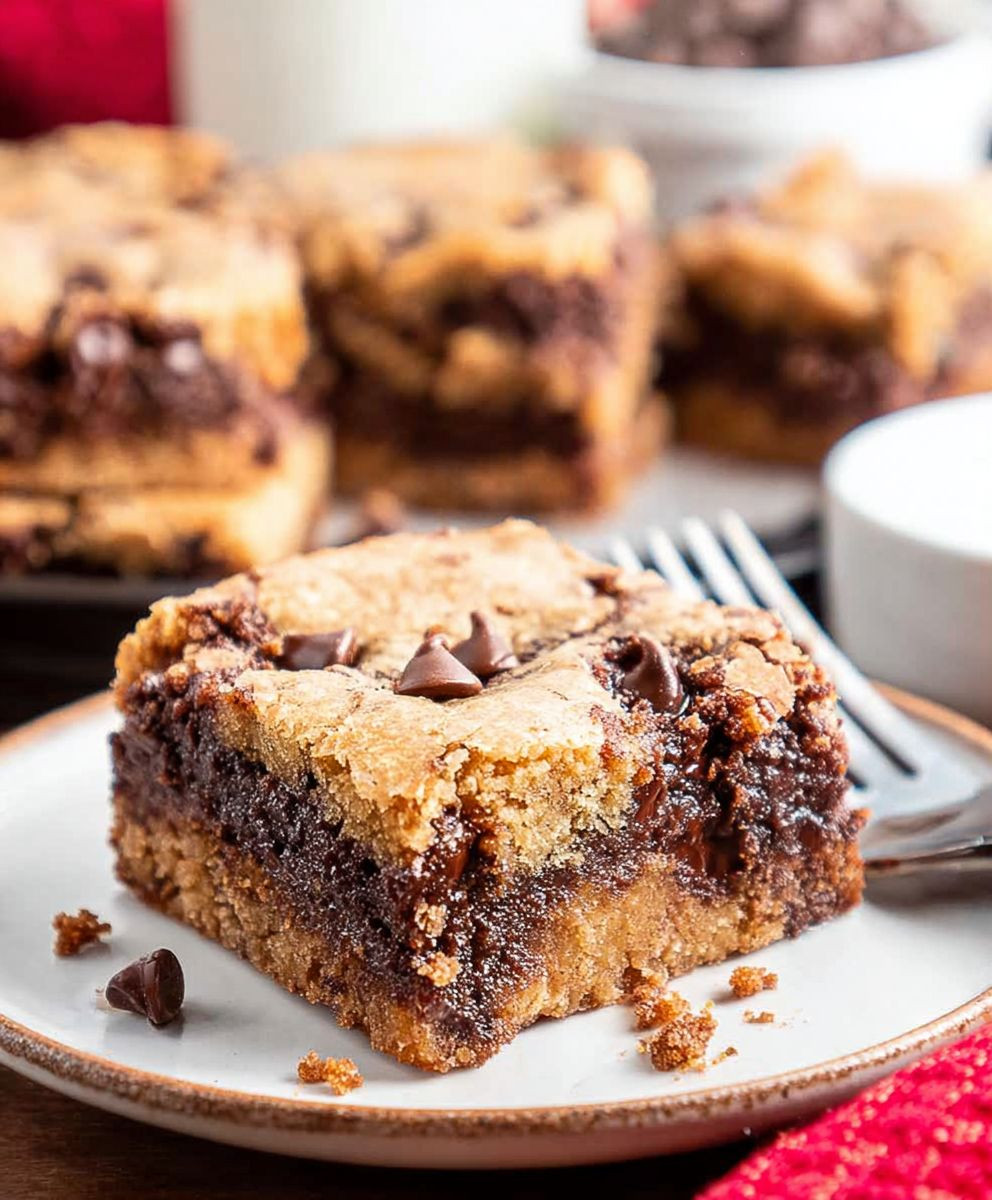
Giant Brookies Bars: Prepare to meet your new favorite dessert! Imagine the fudgy, chewy goodness of a brownie colliding head-on with the sweet, comforting crunch of a chocolate chip cookie. That, my friends, is the magic of a Brookie, and we’re taking it to the next level with these colossal bars.
While the exact origins of the Brookie are shrouded in mystery (a delicious mystery, if you ask me!), its popularity has exploded in recent years. It’s easy to see why. This delightful hybrid offers the best of both worlds, satisfying cravings for both brownies and cookies in a single, convenient bite. No more agonizing over which treat to choose – have them both!
What makes these Giant Brookies Bars so irresistible? It’s the symphony of textures and flavors. The rich, decadent brownie base provides a deep chocolatey foundation, while the generous layer of chocolate chip cookie dough on top adds a delightful sweetness and satisfying chew. The combination is simply divine. Plus, these bars are incredibly easy to make, perfect for potlucks, bake sales, or simply a cozy night in. Get ready to experience dessert perfection!

Ingredients:
- For the Brownie Layer:
- 1 cup (2 sticks) unsalted butter, melted
- 2 cups granulated sugar
- 1 cup unsweetened cocoa powder
- 1 teaspoon salt
- 1 teaspoon baking powder
- 1 tablespoon vanilla extract
- 4 large eggs
- 1 cup all-purpose flour
- 1 cup chocolate chips (milk, semi-sweet, or dark – your choice!)
- For the Cookie Dough Layer:
- 1 cup (2 sticks) unsalted butter, softened
- ¾ cup granulated sugar
- ¾ cup packed brown sugar
- 2 large eggs
- 1 tablespoon vanilla extract
- 3 cups all-purpose flour
- 1 teaspoon baking soda
- 1 teaspoon salt
- 2 cups chocolate chunks (or more chocolate chips!)
Preparing the Brownie Layer:
- Melt the Butter: First, melt the butter in a large, microwave-safe bowl. I usually do this in 30-second intervals, stirring in between, to prevent it from splattering everywhere. You want it completely melted but not boiling.
- Combine Wet Ingredients: Once the butter is melted, whisk in the granulated sugar, cocoa powder, salt, and baking powder. Make sure to get rid of any lumps of cocoa powder. The mixture will be thick and pasty – that’s perfectly normal!
- Add Vanilla and Eggs: Stir in the vanilla extract. Then, add the eggs one at a time, mixing well after each addition. This is important for creating a smooth and fudgy brownie texture. Don’t overmix at this stage.
- Incorporate the Flour: Gradually add the all-purpose flour, mixing until just combined. Be careful not to overmix the batter, as this can lead to tough brownies. A few streaks of flour are okay at this point.
- Fold in Chocolate Chips: Finally, fold in the chocolate chips. I like to use a spatula for this to ensure they are evenly distributed throughout the batter.
Preparing the Cookie Dough Layer:
- Cream Butter and Sugars: In a large bowl (or the bowl of your stand mixer), cream together the softened butter, granulated sugar, and brown sugar until light and fluffy. This usually takes about 3-5 minutes. The mixture should be pale and airy.
- Add Eggs and Vanilla: Beat in the eggs one at a time, mixing well after each addition. Then, stir in the vanilla extract.
- Combine Dry Ingredients: In a separate bowl, whisk together the all-purpose flour, baking soda, and salt. This ensures that the baking soda and salt are evenly distributed throughout the dough.
- Gradually Add Dry Ingredients to Wet Ingredients: Gradually add the dry ingredients to the wet ingredients, mixing until just combined. Again, be careful not to overmix. Overmixing can develop the gluten in the flour, resulting in tough cookies.
- Fold in Chocolate Chunks: Fold in the chocolate chunks (or more chocolate chips!) until they are evenly distributed throughout the dough.
Assembling and Baking the Brookies:
- Prepare the Baking Pan: Preheat your oven to 350°F (175°C). Grease and flour a 9×13 inch baking pan. You can also line the pan with parchment paper, leaving an overhang on the sides, for easy removal. This is my preferred method!
- Layer the Brownie Batter: Pour the brownie batter into the prepared baking pan and spread it evenly.
- Layer the Cookie Dough: Drop spoonfuls of the cookie dough over the brownie batter. You don’t need to completely cover the brownie layer; just make sure there’s cookie dough in every bite! I like to flatten the cookie dough slightly with my fingers to help it spread during baking.
- Swirl (Optional): If you want a marbled effect, you can gently swirl the cookie dough into the brownie batter using a knife or skewer. Be careful not to overmix, as this can muddy the colors.
- Bake: Bake for 30-35 minutes, or until a toothpick inserted into the center comes out with moist crumbs attached. The cookie dough should be golden brown and the brownie layer should be set.
- Cool Completely: Let the brookies cool completely in the pan before cutting into bars. This is important for preventing them from falling apart. If you used parchment paper, you can lift the brookies out of the pan and onto a cutting board for easier slicing.
- Cut and Serve: Cut the brookies into bars and serve. These are best enjoyed warm or at room temperature. They’re also delicious with a scoop of vanilla ice cream!
Tips for Perfect Brookies:
- Don’t Overbake: Overbaking is the enemy of both brownies and cookies. Keep a close eye on the brookies and remove them from the oven when a toothpick inserted into the center comes out with moist crumbs attached.
- Use High-Quality Chocolate: The quality of your chocolate will greatly impact the flavor of the brookies. Use high-quality chocolate chips or chunks for the best results.
- Adjust Baking Time: Baking times may vary depending on your oven. Start checking the brookies for doneness around 30 minutes and adjust the baking time accordingly.
- Let Them Cool: I know it’s tempting to dig in right away, but letting the brookies cool completely is essential for preventing them from falling apart.
- Get Creative with Toppings: Feel free to add your favorite toppings to the brookies, such as sprinkles, chopped nuts, or a drizzle of chocolate sauce.
Storage Instructions:
Store leftover brookies in an airtight container at room temperature for up to 3 days. You can also freeze them for longer storage. To freeze, wrap the brookies individually in plastic wrap and then place them in a freezer-safe bag or container. They can be frozen for up to 2 months. Thaw the brookies at room temperature before serving.
Variations:
- Peanut Butter Brookies: Add ½ cup of peanut butter to the cookie dough for a peanut butter twist. You can also swirl peanut butter into the brownie batter.
- Oreo Brookies: Press Oreo cookies into the cookie dough layer before baking.
- Salted Caramel Brookies: Drizzle salted caramel sauce over the brookies after baking.
- Nutella Brookies: Swirl Nutella into the brownie batter for a hazelnut chocolate flavor.
- White Chocolate Brookies: Use white chocolate chips in the cookie dough and brownie batter.
Troubleshooting:
- Brookies are too dry: Make sure you’re not overbaking them. Also, check that your oven temperature is accurate.
- Brookies are too gooey: You may have underbaked them. Return them to the oven for a few more minutes.
- Cookie dough is too dry: Add a tablespoon or two of milk to the cookie dough until it reaches the desired consistency.
- Brownie batter is too thick: Add a tablespoon or two of milk to the brownie batter until it reaches the desired consistency.
Why This Recipe Works:
This recipe is a guaranteed crowd-pleaser because it combines the best of both worlds: fudgy brownies and chewy chocolate chip cookies. The combination of textures and flavors is simply irresistible. The recipe is also relatively easy to make, even for beginner bakers. The key is to follow the instructions carefully and not overmix the batter or dough. With a little bit of patience and attention to detail, you can create a batch of giant brookies bars that will impress your friends and family.
Enjoy!
I hope you enjoy this recipe as much as I do! Let me know in the comments if you try it and what you think. Happy baking!
Conclusion:
And there you have it! These Giant Brookies Bars are truly a game-changer. They’re the perfect marriage of fudgy brownies and chewy chocolate chip cookies, all baked into one incredibly satisfying treat. If you’re looking for a dessert that’s guaranteed to impress, requires minimal effort, and delivers maximum flavor, then this recipe is an absolute must-try. Trust me, once you take a bite, you’ll understand why I’m so obsessed!
But the best part about these bars is their versatility. While they’re absolutely divine on their own, still slightly warm from the oven, there are so many ways to elevate them even further. For a truly decadent experience, try serving them with a scoop of vanilla bean ice cream and a drizzle of hot fudge sauce. The contrast of the warm, gooey brookies with the cold, creamy ice cream is simply heavenly.
Alternatively, you could crumble them over a milkshake for an extra-special treat. Imagine a rich, chocolatey milkshake with chunks of brownie and cookie goodness swirled throughout – pure bliss! And if you’re feeling adventurous, why not experiment with different toppings? A sprinkle of sea salt can enhance the chocolate flavor, while chopped nuts add a delightful crunch.
Here are a few more serving suggestions to get your creative juices flowing:
Serving Suggestions:
- Brookies Sundae: Top with ice cream, whipped cream, sprinkles, and your favorite sauce.
- Brookies Milkshake: Blend with milk and ice cream for a decadent shake.
- Brookies Parfait: Layer with yogurt, granola, and fresh berries.
- Brookies Crumble Topping: Crumble over ice cream or yogurt for added texture and flavor.
And don’t be afraid to get creative with the recipe itself! You could try adding different types of chocolate chips, such as white chocolate or peanut butter chips. Or, for a more sophisticated flavor, incorporate a swirl of salted caramel or a handful of chopped pecans. The possibilities are endless!
Variations to Try:
- Peanut Butter Brookies: Add peanut butter chips to the cookie dough.
- Salted Caramel Brookies: Swirl salted caramel sauce into the batter before baking.
- Nutty Brookies: Add chopped pecans or walnuts to the batter.
- White Chocolate Brookies: Use white chocolate chips instead of semi-sweet.
I truly believe that everyone should experience the joy of these Giant Brookies Bars at least once in their life. They’re the perfect treat for any occasion, whether it’s a casual weeknight dessert or a special celebration. So, what are you waiting for? Gather your ingredients, preheat your oven, and get ready to bake up a batch of these irresistible bars.
I’m so excited for you to try this recipe! And more importantly, I’d love to hear about your experience. Did you make any variations? What toppings did you use? How did your family and friends react? Please, share your thoughts and photos in the comments below. I can’t wait to see your creations and hear your stories. Happy baking! Let me know if you have any questions, and I’ll do my best to help. Enjoy your delicious, homemade Giant Brookies Bars!
Giant Brookies Bars: The Ultimate Recipe & Baking Guide
Fudgy brownies meet chewy chocolate chip cookie dough in this irresistible Brookies recipe! Easy to make and perfect for satisfying any sweet tooth.
Ingredients
Instructions
Recipe Notes
- Don’t overbake the brookies.
- Use high-quality chocolate for the best flavor.
- Baking times may vary depending on your oven.
- Let the brookies cool completely before cutting.
- Get creative with toppings like sprinkles, nuts, or chocolate sauce.
- Storage: Store leftover brookies in an airtight container at room temperature for up to 3 days. Freeze for longer storage (up to 2 months).
- Variations:
- Peanut Butter Brookies: Add ½ cup of peanut butter to the cookie dough.
- Oreo Brookies: Press Oreo cookies into the cookie dough layer before baking.
- Salted Caramel Brookies: Drizzle salted caramel sauce over the brookies after baking.
- Nutella Brookies: Swirl Nutella into the brownie batter.
- White Chocolate Brookies: Use white chocolate chips in the cookie dough and brownie batter.
- Troubleshooting:
- Brookies are too dry: Don’t overbake. Check oven temperature.
- Brookies are too gooey: Bake for a few more minutes.
- Cookie dough is too dry: Add a tablespoon or two of milk.
- Brownie batter is too thick: Add a tablespoon or two of milk.