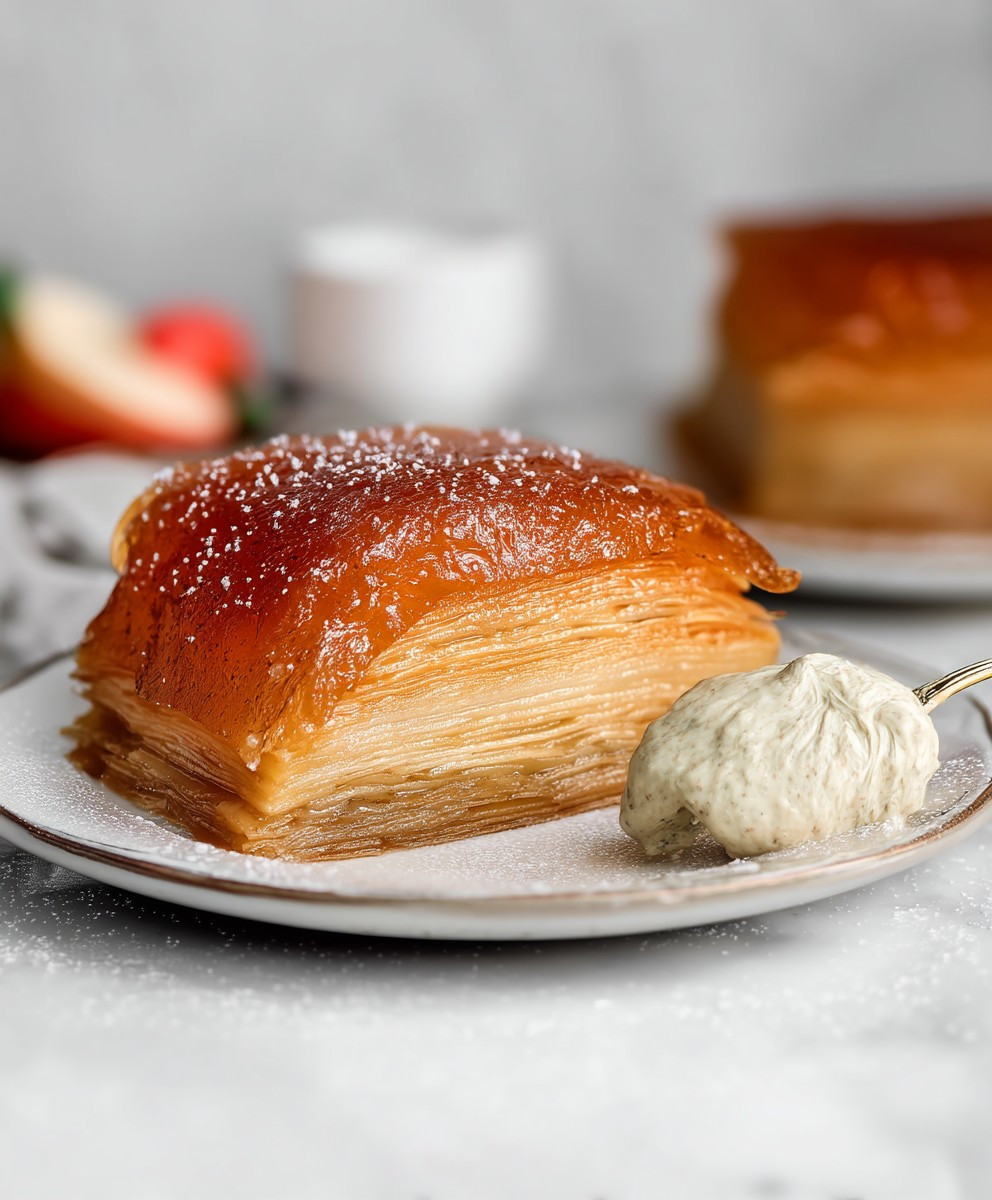
Gluten Free Apple Mille Feuille: Prepare to be amazed! Imagine layers of delicate, flaky pastry embracing a luscious, subtly spiced apple filling, all without a trace of gluten. Sounds too good to be true? It’s not! This recipe unlocks the secrets to creating a truly stunning dessert that everyone can enjoy, regardless of dietary restrictions.
The classic Mille Feuille, meaning “thousand leaves,” is a French pastry masterpiece dating back to the 17th century. Traditionally, it’s a symphony of puff pastry and pastry cream. However, we’ve reimagined this iconic dessert, making it accessible to those avoiding gluten without sacrificing any of the exquisite flavor or texture. While the original might have been a royal indulgence, our Gluten Free Apple Mille Feuille brings that same level of elegance to your home kitchen.
What makes this dessert so irresistible? It’s the delightful contrast of textures – the crisp, shattering pastry against the soft, yielding apples. The warm, comforting spices complement the natural sweetness of the fruit, creating a flavor profile that’s both sophisticated and comforting. Plus, while it looks impressive, this recipe is surprisingly manageable, making it perfect for special occasions or simply a weekend treat. Get ready to impress your friends and family with this unforgettable Gluten Free Apple Mille Feuille!

Ingredients:
- For the Gluten-Free Puff Pastry:
- 250g Gluten-Free All-Purpose Flour Blend (with xanthan gum)
- 250g Cold Unsalted Butter, cubed
- 125ml Ice Water
- 1/2 tsp Salt
- For the Apple Filling:
- 4 Medium Apples (Granny Smith or Honeycrisp recommended), peeled, cored, and thinly sliced
- 50g Unsalted Butter
- 75g Granulated Sugar
- 1 tsp Ground Cinnamon
- 1/2 tsp Ground Nutmeg
- 1 tbsp Lemon Juice
- 1 tbsp Calvados or Apple Brandy (optional)
- For the Crème Pâtissière (Pastry Cream):
- 500ml Whole Milk
- 1 Vanilla Bean, split and scraped (or 1 tsp Vanilla Extract)
- 100g Granulated Sugar
- 4 Large Egg Yolks
- 40g Cornstarch
- 25g Unsalted Butter
- For the Glaze:
- 100g Powdered Sugar
- 2-3 tbsp Milk or Lemon Juice
- Optional Garnish:
- Caramel Sauce
- Chopped Nuts (Pecans, Walnuts)
- Fresh Mint Leaves
Making the Gluten-Free Puff Pastry:
Okay, let’s tackle the puff pastry first. I know, I know, it can seem intimidating, especially when it’s gluten-free, but trust me, it’s totally doable! The key is to keep everything cold. Seriously, cold, cold, cold!
- Combine Dry Ingredients: In a large bowl, whisk together the gluten-free flour blend and salt. This ensures the salt is evenly distributed, which is important for flavor and gluten development (even though we’re gluten-free, the proteins in the flour still benefit from even salt distribution).
- Incorporate the Butter: Add the cubed cold butter to the flour mixture. Using a pastry blender or your fingertips (work quickly!), cut the butter into the flour until the mixture resembles coarse crumbs. You should still see small pieces of butter – that’s what creates the flaky layers! Don’t overmix!
- Add Ice Water: Gradually add the ice water, one tablespoon at a time, mixing gently after each addition. Mix until the dough just comes together. It will be shaggy and may not look perfectly smooth, and that’s perfectly fine.
- Shape and Chill: Gently form the dough into a rectangle, about 1 inch thick. Wrap it tightly in plastic wrap and refrigerate for at least 2 hours, or preferably overnight. This allows the gluten-free flour to hydrate and the butter to firm up.
- First Turn (Lamination): On a lightly floured surface (using your gluten-free flour blend), roll out the chilled dough into a larger rectangle, about 12×18 inches. Make sure the dough doesn’t stick to the surface; add more flour if needed. Fold the dough into thirds, like a letter (this is called a “book fold”). Wrap it tightly in plastic wrap and refrigerate for another 30 minutes.
- Second Turn: Repeat the rolling, folding, and chilling process (step 5) two more times, for a total of three turns. Each turn creates more layers of butter and dough, resulting in a flakier pastry. Remember to keep the dough cold between turns! If the butter starts to melt, the layers will meld together, and you won’t get the desired puff.
- Final Chill: After the third turn, wrap the dough tightly in plastic wrap and refrigerate for at least 1 hour, or up to 24 hours. This allows the dough to relax and makes it easier to roll out for baking.
Preparing the Apple Filling:
While the puff pastry is chilling (or even the day before), let’s get the apple filling ready. This is where the magic happens – the sweet, spiced apples are just divine!
- Sauté the Apples: In a large skillet, melt the butter over medium heat. Add the sliced apples, granulated sugar, cinnamon, and nutmeg. Cook, stirring occasionally, until the apples are softened and slightly caramelized, about 10-15 minutes.
- Add Lemon Juice and Calvados (Optional): Stir in the lemon juice and Calvados (if using). The lemon juice brightens the flavors, and the Calvados adds a lovely depth. Cook for another minute to allow the alcohol to evaporate slightly.
- Cool Completely: Remove the skillet from the heat and let the apple filling cool completely. This is important because you don’t want to melt the pastry cream later on.
Making the Crème Pâtissière (Pastry Cream):
Now for the pastry cream – the creamy, dreamy filling that holds everything together. Don’t be scared; it’s easier than you think! Just follow the steps carefully, and you’ll be rewarded with a luscious, vanilla-infused cream.
- Infuse the Milk: In a medium saucepan, combine the milk and vanilla bean (or vanilla extract). If using a vanilla bean, scrape the seeds into the milk and add the pod as well. Heat the milk over medium heat until it just comes to a simmer. Remove from heat and let it steep for 15-20 minutes to infuse the vanilla flavor. If using vanilla extract, add it after cooking.
- Whisk Egg Yolks and Sugar: In a separate bowl, whisk together the egg yolks and granulated sugar until pale and thick. This is important for creating a smooth and stable pastry cream.
- Add Cornstarch: Whisk in the cornstarch until fully incorporated. Make sure there are no lumps! The cornstarch is what thickens the pastry cream.
- Temper the Egg Yolks: Slowly pour a small amount of the hot milk into the egg yolk mixture, whisking constantly. This is called tempering, and it prevents the egg yolks from scrambling when you add them to the hot milk. Continue adding the hot milk gradually, whisking constantly, until the egg yolk mixture is warmed through.
- Cook the Pastry Cream: Pour the tempered egg yolk mixture back into the saucepan with the remaining milk. Cook over medium heat, whisking constantly, until the pastry cream thickens and comes to a boil. Continue whisking vigorously for 1-2 minutes to ensure the cornstarch is fully cooked and the pastry cream is smooth. It should be thick enough to coat the back of a spoon.
- Finish with Butter and Vanilla (if not already added): Remove the saucepan from the heat and stir in the butter until melted and smooth. If you haven’t already added vanilla extract, stir it in now.
- Cool and Chill: Pour the pastry cream into a clean bowl. Cover the surface directly with plastic wrap to prevent a skin from forming. Refrigerate for at least 2 hours, or preferably overnight, to allow the pastry cream to cool completely and thicken further.
Baking the Puff Pastry:
Alright, time to bake that beautiful puff pastry! This is where you’ll see all your hard work pay off as it puffs up into golden, flaky layers.
- Preheat Oven: Preheat your oven to 400°F (200°C). Line a baking sheet with parchment paper.
- Roll Out the Dough: On a lightly floured surface (again, using your gluten-free flour blend), roll out the chilled puff pastry dough into a rectangle about 1/8 inch thick.
- Cut into Rectangles: Using a sharp knife or pizza cutter, cut the dough into equal-sized rectangles. I usually aim for about 3×4 inches, but you can adjust the size to your preference. You’ll need three rectangles per mille-feuille.
- Dock the Dough: Use a fork to prick the surface of each rectangle several times. This prevents the pastry from puffing up too much in the center.
- Bake: Place the rectangles on the prepared baking sheet and bake for 15-20 minutes, or until golden brown and puffed. Keep a close eye on them, as gluten-free pastry can brown quickly.
- Cool Completely: Transfer the baked pastry rectangles to a wire rack and let them cool completely.
Assembling the Mille-Feuille:
Finally, the fun part
Conclusion:
And there you have it! Our Gluten Free Apple Mille Feuille – a symphony of textures and flavors that’s surprisingly easy to create. I truly believe this recipe is a must-try, not just for those avoiding gluten, but for anyone who appreciates a sophisticated and utterly delicious dessert. The flaky, buttery (yet gluten-free!) pastry, the sweet and slightly tart apple filling, and the delicate vanilla cream combine to create an experience that’s both comforting and elegant.
Why is this a must-try? Well, beyond the incredible taste, it’s about proving that gluten-free baking can be just as impressive and satisfying as its traditional counterpart. No more settling for dry, crumbly imitations! This Gluten Free Apple Mille Feuille delivers on all fronts: flavor, texture, and presentation. It’s a showstopper that will impress your friends and family, and leave them wondering how you managed to create something so exquisite without gluten.
But the best part? It’s adaptable! Feel free to experiment with different apple varieties. Honeycrisp, Granny Smith, or even a mix would work beautifully. For a warmer, spicier flavor profile, add a pinch of cinnamon or nutmeg to the apple filling. You could even incorporate a touch of Calvados or apple brandy for an extra layer of sophistication.
Serving suggestions? This Gluten Free Apple Mille Feuille is wonderful on its own, but it’s even better with a scoop of vanilla ice cream or a dollop of whipped cream. A drizzle of caramel sauce or a sprinkle of toasted almonds would also be delightful additions. For a more casual presentation, you can assemble individual mille feuille pastries instead of one large one. This makes them easier to serve and perfect for parties.
Consider these variations to make it your own:
* Berry Bliss: Substitute some of the apples with fresh berries like raspberries or blueberries for a burst of color and flavor.
* Chocolate Indulgence: Add a layer of chocolate ganache between the pastry layers for a decadent twist.
* Caramel Crunch: Incorporate salted caramel into the cream filling or drizzle it over the finished mille feuille.
I’m so excited for you to try this recipe! I poured my heart into developing a gluten-free version that truly captures the essence of a classic mille feuille. I know you’ll love the results.
So, go ahead, gather your ingredients, and get baking! Don’t be intimidated by the seemingly complex name – the steps are straightforward, and the reward is well worth the effort. I’m confident that you’ll create a Gluten Free Apple Mille Feuille that you’ll be proud to share.
And most importantly, please share your experience with me! I’d love to hear how it turned out, what variations you tried, and any tips or tricks you discovered along the way. Tag me in your photos on social media, or leave a comment below. I can’t wait to see your creations! Happy baking!
Gluten Free Apple Mille Feuille: A Delicious & Easy Recipe
Flaky gluten-free puff pastry layered with caramelized apples and creamy vanilla pastry cream, finished with a sweet glaze. A classic dessert made accessible for gluten-free diets.
Ingredients
Instructions
Recipe Notes
- Keeping the puff pastry dough cold is crucial for achieving flaky layers.
- Use a high-quality gluten-free flour blend with xanthan gum for best results.
- Cool the apple filling and pastry cream completely before assembling to prevent melting.
- Docking the puff pastry prevents it from puffing up too much in the center.
- Adjust baking time as needed, as gluten-free pastry can brown quickly.