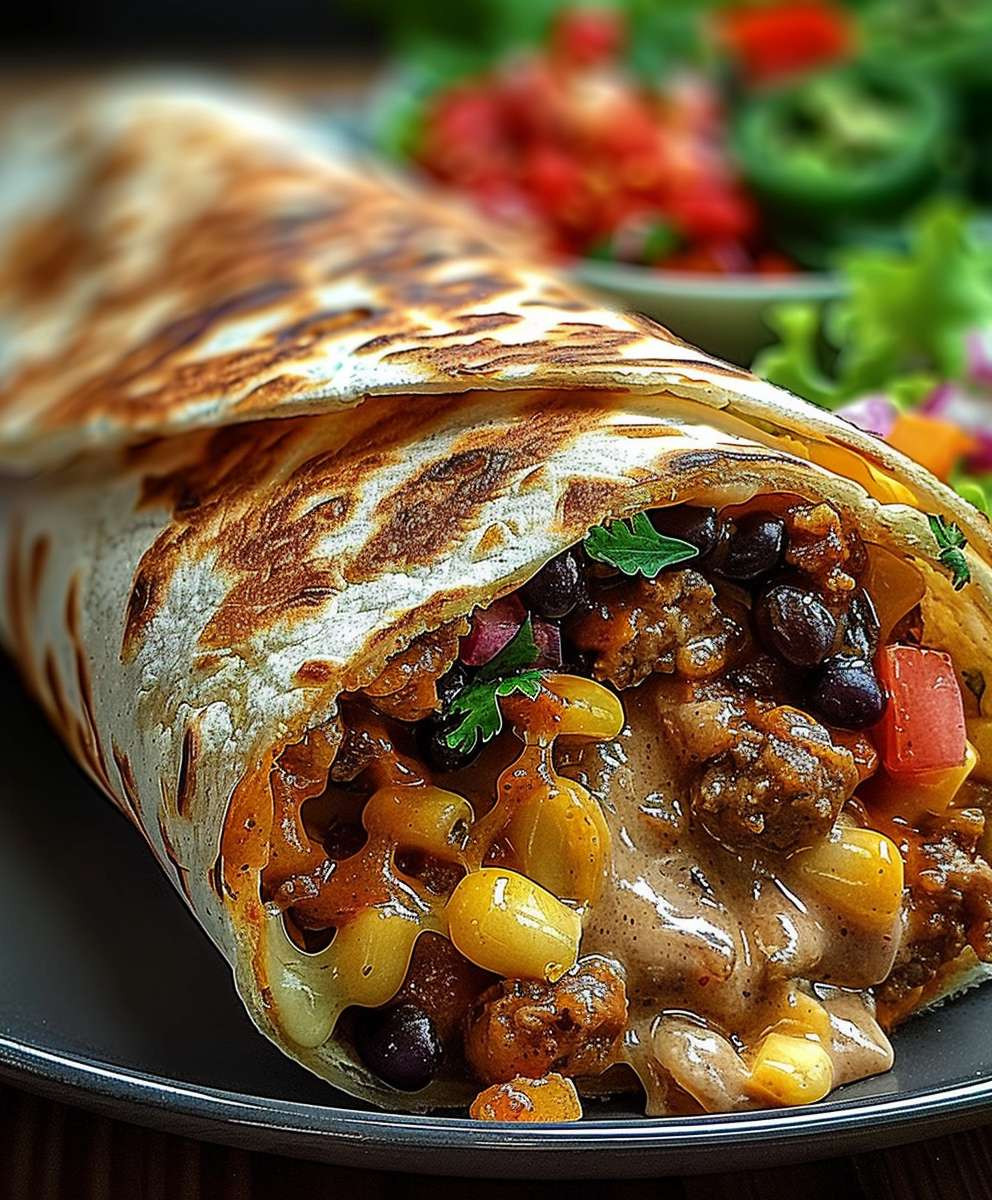
Grilled Cheese Burrito: Prepare to have your mind blown! Imagine the comforting, melty goodness of a classic grilled cheese sandwich, but amplified with the satisfying heft and customizable fillings of a burrito. It’s a culinary mashup that’s taking the internet by storm, and for good reason. This isn’t just a trend; it’s a flavor explosion waiting to happen in your kitchen.
While the exact origins of the Grilled Cheese Burrito are shrouded in mystery (likely born from a late-night craving!), its appeal is undeniable. It cleverly combines two beloved comfort foods, offering a delightful fusion of textures and tastes. The crispy, golden-brown tortilla mimics the perfectly toasted bread of a grilled cheese, while the warm, gooey cheese and your choice of fillings create a hearty and satisfying meal.
What makes this dish so irresistible? It’s the perfect balance of simplicity and customization. You can keep it classic with just cheese, or load it up with your favorite burrito fillings like seasoned ground beef, shredded chicken, black beans, rice, salsa, and guacamole. The possibilities are endless! Plus, it’s incredibly quick and easy to make, making it a perfect weeknight dinner or a fun weekend lunch. Get ready to experience the ultimate comfort food mashup – you won’t be disappointed!

Ingredients:
- 2 large flour tortillas (burrito size)
- 4 slices of your favorite cheese (cheddar, Monterey Jack, pepper jack, or a combination work great!)
- 2 tablespoons butter, divided
- Optional: 2 tablespoons cooked and crumbled bacon
- Optional: 2 tablespoons diced avocado
- Optional: 2 tablespoons salsa
- Optional: 1 tablespoon pickled jalapeños, chopped
Preparing the Grilled Cheese Burrito:
- Prepare your fillings (optional): If you’re adding bacon, avocado, salsa, or jalapeños, have them ready to go. Cook the bacon until crispy, crumble it, and set aside. Dice the avocado. Have your salsa and jalapeños measured out and ready.
- Butter the tortillas: Lightly butter one side of each tortilla. This will be the side that gets grilled, so make sure it’s evenly coated. I like to use softened butter for easier spreading.
- Assemble the first burrito: Place one tortilla, butter-side down, in a large skillet or griddle over medium-low heat. This is important! Low and slow is key to melting the cheese without burning the tortilla.
- Add the cheese: Place two slices of cheese on the tortilla in the skillet, covering as much of the surface as possible. Don’t worry if it hangs over the edges a little; it will melt and create a delicious crispy cheese skirt.
- Add optional fillings (if using): Now, sprinkle half of your chosen fillings (bacon, avocado, salsa, jalapeños) evenly over the cheese. Be careful not to overload it, or it will be difficult to fold.
- Top with more cheese: Place the remaining two slices of cheese on top of the fillings. This helps to hold everything together and ensures maximum cheesiness.
- Top with the second tortilla: Carefully place the second tortilla, butter-side up, on top of the cheese. Make sure it’s centered as best as you can.
Cooking the Grilled Cheese Burrito:
- Grill the first side: Let the burrito grill for 3-5 minutes, or until the bottom tortilla is golden brown and the cheese is starting to melt. Keep a close eye on it to prevent burning. You can gently lift the edge of the tortilla with a spatula to check the color.
- Flip the burrito: Using a large spatula (or two, if needed), carefully flip the burrito over. Be gentle so the fillings don’t spill out.
- Grill the second side: Grill the second side for another 3-5 minutes, or until the tortilla is golden brown and the cheese is completely melted and gooey. Again, check the color frequently to avoid burning.
- Press the burrito (optional): If you want a really flat and crispy burrito, you can gently press down on it with a spatula while it’s grilling. This helps to melt the cheese evenly and create a nice, even browning.
- Ensure the cheese is fully melted: The most important thing is to make sure the cheese is completely melted. If the tortillas are browning too quickly, reduce the heat to low and continue grilling until the cheese is melted. You can also cover the skillet with a lid for a minute or two to help melt the cheese faster.
Serving the Grilled Cheese Burrito:
- Remove from skillet: Once the burrito is golden brown and the cheese is melted, carefully remove it from the skillet and place it on a cutting board.
- Let it cool slightly: Let the burrito cool for a minute or two before cutting into it. This will prevent the cheese from oozing out everywhere and making a mess.
- Cut and serve: Using a sharp knife, cut the burrito in half (or into wedges, if you prefer). The melted cheese will be stringy and delicious!
- Serve immediately: Serve the grilled cheese burrito immediately while it’s hot and gooey. It’s best enjoyed fresh off the griddle.
- Optional dipping sauces: Consider serving your grilled cheese burrito with dipping sauces like salsa, sour cream, guacamole, or even a spicy mayo.
Tips and Variations:
- Cheese variations: Experiment with different types of cheese! Pepper jack adds a kick, Monterey Jack is mild and creamy, and cheddar is a classic choice. A blend of cheeses is always a good idea.
- Protein additions: Add shredded chicken, ground beef, or chorizo for a heartier burrito. Make sure the protein is fully cooked before adding it to the burrito.
- Vegetarian options: Add black beans, corn, bell peppers, or onions for a vegetarian-friendly burrito. Sauté the vegetables before adding them to the burrito for a softer texture.
- Spice it up: Add a pinch of cayenne pepper or a dash of hot sauce to the cheese for a spicy kick.
- Sweet and savory: Try adding a thin layer of fig jam or apple butter to the tortilla before adding the cheese for a sweet and savory twist.
- Make it ahead: You can assemble the burritos ahead of time and store them in the refrigerator for up to 24 hours. Just be sure to wrap them tightly in plastic wrap to prevent them from drying out. When you’re ready to cook them, simply grill them as directed.
- Grill pan alternative: If you don’t have a skillet or griddle, you can also cook the burrito in a grill pan. The grill marks will add a nice touch.
- Oven-baked option: For a hands-off approach, you can bake the burrito in the oven. Preheat the oven to 350°F (175°C). Assemble the burrito as directed, then wrap it in foil and bake for 15-20 minutes, or until the cheese is melted. Remove the foil for the last 5 minutes to crisp up the tortilla.
- Leftovers: Leftover grilled cheese burritos can be stored in the refrigerator for up to 3 days. Reheat them in a skillet, microwave, or oven.
- Don’t overcrowd the skillet: If you’re making multiple burritos, don’t overcrowd the skillet. Cook them in batches to ensure even browning.
- Use a non-stick skillet: A non-stick skillet will make it easier to flip the burrito and prevent it from sticking.
- Adjust the heat as needed: If the tortillas are browning too quickly, reduce the heat. If the cheese isn’t melting fast enough, increase the heat slightly.
- Be patient: Don’t rush the cooking process. Low and slow is the key to a perfectly grilled cheese burrito.
Troubleshooting:
- Burrito is burning: Reduce the heat to low and continue grilling until the cheese is melted. You can also cover the skillet with a lid to help melt the cheese faster.
- Cheese isn’t melting: Increase the heat slightly and continue grilling until the cheese is melted. You can also cover the skillet with a lid to help melt the cheese faster.
- Fillings are spilling out: Don’t overload the burrito with fillings. Use a smaller amount of each filling and spread them evenly over the cheese.
- Tortilla is tearing: Be gentle when flipping the burrito. Use a large spatula (or two, if needed) to support the burrito.
- Burrito is soggy: Make sure the tortillas are buttered evenly. The butter will help to create a crispy crust. Also, don’t add too much wet filling, like salsa.
Enjoy your delicious and customizable Grilled Cheese Burrito!
Conclusion:
So, there you have it! This Grilled Cheese Burrito isn’t just a meal; it’s an experience. It’s the ultimate comfort food mashup, bringing together the gooey, cheesy goodness of a grilled cheese with the satisfying heft and customizable fillings of a burrito. Trust me, once you take that first bite, you’ll understand why I’m so obsessed. It’s quick, it’s easy, and it’s guaranteed to put a smile on your face, even on the toughest of days.
But what truly makes this recipe a must-try is its versatility. While I’ve shared my go-to combination, the possibilities are truly endless. Feeling adventurous? Add some shredded chicken or pulled pork for a heartier meal. Craving something spicy? A dollop of your favorite hot sauce or a sprinkle of jalapeños will do the trick. Vegetarian? Load it up with grilled veggies like bell peppers, onions, and zucchini. You can even experiment with different cheeses! Pepper jack will add a kick, while provolone will give it a smoother, milder flavor. Think of this recipe as a blank canvas, ready for your culinary masterpiece.
Serving Suggestions and Variations:
This Grilled Cheese Burrito is fantastic on its own, but it also pairs perfectly with a variety of sides. A simple side salad with a light vinaigrette will add a refreshing contrast to the richness of the burrito. Or, for a more indulgent meal, serve it with a side of crispy french fries or sweet potato fries. Dipping sauces are also a great addition! Ranch dressing, salsa, guacamole, or even a creamy chipotle sauce would all be delicious. For a fun twist, try cutting the burrito into smaller pieces and serving it as an appetizer with a selection of dipping sauces.
Here are a few more variation ideas to get your creative juices flowing:
- Breakfast Burrito: Scramble some eggs, add some bacon or sausage, and a sprinkle of cheddar cheese.
- Pizza Burrito: Fill it with pepperoni, mozzarella cheese, and pizza sauce.
- Philly Cheesesteak Burrito: Thinly sliced steak, sautéed onions and peppers, and provolone cheese.
- Spicy Southwest Burrito: Black beans, corn, salsa, pepper jack cheese, and a drizzle of chipotle mayo.
I truly believe that this Grilled Cheese Burrito will become a staple in your kitchen. It’s the perfect solution for a quick and easy weeknight dinner, a satisfying lunch, or even a fun weekend brunch. It’s also a great way to use up leftover ingredients in your fridge. So, don’t be afraid to get creative and experiment with different fillings and flavors. The most important thing is to have fun and enjoy the process!
Now, it’s your turn! I’m so excited for you to try this recipe and experience the magic of the Grilled Cheese Burrito for yourself. Once you’ve made it, I’d love to hear about your experience. What fillings did you use? What dipping sauces did you try? Did you make any modifications to the recipe? Share your photos and stories with me! You can tag me on social media or leave a comment below. I can’t wait to see what delicious creations you come up with. Happy cooking!
Grilled Cheese Burrito: The Ultimate Comfort Food Recipe
Easy, customizable Grilled Cheese Burrito! Melty cheese, crispy tortilla, and your favorite fillings combine in one delicious package.
Ingredients
Instructions
Recipe Notes
- Cheese variations: Experiment with different types of cheese! Pepper jack adds a kick, Monterey Jack is mild and creamy, and cheddar is a classic choice. A blend of cheeses is always a good idea.
- Protein additions: Add shredded chicken, ground beef, or chorizo for a heartier burrito. Make sure the protein is fully cooked before adding it to the burrito.
- Vegetarian options: Add black beans, corn, bell peppers, or onions for a vegetarian-friendly burrito. Sauté the vegetables before adding them to the burrito for a softer texture.
- Spice it up: Add a pinch of cayenne pepper or a dash of hot sauce to the cheese for a spicy kick.
- Sweet and savory: Try adding a thin layer of fig jam or apple butter to the tortilla before adding the cheese for a sweet and savory twist.
- Make it ahead: You can assemble the burritos ahead of time and store them in the refrigerator for up to 24 hours. Just be sure to wrap them tightly in plastic wrap to prevent them from drying out. When you’re ready to cook them, simply grill them as directed.
- Grill pan alternative: If you don’t have a skillet or griddle, you can also cook the burrito in a grill pan. The grill marks will add a nice touch.
- Oven-baked option: For a hands-off approach, you can bake the burrito in the oven. Preheat the oven to 350°F (175°C). Assemble the burrito as directed, then wrap it in foil and bake for 15-20 minutes, or until the cheese is melted. Remove the foil for the last 5 minutes to crisp up the tortilla.
- Leftovers: Leftover grilled cheese burritos can be stored in the refrigerator for up to 3 days. Reheat them in a skillet, microwave, or oven.
- Don’t overcrowd the skillet: If you’re making multiple burritos, don’t overcrowd the skillet. Cook them in batches to ensure even browning.
- Use a non-stick skillet: A non-stick skillet will make it easier to flip the burrito and prevent it from sticking.
- Adjust the heat as needed: If the tortillas are browning too quickly, reduce the heat. If the cheese isn’t melting fast enough, increase the heat slightly.
- Be patient: Don’t rush the cooking process. Low and slow is the key to a perfectly grilled cheese burrito.