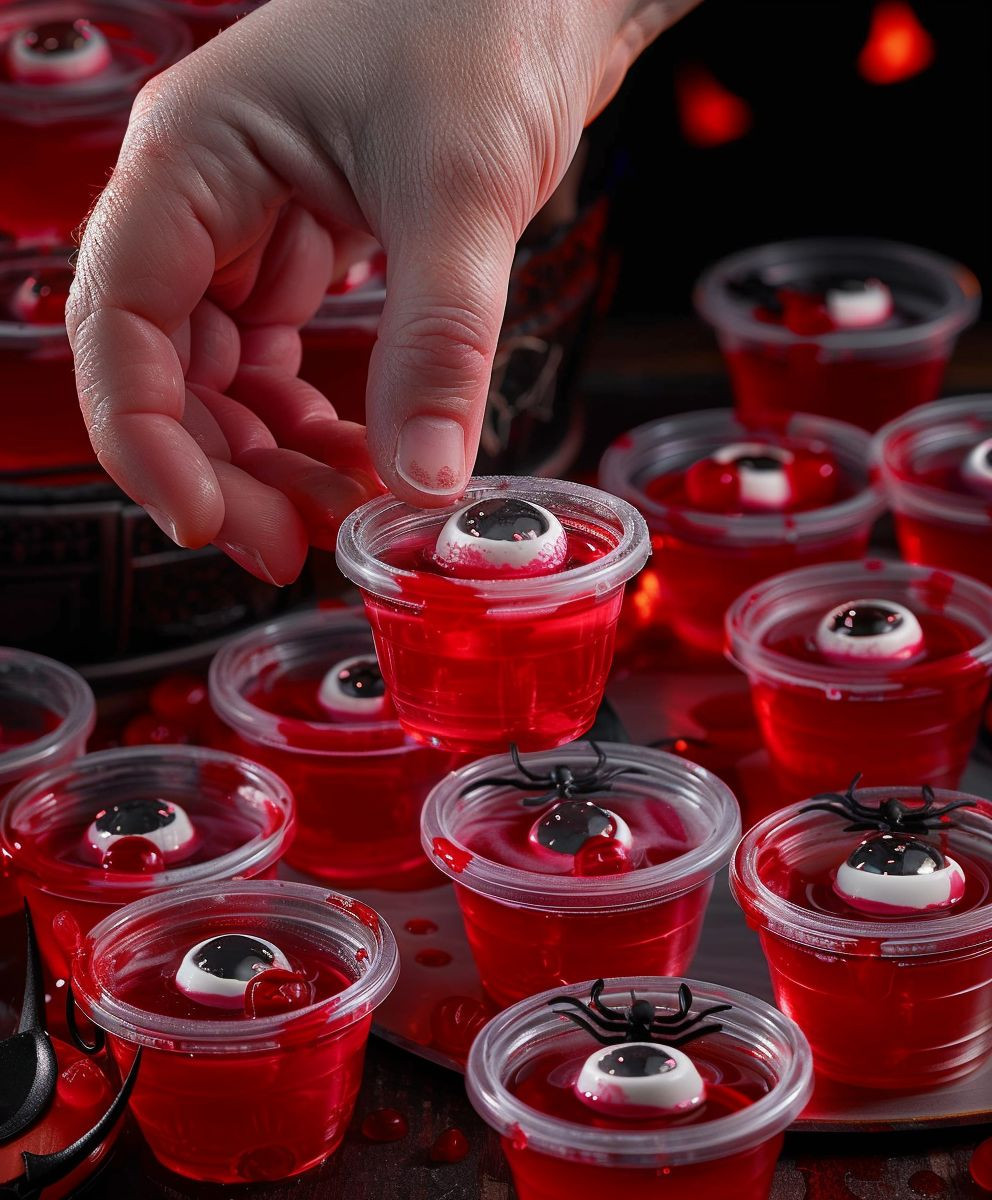
Halloween Jello Shots
Halloween Jello Shots are the perfect spooky treat to elevate your Halloween festivities! Forget the same old candy corn – this year, I’m sharing a recipe that’s guaranteed to be a conversation starter (and a delicious one at that!). These aren’t your average Jello cups; we’re talking vibrant, creepy-crawly creations that are as fun to make as they are to consume.
While the precise origins of Jello shots are a bit murky, their popularity exploded in the late 20th century, becoming a staple at parties and celebrations. Their adaptability to any theme, especially Halloween, makes them incredibly versatile. This recipe takes that versatility to a whole new level, transforming simple Jello into miniature works of edible art.
What makes Halloween Jello Shots so beloved? It’s the perfect blend of sweet, jiggly texture and a customizable boozy kick (optional, of course!). They’re incredibly easy to make, requiring minimal ingredients and even less effort. Plus, the visual appeal is undeniable; imagine the delighted gasps as your guests uncover these spooky delights. Whether you’re hosting a large Halloween bash or a small gathering with close friends, these Halloween Jello Shots are sure to be a hit.
So, get ready to unleash your inner artist and prepare for a truly unforgettable Halloween experience. Let’s dive into the recipe and create some seriously spooky (and delicious) memories!

Ingredients:
- 1 (3 ounce) package orange flavored gelatin
- 1 (3 ounce) package lime flavored gelatin
- 1 (3 ounce) package lemon flavored gelatin
- 1 (3 ounce) package green flavored gelatin
- 2 cups boiling water
- 1 cup cold water
- 1 cup vodka (or other alcohol of your choice, or substitute with additional water for a non-alcoholic version)
- Optional: 1/2 cup gummy worms or other Halloween-themed candies for garnish
- Optional: Plastic spiders or other Halloween-themed decorations
- Silicone molds or small cups (shot glasses work well)
Preparing the Gelatin
- First, I carefully separate the four different flavored gelatin packages. I find it easiest to do this before I start anything else, so I don’t accidentally mix them up later.
- Next, I prepare four separate bowls. I label each bowl clearly with the flavor of gelatin it will contain (orange, lime, lemon, green). This helps avoid any confusion during the mixing process.
- I then add 1/2 cup of boiling water to each bowl. It’s important to use boiling water to properly dissolve the gelatin. I pour slowly and carefully to avoid splashing.
- Now for the fun part – dissolving the gelatin! I add one packet of gelatin to each bowl. I stir each mixture vigorously with a separate spoon for each flavor until the gelatin is completely dissolved. This usually takes about 2-3 minutes per bowl. Make sure there are no undissolved granules remaining.
- Once all the gelatin is dissolved, I add 1/4 cup of cold water to each bowl. This helps to cool the mixture down and prevent the gelatin from setting too quickly.
- Finally, I stir in 1/4 cup of vodka (or your preferred alcohol, or additional water) to each bowl. Again, I stir gently but thoroughly to ensure the alcohol is evenly distributed. If you’re making a non-alcoholic version, simply add an extra 1/4 cup of cold water instead.
Layering the Jello Shots
- Now comes the creative part! I start by carefully pouring about 1/4 cup of the orange gelatin mixture into each of my prepared molds. I try to pour slowly and evenly to avoid creating air bubbles.
- I then place the molds in the refrigerator for approximately 30 minutes, or until the orange layer has set. This allows the layers to solidify and prevents them from mixing.
- Once the orange layer is set, I carefully pour about 1/4 cup of the lime gelatin mixture on top of the orange layer in each mold. Again, I pour slowly and evenly.
- I return the molds to the refrigerator for another 30 minutes to allow the lime layer to set.
- I repeat this process with the lemon and then the green gelatin layers. Each layer needs about 30 minutes to set before adding the next. This ensures a nice, distinct layered effect.
- Important Note: The setting time may vary depending on the temperature of your refrigerator. If your refrigerator is particularly cold, the layers may set faster. If it’s warmer, they may take a little longer.
Chilling and Garnishing
- Once all four layers have been added and set, I place the molds in the refrigerator for at least 4 hours, or preferably overnight, to allow the jello shots to fully set. The longer they chill, the firmer they will be.
- After the chilling period, I carefully remove the jello shots from the molds. Silicone molds are easiest to use for this, as the jello shots will simply pop out. If using other types of molds, you may need to run them under warm water for a few seconds to loosen the jello shots.
- Finally, I garnish the jello shots with gummy worms, plastic spiders, or any other Halloween-themed decorations you like. Get creative and have fun with it!
Troubleshooting Tips
- Cloudy Jello Shots: If your jello shots are cloudy, it’s likely due to undissolved gelatin or too much stirring. Make sure the gelatin is completely dissolved before adding the cold water and alcohol.
- Layers Not Setting: If your layers aren’t setting properly, your refrigerator might not be cold enough. Try placing the molds in the coldest part of your refrigerator.
- Jello Shots Sticking to the Molds: If your jello shots are sticking to the molds, try running the molds under warm water for a few seconds before removing the jello shots.
Serving Suggestions
- Serve these Halloween Jello shots chilled. They are best enjoyed within a few days of making them.
- Arrange them on a platter with other Halloween treats for a spooky spread.
- Consider using different colored gelatin for a more unique look.
Conclusion:
So there you have it – my recipe for spooktacular Halloween Jello Shots! I truly believe this recipe is a must-try for your Halloween gathering, or even just a fun Friday night treat. Why? Because it’s incredibly easy to make, requiring minimal ingredients and even less effort. The vibrant colors are guaranteed to impress your guests, and the customizable nature means you can tailor the flavors and presentation to perfectly match your Halloween theme. Forget store-bought treats – these homemade Halloween Jello Shots offer a unique and delicious alternative that’s far more satisfying (and arguably more fun to make!).
The best part? The possibilities are endless! I’ve given you a basic recipe, but feel free to experiment with different flavors. Think about adding a splash of cranberry juice for a deeper red, or using lime Jello and adding a touch of tequila for a zesty, adult-only version. For a truly creepy effect, try using gummy worms or plastic spiders as garnishes. You could even layer different colored Jello for a truly impressive, multi-toned effect. Get creative and have fun with it!
Beyond the flavor variations, consider how you serve these delightful shots. Use fun, themed cups – plastic pumpkins, skull-shaped glasses, or even small cauldrons would all add to the Halloween atmosphere. You can also arrange them on a bed of dry ice for a truly chilling presentation (always supervise children around dry ice!). A simple garnish of whipped cream and chocolate shavings can elevate the presentation, too. Don’t be afraid to get creative and personalize your serving style to match your party’s overall aesthetic.
I’ve found that these Halloween Jello Shots are a huge hit with both kids and adults (the adult versions, of course, are for the grown-ups!). They’re the perfect balance of sweet and fun, making them a guaranteed crowd-pleaser at any Halloween party. They’re also incredibly versatile – perfect for a casual get-together with friends, a spooky family gathering, or even a themed cocktail party. The ease of preparation means you can spend more time enjoying the festivities and less time slaving away in the kitchen.
So, what are you waiting for? Give this recipe a try and let me know how it turns out! I’d love to hear about your experiences, any variations you create, and see pictures of your spooky creations. Share your photos and feedback on social media using the hashtag #HalloweenJelloShots – I can’t wait to see what you come up with! Remember, the most important ingredient is having fun, so get creative and enjoy the process of making these delicious and festive treats. Happy Halloween!
Don’t forget to share your amazing Halloween Jello Shot creations with me and the world!
Happy haunting!
Halloween Jello Shots: Spooky Recipes & Easy DIY Ideas
Spooky, layered jello shots perfect for Halloween parties! Four vibrant colors create a fun, festive treat. Easy to make with minimal cook time, but requires chilling time.
Ingredients
Instructions
Recipe Notes
- Cloudy jello shots may result from undissolved gelatin or excessive stirring. Ensure gelatin is fully dissolved before adding cold water and alcohol.
- Layers may not set properly if your refrigerator isn’t cold enough. Use the coldest part of your refrigerator.
- Jello shots sticking to molds? Run molds under warm water before removing.
- Serve chilled within a few days of making.