Halloween Oreo Dirt Cake is more than just a dessert; it’s a delightful, edible spectacle that perfectly encapsulates the playful spirit of the spooky season! Imagine a dish so ingeniously crafted, it transforms simple ingredients into a whimsical, ghoulish landscape, ready to captivate both young and old. I’ve always found that the very best Halloween treats are those that combine irresistible flavor with an element of fun, and this recipe delivers on all fronts.
Why This Spooky Sweet Treat is a Family Favorite
What makes this particular creation a perennial hit is its incredible versatility and the sheer joy it brings to any festive gathering. The rich, creamy layers—often a luscious combination of cream cheese, pudding, and whipped topping—are perfectly complemented by the crumbly, chocolatey “dirt” made from crushed Oreo cookies. It’s a symphony of textures and tastes, offering a smooth, decadent mouthful followed by the satisfying crunch of cookie bits. Furthermore, the no-bake nature of a Halloween Oreo Dirt Cake makes it an incredibly convenient and stress-free option for busy hosts, allowing more time for costume planning and less for oven-watching.
Historically, “dirt cake” has been a beloved American potluck staple for decades, revered for its simplicity and crowd-pleasing appeal. Its Halloween transformation elevates it, turning a comforting classic into a canvas for creative expression. Adding gummy worms, candy corn pumpkins, or even small toy gravestones turns this dessert into an interactive, themed masterpiece. It’s not just about eating; it’s about experiencing the fun, imaginative side of Halloween through a truly delicious treat.

Ingredients:
- Oreo Cookies: Two (2) packages (14.3 ounces each) of original Oreo cookies. You’ll need about 45-50 cookies in total. Make sure they’re the classic ones, not Double Stuf, for the best crumb texture that mimics real dirt.
- Cream Cheese: One (1) 8-ounce block of full-fat cream cheese, softened to room temperature. This is absolutely crucial for a smooth, lump-free filling; cold cream cheese will make your filling lumpy.
- Unsalted Butter: One (1) stick (1/2 cup) of unsalted butter, also softened to room temperature. Like the cream cheese, proper temperature ensures it creams beautifully with other ingredients.
- Powdered Sugar: One (1) cup of powdered sugar (also known as confectioners’ sugar). Sifting it before adding to the mix can help prevent any stubborn lumps in your creamy filling.
- Milk: Three and a half (3 1/2) cups of cold milk. I prefer using whole milk for a richer, more decadent taste, but 2% milk will also work perfectly fine for the pudding mix.
- Instant Vanilla Pudding Mix: Two (2) packages (3.4 ounces each) of instant vanilla pudding mix. Please ensure it specifically says “instant” and not the “cook-and-serve” variety, as they behave very differently.
- Cool Whip: One (1) large (12-ounce) container of frozen whipped topping (like Cool Whip), thawed in the refrigerator overnight or for a few hours until it’s soft but still nicely chilled.
- Vanilla Extract: One (1) teaspoon of pure vanilla extract, for an extra layer of delicious aroma and flavor in the creamy mixture.
For Halloween Decoration (Optional but highly recommended for that true “Halloween Oreo Dirt Cake” theme!):
- Gummy Worms: A generous handful of gummy worms in various colors. These are essential for the classic “dirt cake” look and feel!
- Plastic Spiders: Small, clean plastic spiders or other spooky critters to scatter on top. Make sure they are new and clean if you plan for them to touch the food directly.
- Candy Pumpkins/Corn: Mini candy pumpkins or candy corn for added autumnal colors and festive flair.
- Green Food Coloring: A few drops of green food coloring, if you’re feeling adventurous and want to tint some of your “dirt” for a mossy or eerie slime effect.
- Marshmallow Ghosts: Small marshmallows, which can be easily decorated with edible marker faces to create adorable little ghosts.
- Small Halloween Candies: Any other small Halloween-themed candies you love – think candy eyeballs, sprinkles, or tiny candy bones!
Equipment You’ll Need:
- Food Processor: A good food processor is your best friend for quickly and efficiently transforming those Oreos into perfect crumbs. If you don’t have one, a sturdy Ziploc bag and a rolling pin can also get the job done, though with a bit more elbow grease!
- Large Mixing Bowl: You’ll definitely need a very large mixing bowl to comfortably combine the pudding mixture and whipped topping.
- Electric Mixer: Either a stand mixer equipped with a paddle attachment or a reliable hand-held electric mixer will be absolutely essential for whipping up that smooth and creamy filling.
- Spatulas: Both flexible rubber spatulas for scraping down bowls and sturdy mixing spatulas for folding will come in handy throughout the process.
- Measuring Cups and Spoons: Your standard kitchen essentials for accurate ingredient measurements.
- 9×13-inch Baking Dish or Deep Trifle Bowl: A 9×13-inch dish is great for serving, but a clear glass trifle bowl truly makes the layers shine, enhancing the visual appeal of your Halloween Oreo Dirt Cake.
- Serving Spoon: A large, robust spoon for dishing out generous portions of this delightful dessert.
Preparing the Oreo Crumbs:
- Alright, let’s get started on the foundation of our Halloween Oreo Dirt Cake: the delicious “dirt” itself! Grab your two packages of original Oreo cookies. This step is surprisingly fun and quite therapeutic, if you ask me.
- We’re going to create two different textures of Oreo crumbs to give our “dirt” a more realistic and visually appealing quality. First, separate approximately 15-20 cookies from your total stash. These will be crushed very finely for the inner layers, providing a smooth, consistent base.
- Place this first batch of 15-20 Oreos into your food processor. Pulse the cookies until they are very finely ground, resembling dark, rich soil or fine sand. You want them to be uniform in size, without any noticeable large chunks. Once achieved, carefully transfer these finely crushed crumbs into a small bowl and set them aside. These will integrate seamlessly into the creamy layers.
- Now, take the remaining 30-35 Oreos. Place these into the food processor. For this batch, we’re aiming for a slightly coarser texture. Pulse them just until they are crushed, but still contain some small, irregular pieces mixed in with the finer crumbs. This variation in texture is what will truly give the top layer of your Halloween Oreo Dirt Cake an authentic, freshly tilled “dirt” look and feel.
- If you don’t have a food processor, no worries at all! You can still achieve great results. Place the cookies into a large, sturdy Ziploc bag. Seal the bag, ensuring you press out as much air as possible to prevent it from bursting. Then, use a rolling pin, a meat mallet, or even the bottom of a heavy saucepan to firmly smash and crush the cookies until they reach your desired consistency for both fine and coarse crumbs. You might find it easier to do this in smaller batches.
- Once both your finely crushed and coarsely crushed Oreo crumbs are ready, make sure to keep them in separate bowls. The distinction between the two textures is important for the layering process and for achieving that ultimate “dirt” effect, especially when you apply the final, coarse layer to the top of your Halloween Oreo Dirt Cake. This thoughtful separation is key to a visually and texturally pleasing dessert.
Making the Creamy Filling:
- Let’s move on to creating the luscious, creamy heart of our Halloween Oreo Dirt Cake. In a large mixing bowl, combine your softened cream cheese and softened unsalted butter. I really can’t emphasize enough how important it is for both of these ingredients to be at proper room temperature. If they’re cold, they won’t emulsify correctly, leading to a lumpy, inconsistent filling, which we definitely want to avoid!
- Using your electric mixer (whether it’s a stand mixer with a paddle attachment or a trusty handheld mixer), beat the cream cheese and butter together on medium speed. Continue mixing until the mixture is beautifully light, fluffy, and completely well combined. This usually takes about 2 to 3 minutes. Remember to pause and scrape down the sides of the bowl with a spatula occasionally to ensure every bit is incorporated evenly.
- Now, gradually add the sifted powdered sugar to the cream cheese and butter mixture. Start beating on a low speed until the sugar is fully incorporated and there’s no visible powder flying around. Then, increase the speed to medium-high and continue beating until the mixture becomes wonderfully smooth, creamy, and airy. This sweet and rich base forms the foundational flavor of our dirt cake’s filling.
- In a separate, even larger mixing bowl, pour in your three and a half cups of cold milk. Add the two packages of instant vanilla pudding mix. With a whisk, vigorously beat these together for about 2 minutes, or until you observe the mixture beginning to thicken significantly. It’s crucial not to overmix the pudding at this stage, as it can sometimes become lumpy or lose its optimal creamy texture. You’ll see it transform quite quickly from a liquid to a thick, custard-like consistency.
- Once the pudding has thickened to your satisfaction, let it sit undisturbed for another 2-3 minutes. This allows it to firm up just a little bit more. After that, gently fold in your thawed whipped topping (Cool Whip) into the pudding mixture. Use a large rubber spatula for this, incorporating it carefully with an up-and-over motion so you don’t accidentally deflate all that wonderful airiness from the whipped topping. This step is what makes the filling so incredibly light, fluffy, and decadent.
- Finally, it’s time to bring all the creamy goodness together! Add the cream cheese and butter mixture (that lovely, sweet base you made in step 3) into the large bowl containing your pudding and whipped topping mixture. This is also the perfect moment to stir in your teaspoon of pure vanilla extract for that extra layer of aromatic flavor.
- Using your electric mixer on a low speed, or continuing by hand with a spatula if you prefer, gently mix everything together. The goal here is to just combine until the mixture is smooth and uniform, without any streaks. Again, be mindful not to overmix, as this can break down the structure of the whipped topping and make your filling less airy. What you’re aiming for is a beautifully uniform, pale, and utterly luscious cream. Give it a little taste, and if you desire, you can adjust the sweetness, though I typically find it perfectly balanced as is for a Halloween Oreo Dirt Cake. This exquisite creamy concoction is truly what makes every bite of this dessert so utterly irresistible.
Assembling Your Halloween Oreo Dirt Cake:
- Alright, now for the truly exciting part: assembling our spooky and absolutely delicious Halloween Oreo Dirt Cake! If you’ve chosen a clear dish or trifle bowl, you’re going to love watching those distinct layers come to life before your eyes.
- We’ll begin by establishing our first “dirt” layer. Take a thin layer of the finely crushed Oreo crumbs (from your first batch, remember?) and spread them evenly across the bottom of your 9×13-inch baking dish or trifle bowl. This initial layer creates a solid, flavorful foundation and also acts as a barrier, preventing the creamy filling from sticking directly to the bottom of the dish. Just a few generous tablespoons should be enough to cover the surface thinly and uniformly.
- Next, it’s time for the first creamy layer. Spoon approximately one-third of your wonderfully rich and fluffy creamy filling mixture directly over the Oreo crumb base. Using a spatula or the back of a spoon, gently spread this filling out evenly, ensuring it reaches all the corners and edges of your dish. Be careful not to press down too hard, as the goal is to create distinct, clean layers without mixing them together just yet.
- Now, let’s add another “dirt” layer! Liberally sprinkle another generous layer of the finely crushed Oreo crumbs over the creamy filling you just spread. You really want this to be a visible, satisfying layer of “dirt,” so don’t be shy with the crumbs! This is a crucial step for infusing that fantastic classic Oreo flavor throughout the cake and ensuring every spoonful is packed with it.
- We’re going to repeat this delightful layering process. Add another one-third portion of your creamy filling, carefully spreading it out over the second layer of Oreo crumbs. After that, follow up with another good sprinkle of the finely crushed Oreo crumbs. You should now be seeing beautiful, distinct layers of dark “dirt” alternating with the pale, luscious cream. This visual appeal is a big part of what makes the Halloween Oreo Dirt Cake so special.
- Finally, gently spoon the last third of your creamy filling mixture as the very top creamy layer of your cake. Take your time to spread it out smoothly and evenly across the surface. This will be the canvas for your final “dirt” and decorations.
- Here’s where the magic really happens for our “dirt” effect! Take your reserved, coarsely crushed Oreo crumbs. Generously sprinkle and spread these crumbs all over the top of the final creamy layer. Don’t just lightly dust it; truly cover it, making it look like a fresh, rich pile of garden soil. You can even create slight mounds or uneven textures to give it more depth and a more authentic “dirt” appearance. This coarser texture truly sells the “dirt” effect and is what transforms your dessert into a convincing and delicious Halloween Oreo Dirt Cake.
Decorating for a Spooky Touch:
- With your Halloween Oreo Dirt Cake fully assembled and its final layer of coarse “dirt” beautifully in place, it’s time for the most creative and fun part: bringing on the spooky! This is where your imagination can truly shine, transforming a delightful dessert into a festive and eerie Halloween masterpiece.
- Begin by strategically placing your gummy worms. Some can be half-buried in the “dirt,” making it look as if they are realistically crawling out of the ground, adding an element of surprise. Others can be fully exposed, wriggling across the top surface of the cake. Don’t hesitate to gently poke some into the cake so just their heads or tails are peeking out. This illusion of actual worms in the soil is delightfully creepy and perfect for Halloween!
- If you’re using plastic spiders or other small, creepy-crawly toys, carefully place them directly on top of the “dirt.” You can arrange them so they appear to be scuttling towards the gummy worms, or simply scatter them randomly across the surface for maximum spook factor. Always ensure that any plastic decorations are clean, food-safe, and clearly distinguishable from edible components.
- For a touch of autumnal harvest color and classic Halloween charm, add mini candy pumpkins and candy corn. These are excellent for filling in any bare spots and adding a pop of vibrant color. You can arrange them in small clusters for a focal point or spread them out evenly, depending on the overall aesthetic you’re aiming for.
- To achieve an extra ghoulish touch, I highly recommend making little marshmallow ghosts. Take regular-sized marshmallows, gently flatten one side slightly, and then use an edible marker to draw on two simple eyes and a small, open mouth. Place these adorable (and slightly spooky) ghosts standing upright or lying down on your “dirt” to create a ghostly graveyard scene. If you want them to stand taller, you can even carefully skewer them onto half-toothpicks.
- Feeling particularly creative and wanting to go all out? You can craft edible “tombstones” using rectangular cookies like Milano cookies or graham crackers. Simply use an edible marker to inscribe “RIP” or funny, spooky epitaphs, and then gently push them into the cake, standing upright. For an even more immersive graveyard theme, mix a few drops of green food coloring into a small portion of your reserved top Oreo crumbs. This creates a fantastic “mossy” effect, which you can strategically sprinkle around your tombstones or along the edges of your Halloween Oreo Dirt Cake.
- Remember, this entire dessert is your creative canvas! Feel absolutely free to incorporate any other small Halloween candies, sprinkles, or edible decorations you adore. The more creative and playful you allow yourself to be, the more your Halloween Oreo Dirt Cake will stand out as a truly festive, fun, and memorable dessert for your holiday gathering.
Chilling and Serving:
- After all your dedicated effort in assembling and decorating your masterpiece, the single most crucial step before you can indulge in your Halloween Oreo Dirt Cake is allowing it sufficient time to chill. This step is absolutely non-negotiable! Gently cover the dish loosely with plastic wrap. You want it to be covered to protect it, but avoid pressing down on your beautiful and delicate decorations.
- Place the covered Halloween Oreo Dirt Cake into the refrigerator for a minimum of 4 hours. However, for the absolute best possible flavor development, optimal texture, and ease of serving, I wholeheartedly recommend chilling it overnight. This extended chilling period allows all the distinct layers to fully set and firm up the creamy filling, making it much easier to scoop out clean portions without a messy collapse. Furthermore, it gives the Oreo crumbs ample time to soften slightly, melding beautifully with the creamy layers for an incredibly smooth, cohesive, and well-integrated experience. The flavors also have a chance to meld and deepen, which only enhances the overall deliciousness.
- Once your Halloween Oreo Dirt Cake has been thoroughly chilled and has reached its perfect set consistency, it is finally ready to be unveiled and enjoyed! Use a large serving spoon or a wide spatula to scoop out generous portions. Because it’s a “dirt” cake, there’s no need to aim for perfectly neat or precise slices; a rustic, hearty scoop actually adds to its charming and informal appeal.
- Serve your spooky, sweet treat immediately and prepare to watch your guests’ faces light up with delight! It’s not just a dessert; it’s a fantastic conversation starter and an absolute guaranteed hit at any Halloween gathering, bringing smiles and a touch of delicious spookiness to the table.
- Should you have any glorious leftovers (which is rare, but possible!), they should be stored properly. Simply cover the dish tightly with plastic wrap or transfer portions to airtight containers, and keep them in the refrigerator. The cake will remain wonderfully fresh and delicious for up to 3-4 days. While it truly is at its peak when enjoyed fresh within a day or two, it often tastes equally wonderful a few days later, sometimes even becoming softer and more integrated in texture as the crumbs continue to absorb moisture from the cream.
Tips for the Perfect Halloween Oreo Dirt Cake:
- Room Temperature Ingredients are Key: I really can’t stress this enough! For the creamiest, most luscious, and absolutely lump-free filling, ensure your cream cheese and unsalted butter are thoroughly softened to room temperature. It’s best to take them out of the fridge at least 30 minutes to an hour before you plan to start mixing. This crucial step prevents a grainy or gritty texture and guarantees smooth emulsification, leading to a much more delightful result.
- Don’t Overmix the Pudding: When whisking the instant pudding mix with the cold milk, mix until it just thickens. Be mindful not to overmix, as doing so can sometimes break down the starches in the pudding, potentially resulting in a thinner, less set, or even slightly watery consistency, which we definitely want to avoid in our firm Halloween Oreo Dirt Cake. Stop as soon as it reaches that desired thick, custard-like state.
- Gently Fold in Whipped Topping: When it comes to combining the prepared pudding with the thawed whipped topping, use a light, gentle folding motion with a rubber spatula. This technique is important for preserving the airiness and volume of the whipped topping, which directly contributes to the light and fluffy texture of your overall dirt cake filling.
- Vary Oreo Crumb Texture: As we discussed in the preparation steps, employing a mix of both finely crushed and coarsely crushed Oreos is a secret weapon for creating a more realistic and visually appealing “dirt” effect. The fine crumbs blend seamlessly into the creamy layers, providing consistent flavor, while the coarser crumbs on top add fantastic visual interest and a varied texture that truly sells the “dirt” illusion.
- Chill Time is Essential: This isn’t merely a suggestion; it’s an absolute requirement for success! Allowing a minimum of 4 hours, and preferably chilling overnight, enables all the creamy layers to set properly, firming up the dessert beautifully. It also gives all the delicious flavors ample time to marry and deepen. Rushing this critical chilling step will almost certainly result in a messy, unset cake that lacks the desired structure and cohesive texture.
- Layering Technique: When you’re spreading the creamy layers over the Oreo crumbs, always do so gently and carefully. Avoid pressing down too hard, as this can compact the “dirt” layers or cause them to mix prematurely with the cream, blurring your beautiful distinct layers. A light, even spread is all that’s needed to maintain the integrity of each layer.
- Make it Your Own: While the classic “dirt” cake is undeniably wonderful, the Halloween theme provides an abundance of opportunities for personalization and creative expression. Don’t be afraid to experiment with different types of Halloween candies, cookie shapes, or even adding a few drops of food coloring to a small portion of the top Oreo crumbs to create spooky “moss” or eerie “slime” effects for your Halloween Oreo Dirt Cake.
- Consider a Trifle Bowl: If you happen to own a clear glass trifle bowl, I wholeheartedly recommend using it for this dessert! The distinct and beautiful layers of dark Oreo crumbs contrasting with the light, pale cream are incredibly visually stunning. A trifle bowl truly enhances the presentation, especially with all your spooky decorations playfully peeking through, making your Halloween Oreo Dirt Cake an impressive centerpiece.
Variations to Spookify Your Dirt Cake:
- Worm-Free Option: If gummy worms aren’t quite your favorite or you’re catering to different tastes, consider other delightful (and still creepy) candy alternatives like gummy spiders, gummy snakes, or even chocolate rocks. Chocolate rocks can give it a more geological, stony “dirt” feel that is equally thematic.
- Chocolate Lover’s Dream: For an even more intense chocolate experience, you can easily swap out the vanilla instant pudding mix for chocolate instant pudding. To take it a step further, consider swirling in a small amount of melted dark chocolate into the creamy filling for an extra layer of rich, decadent cocoa flavor in your Halloween Oreo Dirt Cake.
- Minty Graveyard: Introduce a refreshing twist by using Mint Oreo cookies for your crumbs. Additionally, you can add a touch of mint extract to your creamy filling. Green gummy worms would look exceptionally fitting and vibrant against the dark minty “dirt” for this variation!
- Berry Patch Dirt: While perhaps less overtly “Halloween,” for a unique flavor profile, you could strategically layer fresh raspberries or blackberries between the creamy layers. This creates a delightful “berry patch” effect, with the dark crumbs representing the rich soil beneath a fruit garden.
- Peanut Butter Perfection: For the ultimate flavor pairing, mix a few generous tablespoons of smooth peanut butter into your cream cheese mixture. This creates a delightful peanut butter Oreo dirt cake variation, a classic combination that is incredibly hard to resist.
- Pumpkin Spice Touch: To infuse a wonderful autumnal vibe into your Halloween Oreo Dirt Cake, consider adding a teaspoon of pumpkin pie spice to your creamy filling. It will impart a warm, festive aroma and taste that complements the chocolate and cream beautifully.
- Candy Corn Swirl: Crush some candy corn and gently swirl it into a small portion of your creamy filling for a fun burst of color and a uniquely sweet flavor profile. Alternatively, simply use candy corn generously as a vibrant topping decoration.
- Grave Digger’s Delight: For a truly elaborate and amusing Halloween display, consider using a clean, brand new toy plastic shovel or a small trowel as your serving utensil. It adds a wonderfully quirky and themed touch that your guests will undoubtedly adore and remember.
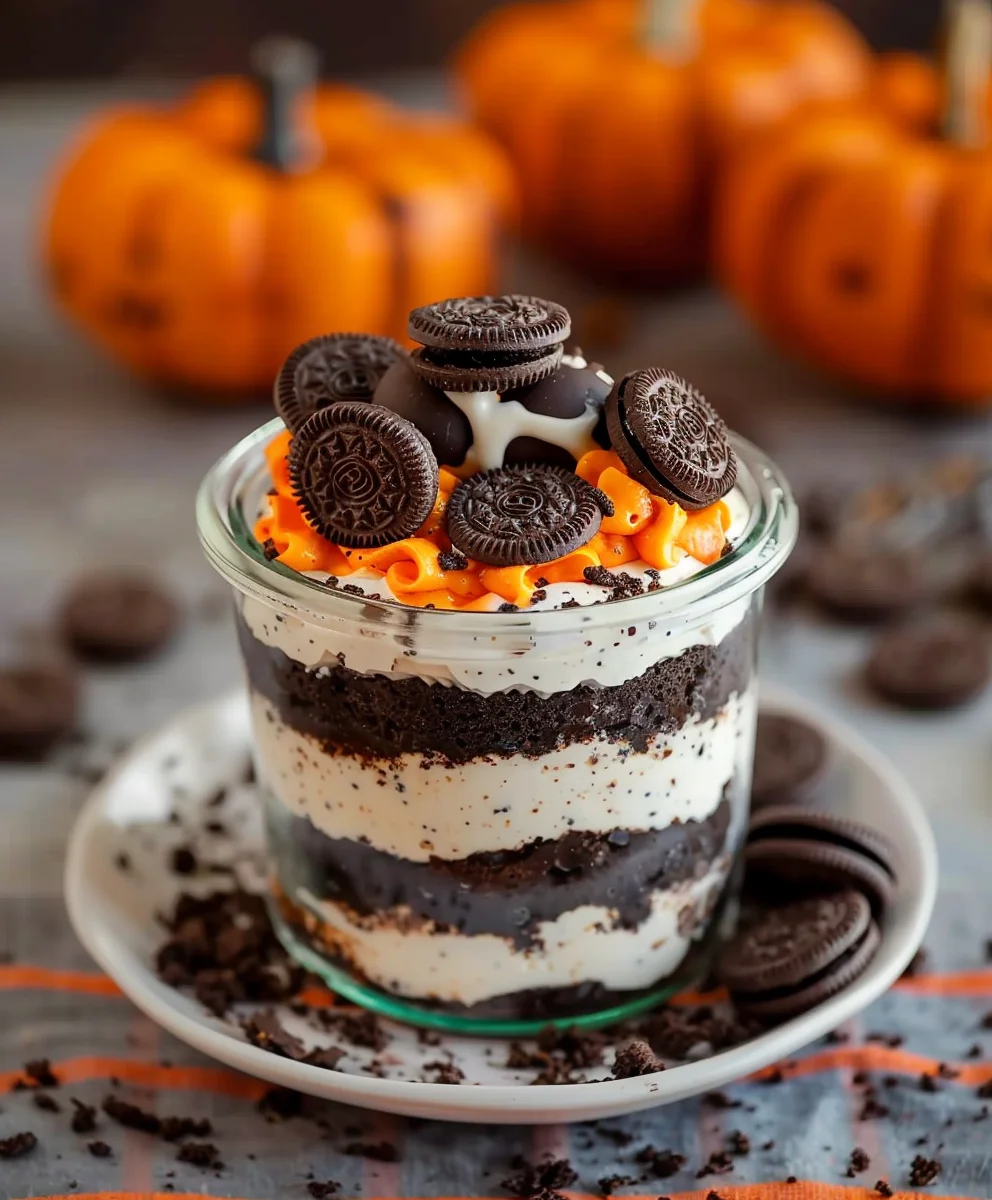
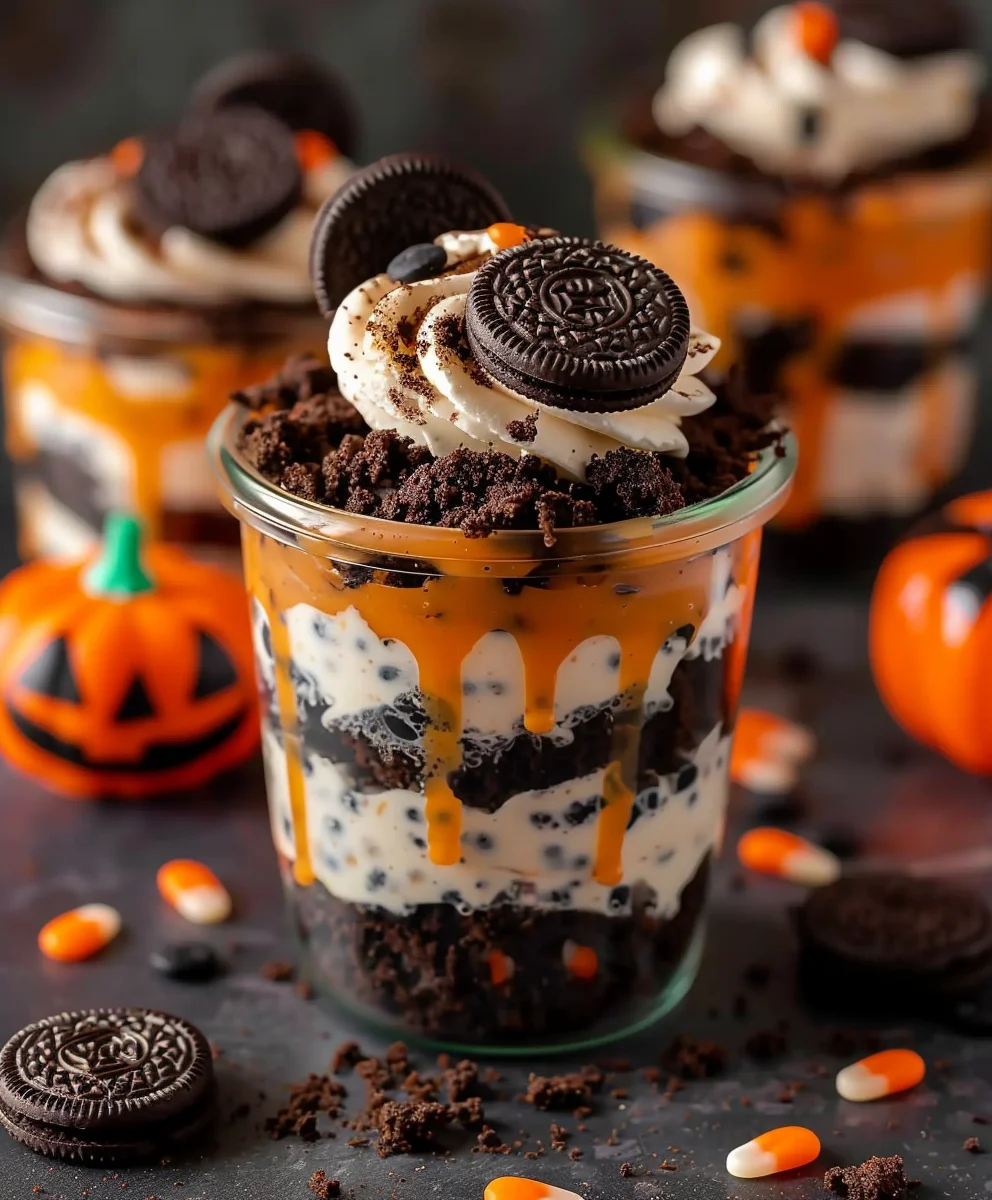
- Individual Servings: Instead of preparing one large dish, layer your Halloween Oreo Dirt Cake into individual clear plastic cups or small mason jars. This not only makes for incredibly easy serving but also looks exceptionally charming and appealing, especially with a gummy worm playfully peeking out of each personalized cup!
Conclusion:
This isn’t just any dessert; it’s a showstopper that consistently brings smiles, especially during the spooky season. The combination of rich, creamy pudding, whipped topping, and crushed Oreo cookies creates an irresistible texture that’s both smooth and delightfully crunchy. It’s a no-bake wonder, meaning you spend less time in the kitchen and more time enjoying the festivities. Imagine the delight on your guests’ faces as they dig into layers of chocolatey goodness, speckled with “dirt” that perfectly captures the Halloween spirit. It’s incredibly easy to assemble, making it ideal for busy hosts, and yet it looks like you’ve put in hours of effort. Seriously, this Halloween Oreo Dirt Cake is the ultimate crowd-pleaser, delivering on taste, ease, and visual appeal. It perfectly balances a sophisticated dessert profile with a playful, thematic presentation, ensuring it appeals to both adults and children alike. The rich chocolate flavor from the Oreos and pudding is deeply satisfying, complemented by the lightness of the whipped topping, creating a dessert that’s decadent without being overly heavy. It’s a dessert that truly embodies the joy and playful spookiness of Halloween, making it an absolute must-try for your next celebration.
Serving Suggestions & Creative Variations to Elevate Your Spooky Treat:
When it comes to serving your spectacular Halloween Oreo Dirt Cake, you have a plethora of options to truly make it shine. For individual portions, clear plastic cups or small glass jars are absolutely perfect. Not only do they look incredibly charming, but they also allow your guests to admire the beautiful layers of “dirt” and creamy filling before they even take their first bite. You can even tie a small festive ribbon around each jar or add a personalized Halloween-themed tag. If you’re catering to a larger crowd, a grand trifle bowl makes for a stunning centerpiece on your dessert table. The height and transparency of a trifle bowl will showcase the distinct layers beautifully, making it an undeniable focal point.
But don’t stop there! The beauty of this Halloween Oreo Dirt Cake lies in its versatility. You can customize it endlessly to suit your preferences and imagination.
Embrace the Spooky Theme:
Go wild with thematic decorations! Instead of plain gummy worms, hunt for sour gummy worms or even gummy spiders to crawl out of the “dirt.” Mini chocolate gravestone cookies, strategically placed, can transform your cake into a spooky graveyard scene. You can even find edible candy eyeballs to peek out from the chocolate layers, adding an unexpected and delightful creepiness. For a truly ghoulish touch, consider making small meringue ghosts to perch on top. Don’t forget to scatter some candy corn or mini pumpkin candies around the base for an extra festive touch.
Flavor Adventures:
While classic chocolate pudding is divine, feel free to experiment with other pudding flavors. Vanilla pudding creates a lovely contrast with the dark Oreos, mimicking a lighter, sandier dirt, perfect for a “graveyard by moonlight” theme. White chocolate pudding would also be a fantastic choice for a richer, creamier base. For an adult-only version, you could infuse the pudding mixture with a touch of coffee liqueur or even a splash of orange-flavored liqueur for a subtle, sophisticated twist that complements the chocolate beautifully. Imagine a pumpkin spice pudding for a truly autumnal take, or even a cheesecake flavored pudding for an extra rich dessert.
Cookie Creativity:
Don’t limit yourself to just regular Oreos! While they are the classic choice, experimenting can be fun. Golden Oreos would make a “lighter dirt” or sand effect, perfect for a different kind of themed cake, perhaps a desert mummy theme. Chocolate wafer cookies can also be crushed and used for a slightly less sweet but equally chocolatey base. Keep an eye out for seasonal Oreo flavors, like pumpkin spice, mint, or even red velvet, to add another layer of flavor complexity and a unique twist to your Halloween dessert. These variations can transform the entire flavor profile, offering endless possibilities for repeat enjoyment.
Candy Add-ins:
Mix in your favorite Halloween candies! Candy corn, mini Reese’s peanut butter cups, or even chopped Snickers bars can be folded into the creamy layers for an extra burst of flavor and texture. Sprinkle some festive sprinkles on top for a final flourish. Bits of crushed caramel or toffee would also provide a delightful crunch and buttery flavor that pairs wonderfully with the chocolate.
Your Turn to Create and Share!
Now that you have all the tips and tricks, I truly hope you feel inspired to whip up this incredible Halloween Oreo Dirt Cake. It’s more than just a recipe; it’s an experience, a delightful treat that embodies the fun and spirit of the season. I promise you, it’s going to be a massive hit! I absolutely adore seeing your culinary creations, so once you’ve made your spooky masterpiece, please don’t hesitate to share your photos and experiences with me. Tag me on social media or drop a comment below. Tell me about your favorite variations, your serving suggestions, or simply how much your friends and family enjoyed this fantastic dessert. Your feedback and creative twists are what make this community so vibrant and inspiring. Go forth, embrace the spooky season, and create some delicious memories with your very own Halloween Oreo Dirt Cake! Happy haunting, and happy baking (or rather, no-baking)!
Halloween Oreo Dirt Cake: Spooky Easy No-Bake Treat!
A delightful, edible spectacle that perfectly encapsulates the playful spirit of the spooky season! This no-bake Halloween Oreo Dirt Cake transforms simple ingredients into a whimsical, ghoulish landscape, combining irresistible flavor with elements of fun for a family-favorite treat.
Ingredients
-
2 packages (14.3 oz each) Oreo cookies
-
1 (8 oz) block full-fat cream cheese, softened
-
1 stick (1/2 cup) unsalted butter, softened
-
1 cup powdered sugar
-
3 1/2 cups cold whole milk
-
2 packages (3.4 oz each) instant vanilla pudding mix
-
1 large (12 oz) container frozen whipped topping, thawed
-
1 tsp pure vanilla extract
-
Gummy worms (for decoration)
-
Plastic spiders (optional, for decoration)
-
Mini candy pumpkins or candy corn (for decoration)
-
Green food coloring (optional, for decoration)
-
Marshmallow ghosts (made with marshmallows & edible marker, for decoration)
-
Assorted small Halloween candies (optional, for decoration)
Instructions
-
Step 1
Finely crush 15-20 Oreo cookies in a food processor until resembling fine sand. Transfer to a bowl. Coarsely crush remaining 30-35 Oreo cookies, leaving some small chunks. Transfer to a separate bowl. (Alternatively, crush all cookies in a sealed bag with a rolling pin, separating fine and coarse crumbs). -
Step 2
In a large bowl, beat softened cream cheese and butter with an electric mixer until light and fluffy (2-3 minutes), scraping down sides. Gradually add powdered sugar; beat on medium-high until smooth and airy. -
Step 3
In a separate large bowl, whisk cold milk and instant vanilla pudding mix for 2 minutes until thickened. Let sit 2-3 minutes. Gently fold in thawed whipped topping into the pudding mixture with a rubber spatula. -
Step 4
Add the cream cheese mixture and vanilla extract to the pudding-whipped topping mixture. Gently mix with an electric mixer on low or by hand until smooth and uniform. -
Step 5
Spread a thin layer of finely crushed Oreos across the bottom of a 9×13-inch dish or trifle bowl. Spoon one-third of the creamy filling over the Oreo layer, spreading gently. Liberally sprinkle another layer of finely crushed Oreos. Repeat this layering: add another third of the creamy filling, then another layer of finely crushed Oreos. Spoon the remaining creamy filling as the top creamy layer, spreading smoothly. -
Step 6
Generously sprinkle the reserved coarsely crushed Oreos over the entire top surface to create an authentic ‘dirt’ effect, creating slight mounds for texture if desired. -
Step 7
Decorate the top with gummy worms, strategically placing some half-buried. Add plastic spiders, mini candy pumpkins, candy corn, and marshmallow ghosts (made by drawing faces on marshmallows with an edible marker). (Optional) Make edible tombstones from rectangular cookies with ‘RIP’ written in edible marker, and push into the cake. Sprinkle green-tinted Oreo crumbs for a ‘mossy’ effect. Add any other small Halloween candies. -
Step 8
Loosely cover the assembled cake with plastic wrap. Refrigerate for a minimum of 4 hours, or preferably overnight, to allow layers to set and flavors to meld. Serve chilled with a large serving spoon. Store any leftovers covered tightly in the refrigerator for up to 3-4 days.
Important Information
Nutrition Facts (Per Serving)
It is important to consider this information as approximate and not to use it as definitive health advice.
Allergy Information
Please check ingredients for potential allergens and consult a health professional if in doubt.