Chocolate Thumbprint Cookies! Prepare to be charmed by a cookie that perfectly marries rich, decadent chocolate with a surprise burst of flavor in every bite! Originating from a delightful Scandinavian tradition, these ‘thumbprint’ cookies, sometimes known as ‘hallongrotta’ or ‘raspberry caves,’ have evolved into countless variations globally. While the classic often features fruit jam, our chocolate rendition takes this beloved concept to a new, irresistible level. I’ve always found something incredibly comforting about the balance they strike – a tender, buttery chocolate base cradling a luscious dollop of chocolate ganache, caramel, or even another type of jam. It’s the ultimate canvas for creativity, yet inherently simple and satisfying. People adore these cookies not just for their stunning appearance, making them a centerpiece on any dessert platter, but for their incredible taste and texture. The melt-in-your-mouth cookie combined with a gooey center creates a symphony of sensations that’s simply addictive. Whether you’re baking for a holiday gathering, a special occasion, or simply treating yourself, mastering the art of the Chocolate Thumbprint Cookies is a truly rewarding experience.

Ingredients:
-
For the Irresistible Chocolate Thumbprint Cookie Dough:
- 1 cup (2 sticks or 226g) unsalted butter, softened: I always make sure my butter is truly soft, but not melted, for the creaming process. This is crucial for achieving that light, airy texture in our Chocolate Thumbprint Cookies. If it’s too cold, it won’t cream properly; too warm, and your dough might become greasy.
- ½ cup (100g) granulated sugar: This provides the foundational sweetness and helps tenderize the cookies. It also works with the butter to create tiny air pockets during creaming, contributing to the cookie’s final texture.
- ½ cup (110g) packed light brown sugar: The brown sugar adds a lovely caramel-like note and ensures our Chocolate Thumbprint Cookies remain moist and chewy. Its molasses content is key to that desirable soft texture.
- 1 large egg: This acts as a binder, holding all our ingredients together and adding richness. Make sure it’s at room temperature for better emulsification with the butter and sugar.
- 1 teaspoon pure vanilla extract: Don’t skimp on good quality vanilla! It truly elevates the flavor of almost any baked good, and these cookies are no exception. It complements the chocolate beautifully.
- 2 cups (240g) all-purpose flour: I always recommend using a kitchen scale for flour to ensure accuracy. Too much flour can make your cookies dry and crumbly, while too little might make them spread too much. This is the structural backbone of our cookie.
- ¾ cup (65g) unsweetened cocoa powder: For that deep, rich chocolate flavor in the cookie itself. Choose a good quality unsweetened cocoa powder; Dutch-processed will give a darker color and milder flavor, while natural cocoa powder will yield a lighter color and more intense chocolate flavor. Either works wonderfully for these Chocolate Thumbprint Cookies.
- ½ teaspoon baking soda: This leavening agent helps our cookies rise slightly and contributes to a tender crumb. It reacts with the acidic cocoa powder to create a light texture.
- ¼ teaspoon salt: Salt is a flavor enhancer, balancing the sweetness and intensifying the chocolate. Never skip the salt in your baking!
-
For the Decadent Chocolate Ganache Filling:
- 4 ounces (113g) good quality semi-sweet or dark chocolate, finely chopped: I prefer to use a chocolate bar that I chop myself, rather than chocolate chips, as bar chocolate melts more smoothly and yields a silkier ganache. However, good quality chocolate chips will also work perfectly fine for our delicious Chocolate Thumbprint Cookies.
- ½ cup (120ml) heavy cream (also known as whipping cream): The fat content in heavy cream is essential for creating a stable, luxurious ganache. Don’t substitute with lighter creams, as the ganache might not set properly.
- 1 tablespoon unsalted butter (optional, for extra sheen and richness): I love adding this at the end for an extra glossy finish and velvety texture, but it’s not strictly necessary if you’re looking to keep things simpler.
- Pinch of sea salt (optional, for flavor enhancement): A tiny pinch of flaky sea salt on top of the ganache really brings out the chocolate flavor and adds a sophisticated touch.
-
Optional Garnishes:
- Flaky sea salt: A sprinkling on top of the finished ganache is absolutely divine.
- Chocolate sprinkles or finely chopped nuts: For a bit of extra texture and visual appeal.
Making the Chocolate Thumbprint Cookie Dough
Let’s get started on creating the foundation for our incredible Chocolate Thumbprint Cookies! This part is all about precision and patience to ensure the perfect texture.
-
Prepare Your Workspace and Ingredients:
Before I even touch a mixer, I like to ensure all my ingredients are measured out and ready to go. This practice, known as mise en place, makes the entire baking process smoother and helps prevent any last-minute scrambling. Make sure your butter and egg are at room temperature. If you forgot to take them out, you can quickly soften butter by microwaving it in 10-second bursts, or warming your egg in a bowl of warm water for a few minutes.
-
Cream the Butter and Sugars:
In a large mixing bowl, using either a stand mixer fitted with the paddle attachment or a hand mixer, cream together the softened unsalted butter, granulated sugar, and packed light brown sugar. I typically start on a low speed to combine everything, then increase the speed to medium-high. You want to beat this mixture for at least 3-5 minutes. This step is critically important; you’re incorporating air into the butter and sugar, which will result in light, tender Chocolate Thumbprint Cookies. The mixture should become pale in color and visibly fluffy. Don’t rush this stage!
-
Incorporate the Wet Ingredients:
Once your butter and sugars are beautifully creamed, crack in the large room-temperature egg. Mix on medium speed until it’s just incorporated, scraping down the sides of the bowl as needed. Overmixing the egg can sometimes lead to a tougher cookie. Then, stir in the pure vanilla extract until just combined. The aroma at this point is already starting to hint at the deliciousness to come!
-
Sift the Dry Ingredients:
In a separate medium bowl, whisk together the all-purpose flour, unsweetened cocoa powder, baking soda, and salt. Sifting these ingredients together ensures they are evenly distributed and helps to prevent lumps in your final cookie dough. This also adds a little more air to the mixture, contributing to the lightness of the cookies.
-
Combine Wet and Dry Mixtures:
Gradually add the dry ingredient mixture to the wet mixture in the stand mixer bowl. I like to do this in two or three additions, mixing on low speed until just combined after each addition. The key here is to mix until just combined. As soon as you no longer see streaks of dry flour, stop mixing. Overmixing at this stage can develop the gluten in the flour too much, leading to tough or dense cookies. We want tender, melt-in-your-mouth Chocolate Thumbprint Cookies!
-
Chill the Dough:
Once your dough is ready, it will be soft and slightly sticky. I highly recommend chilling the dough for at least 30 minutes, or up to 1 hour, in the refrigerator. This step is not optional for thumbprint cookies! Chilling helps solidify the butter, making the dough much easier to handle when shaping. It also prevents the cookies from spreading too much during baking, ensuring they hold their distinct thumbprint shape. Cover the bowl with plastic wrap before chilling.
Shaping and Baking Your Chocolate Thumbprint Cookies
With our dough perfectly chilled, it’s time to bring our delightful Chocolate Thumbprint Cookies to life! This stage is all about forming and baking them to golden perfection.
-
Preheat Oven and Prepare Baking Sheets:
While your dough is chilling (or right before you take it out), preheat your oven to 350°F (175°C). Line two baking sheets with parchment paper or silicone baking mats. This prevents sticking and ensures even baking and easy cleanup. Trust me, parchment paper is your best friend when baking cookies!
-
Portion the Dough:
Remove the chilled dough from the refrigerator. Using a small cookie scoop (about 1.5 tablespoons) or by hand, roll the dough into uniform balls, about 1-inch in diameter. Consistency in size is important for even baking. I find a cookie scoop makes this process quick and keeps my hands less messy. If the dough feels too sticky to roll, you can lightly dust your hands with a tiny bit of cocoa powder or flour, or even chill it for a few more minutes.
-
Roll in Optional Coating (if using):
Some thumbprint recipes call for rolling the dough balls in granulated sugar or finely chopped nuts before pressing. For these chocolate cookies, I usually skip that step as the focus is on the rich chocolate dough and filling. However, if you wanted a little textural contrast, a light roll in granulated sugar or cocoa powder would work.
-
Create the Thumbprint Indentation:
Place the rolled dough balls about 2 inches apart on your prepared baking sheets. Now comes the “thumbprint” part! Using your thumb (or the back of a rounded teaspoon, which I sometimes prefer for a cleaner, deeper well), gently press an indentation into the center of each cookie dough ball. Be careful not to press all the way through the bottom. If the edges crack too much, gently pinch them back together. This indentation will hold our luscious chocolate ganache!
-
Bake the Cookies:
Transfer the baking sheets to the preheated oven. Bake for 10-12 minutes. The exact baking time will depend on your oven and the size of your cookies. You’ll know they’re done when the edges are set, and the centers look just slightly soft. They won’t look golden brown like a vanilla cookie, due to the cocoa powder. Don’t overbake them, or they will become dry! A slightly underbaked chocolate cookie is better than an overbaked one for tenderness.
-
Cool on Baking Sheets:
Once baked, remove the baking sheets from the oven and let the Chocolate Thumbprint Cookies cool on the sheets for about 5 minutes. They are quite delicate when hot, and this brief cooling period allows them to firm up. During this time, the indentations might puff up slightly. If they do, gently re-press them with your thumb or the back of the spoon to ensure there’s enough room for the filling.
-
Transfer to Cooling Rack:
After 5 minutes, carefully transfer the cookies to a wire cooling rack to cool completely. It’s crucial that the cookies are fully cooled before you fill them with the ganache. If they’re still warm, the ganache will melt and run everywhere, ruining all your hard work!
Preparing the Rich Chocolate Filling
While our Chocolate Thumbprint Cookies are cooling, let’s create the star of the show – a velvety, rich chocolate ganache that will nestle perfectly in each cookie.
-
Chop the Chocolate:
If you haven’t already, finely chop your semi-sweet or dark chocolate. The finer the chop, the faster and more evenly it will melt. Place the chopped chocolate in a heatproof bowl. I usually grab a medium-sized glass or ceramic bowl for this.
-
Heat the Heavy Cream:
Pour the heavy cream into a small saucepan. Heat the cream over medium heat until it just begins to simmer around the edges. You’ll see tiny bubbles forming. Do not let it come to a rolling boil! We just want it hot enough to melt the chocolate effectively.
-
Pour and Rest:
Immediately remove the hot cream from the heat and pour it directly over the chopped chocolate in the heatproof bowl. Do not stir yet! Let the mixture sit undisturbed for 5 minutes. This allows the hot cream to begin melting the chocolate without scorching it. This resting period is a secret to super smooth ganache.
-
Stir to Create Ganache:
After 5 minutes, begin stirring the mixture gently, starting from the center and working your way outwards, using a whisk or a rubber spatula. Continue stirring until the chocolate is completely melted and the mixture is smooth, glossy, and homogeneous. If you added the optional tablespoon of butter, stir it in now until fully incorporated. It will add an extra layer of richness and shine to our Chocolate Thumbprint Cookies.
-
Cool and Thicken the Ganache:
Allow the ganache to cool at room temperature for at least 30-60 minutes, or even longer, until it has thickened to a pipeable or spoonable consistency. It should be thick enough to hold its shape in the thumbprint indentation without running over the edges. If you’re in a hurry, you can pop it into the refrigerator for 15-20 minutes, stirring occasionally, but be careful not to let it get too firm. If it gets too firm, you can gently reheat it over a double boiler or in short bursts in the microwave, stirring well each time.
Filling and Finishing Your Chocolate Thumbprint Cookies
The moment of truth! Our cooled cookies are waiting patiently for their luscious filling. This is where your beautiful Chocolate Thumbprint Cookies truly come together.
-
Fill the Cookies:
Once your ganache has reached the desired consistency and the cookies are completely cool, it’s time to fill them. You can use a small spoon to carefully scoop the ganache into each thumbprint indentation. Alternatively, for a neater and more professional look, you can transfer the ganache to a piping bag fitted with a small round tip (or simply snip off the corner of a Ziploc bag) and pipe the ganache into the centers. Fill each cookie generously, but make sure not to overfill so it doesn’t spill over the sides.
-
Add Optional Garnishes:
This is where you can add your personal touch! While the ganache is still wet, sprinkle a tiny pinch of flaky sea salt on top of some or all of your cookies. The contrast of sweet and salty is truly sublime and enhances the chocolate flavor beautifully. You could also add a few chocolate sprinkles, finely chopped nuts, or even a tiny curl of white chocolate for visual appeal. These small details make your Chocolate Thumbprint Cookies even more special.
-
Allow Ganache to Set:
Once all the cookies are filled and garnished, let them sit at room temperature for about 30 minutes to an hour, or until the ganache has fully set. If your kitchen is warm, you can transfer them to the refrigerator for 15-20 minutes to speed up the setting process. Once the ganache is set, it will have a beautiful, firm sheen.
-
Serve and Store:
Your exquisite Chocolate Thumbprint Cookies are now ready to be enjoyed! They make a fantastic addition to any cookie platter, a delightful treat with a cup of coffee, or a perfect gift for friends and family. Store the cookies in an airtight container at room temperature for up to 5-7 days. If your ganache is particularly rich or if it’s a warm environment, you might prefer to store them in the refrigerator, bringing them back to room temperature for about 15-20 minutes before serving for optimal texture and flavor. These cookies also freeze well without the ganache; simply bake, cool, and freeze the plain cookies, then fill them after thawing.
I genuinely hope you enjoy baking and, more importantly, devouring these delightful Chocolate Thumbprint Cookies as much as I do. Happy baking!

Conclusion:
I truly believe this recipe is a phenomenal addition to any baker’s repertoire, and I’m so excited for you to experience the magic of these cookies yourself. There’s something incredibly special about the delicate balance of flavors and textures in these delightful treats that makes them an absolute must-try. The moment you bite into one, you’re greeted by a perfectly tender, buttery shortbread base that practically melts in your mouth, almost instantaneously followed by the rich, gooey embrace of the chocolate filling. It’s a contrast that dances beautifully on your palate, offering both comfort and sophistication in a single bite. What I particularly adore about these cookies is their deceptively simple nature; they look elegant and impressive, yet they are wonderfully straightforward to prepare, making them perfect for bakers of all skill levels. They truly embody the essence of homemade goodness, offering a warmth and charm that store-bought alternatives simply cannot replicate.
When it comes to serving, these cookies are incredibly versatile. Imagine a cozy afternoon, perhaps curled up with a good book and a warm beverage; these cookies are the ideal companion to a robust cup of coffee, a frothy latte, or a fragrant herbal tea. Their indulgent quality makes them a perfect standalone treat, but they also shine brightly on a meticulously arranged dessert platter. Pair them with fresh berries, a scoop of vanilla bean ice cream, or even a light fruit sorbet for a delightful post-dinner offering. Furthermore, if you’re looking for a heartfelt, homemade gift, these cookies are an absolute winner. Arranged beautifully in a decorative tin or a cellophane bag tied with a ribbon, they convey a personal touch and thoughtfulness that is always appreciated. They’re also superb for holiday gatherings, potlucks, or simply as a special treat to brighten someone’s day, bringing a smile to every face they encounter.
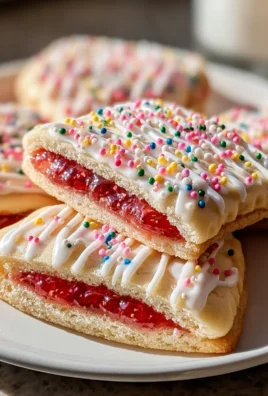
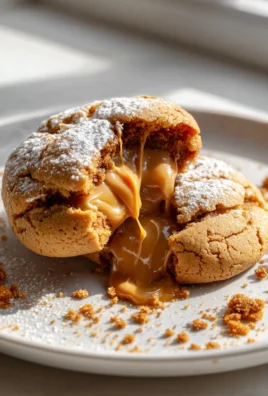
The beauty of this recipe, and specifically our wonderful Chocolate Thumbprint Cookies, lies in their adaptability. While the classic rich chocolate ganache is undeniably divine, I wholeheartedly encourage you to unleash your creativity and experiment with variations. For a different flavor profile, consider filling the thumbprint with a vibrant raspberry or strawberry jam for a delightful sweet-tart counterpoint, or perhaps a luscious salted caramel for an extra layer of indulgence. If you’re feeling adventurous, a dollop of lemon curd or even a peanut butter filling can transform the experience entirely. For those who love a bit of texture, try rolling the cookie dough balls in finely chopped nuts like pecans, walnuts, or almonds before making the thumbprint; this adds a wonderful crunch and a nutty aroma that complements the buttery dough beautifully.
Enhance Your Chocolate Thumbprint Cookies with These Creative Twists:
- Drizzle Options: Once cooled, a delicate drizzle of melted white chocolate, dark chocolate, or even a contrasting caramel sauce over the top can add both visual appeal and another layer of flavor.
- Spice it Up: A tiny pinch of cinnamon, cardamom, or even a touch of espresso powder mixed into the cookie dough can introduce an unexpected warmth and depth that will surprise and delight your taste buds.
- Mini Versions: For a more delicate presentation, you can make smaller cookies, perfect for tea parties or elegant dessert buffets, offering a bite-sized burst of flavor.
So, what are you waiting for? I wholeheartedly encourage you to roll up your sleeves, gather your ingredients, and give these wonderful cookies a try. The process of baking them is a joyful experience in itself, filling your kitchen with an irresistible aroma that promises deliciousness to come. The satisfaction of pulling a batch of perfectly golden, chocolate-filled cookies from the oven is truly unparalleled, and the joy of sharing them with loved ones is even greater. This isn’t just a recipe; it’s an invitation to create memories, to share warmth, and to indulge in a moment of pure, unadulterated pleasure.
I would absolutely love to hear about your baking adventures! Please don’t hesitate to share your photos, your clever modifications, or your favorite filling variations in the comments below. Did you try a unique jam? Did you roll them in a different type of nut? Or perhaps you discovered a new favorite spice to add to the dough? Your insights and experiences are invaluable and help build a wonderful community of fellow bakers. Let’s inspire each other to explore the endless possibilities of these delightful Chocolate Thumbprint Cookies. Happy baking, and I can’t wait to see what you create!
Homemade Chocolate Thumbprint Cookies
These delightful chocolate thumbprint cookies feature a tender, buttery chocolate base cradling a luscious dollop of rich chocolate ganache. A beloved classic, our chocolate rendition offers a symphony of melt-in-your-mouth cookie and a gooey center, perfect for any occasion.
Ingredients
Instructions
Important Information
Nutrition Facts (Per Serving)
It is important to consider this information as approximate and not to use it as definitive health advice.
Allergy Information
Please check ingredients for potential allergens and consult a health professional if in doubt.