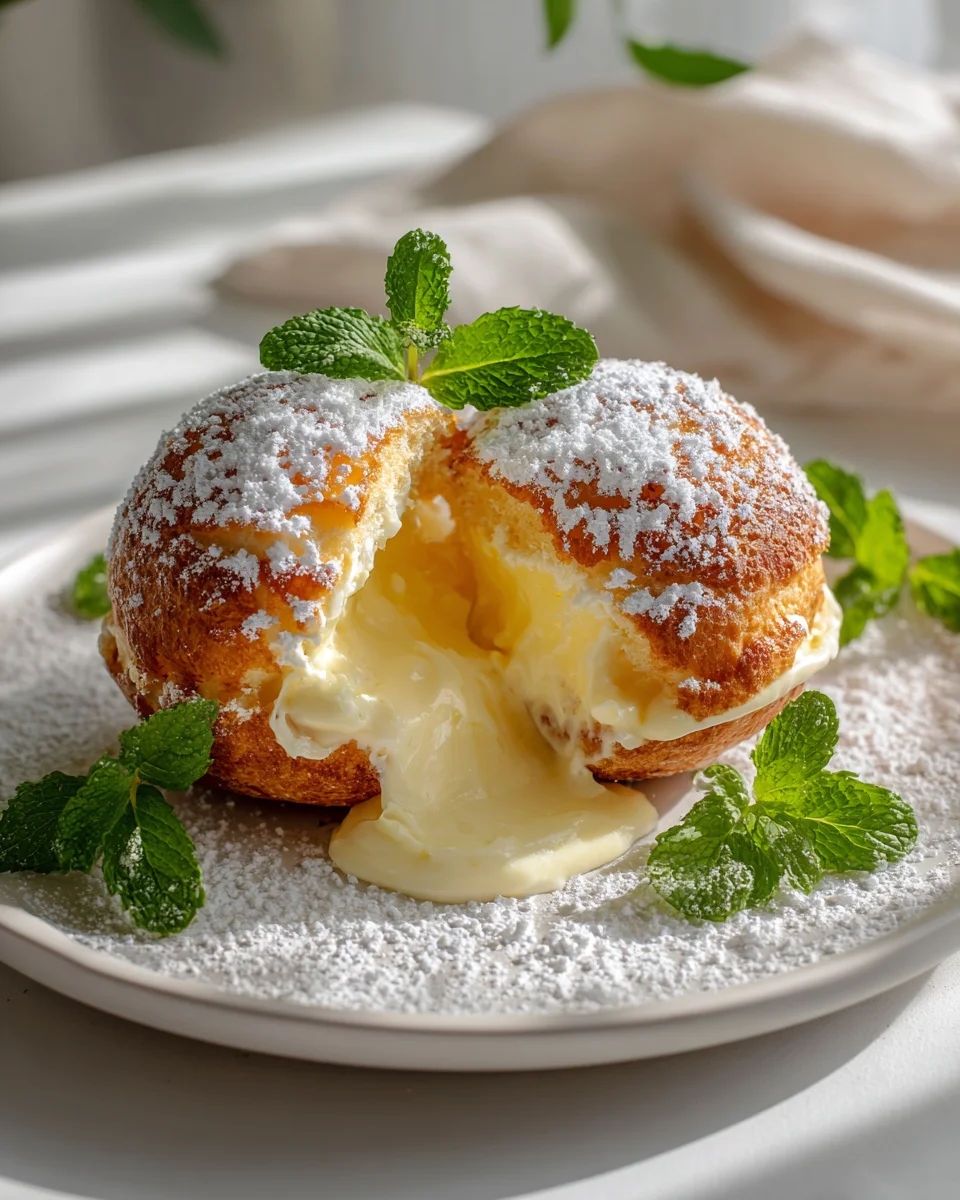
Italian Cream Bombs
Oh my goodness, get ready to experience a dessert that’s truly explosive in flavor! Italian Cream Bombs are quite simply my new obsession, and I guarantee they’re about to become yours too. What makes these little wonders so incredibly special? It’s that perfect marriage of a delicate, slightly crisp (or perhaps soft and yielding, depending on the exact preparation) exterior giving way to the most unbelievably rich, velvety, and sweet Italian cream filling you could ever imagine. We’re talking pure, unadulterated bliss in every single bite!
You are going to absolutely adore these because they’re the ultimate crowd-pleaser – elegant enough for a special occasion, yet so utterly comforting and satisfying for an everyday treat. Picture this: a bite-sized delight that delivers a powerful punch of authentic Italian sweetness, perhaps with hints of vanilla, a whisper of citrus, or even a touch of coffee. They’re not just desserts; they’re tiny explosions of happiness. These Italian Cream Bombs are essentially individual portions of pure creamy heaven, designed to melt in your mouth and leave you craving just one more. Trust me, once you try them, there’s no going back!

Ingredient Notes
Hello, fellow dessert lovers! I’m so excited to share my go-to recipe for these delightful Italian Cream Bombs with you. They’re essentially little pillows of joy, fried until golden and then bursting with a rich, silky Italian pastry cream. Here’s a breakdown of the key ingredients we’ll need to create this magic, along with some handy substitution ideas.
For the Dough:
- All-Purpose Flour: This is the backbone of our fluffy bombs. I recommend using a good quality unbleached all-purpose flour for the best texture. You want something that will give you a tender crumb.
- Granulated Sugar: Not just for sweetness, sugar also helps to tenderize the dough and give it a beautiful golden hue when fried.
- Instant Dry Yeast: My preferred choice for convenience! It doesn’t require activation, so you can mix it directly with your dry ingredients. If you only have active dry yeast, simply proof it first in a portion of the warm milk with a pinch of sugar for about 5-10 minutes until foamy.
- Milk: Whole milk works wonders here, providing richness and tenderness. For a dairy-free alternative, unsweetened almond milk or oat milk can be used, though the texture might be slightly less rich.
- Eggs: Large eggs bind the dough and contribute to its richness and structure. Make sure they’re at room temperature for better incorporation.
- Unsalted Butter: Softened butter adds incredible flavor and creates a tender, melt-in-your-mouth dough. If you need a dairy-free option, a good quality plant-based margarine or vegan butter alternative will work well.
- Salt: A crucial ingredient that balances the sweetness and enhances all the other flavors in the dough. Don’t skip it!
- Neutral Frying Oil: For frying, you’ll need a high smoke point, neutral-flavored oil like sunflower, canola, or vegetable oil.
For the Italian Pastry Cream (Crema Pasticcera):
- Egg Yolks: These are the star of our cream, providing richness, color, and thickening power. Don’t waste the whites; save them for meringues or an omelet!
- Granulated Sugar: Sweetens the cream and helps create that glossy, smooth texture.
- Whole Milk: Again, whole milk is best for a truly luxurious cream. Dairy-free milks can be used here too, but may result in a slightly thinner consistency.
- Cornstarch: This is my secret weapon for a perfectly smooth and stable pastry cream. It ensures a thick cream without any eggy taste. You can substitute with an equal amount of all-purpose flour, but cornstarch tends to give a silkier finish.
- Vanilla Bean Paste or Extract: This is where a lot of the bomb’s delicious flavor comes from! I love using vanilla bean paste for those beautiful specks, but a high-quality vanilla extract is perfectly fine. For an extra touch of brightness, you can add a strip of lemon zest to the milk while it heats, removing it before tempering the yolks.
Step-by-Step Instructions
Alright, let’s get baking (and frying)! Follow these steps closely, and you’ll be enjoying these luscious Italian Cream Bombs in no time.
Part 1: Crafting the Perfect Dough
- Warm the Milk: In a small saucepan, gently warm the milk until it’s lukewarm (about 105-115°F or 40-46°C). It should be warm to the touch but not hot.
- Combine Dry Ingredients: In the bowl of a stand mixer fitted with the dough hook attachment, combine the flour, sugar, and instant dry yeast (if using active dry yeast, activate it first in the warm milk). Give it a quick whisk.
- Add Wet Ingredients: Pour the warm milk into the dry ingredients, then add the eggs and salt. Mix on low speed until a shaggy dough forms, about 2 minutes.
- Knead and Add Butter: Increase the speed to medium-low and continue to knead for about 5 minutes. The dough will start to come together. Now, add the softened butter, one tablespoon at a time, allowing each addition to be fully incorporated before adding the next. This will take another 5-7 minutes.
- Achieve Smoothness: Continue kneading on medium speed for an additional 8-10 minutes, or until the dough is smooth, elastic, and pulls away cleanly from the sides of the bowl. It should be slightly sticky but manageable.
- First Proof: Lightly oil a large bowl. Transfer the dough to the bowl, turning it once to coat. Cover the bowl tightly with plastic wrap or a damp kitchen towel. Let it rise in a warm, draft-free place for 1.5 to 2 hours, or until doubled in size.
- Shape the Bombs: Gently punch down the risen dough and turn it out onto a lightly floured surface. Roll the dough to about 1/2-inch thickness. Using a 2.5 to 3-inch round cutter (or the rim of a glass), cut out your bomb shapes. Gather and re-roll scraps once, if desired.
- Second Proof: Arrange the cut dough rounds on a baking sheet lined with parchment paper, leaving some space between them. Cover loosely with plastic wrap or a clean kitchen towel. Let them rise for another 30-45 minutes, or until noticeably puffy.
Part 2: Preparing the Silky Italian Pastry Cream
- Whisk Yolks and Sugar: In a medium heatproof bowl, whisk together the egg yolks and granulated sugar until pale and creamy. Whisk in the cornstarch until no lumps remain.
- Heat Milk and Flavor: In a medium saucepan, combine the whole milk and vanilla bean paste (or extract). Heat over medium heat until the milk just begins to simmer around the edges. Do not boil.
- Temper the Yolks: Slowly, and while whisking constantly, pour about half of the hot milk mixture into the egg yolk mixture. This crucial step is called tempering and prevents the eggs from scrambling.
- Return to Pan: Pour the tempered egg mixture back into the saucepan with the remaining milk.
- Thicken the Cream: Return the saucepan to medium-low heat and cook, whisking continuously, until the cream thickens significantly and boils gently for 1 minute. It should coat the back of a spoon.
- Strain and Chill: Remove from heat, stir in any remaining vanilla extract if not added earlier. For the silkiest cream, pass it through a fine-mesh sieve into a clean bowl. Press a piece of plastic wrap directly onto the surface of the cream to prevent a skin from forming. Refrigerate for at least 3-4 hours, or preferably overnight, until completely cold and firm.
Part 3: Frying the Golden Bombs
- Heat the Oil: In a large, heavy-bottomed pot or Dutch oven, pour in enough neutral frying oil to come about 3-4 inches up the sides. Heat the oil over medium heat until it reaches 350°F (175°C). A thermometer is essential here!
- Fry in Batches: Carefully lower 3-4 proofed dough rounds into the hot oil (don’t overcrowd the pan!). Fry for 2-3 minutes per side, or until deeply golden brown and puffed.
- Drain: Using a slotted spoon or spider, transfer the fried bombs to a wire rack set over a baking sheet lined with paper towels to drain excess oil. Let them cool slightly before filling.
Part 4: Filling and Finishing Touches
- Prepare for Filling: Once the fried bombs have cooled enough to handle (but are still slightly warm is fine), prepare your pastry cream. Give the chilled cream a good whisk to loosen it up and make it smooth. Transfer the cream to a piping bag fitted with a long, plain nozzle.
- Fill the Bombs: Insert the nozzle into the side of each bomb, wiggling it gently to create a cavity. Squeeze the piping bag until the bomb feels noticeably heavier and slightly puffed, indicating it’s full of cream.
- Dust and Serve: Arrange the filled Italian Cream Bombs on a serving platter. Dust generously with powdered sugar just before serving.
Tips & Suggestions
Making these Italian Cream Bombs is such a rewarding experience, but a few insider tips can elevate your results from good to absolutely fantastic. I’ve learned these through trial and error, and I’m happy to pass them on!
- Don’t Rush the Proofing: Patience is truly a virtue when it comes to yeast doughs. A proper, slow proof gives the bombs their incredible flavor and airy texture. If your kitchen is cool, try proofing your dough in a slightly warmed, turned-off oven (preheat for a minute, then turn off) with a bowl of hot water inside.
- Oil Temperature is Key for Frying: This is perhaps the most critical step for perfectly fried bombs. If the oil is too cool, the bombs will absorb too much oil and become greasy. If it’s too hot, they’ll brown too quickly on the outside while remaining raw in the middle. Invest in a good thermometer and monitor the temperature closely, adjusting your heat as needed.
- Avoid Overcrowding the Pan: Frying in small batches is essential. Overcrowding the pot will drop the oil temperature drastically, leading to greasy bombs. Give them space to swim!
- Chill the Pastry Cream Thoroughly: A well-chilled pastry cream is not only easier to pipe but also sets beautifully, ensuring a stable and delicious filling. Don’t try to rush this step!
- Lighten the Cream (Optional): For an even lighter, airier filling, you can gently fold some freshly whipped cream into your chilled pastry cream just before filling. This creates a “crema diplomatica” which is divine!
- Spice It Up (Non-Alcoholic): While traditional Italian pastry cream relies on vanilla and sometimes lemon zest, you could experiment with other non-alcoholic flavors. A tiny pinch of ground cinnamon or even a non-alcoholic orange blossom water could add an interesting twist. Just be mindful not to overpower the delicate vanilla.
- Dust Just Before Serving: Powdered sugar has a tendency to dissolve into the pastry over time. For the prettiest presentation, dust your bombs right before you plan to serve them.
Storage
While Italian Cream Bombs are undeniably at their absolute best when fresh – still slightly warm from the fryer and just filled with that creamy goodness – I understand you might have a few leftovers, or want to prepare them slightly ahead. Here’s my advice on keeping them delicious:
- Immediately After Frying (Unfilled): If you want to fry the dough ahead of time, let the fried bombs cool completely on a wire rack. Once cool, you can store them in an airtight container at room temperature for up to 1 day. Before serving, you can gently warm them in a preheated oven (300°F/150°C) for 5-7 minutes to refresh them, then fill.
- Filled Bombs: Once filled with pastry cream, these bombs are best enjoyed within 1-2 days. The cream will start to soften the dough over time, making them a bit less crisp. Store them in a single layer in an airtight container in the refrigerator.
- Reheating Filled Bombs: I generally don’t recommend reheating filled bombs, as the cream can become warm and the texture of the fried dough can suffer. They are delicious served chilled or at room temperature after being refrigerated.
- Storing Pastry Cream: The Italian Pastry Cream itself can be made up to 2-3 days in advance. Store it in an airtight container in the refrigerator with plastic wrap pressed directly onto the surface to prevent a skin from forming. Give it a good whisk to loosen before filling your bombs.
- Freezing: I do not recommend freezing the filled Italian Cream Bombs. The fried dough can become soggy upon thawing, and the cream’s texture may change. You could potentially freeze the unfilled fried dough balls for up to a month, thawing them at room temperature and then warming them briefly in the oven before filling.
Final Thoughts
And there you have it! Crafting these exquisite Italian Cream Bombs is truly a labor of love, but oh, what a rewarding experience it is. I promise you, the moment you bite into one of these heavenly creations, you’ll understand exactly why they are an absolute must-try. The delicate crispness, followed by that rich, velvety cream filling, makes for an unforgettable dessert experience.
These Italian Cream Bombs aren’t just a treat; they’re a celebration in every bite! Perfect for impressing guests, indulging yourself, or making any occasion feel a little more special. I encourage you to dive in and create your own batch – I have no doubt they’ll become a beloved staple in your kitchen!

Decadent Italian Cream Bombs Recipe: Easy Dessert Bites
- Total Time: 1 hour
- Yield: 12 servings
Description
Italian Cream Bombs are delightful, bite-sized treats filled with rich Italian pastry cream. These little wonders are perfect for any occasion, offering an explosion of flavor in every bite.
Ingredients
- All-Purpose Flour
- Granulated Sugar
- Instant Dry Yeast
- Milk
- Eggs
- Unsalted Butter
- Salt
- Neutral Frying Oil
- Egg Yolks
- Granulated Sugar
- Whole Milk
- Cornstarch
- Vanilla Bean Paste or Extract
Instructions
- Warm the Milk: In a small saucepan, gently warm the milk until it's lukewarm (about 105-115°F or 40-46°C). It should be warm to the touch but not hot.
- Combine Dry Ingredients: In the bowl of a stand mixer fitted with the dough hook attachment, combine the flour, sugar, and instant dry yeast (if using active dry yeast, activate it first in the warm milk). Give it a quick whisk.
- Add Wet Ingredients: Pour the warm milk into the dry ingredients, then add the eggs and salt. Mix on low speed until a shaggy dough forms, about 2 minutes.
- Knead and Add Butter: Increase the speed to medium-low and continue to knead for about 5 minutes. The dough will start to come together. Now, add the softened butter, one tablespoon at a time, allowing each addition to be fully incorporated before adding the next. This will take another 5-7 minutes.
- Achieve Smoothness: Continue kneading on medium speed for an additional 8-10 minutes, or until the dough is smooth, elastic, and pulls away cleanly from the sides of the bowl. It should be slightly sticky but manageable.
- First Proof: Lightly oil a large bowl. Transfer the dough to the bowl, turning it once to coat. Cover the bowl tightly with plastic wrap or a damp kitchen towel. Let it rise in a warm, draft-free place for 1.5 to 2 hours, or until doubled in size.
- Shape the Bombs: Gently punch down the risen dough and turn it out onto a lightly floured surface. Roll the dough to about 1/2-inch thickness. Using a 2.5 to 3-inch round cutter (or the rim of a glass), cut out your bomb shapes. Gather and re-roll scraps once, if desired.
- Second Proof: Arrange the cut dough rounds on a baking sheet lined with parchment paper, leaving some space between them. Cover loosely with plastic wrap or a clean kitchen towel. Let them rise for another 30-45 minutes, or until noticeably puffy.
- Whisk Yolks and Sugar: In a medium heatproof bowl, whisk together the egg yolks and granulated sugar until pale and creamy. Whisk in the cornstarch until no lumps remain.
- Heat Milk and Flavor: In a medium saucepan, combine the whole milk and vanilla bean paste (or extract). Heat over medium heat until the milk just begins to simmer around the edges. Do not boil.
- Temper the Yolks: Slowly, and while whisking constantly, pour about half of the hot milk mixture into the egg yolk mixture. This crucial step is called tempering and prevents the eggs from scrambling.
- Return to Pan: Pour the tempered egg mixture back into the saucepan with the remaining milk.
- Thicken the Cream: Return the saucepan to medium-low heat and cook, whisking continuously, until the cream thickens significantly and boils gently for 1 minute. It should coat the back of a spoon.
- Strain and Chill: Remove from heat, stir in any remaining vanilla extract if not added earlier. For the silkiest cream, pass it through a fine-mesh sieve into a clean bowl. Press a piece of plastic wrap directly onto the surface of the cream to prevent a skin from forming. Refrigerate for at least 3-4 hours, or preferably overnight, until completely cold and firm.
- Heat the Oil: In a large, heavy-bottomed pot or Dutch oven, pour in enough neutral frying oil to come about 3-4 inches up the sides. Heat the oil over medium heat until it reaches 350°F (175°C). A thermometer is essential here!
- Fry in Batches: Carefully lower 3-4 proofed dough rounds into the hot oil (don't overcrowd the pan!). Fry for 2-3 minutes per side, or until deeply golden brown and puffed.
- Drain: Using a slotted spoon or spider, transfer the fried bombs to a wire rack set over a baking sheet lined with paper towels to drain excess oil. Let them cool slightly before filling.
- Prepare for Filling: Once the fried bombs have cooled enough to handle (but are still slightly warm is fine), prepare your pastry cream. Give the chilled cream a good whisk to loosen it up and make it smooth. Transfer the cream to a piping bag fitted with a long, plain nozzle.
- Fill the Bombs: Insert the nozzle into the side of each bomb, wiggling it gently to create a cavity. Squeeze the piping bag until the bomb feels noticeably heavier and slightly puffed, indicating it's full of cream.
- Dust and Serve: Arrange the filled Italian Cream Bombs on a serving platter. Dust generously with powdered sugar just before serving.
- Prep Time: 30 mins
- Cook Time: 30 mins
- Category: Dessert
- Method: Frying
- Cuisine: Italian
Nutrition
- Serving Size: 1 bomb
- Calories: 200
- Sugar: 10 g
- Sodium: 150 mg
- Fat: 10 g
- Saturated Fat: 5 g
- Unsaturated Fat: 3 g
- Trans Fat: 0 g
- Carbohydrates: 25 g
- Fiber: 1 g
- Protein: 3 g
- Cholesterol: 50 mg
Keywords: Don't rush the proofing for the best flavor and texture. Ensure the oil temperature is correct for frying, and avoid overcrowding the pan. Chill the pastry cream thoroughly for easier filling.