Jalapeno Popper Chicken Quesadilla: Prepare to have your taste buds blown away! Imagine the creamy, cheesy goodness of a jalapeno popper colliding head-on with the satisfying crunch of a perfectly grilled quesadilla. It’s an explosion of flavor that’s surprisingly easy to create, and trust me, once you try it, you’ll be hooked.
While the exact origins of this fusion dish are a bit hazy (likely born from a late-night craving!), both jalapeno poppers and quesadillas have rich culinary histories. Jalapeno poppers, with their spicy kick and creamy filling, gained popularity in the United States as a fun and flavorful appetizer. Quesadillas, on the other hand, boast a much longer history, tracing back to Southern Mexico, where they were traditionally made with simple fillings like cheese and squash blossoms. This Jalapeno Popper Chicken Quesadilla brings together the best of both worlds!
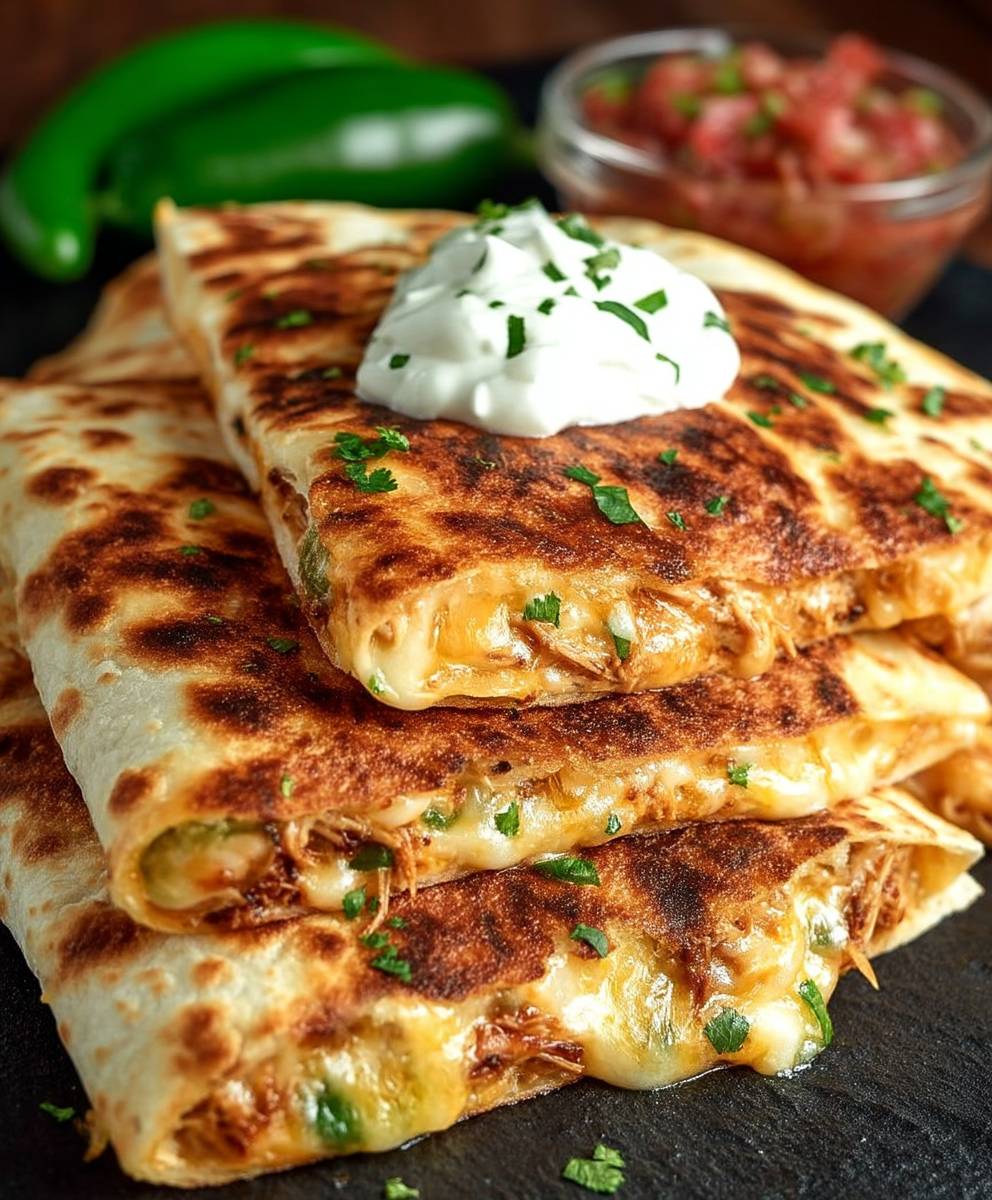
People adore this dish for its incredible combination of textures and tastes. The slight heat from the jalapenos is perfectly balanced by the cool cream cheese and cheddar, while the juicy chicken adds a hearty element. The crispy tortilla provides the perfect vessel for all these delicious ingredients. Plus, it’s incredibly versatile! You can easily customize it with your favorite toppings and adjust the spice level to your liking. Whether you’re looking for a quick weeknight dinner or a crowd-pleasing appetizer, this quesadilla is guaranteed to be a hit.

Ingredients:
- For the Jalapeno Popper Filling:
- 1.5 lbs boneless, skinless chicken breasts, cooked and shredded
- 8 oz cream cheese, softened
- 1 cup shredded cheddar cheese
- 1/2 cup shredded Monterey Jack cheese
- 1/2 cup pickled jalapenos, finely diced (adjust to your spice preference)
- 1/4 cup crumbled cooked bacon (about 4 slices)
- 2 tablespoons mayonnaise
- 1 tablespoon chopped fresh cilantro
- 1 teaspoon garlic powder
- 1/2 teaspoon onion powder
- 1/4 teaspoon black pepper
- Pinch of salt (taste and adjust after mixing)
- For the Quesadillas:
- 8 large flour tortillas (10-12 inch)
- 2 tablespoons butter, melted (for brushing the tortillas)
- Optional: Sour cream, guacamole, salsa for serving
Preparing the Jalapeno Popper Filling:
This is where the magic happens! We’re going to create that creamy, cheesy, spicy filling that makes this quesadilla so irresistible. Don’t be afraid to adjust the jalapenos to your liking – if you’re a spice fiend, add more! If you’re a bit more sensitive, reduce the amount or remove the seeds and membranes.
- Cook and Shred the Chicken: The first step is to cook your chicken. You can bake it, boil it, grill it, or even use rotisserie chicken to save time. I personally like to poach my chicken breasts because it keeps them nice and moist. To poach, simply place the chicken breasts in a pot, cover with water, bring to a simmer, and cook for about 15-20 minutes, or until cooked through. Once cooked, let the chicken cool slightly, then shred it using two forks. You can also use a stand mixer with the paddle attachment to shred the chicken quickly.
- Soften the Cream Cheese: Make sure your cream cheese is nice and soft. This is crucial for a smooth and creamy filling. If you forget to take it out of the fridge ahead of time, you can microwave it for about 15-20 seconds, but be careful not to melt it completely.
- Combine the Ingredients: In a large bowl, combine the softened cream cheese, shredded cheddar cheese, shredded Monterey Jack cheese, diced jalapenos, crumbled bacon, mayonnaise, chopped cilantro, garlic powder, onion powder, black pepper, and salt. Mix everything together until well combined.
- Add the Shredded Chicken: Add the shredded chicken to the bowl and mix until everything is evenly distributed. Make sure the chicken is well coated with the cheesy mixture.
- Taste and Adjust: Now, give the filling a taste! This is your chance to adjust the seasoning to your liking. If you want more spice, add a pinch of cayenne pepper or a few more diced jalapenos. If it needs more salt, add a pinch at a time until it tastes just right.
- Refrigerate (Optional): If you’re not planning on making the quesadillas right away, you can cover the filling and refrigerate it for up to 24 hours. This will actually allow the flavors to meld together even more!
Assembling and Cooking the Quesadillas:
Now for the fun part – putting it all together! This is a pretty straightforward process, but there are a few tips and tricks to ensure your quesadillas are perfectly golden brown and cheesy.
- Prepare Your Work Station: Lay out your tortillas on a clean surface. Have your jalapeno popper filling ready to go, along with your melted butter and a pastry brush.
- Fill the Tortillas: Spread about 1/2 to 3/4 cup of the jalapeno popper filling evenly over one half of each tortilla. Don’t overfill the tortillas, or the filling will spill out when you fold them.
- Fold the Tortillas: Fold the other half of the tortilla over the filling to create a half-moon shape.
- Brush with Butter: Brush the outside of each quesadilla with melted butter. This will help them get nice and golden brown and crispy in the pan.
- Cook the Quesadillas: Heat a large skillet or griddle over medium heat. Place one or two quesadillas in the skillet (depending on the size of your skillet) and cook for about 3-4 minutes per side, or until golden brown and the cheese is melted and gooey. Be careful not to burn the tortillas. If they’re browning too quickly, reduce the heat slightly.
- Remove and Repeat: Remove the cooked quesadillas from the skillet and place them on a cutting board. Repeat the process with the remaining quesadillas.
- Cut and Serve: Let the quesadillas cool for a minute or two before cutting them into wedges. Serve immediately with your favorite toppings, such as sour cream, guacamole, and salsa.
Tips for the Perfect Quesadilla:
Here are a few extra tips to help you make the best jalapeno popper chicken quesadillas ever!
- Don’t Overfill: I know it’s tempting to load up the tortillas with tons of filling, but trust me, less is more. Overfilling will make the quesadillas difficult to fold and cook evenly, and the filling will likely spill out.
- Use Medium Heat: Cooking the quesadillas over medium heat will ensure that the tortillas get golden brown and crispy without burning, and the cheese will have plenty of time to melt.
- Press Down Gently: While the quesadillas are cooking, you can gently press down on them with a spatula to help them cook evenly and get a nice, flat surface.
- Keep Warm: If you’re making a large batch of quesadillas, you can keep them warm in a preheated oven (200°F) until you’re ready to serve them.
- Get Creative with Toppings: Don’t be afraid to get creative with your toppings! Sour cream, guacamole, salsa, pico de gallo, and even a drizzle of hot sauce are all great options.
- Add Other Ingredients: Feel free to add other ingredients to the filling, such as corn, black beans, or diced tomatoes.
- Use Different Cheeses: Experiment with different types of cheese, such as pepper jack, Colby jack, or even a little bit of blue cheese for a bolder flavor.
Variations:
Want to mix things up a bit? Here are a few variations you can try:
- Spicy Version: Add a pinch of cayenne pepper or a few dashes of hot sauce to the filling for an extra kick. You can also use spicier jalapenos, such as serrano peppers.
- Vegetarian Version: Omit the chicken and add more vegetables, such as corn, black beans, and bell peppers.
- Grilled Quesadillas: Instead of cooking the quesadillas in a skillet, you can grill them over medium heat for a smoky flavor.
- Baked Quesadillas: Preheat your oven to 375°F. Place the assembled quesadillas on a baking sheet and bake for about 10-12 minutes, or until golden brown and the cheese is melted.
- Mini Quesadillas: Use smaller tortillas to make mini quesadillas for appetizers or snacks.
Serving Suggestions:
These jalapeno popper chicken quesadillas are delicious on their own, but they’re even better with some tasty sides and toppings. Here are a few ideas:
- Sour Cream: A classic topping for quesadillas.
- Guacamole: Creamy and flavorful, guacamole is a perfect complement to the spicy filling.
- Salsa: Choose your favorite salsa, from mild to hot.
- Pico de Gallo: Fresh and flavorful, pico de gallo adds a bright touch.
- Hot Sauce: For those who like it extra spicy.
- Mexican Rice: A classic side dish for Mexican-inspired meals.
- Black Beans: A healthy and flavorful side dish.
- Corn Salad: A refreshing and colorful side dish.
Enjoy your delicious homemade Jalapeno Popper Chicken Quesadillas! I hope you love them as much as I do!
Conclusion:
This Jalapeno Popper Chicken Quesadilla isn’t just another weeknight dinner; it’s a flavor explosion waiting to happen! Seriously, the creamy, spicy filling combined with the crispy tortilla is a match made in culinary heaven. If you’re looking for a quick, easy, and incredibly satisfying meal that will impress your family and friends, then this recipe is an absolute must-try. I promise, once you taste that first bite, you’ll be hooked!
But the best part? It’s incredibly versatile! Feel free to experiment with different cheeses. Pepper jack would kick up the heat even more, while a mild cheddar would offer a more mellow flavor. You could even add a sprinkle of crumbled bacon to the filling for an extra layer of smoky goodness. For serving, I personally love to dip these quesadillas in a dollop of sour cream or guacamole to cool down the spice. A side of fresh salsa or a simple green salad also complements the richness perfectly.
Serving Suggestions and Variations:
* Spice it up: Add a pinch of cayenne pepper or a dash of hot sauce to the filling for an extra kick.
* Cool it down: Serve with a side of cool sour cream, guacamole, or a refreshing cucumber salad.
* Make it vegetarian: Substitute the chicken with black beans or grilled corn for a delicious vegetarian option.
* Get creative with cheese: Experiment with different cheese blends, such as pepper jack, Monterey Jack, or a Mexican cheese blend.
* Add some crunch: Sprinkle some crushed tortilla chips inside the quesadilla for added texture.
* Make it a meal: Serve with a side of rice and beans for a complete and satisfying meal.
* Party time: Cut the quesadillas into smaller wedges and serve as appetizers at your next gathering.
I’ve poured my heart into perfecting this recipe, and I’m so excited for you to try it. I truly believe that this Jalapeno Popper Chicken Quesadilla will become a new family favorite. It’s the perfect balance of comfort food and exciting flavors, and it’s guaranteed to satisfy even the pickiest eaters.
So, what are you waiting for? Gather your ingredients, fire up your skillet, and get ready to create some magic in the kitchen! I’m confident that you’ll love this recipe as much as I do. And don’t forget to get creative and put your own spin on it!
Once you’ve made this delicious quesadilla, I would absolutely love to hear about your experience. Did you make any modifications? What did you serve it with? What did your family think? Share your photos and stories in the comments below! Your feedback is invaluable, and it helps me to continue creating and sharing recipes that you’ll love. Happy cooking, and enjoy! I can’t wait to see your culinary creations! Let me know if you have any questions, and I’ll do my best to help. Bon appétit!
Jalapeno Popper Chicken Quesadilla: A Spicy & Cheesy Delight!
Creamy, cheesy, and spicy Jalapeno Popper Chicken Quesadillas! Easy to make, loaded with chicken, cream cheese, cheddar, Monterey Jack, jalapenos, and bacon. Perfect for lunch, dinner, or appetizer.
Ingredients
Instructions
Recipe Notes
- Don’t overfill the tortillas.
- Use medium heat to prevent burning.
- Press down gently with a spatula while cooking.
- Keep warm in a preheated oven (200°F) if making a large batch.
- Get creative with toppings and fillings.
- Variations: Spicy (add cayenne/hot sauce), Vegetarian (omit chicken), Grilled, Baked, Mini.
- Serving Suggestions: Sour cream, guacamole, salsa, pico de gallo, hot sauce, Mexican rice, black beans, corn salad.