Layered Finger Jello: Prepare to be amazed by this vibrant and jiggly treat that’s as fun to make as it is to eat! Forget everything you thought you knew about Jello; this isn’t your average dessert. We’re talking about a dazzling rainbow of flavors and colors, stacked high in perfect, bite-sized squares. It’s a guaranteed showstopper at any party, picnic, or potluck.
While Jello itself has a relatively modern history, dating back to the late 19th century, the concept of layered desserts has been around for centuries. Think of trifles and parfaits – beautiful, multi-textured creations designed to delight the senses. Layered Finger Jello takes that same principle and infuses it with a playful, nostalgic twist.
So, why do people adore this colorful confection? Well, for starters, it’s incredibly versatile. You can customize the flavors and colors to match any theme or occasion. But beyond the visual appeal, it’s the delightful combination of textures that truly captivates. The smooth, cool Jello melts in your mouth, offering a burst of fruity sweetness with every bite. Plus, let’s be honest, who can resist the satisfying wiggle of perfectly set Jello? It’s a simple pleasure that brings out the kid in all of us. And the best part? It’s surprisingly easy to make! Let’s dive into the recipe and create some edible art together.

Ingredients:
- 6 boxes (3 oz each) Jell-O gelatin (different colors, such as red, orange, yellow, green, blue, and purple)
- 6 cups boiling water (1 cup for each Jell-O flavor)
- 4 cups cold water (divided, approximately 2/3 cup for each layer)
- 1 can (14 oz) sweetened condensed milk
- 2 envelopes (0.25 oz each) unflavored gelatin
- 1/2 cup cold water (for the unflavored gelatin)
- 2 cups boiling water (for the unflavored gelatin mixture)
- Non-stick cooking spray
Preparing the Jell-O Layers:
This is where the fun begins! We’re going to create each colorful layer individually. Patience is key here, as each layer needs to set before adding the next.
- Prepare the First Jell-O Layer: Choose your first color of Jell-O. In a bowl, dissolve one 3 oz box of Jell-O gelatin in 1 cup of boiling water. Stir until the gelatin is completely dissolved. This usually takes about 2-3 minutes. Make sure there are no granules left!
- Add Cold Water: Stir in approximately 2/3 cup of cold water. This will help the Jell-O set properly.
- Pour into Pan: Lightly spray a 9×13 inch baking pan with non-stick cooking spray. This will make it easier to remove the Jell-O later. Pour the first layer of Jell-O into the prepared pan.
- Refrigerate: Place the pan in the refrigerator and let it set completely. This usually takes about 30-45 minutes, but it’s best to check to make sure it’s firm to the touch before adding the next layer. You want it firm enough that the next layer won’t mix into it.
- Repeat for Remaining Colors: Repeat steps 1-4 for each of the remaining Jell-O colors. Remember to use a clean bowl for each color to avoid mixing them. Refrigerate each layer until firm before adding the next. This process can take a while, so plan accordingly!
Preparing the Creamy White Layer:
Now for the creamy, dreamy layer that separates the colorful Jell-O. This layer adds a wonderful texture and flavor contrast.
- Bloom the Unflavored Gelatin: In a small bowl, sprinkle the two envelopes of unflavored gelatin over 1/2 cup of cold water. Let it sit for about 5 minutes to “bloom.” This allows the gelatin to absorb the water and dissolve properly.
- Dissolve the Bloomed Gelatin: Add 2 cups of boiling water to the bloomed gelatin. Stir until the gelatin is completely dissolved. Again, make sure there are no granules remaining.
- Combine with Sweetened Condensed Milk: In a separate bowl, pour the can of sweetened condensed milk. Gradually add the dissolved gelatin mixture to the sweetened condensed milk, stirring constantly to ensure it’s well combined and smooth.
Assembling the Layered Finger Jell-O:
This is where we bring it all together! The key is to alternate between the colorful Jell-O layers and the creamy white layer.
- First Creamy Layer: After the first colored Jell-O layer has set, pour a thin layer of the creamy white mixture over it. You don’t need to use all of the creamy mixture at once; we’ll be using it between each colored layer. Use about 1/6 of the mixture.
- Refrigerate: Return the pan to the refrigerator and let the creamy layer set completely. This usually takes about 30-45 minutes.
- Continue Layering: Once the creamy layer is set, carefully pour the next colored Jell-O layer over it. Make sure the Jell-O is cooled slightly before pouring it over the creamy layer to prevent it from melting.
- Refrigerate: Refrigerate the pan again until the colored Jell-O layer is set.
- Repeat the Process: Continue alternating between the colored Jell-O layers and the creamy white layers, refrigerating each layer until set before adding the next. You should end up with six colored layers and five creamy layers.
- Final Refrigeration: After the final layer (either colored or creamy) has been added, refrigerate the entire pan for at least 2-3 hours, or preferably overnight, to ensure it’s completely set.
Cutting and Serving:
The moment of truth! Time to cut and serve your beautiful layered creation.
- Loosen the Edges: Run a thin knife or spatula around the edges of the pan to loosen the Jell-O.
- Dip the Bottom (Optional): Briefly dip the bottom of the pan in warm water for a few seconds. This will help loosen the Jell-O and make it easier to remove. Be careful not to let the water get too hot, or it will melt the Jell-O.
- Invert (Optional): If you want to invert the Jell-O onto a serving platter, place the platter over the pan and carefully flip it over. Gently shake the pan to release the Jell-O.
- Cut into Squares: Use a sharp knife to cut the Jell-O into squares or rectangles. The size is up to you!
- Serve and Enjoy: Arrange the Jell-O squares on a serving platter and enjoy! These are best served cold.
Tips and Tricks:
- Color Order: Plan your color order in advance for the most visually appealing effect. Consider using a rainbow order or alternating contrasting colors.
- Patience is Key: Don’t rush the setting process. Each layer needs to be completely set before adding the next to prevent mixing.
- Cool the Jell-O: Make sure the Jell-O is cooled slightly before pouring it over the creamy layer to prevent it from melting.
- Even Layers: Try to pour each layer as evenly as possible for a uniform look.
- Variations: Get creative with your flavors and colors! You can use sugar-free Jell-O for a healthier option, or add fruit pieces to the Jell-O layers.
- Storage: Store leftover Jell-O in the refrigerator in an airtight container. It will keep for several days.
Troubleshooting:
- Layers are Mixing: This usually happens if the previous layer wasn’t completely set before adding the next. Make sure to refrigerate each layer until firm to the touch.
- Creamy Layer is Too Thin: You may have used too much boiling water when dissolving the unflavored gelatin. Make sure to follow the recipe measurements carefully.
- Jell-O is Not Setting: This could be due to several factors, such as not using enough gelatin, not using enough boiling water, or not refrigerating the Jell-O long enough. Double-check the recipe and make sure you’re following all the steps correctly.
Conclusion:
This Layered Finger Jello recipe isn’t just a dessert; it’s a vibrant, playful experience that’s guaranteed to bring smiles to faces of all ages. From the mesmerizing layers of color to the satisfying jiggly texture, it’s a treat that engages all the senses. I truly believe this is a must-try recipe for anyone looking to add a touch of whimsy and fun to their next gathering, or simply brighten up a weekday afternoon.
Why is it a must-try? Because it’s surprisingly easy to make, even though it looks incredibly impressive. The process is straightforward, and the results are always stunning. Plus, it’s a fantastic make-ahead dessert, freeing you up to focus on other aspects of your event. And let’s be honest, who can resist the allure of colorful, jiggly jello? It’s a nostalgic treat that evokes happy memories and creates new ones.
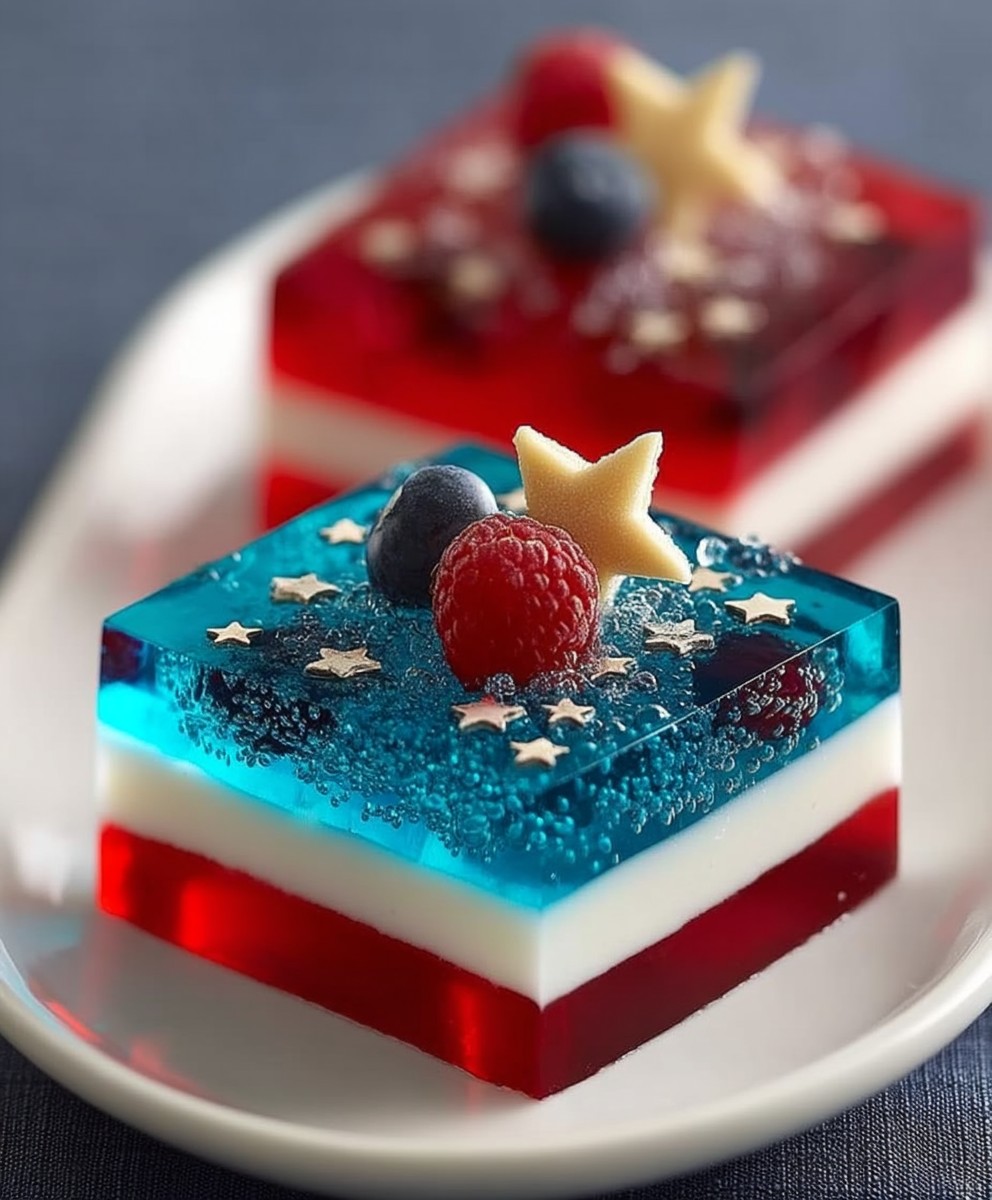
But the best part? The possibilities are endless! You can customize the colors to match a specific theme, holiday, or even your favorite sports team. Imagine a red, white, and blue layered jello for the Fourth of July, or a rainbow of colors for a birthday party. The only limit is your imagination!
Here are a few serving suggestions and variations to get you started:
* Individual Cups: For easy serving and portion control, pour the jello into individual clear cups. This is especially great for kids’ parties.
* Cookie Cutters: Once the jello is set, use cookie cutters to create fun shapes. Stars, hearts, and animals are always a hit!
* Fruit Infusion: Add small pieces of fruit, like berries or mandarin oranges, to each layer for a burst of fresh flavor and added texture. Just be sure to use canned fruit or cooked fruit, as fresh pineapple, kiwi, and papaya contain enzymes that can prevent the jello from setting properly.
* Creamy Layers: For a richer, more decadent treat, try adding a layer of sweetened condensed milk or whipped cream between the jello layers. This creates a beautiful contrast in texture and flavor.
* Adult Version: For a grown-up twist, try adding a splash of vodka or rum to each layer. Just be sure to adjust the liquid measurements accordingly.
* Holiday Themes: Get creative with your color combinations to match different holidays. Green and red for Christmas, orange and black for Halloween, or pastel colors for Easter.
I’m confident that you’ll love making and sharing this Layered Finger Jello. It’s a recipe that’s sure to become a family favorite.
So, what are you waiting for? Gather your ingredients, put on some music, and get ready to create a masterpiece! I’m so excited for you to try this recipe and experience the joy of making something so beautiful and delicious.
Once you’ve made your own version of this delightful dessert, I’d absolutely love to hear about your experience! Share your photos and stories in the comments below. Let me know what color combinations you used, what variations you tried, and how much everyone enjoyed it. Your feedback is invaluable and helps inspire others to try this recipe as well. Don’t be shy – let’s spread the joy of Layered Finger Jello far and wide! Happy jello-ing!
Layered Finger Jello: The Ultimate Guide to Making Perfect Rainbow Jello
Fun, colorful layered Jell-O dessert with vibrant flavors and a creamy filling. Perfect for parties!
Ingredients
Instructions
Recipe Notes
- Plan your color order in advance for the most visually appealing effect.
- Patience is key! Each layer needs to be completely set before adding the next to prevent mixing.
- Cool the Jell-O slightly before pouring it over the creamy layer to prevent it from melting.
- Try to pour each layer as evenly as possible for a uniform look.
- Get creative with your flavors and colors! You can use sugar-free Jell-O for a healthier option, or add fruit pieces to the Jell-O layers.
- Store leftover Jell-O in the refrigerator in an airtight container. It will keep for several days.