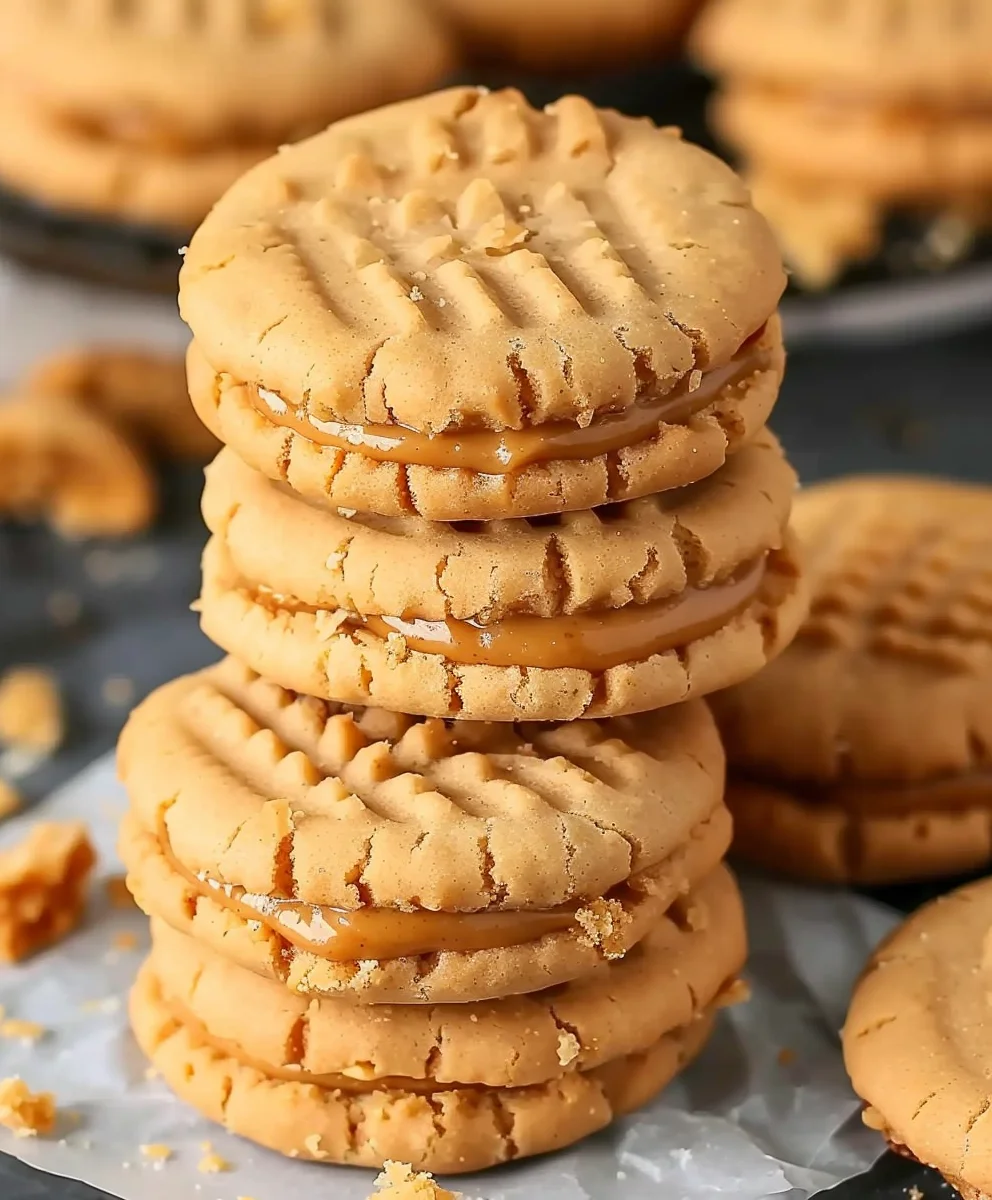
Homemade Copycat Nutter Butters are more than just a delightful treat; they’re an invitation to revisit cherished childhood memories with every single bite. Do you remember that iconic, peanut-shaped cookie, perfectly balancing crispness with a rich, creamy peanut butter filling? We certainly do, and that’s precisely the magic we’re about to recreate.
Since their introduction, the original Nutter Butters have held a special place in the hearts of many, becoming an unmistakable icon of American snack culture. There’s an undeniable nostalgia associated with their unique shape and unmistakable flavor, a snack that has comforted generations. What truly makes this dish so universally loved is the irresistible combination of two perfectly textured peanut butter cookies sandwiching a luscious, intensely peanut-buttery cream. It’s the symphony of crunchy and smooth, sweet and savory, that creates an experience which is simply addictive.
Why You’ll Love Making These at Home
Making your own Homemade Copycat Nutter Butters allows you to control the quality of ingredients, ensuring a fresher, more robust flavor that often surpasses the store-bought version. I am absolutely thrilled to guide you through crafting these incredible cookies. Prepare to impress everyone with these delightful treats that taste just like, if not better than, the classic!

Ingredients:
-
For the Peanut Butter Cookies:
- 1 cup (2 sticks) unsalted butter, softened to room temperature
- 1 cup granulated sugar
- 1 cup packed light brown sugar
- 1 cup creamy peanut butter (I prefer a classic, smooth variety like Jif or Skippy for the most authentic taste in our Homemade Copycat Nutter Butters)
- 2 large eggs
- 2 teaspoons pure vanilla extract
- 2 ½ cups all-purpose flour
- 1 teaspoon baking soda
- ½ teaspoon salt
-
For the Creamy Peanut Butter Filling:
- 1 cup (2 sticks) unsalted butter, softened to room temperature
- 1 ½ cups creamy peanut butter (again, stick with a smooth, classic brand for that signature flavor)
- 4-5 cups powdered sugar (confectioners’ sugar), sifted
- 2-4 tablespoons milk or heavy cream, as needed
- 1 teaspoon pure vanilla extract
- ¼ teaspoon salt (optional, but I find it really balances the sweetness)
Gathering Your Tools and Preparing for Baking Perfection
Before we dive into the delightful process of creating our Homemade Copycat Nutter Butters, it’s always a good idea to gather all your ingredients and tools. This mise en place approach makes the baking experience so much smoother and more enjoyable. You’ll want to have on hand a stand mixer with paddle attachment or a large mixing bowl with an electric hand mixer, measuring cups and spoons, rubber spatulas, parchment paper, baking sheets, a rolling pin, and a cookie cutter. For that iconic peanut shape, a specialized Nutter Butter cookie cutter is fantastic, but I’ll also share tips if you don’t have one. Trust me, taking a few extra minutes to get organized now will save you time and stress later, ensuring every step of making these delicious cookies is a breeze.
Why Ingredient Temperature Matters for Your Homemade Copycat Nutter Butters
Ensuring your butter and eggs are at room temperature is absolutely crucial for the success of these cookies. Room temperature butter creams beautifully with sugar, creating a light, airy base, while cold butter will result in a lumpy, dense dough. Similarly, room temperature eggs emulsify much better into the mixture, contributing to a smoother batter and a more uniform texture in your finished cookies. So, remember to pull them out of the fridge at least an hour before you plan to start baking. This seemingly small detail makes a huge difference in achieving the perfect texture for your Homemade Copycat Nutter Butters.
Preparing the Peanut Butter Cookie Dough
- Cream the Butter and Sugars: In a large mixing bowl or the bowl of your stand mixer, I like to combine my softened unsalted butter with both the granulated sugar and the light brown sugar. I’ll beat these together using an electric mixer on medium-high speed. The goal here is to cream them until the mixture becomes wonderfully light, fluffy, and noticeably paler in color. This creaming process is absolutely crucial, as it incorporates air into the butter, which will give our Homemade Copycat Nutter Butters their tender, melt-in-your-mouth texture later on. This usually takes about 3-5 minutes, so be patient and let the mixer do its work. Scrape down the sides of the bowl occasionally to ensure everything is evenly combined.
- Incorporate Wet Ingredients: Next, I’ll add the creamy peanut butter to the butter-sugar mixture. Beat it in until it’s fully incorporated and smooth. Then, I’ll crack in the large eggs, one at a time, beating well after each addition until just combined. Finally, stir in the pure vanilla extract. It’s important not to overmix at this stage; we just want everything to come together nicely. The mixture should be rich, fragrant, and beautifully emulsified, a perfect foundation for our classic cookies.
- Combine Dry Ingredients: In a separate medium bowl, I’ll whisk together the all-purpose flour, baking soda, and salt. Whisking these dry ingredients thoroughly ensures that the leavening agent and salt are evenly distributed throughout the flour, preventing any pockets of unmixed ingredients in our dough. This step is key for consistent rise and flavor in every single one of your Homemade Copycat Nutter Butters.
- Gradually Add Dry to Wet: With the mixer on low speed, I’ll gradually add the dry ingredients to the wet ingredients, a third at a time. Mix only until just combined, being careful not to overmix the dough. Overmixing can develop the gluten in the flour too much, leading to tough, rather than tender, cookies. As soon as you see no more streaks of dry flour, stop mixing. The dough will be thick, soft, and wonderfully pliable.
- Chill the Dough (Crucial Step!): This step is non-negotiable for perfectly shaped Homemade Copycat Nutter Butters. Divide the dough into two or three equal portions. Flatten each portion into a disk, wrap it tightly in plastic wrap, and refrigerate for at least 2 hours, or preferably overnight. Chilling the dough helps the butter solidify, preventing the cookies from spreading too much in the oven and allowing them to hold their iconic shape. It also deepens the flavor of the peanut butter, making these cookies even more irresistible. If you skip this, your cookies might spread too thin, losing that perfect Nutter Butter silhouette.
Shaping and Baking Your Homemade Copycat Nutter Butters
- Preheat Oven and Prepare Baking Sheets: Once your dough is thoroughly chilled, preheat your oven to 350°F (175°C). Line several baking sheets with parchment paper. Parchment paper is my secret weapon for easy cleanup and preventing sticking, ensuring our beautiful Homemade Copycat Nutter Butters lift right off the tray.
- Roll Out the Dough: On a lightly floured surface, or even better, between two sheets of parchment paper (this prevents sticking to your rolling pin and surface), take one disk of chilled dough and roll it out to about ¼-inch thickness. This thickness is ideal for achieving a tender yet slightly crisp cookie, much like the original.
- Cut Out the Peanut Shapes: This is where the magic happens! If you have a Nutter Butter cookie cutter, now is its moment to shine. Cut out as many peanut shapes as you can from the rolled dough. Carefully transfer them to your prepared baking sheets, leaving about 1-2 inches between each cookie to allow for a little spread.
Tip for Shaping Without a Nutter Butter Cutter:
If you don’t have the specific peanut-shaped cutter, don’t fret! You can still create amazing Homemade Copycat Nutter Butters. Roll the dough into small logs, about 2 inches long, and then gently pinch and shape the ends to create a rough peanut shape. Alternatively, you can use an oval cookie cutter and then gently indent the middle with your finger or a knife handle to give it that distinctive “waist.” Remember, perfection isn’t the goal; deliciousness is! My kids actually love helping with this part, making each cookie uniquely theirs.
Gather and Re-roll Scraps: Collect any dough scraps, gently press them back together, and re-roll to cut out more cookies until all the dough is used.
- Optional Fork Marks: For that truly authentic Nutter Butter look, gently press the tines of a fork into the top of each unbaked cookie, first horizontally and then vertically, creating a crosshatch pattern. This not only adds visual appeal but also helps to aerate the cookie slightly, contributing to its texture.
- Bake to Golden Perfection: Bake the cookies for 10-12 minutes, or until the edges are lightly golden and the centers are just set. It’s important not to overbake these cookies, as they can become dry. They will continue to set up as they cool. The exact baking time might vary depending on your oven, so keep a close eye on them, especially during the first batch. I always recommend rotating the baking sheets halfway through for even baking.
- Cooling Process: Once baked, remove the baking sheets from the oven and let the cookies cool on the sheets for about 5 minutes. This allows them to firm up slightly. Then, carefully transfer the cookies to a wire rack to cool completely. They must be completely cool before we add our delicious peanut butter filling; otherwise, the filling will melt and slide right off, and we don’t want that for our perfect Homemade Copycat Nutter Butters!
Crafting the Creamy Peanut Butter Filling
The filling is what truly elevates these cookies to their copycat status, so let’s make sure it’s absolutely perfect – creamy, rich, and bursting with peanut butter flavor!
- Cream Butter and Peanut Butter: In a clean large mixing bowl or the bowl of your stand mixer, combine the softened unsalted butter and the creamy peanut butter. Beat them together on medium speed until the mixture is incredibly light, fluffy, and well combined. This step is vital for achieving a smooth, airy texture in the filling, not dense or pasty. This usually takes about 3-4 minutes, so give it time to become truly magnificent.
- Gradually Add Powdered Sugar: With the mixer on low speed, begin adding the sifted powdered sugar, one cup at a time. I always recommend sifting powdered sugar because it removes any lumps, ensuring a silky-smooth filling. Beat well after each addition until the sugar is fully incorporated. The mixture will become very thick.
Why Sifting Powdered Sugar is a Game Changer:
You might be tempted to skip sifting, but trust me, it’s a small step with a huge payoff. Sifting powdered sugar prevents lumps and ensures your filling is incredibly smooth and creamy, just like the real deal. It makes a noticeable difference in the final texture of your Homemade Copycat Nutter Butters filling.
- Achieve Desired Consistency: Once all the powdered sugar is incorporated, the filling will be quite stiff. Now it’s time to add the milk or heavy cream, one tablespoon at a time, beating after each addition until you reach a wonderfully smooth, spreadable, yet firm consistency. I usually start with 2 tablespoons and add more if needed. You want it to be easy to spread or pipe but still hold its shape.
- Flavor Boost: Finally, beat in the vanilla extract and the optional ¼ teaspoon of salt. The salt, even in a small amount, really helps to cut through the sweetness and enhance the peanut butter flavor, making the filling even more dynamic and delicious. Taste it and adjust if needed; sometimes I add a tiny pinch more salt if I feel it needs it.
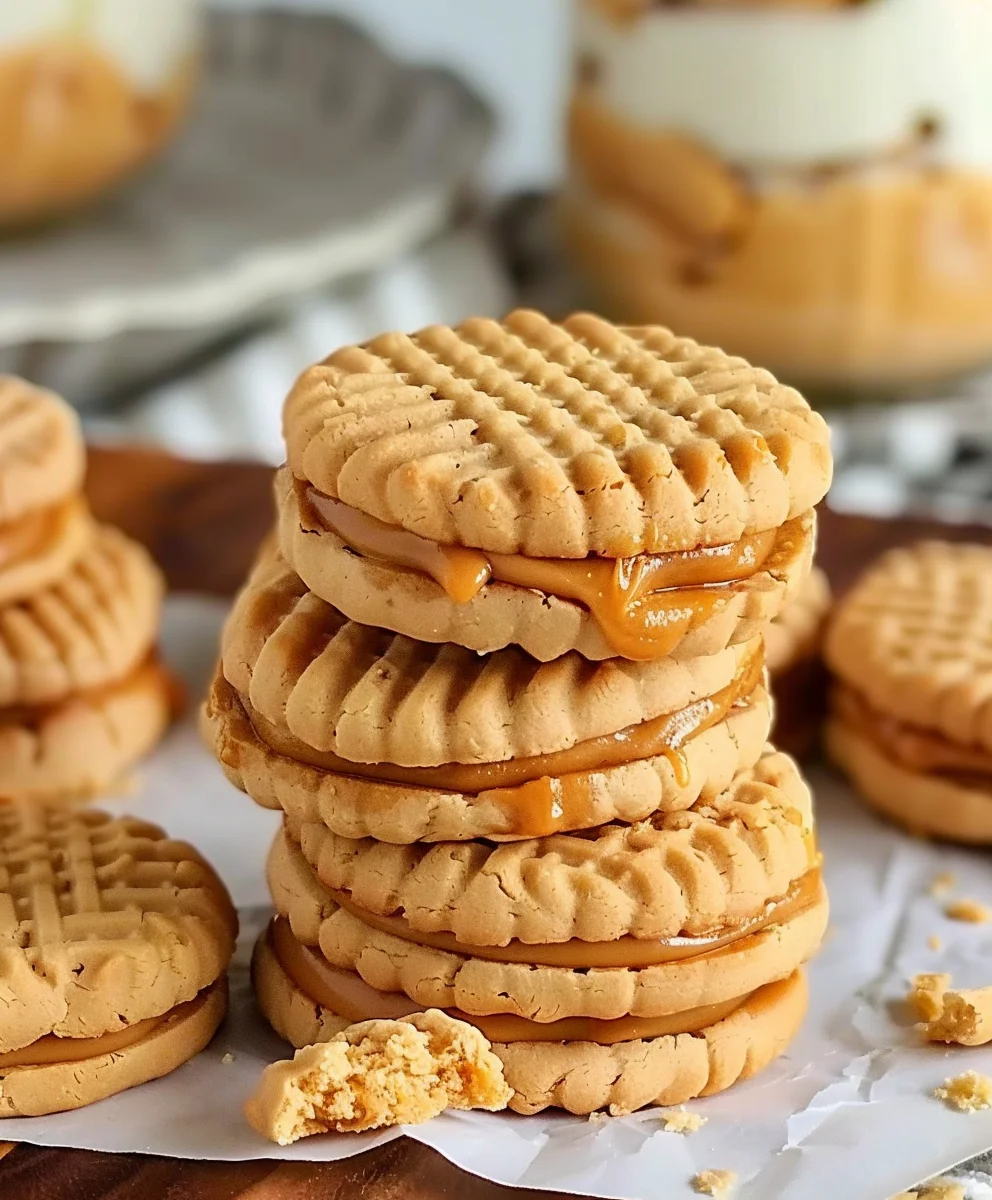
Assembling Your Irresistible Homemade Copycat Nutter Butters
This is the moment we’ve all been waiting for – bringing together those delicious cookies and that creamy, dreamy filling to create the ultimate Homemade Copycat Nutter Butters!
- Pair Up Your Cookies: Lay out all your cooled peanut butter cookies. Take a moment to admire their beautiful golden-brown color and the intricate fork marks, if you added them. Now, gently match them into pairs of similar size and shape. This will make the assembly process much smoother and ensure each sandwich cookie looks perfect.
- Fill Each Cookie: You have a couple of options here, depending on your preference and the tools you have.
- Piping Method: For a neat and professional look, transfer the peanut butter filling to a piping bag fitted with a large round or star tip. Pipe a generous dollop of filling onto the flat side of one cookie from each pair. I find this method gives the most even distribution and makes for a very attractive finished product.
- Spreading Method: Alternatively, if you don’t have a piping bag, simply use a small offset spatula or a butter knife to spread a good tablespoon (or more, if you’re like me and love extra filling!) of the creamy peanut butter filling onto the flat side of one cookie. Spread it almost to the edges.
Don’t be shy with the filling; a generous amount is part of the charm of these Homemade Copycat Nutter Butters!
- Create the Sandwich: Take the second cookie from the pair and gently place it on top of the filling, flat side down. Press down lightly until the filling spreads to the edges and the cookies form a neat sandwich. Be careful not to press too hard, or the cookies might crack.
- Optional: Re-create the Ridges: For an extra touch of authenticity, once your sandwich cookies are assembled, you can gently press the tines of a fork around the edges of the filling, pushing slightly inwards. This creates those distinctive ridged edges that are so characteristic of store-bought Nutter Butters. It’s a fun detail that really makes these Homemade Copycat Nutter Butters look the part!
- Serve and Store: Your incredible Homemade Copycat Nutter Butters are now ready to be devoured! These cookies are best enjoyed fresh, but they also store beautifully. Place them in an airtight container at room temperature for up to 5-7 days. For longer storage, you can freeze the assembled cookies for up to 2-3 months. Just be sure to separate layers with parchment paper to prevent sticking. Thaw at room temperature before enjoying. I promise you, these homemade versions are so much better than anything you can buy at the store, and everyone will be asking for your secret recipe! They truly capture the essence of that beloved peanut butter cookie.
Conclusion:
Well, my fellow dessert enthusiasts, we’ve reached the sweet finale of our culinary adventure! If there’s one recipe I could implore you to try this week, it truly has to be this one. The satisfaction of baking something so utterly delicious, so perfectly reminiscent of a beloved classic, is an experience I want every single one of you to have. There’s a distinct joy in knowing exactly what goes into your treats, a transparency you just don’t get from store-bought versions. This isn’t just about making a cookie; it’s about crafting a moment of pure, unadulterated bliss. The rich, creamy peanut butter filling, nestled between those crisp, yet tender, peanut-shaped shortbread cookies – it’s a symphony of textures and flavors that dances on your palate. Forget everything you thought you knew about store-bought snacks; these Homemade Copycat Nutter Butters are about to redefine your snack time standards. I promise, once you experience the deep, authentic peanut butter flavor and the perfect crumb of these homemade delights, you’ll understand exactly why this recipe isn’t just a suggestion, it’s a culinary imperative.
What makes these cookies an absolute must-try isn’t just their incredible taste, but the sheer nostalgic power they wield. One bite and you’re transported back to childhood, to simpler times, but with a grown-up appreciation for quality ingredients and impeccable flavor balance. The slight saltiness of the cookies perfectly cuts through the sweetness of the filling, creating an addictive harmony that will have you reaching for another, and another. They’re surprisingly simple to make, a true testament to the fact that the best things in life often are. You’ll be amazed at how easily you can transform basic pantry staples into something truly extraordinary, something that feels gourmet, yet utterly comforting. They’re perfect for cheering up a dreary afternoon, celebrating a small victory, or simply indulging in a moment of well-deserved self-care. Trust me when I say, the effort is minimal, but the reward is immense – a batch of cookies that are superior in every conceivable way to their mass-produced counterparts.
Serving Suggestions to Elevate Your Experience
Now that you’re armed with a batch of these glorious cookies, let’s talk about how to best enjoy them. While they are utterly fantastic on their own, a warm cup of coffee or a cold glass of milk makes them an absolute dream. Imagine dunking one of these beauties into a frothy latte on a lazy Sunday morning – pure heaven! They also make an excellent addition to any dessert platter, especially during holidays or gatherings. Their unique shape and irresistible flavor always make them a standout. Don’t forget to pack a couple in lunchboxes for a delightful midday treat that will make anyone’s day a little brighter. And for those special occasions, tie a stack of them with a pretty ribbon and present them as a thoughtful, homemade gift. They’re guaranteed to be a hit and show just how much you care.
Creative Variations to Spark Your Culinary Imagination
But why stop at perfection when you can also explore endless possibilities? While the classic recipe is a masterpiece, feel free to get creative with your next batch. For a touch of decadence, try drizzling melted dark or milk chocolate over half of each cookie once they’ve cooled – the combination of chocolate and peanut butter is always a winner. You could also experiment with adding a pinch of cinnamon or a dash of vanilla extract to the cookie dough for a subtle twist on the flavor profile. If you’re feeling adventurous, try grinding some peanuts more coarsely into the dough for an extra textural crunch. For those who enjoy a little spice, a tiny pinch of cayenne pepper in the filling can add an unexpected and delightful kick, balancing the sweetness in a truly intriguing way. And for a gluten-free friendly option, simply swap out the all-purpose flour for a good quality gluten-free baking blend (ensure it contains xanthan gum for best results), keeping the rest of the recipe the same. The beauty of homemade treats is that you are the chef, and the kitchen is your playground!
So, what are you waiting for? I wholeheartedly encourage you to roll up your sleeves, gather your ingredients, and give this recipe a try. The process itself is therapeutic, and the aroma filling your kitchen will be pure bliss. There’s an undeniable satisfaction that comes from creating something so delicious from scratch, something that brings smiles to faces and warmth to hearts. I am genuinely excited for you to experience the magic of these cookies firsthand. Once you’ve baked your batch, please don’t keep it to yourself! I would absolutely love to hear about your experience. Share your photos on social media, tell me about any creative twists you tried, or simply let me know how much you (and your loved ones) enjoyed them. Your feedback and shared experiences are what truly make this community special, inspiring us all to keep baking and creating delicious memories. Happy baking, everyone, and get ready to fall in love with your new favorite peanut butter cookie!
Homemade Copycat Nutter Butters
Homemade Copycat Nutter Butters are more than just a delightful treat; they’re an invitation to revisit cherished childhood memories with every single bite.
Ingredients
-
1/2 cup unsalted butter, softened
-
1/2 cup creamy peanut butter (for cookies)
-
1/2 cup granulated sugar (plus extra for topping)
-
1/2 cup brown sugar, packed
-
1 large egg
-
1 teaspoon vanilla extract
-
1 1/4 cups all-purpose flour
-
3/4 teaspoon baking soda
-
1/4 teaspoon salt
-
1/2 cup creamy peanut butter (for filling)
-
1/4 cup unsalted butter, softened (for filling)
-
1 cup powdered sugar, sifted
-
1 teaspoon vanilla extract (for filling)
-
1-2 tablespoons milk, as needed
Instructions
- Step 1
In a mixer, cream 1/2 cup softened butter, granulated sugar, and brown sugar until light and fluffy. Beat in 1/2 cup creamy peanut butter, then the egg and 1 tsp vanilla. In a separate bowl, whisk together flour, baking soda, and salt. Gradually add dry ingredients to wet, mixing until just combined. - Step 2
Divide dough into disks, wrap, and refrigerate for at least 2 hours or overnight. This is crucial for shaping. - Step 3
Preheat oven to 350°F (175°C). Line baking sheets with parchment paper. On a lightly floured surface, roll chilled dough to 1/4-inch thick. Cut out peanut shapes (or desired shapes) and place on sheets. Optionally, press fork tines into cookies for a crosshatch pattern. Bake for 10-12 minutes until edges are lightly golden. - Step 4
Let cookies cool on baking sheets for 5 minutes, then transfer to a wire rack to cool completely before filling. - Step 5
In a mixer, cream 1/2 cup creamy peanut butter and 1/4 cup softened butter until light and fluffy. Gradually beat in 1 cup sifted powdered sugar until thick. Add 1 tsp vanilla extract and 1-2 tbsp milk, one at a time, until smooth, spreadable, and firm. - Step 6
Match cooled cookies into pairs. Spread or pipe a generous amount of filling onto the flat side of one cookie, then top with the second, gently pressing to form a sandwich. Optionally, press fork tines around the filling edges for ridges. - Step 7
Enjoy immediately or store in an airtight container at room temperature for up to 5-7 days.
Important Information
Nutrition Facts (Per Serving)
It is important to consider this information as approximate and not to use it as definitive health advice.
Allergy Information
Please check ingredients for potential allergens and consult a health professional if in doubt.